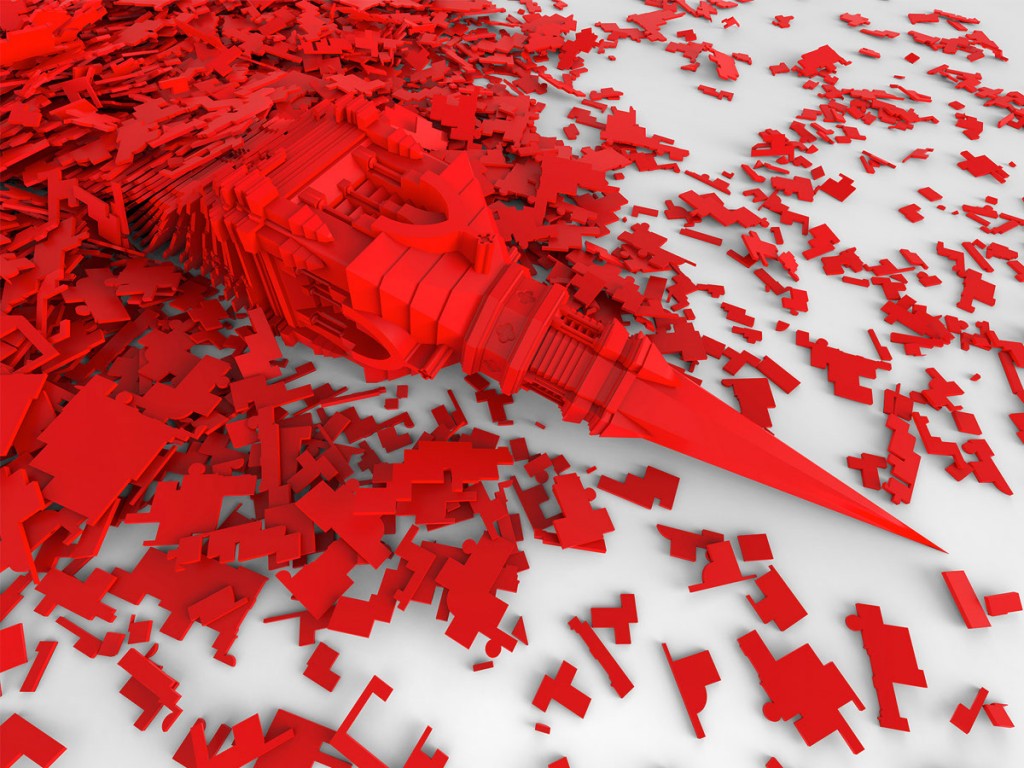
I used a rigid body physics simulation to create the dropped blocks in the image below. This project is a part of my “Liminal Construct” series.
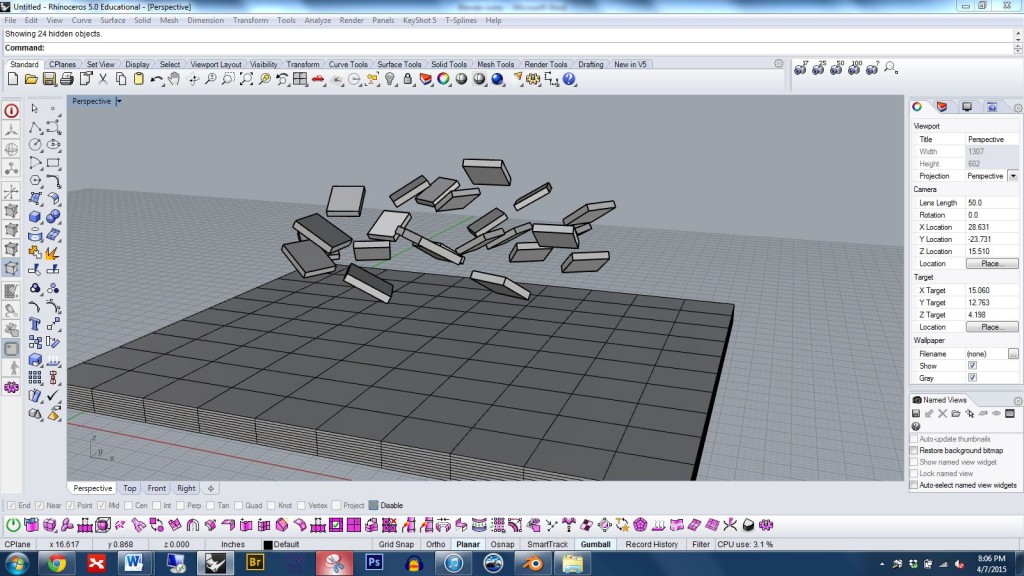
To get started, open Rhino, and by clicking the buttons circled in the image below, open the mesh panel and create a mesh box. This will serve as the ground plane for the collision. (Using a mesh box rather than a NURBS box converted to a mesh will give more vertices and yield better results.)

Create and position the objects you wish to drop. It is fine for these to be NURBS objects. We’ll mesh them when we export.
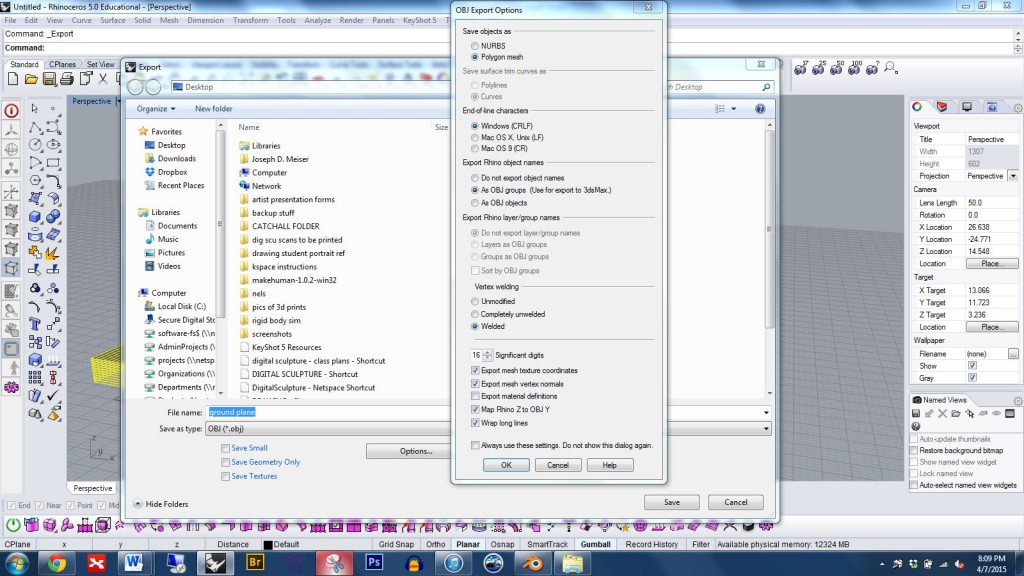
Export just the ground plane as an OBJ. Use the settings shown below.
Export just the objects to drop as an OBJ. Use the settings shown below.
Open blender and delete the box, camera, and light.
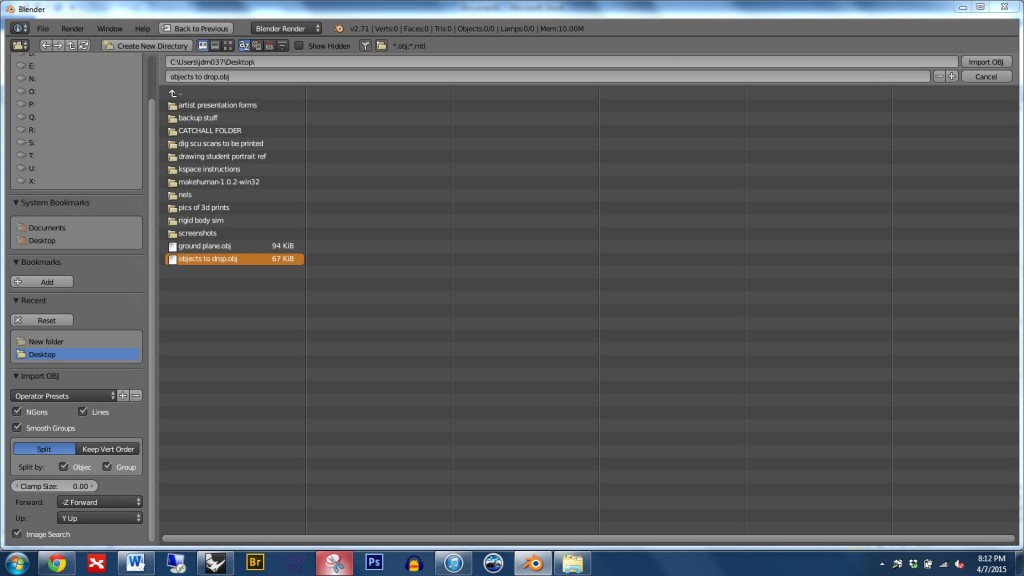
Import your objects to drop. Be sure to use the same settings shown in the lower left of the image below. If your objects appear off center you can zoom-selected by selecting some of the parts and pressing the . key in the keyboard’s numberpad.
Press B and use the lasso to select all of the parts you want to drop. Then reset object origins by pressing Shift Ctrl Alt and C at the same time, then choose “set origin to geometry”. Notice that a small orange dot appears on each part. *Note: if your objects seem to be joined together in a problematic way you can press P to unjoin them.
Select one of your drop parts, open the physics panel, and click on rigid body. Set it to be an active AND dynamic object.
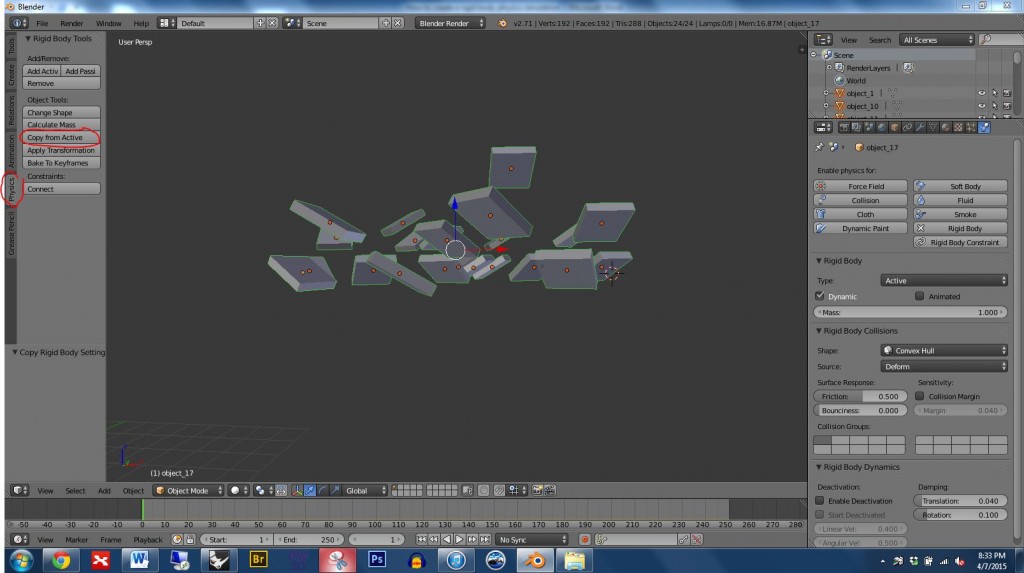
Now we will copy the settings from the first part to the others. Do this with the following steps: 1) Select all object that you wish to copy the physics properties to 2) Select the object you wish to copy the physics properties from (note: we select this one last so that it becomes the active selected object. This is the object that has the desired physics properties.) 3) Then in the left Physics panel under Object Tools choose Copy From Active.
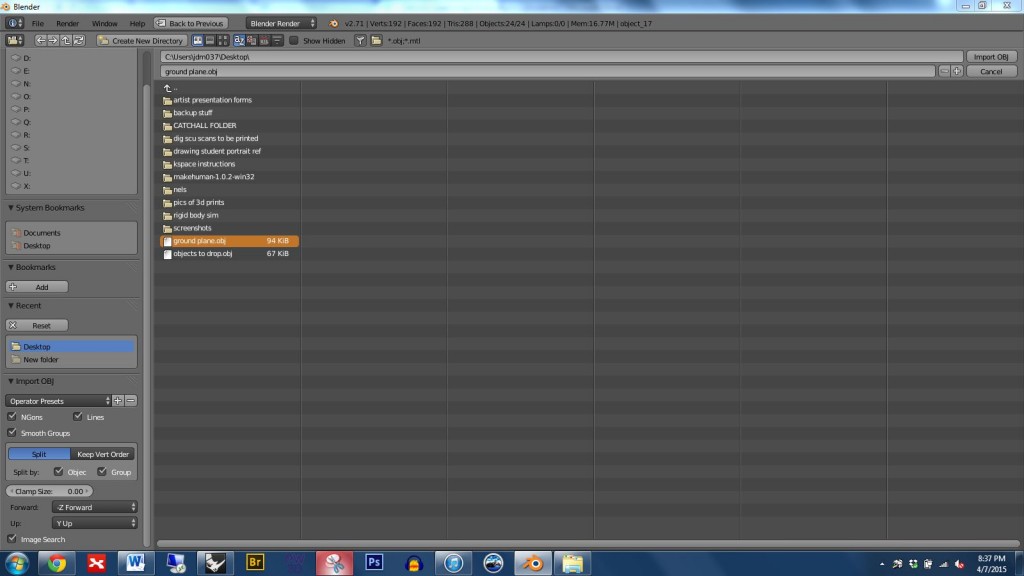
Import the ground plane using the settings shown below.
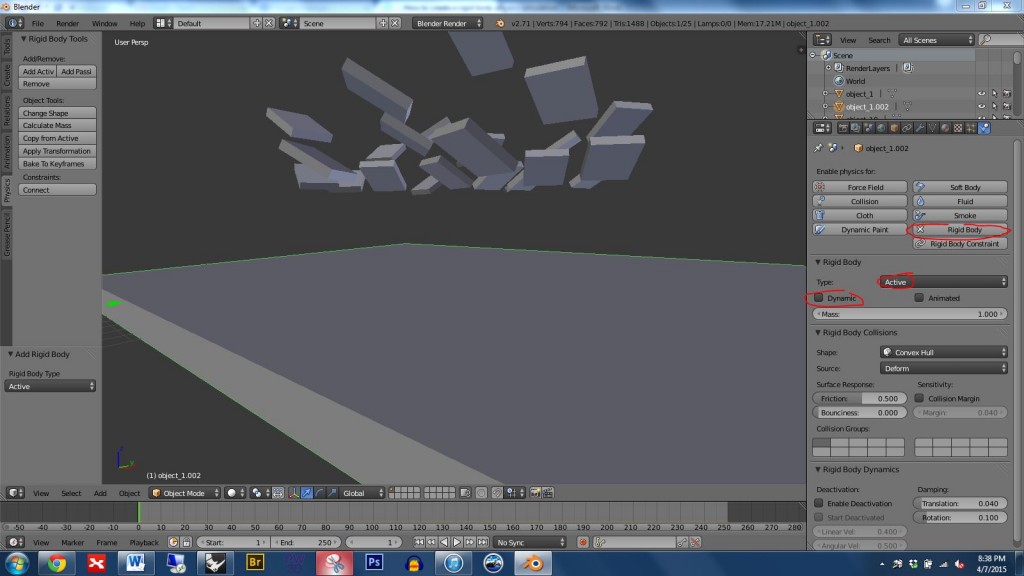
Select the ground plane, go to the right physics panel, click on rigid body, and set the ground plane to by active but NOT dynamic.
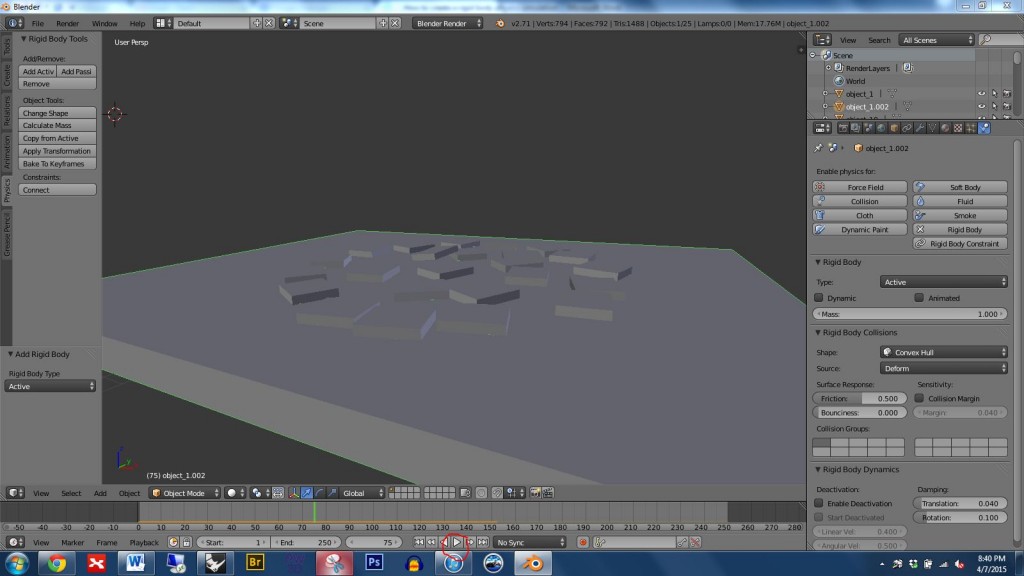
Press the play button shown in the image below to start the simulation. The parts should drop and land on the ground plane. If not, look back over the previous instructions and see if you missed something.
To create a more dramatic result I have copied and pasted the drop parts to create many more. When you are satisfied with the result, scroll the timeline to the moment you want to keep…
Then export as OBJ using the settings shown in the image below.
In Rhino, import using the settings shown below.
The finished result is shown below.
Additional resources:
