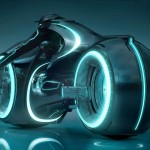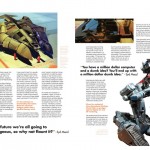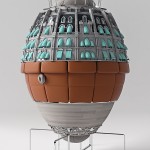
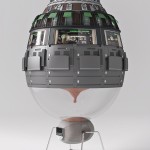

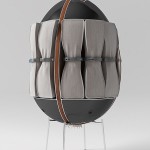
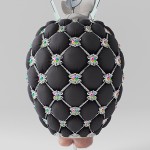

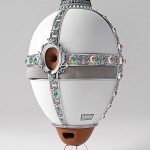

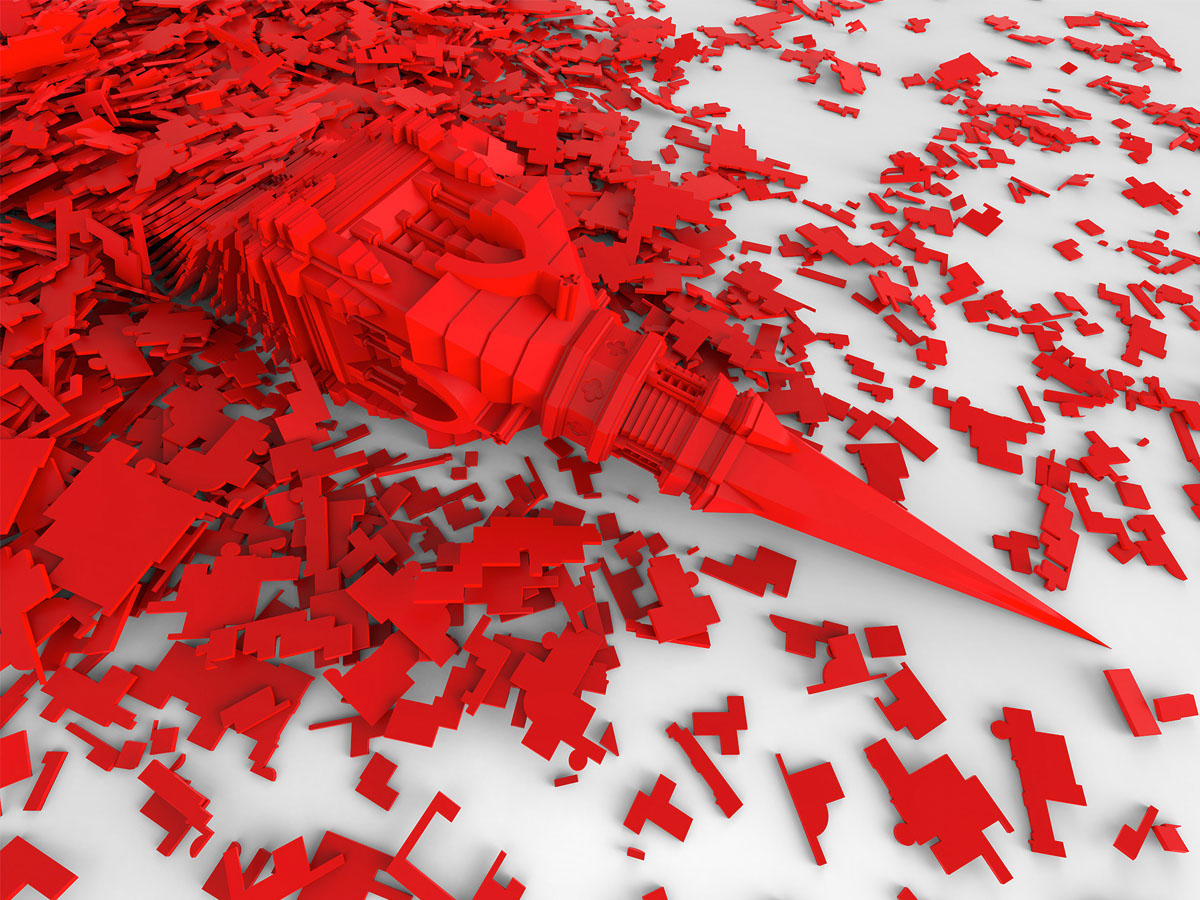
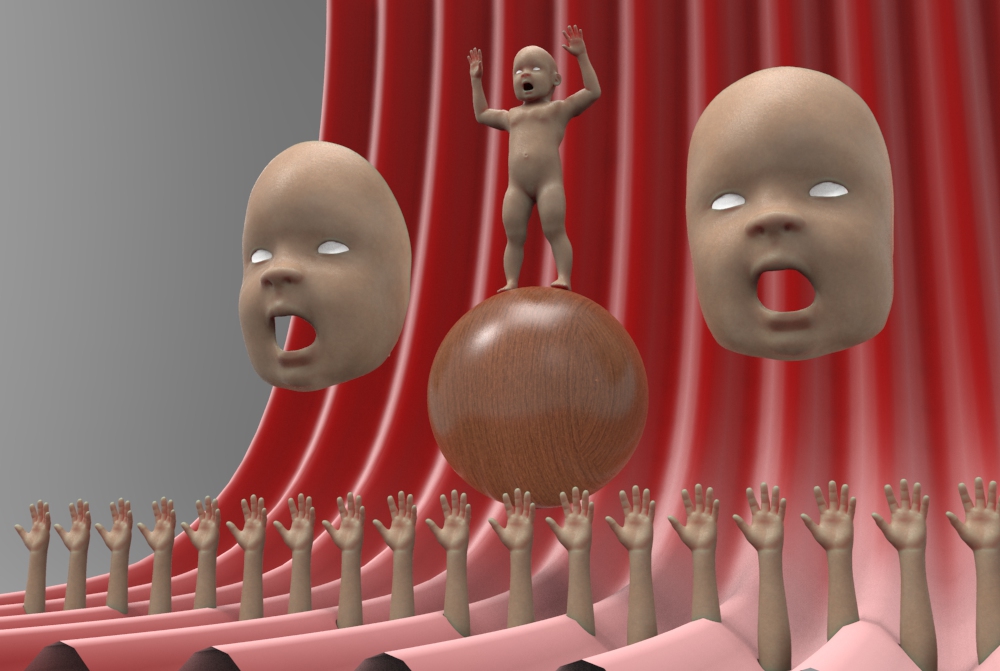
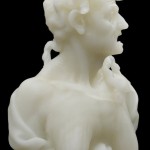
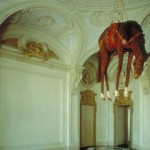
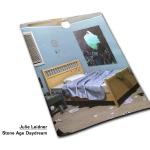
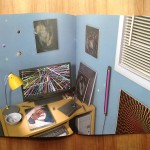
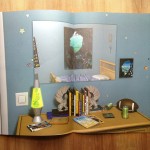
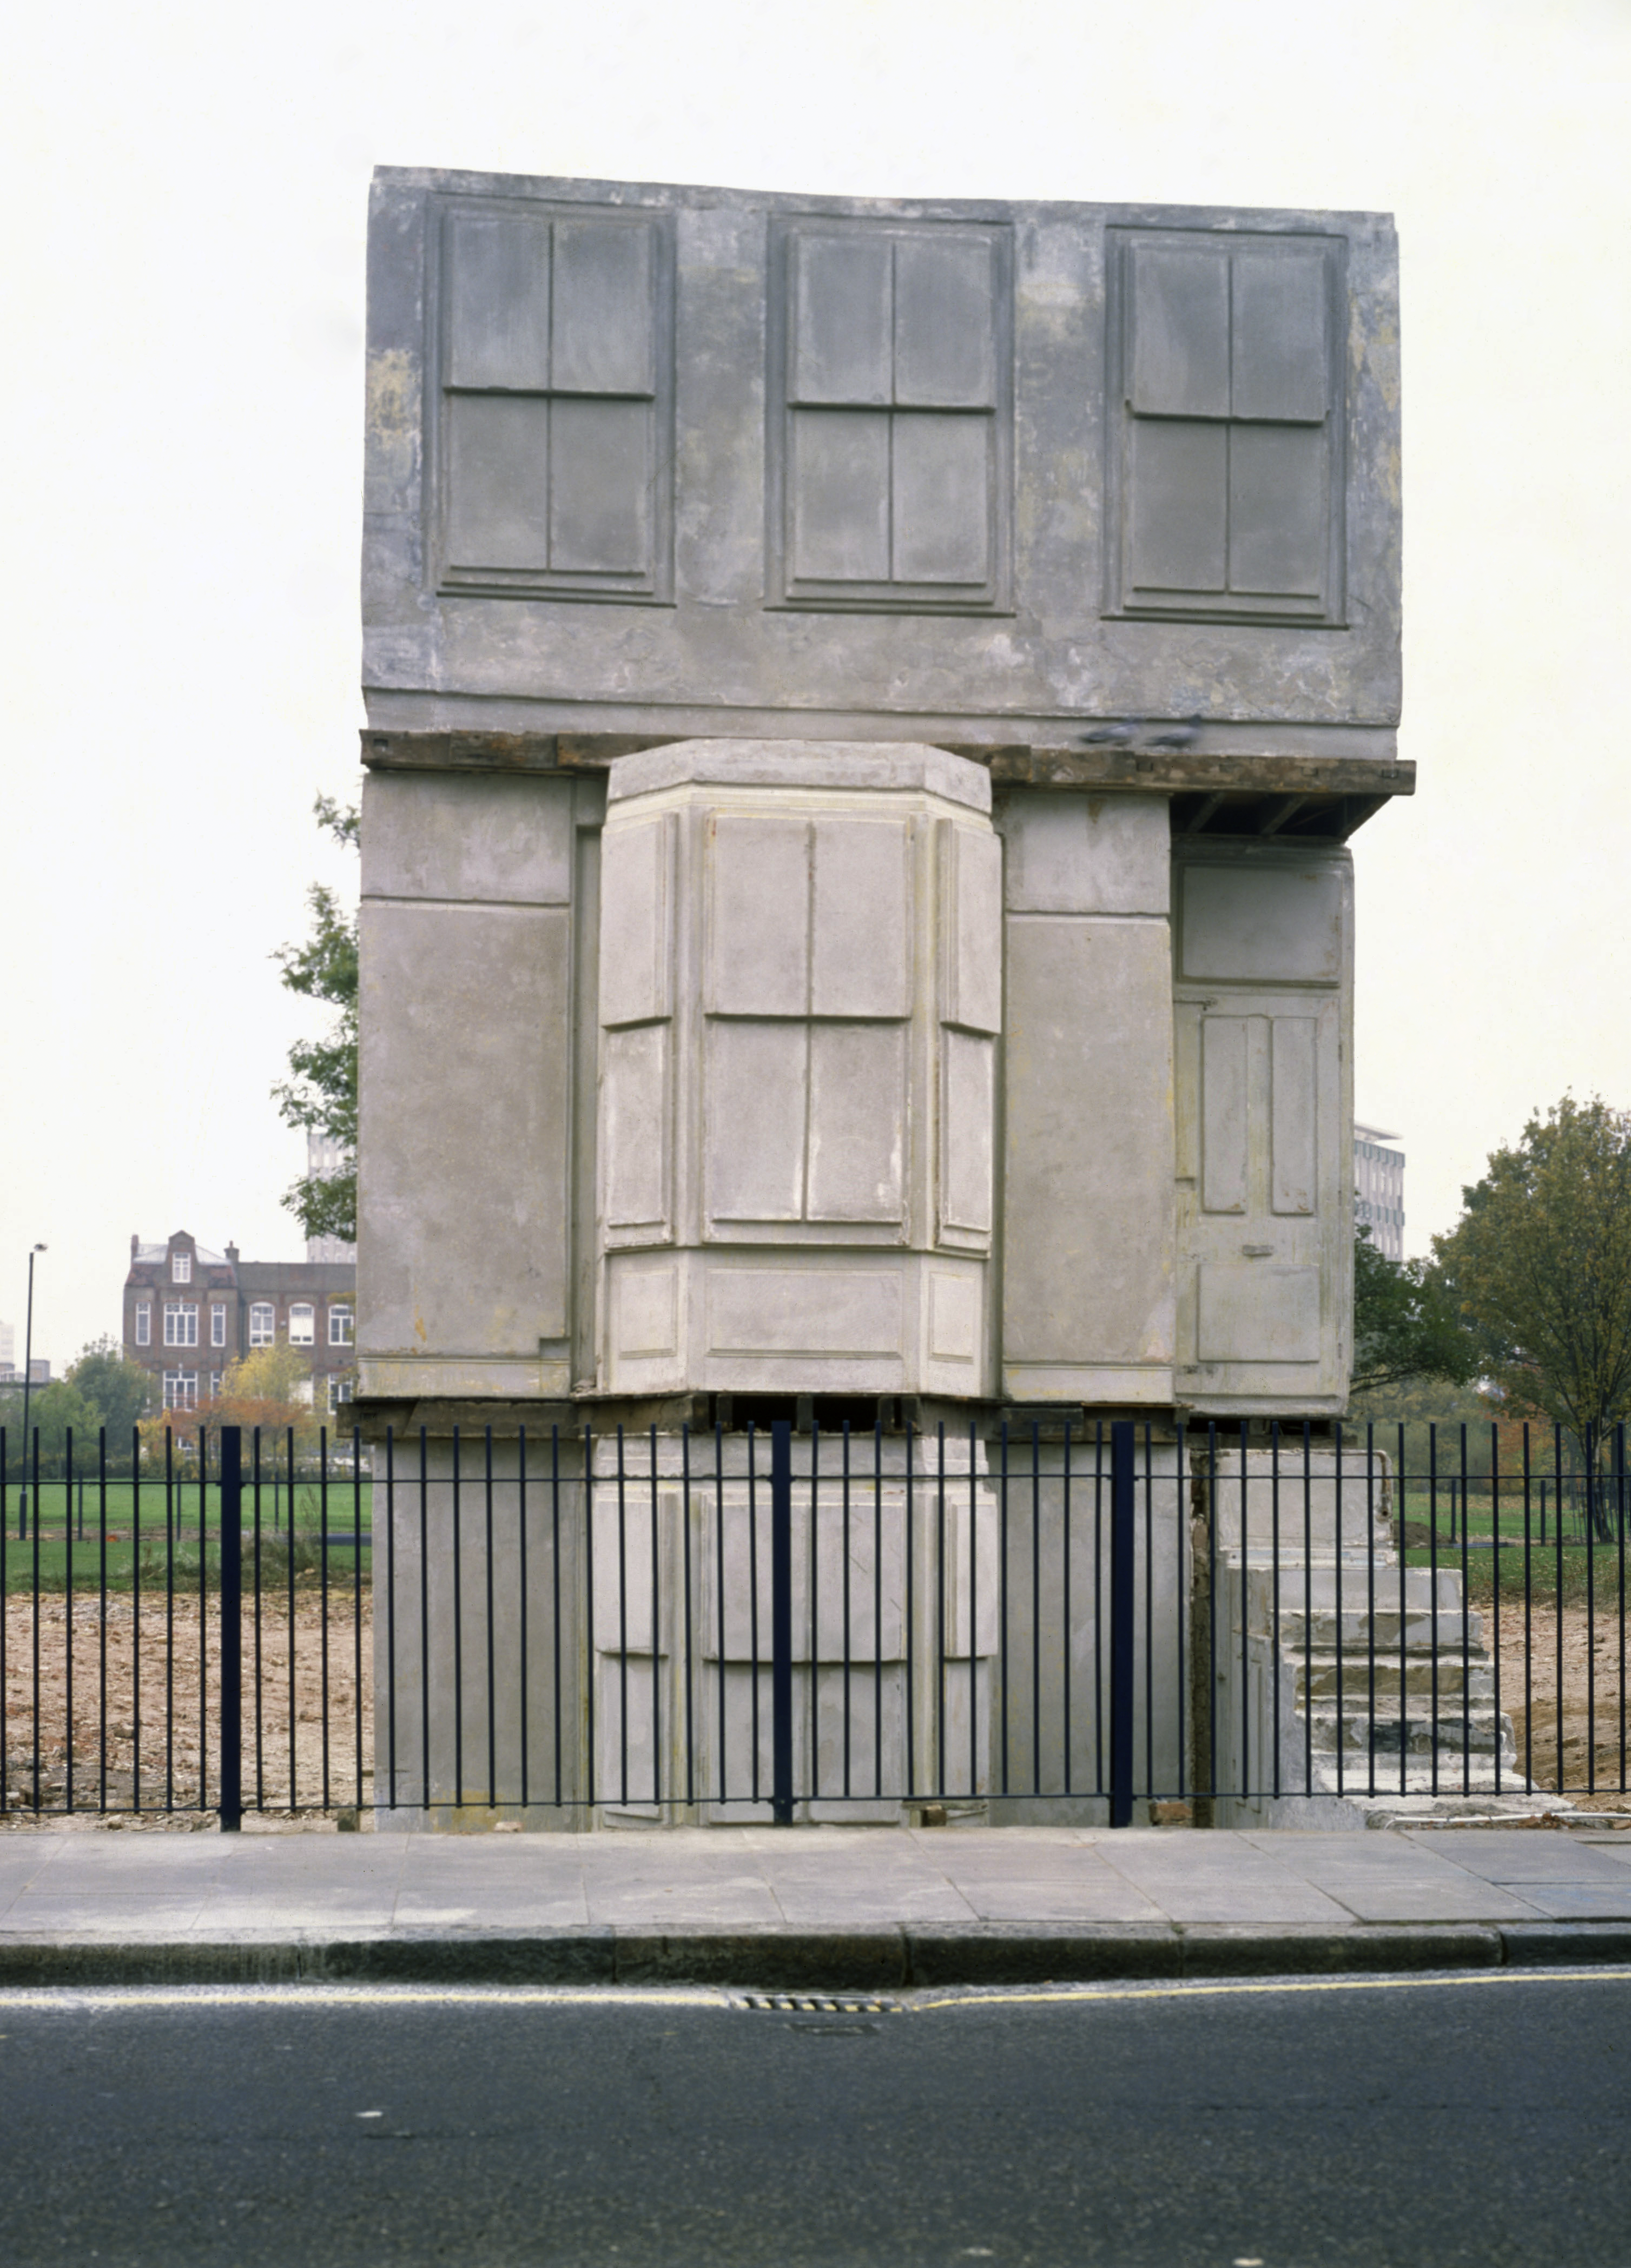
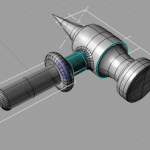
http://beautifuldecay.com/2015/03/30/jonathan-monaghan-renders-utopian-universe-modeled-faberge-egg/
http://beautifuldecay.com/2015/03/30/jonathan-monaghan-renders-utopian-universe-modeled-faberge-egg/
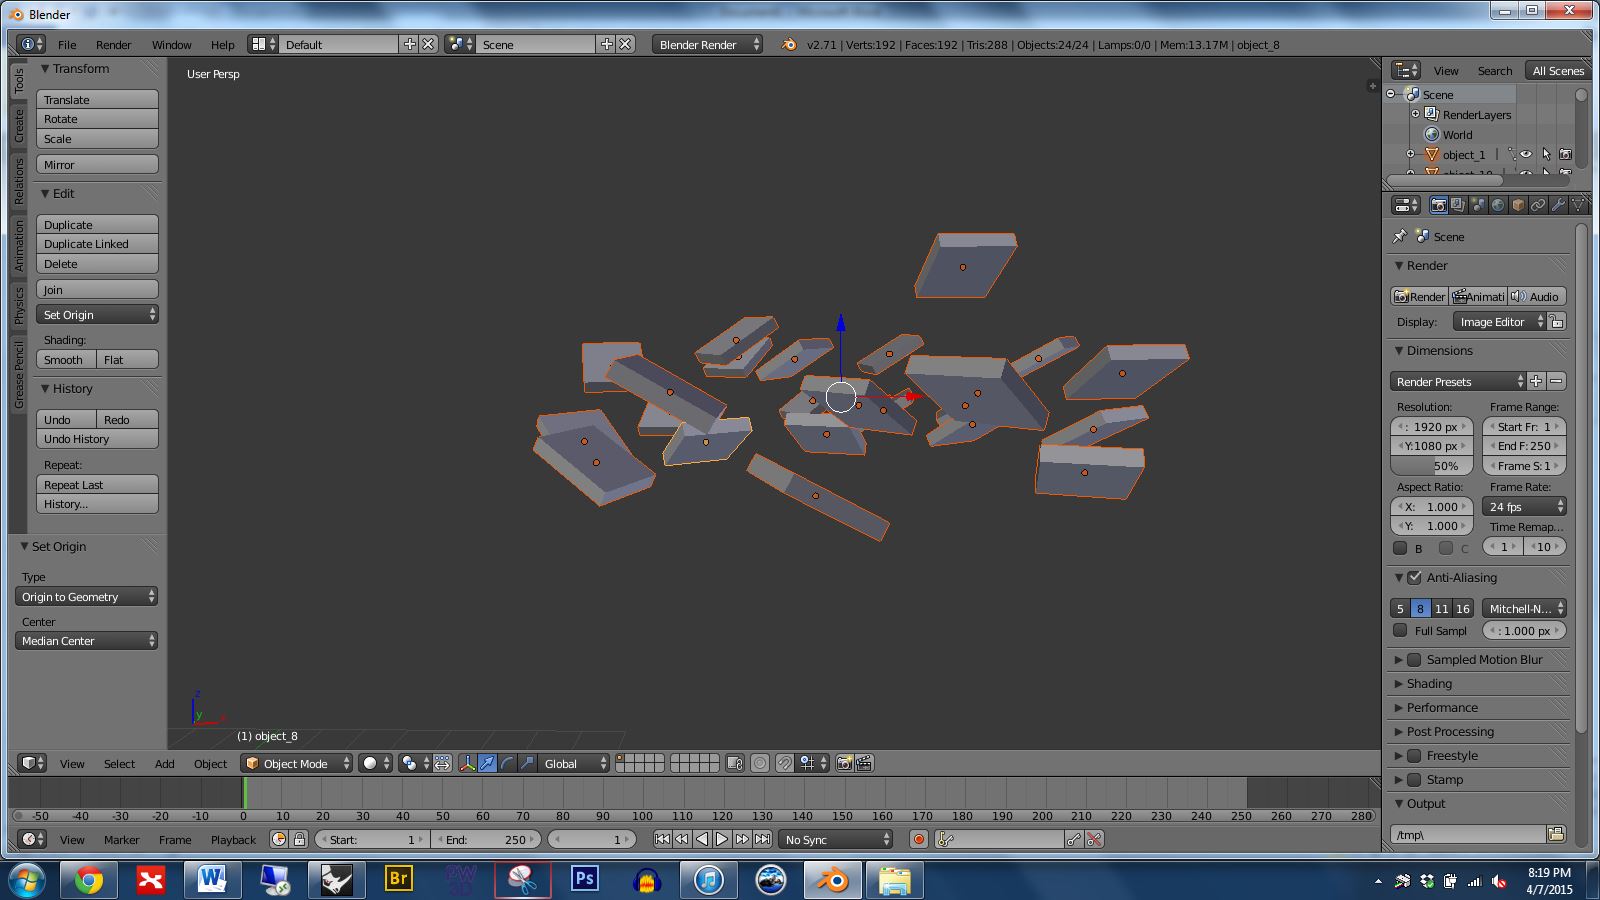
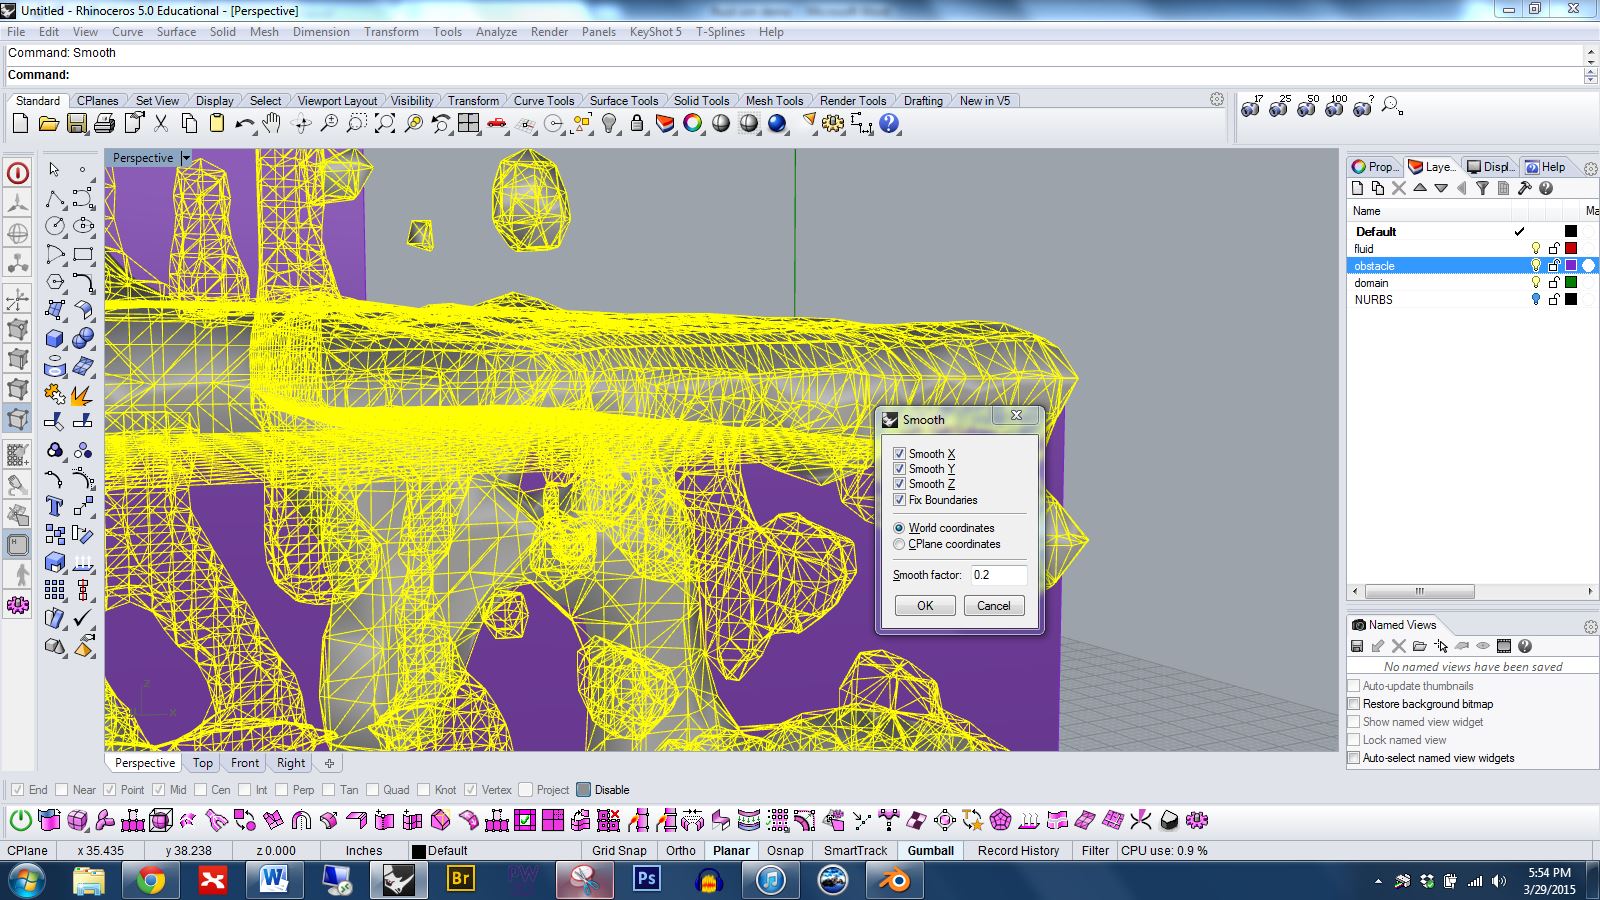
I used a rigid body physics simulation to create the dropped blocks in the image below. This project is a part of my “Liminal Construct” series.
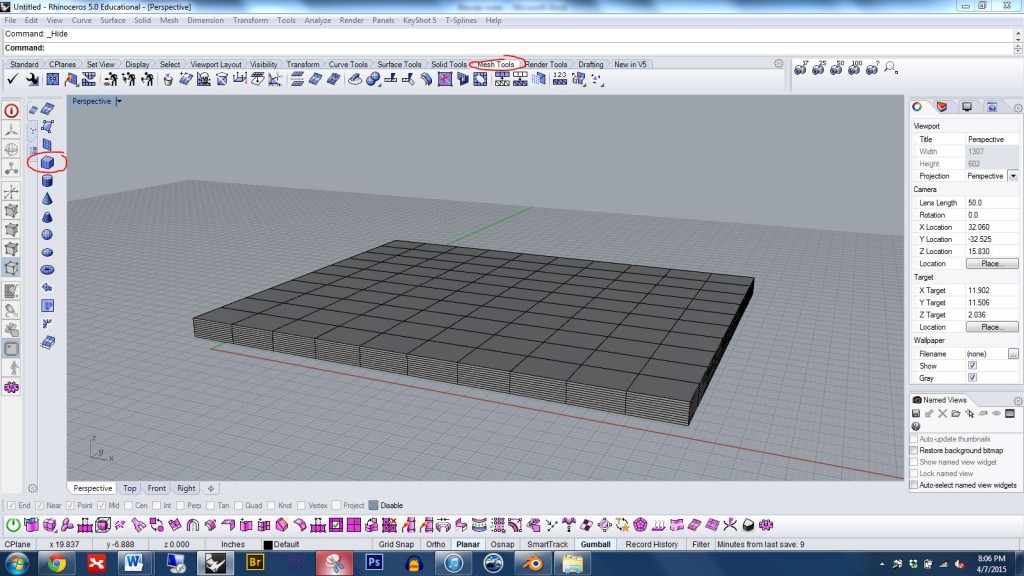
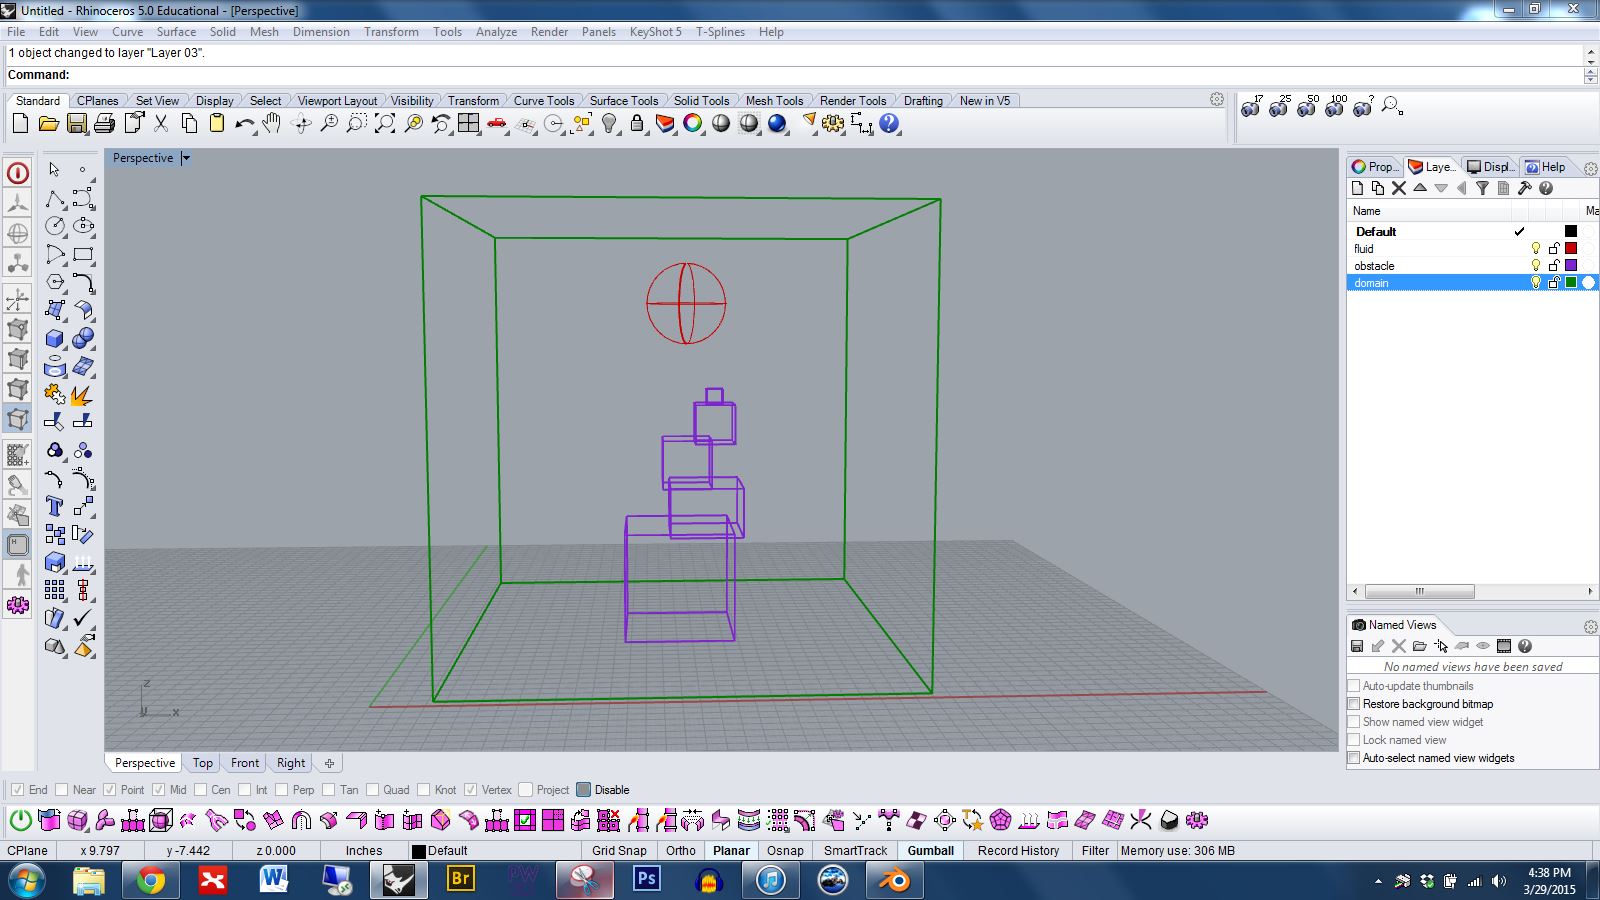
To get started, open Rhino, and by clicking the buttons circled in the image below, open the mesh panel and create a mesh box. This will serve as the ground plane for the collision. (Using a mesh box rather than a NURBS box converted to a mesh will give more vertices and yield better results.)
Create and position the objects you wish to drop. It is fine for these to be NURBS objects. We’ll mesh them when we export.

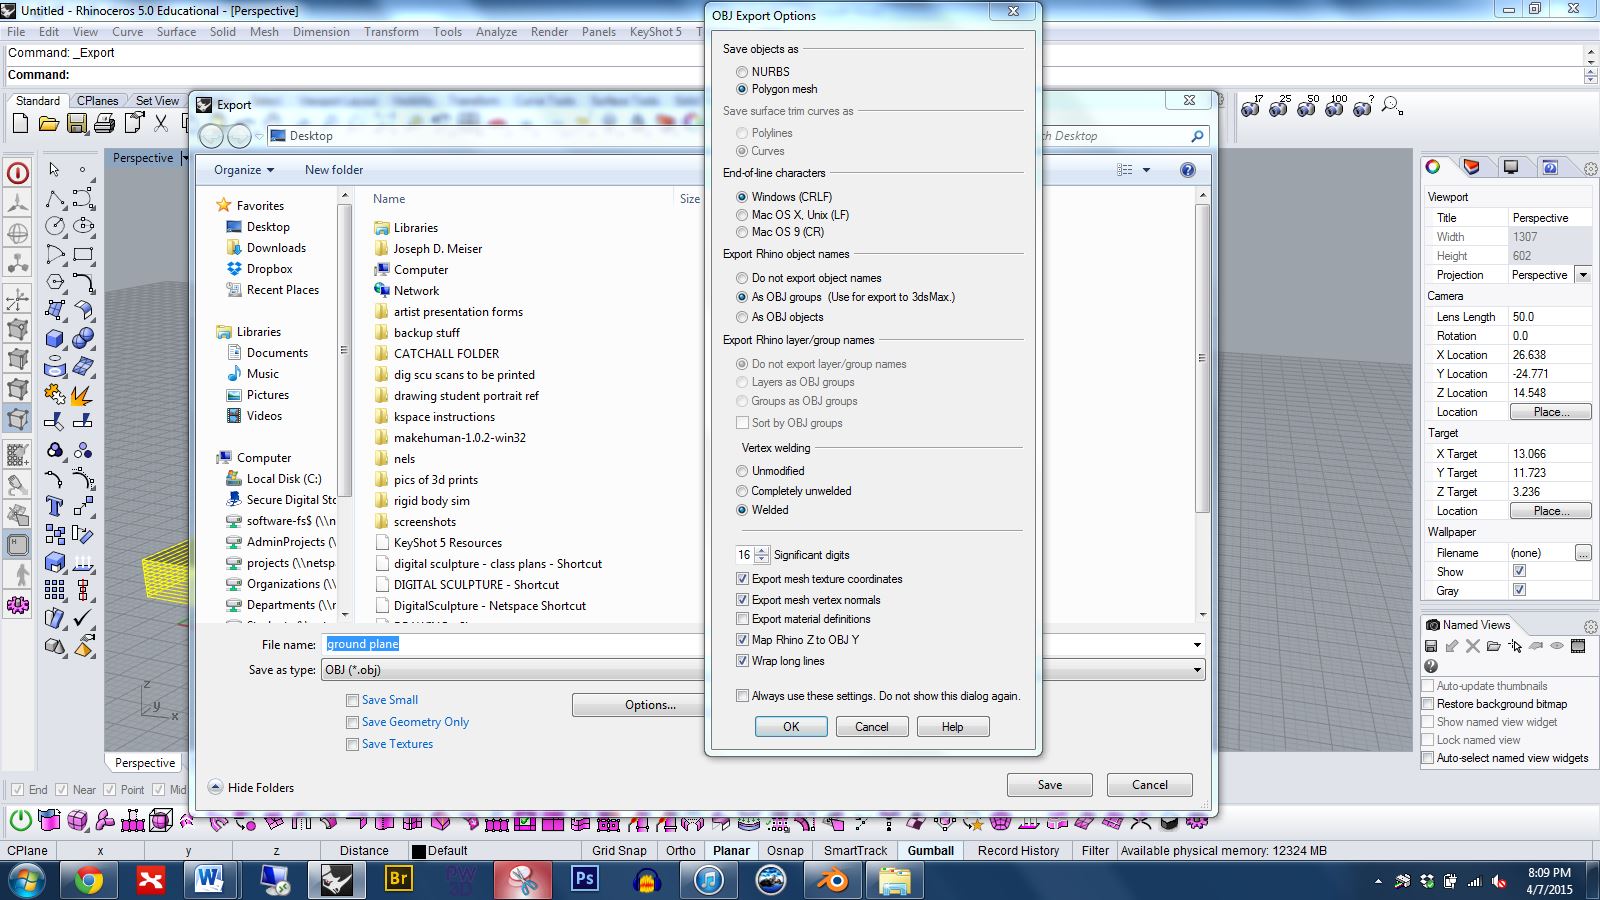
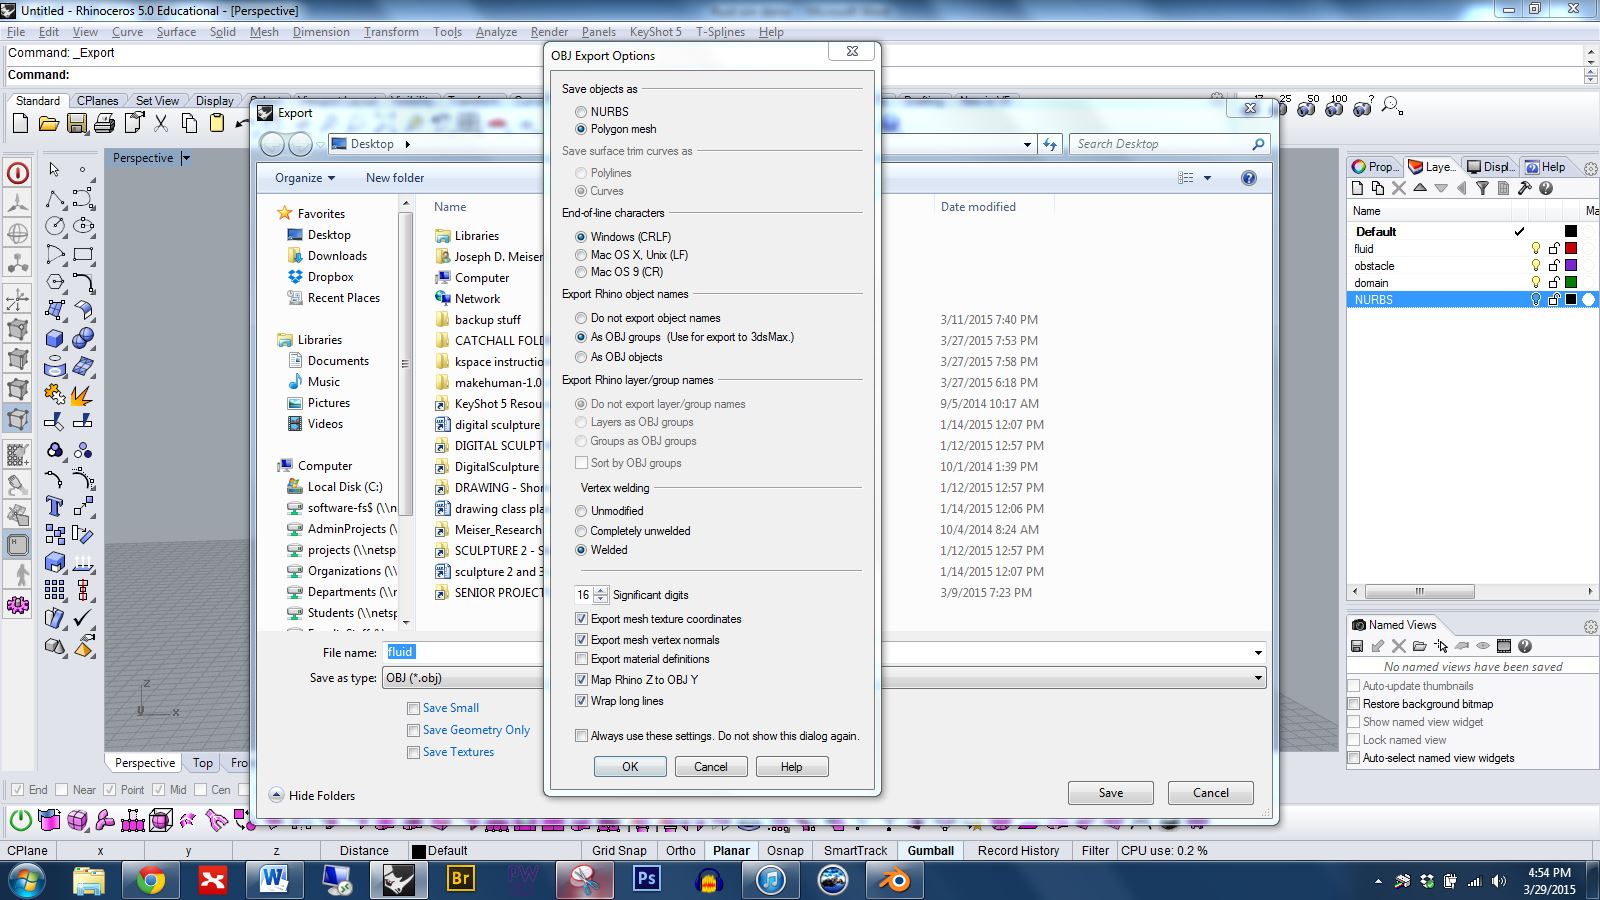
Export just the ground plane as an OBJ. Use the settings shown below.
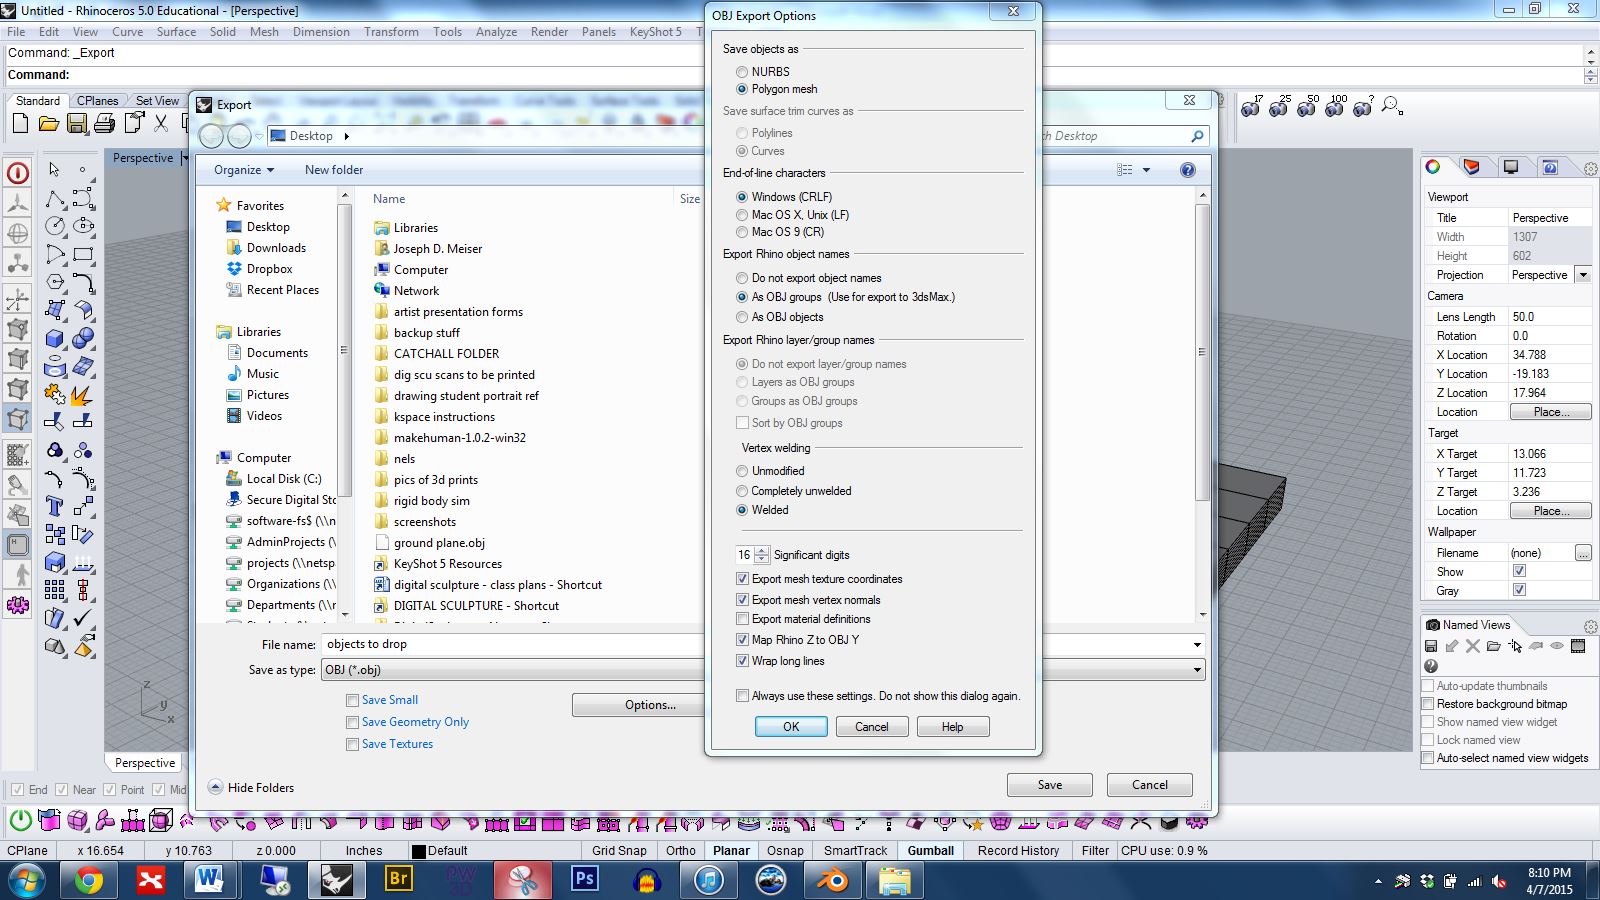
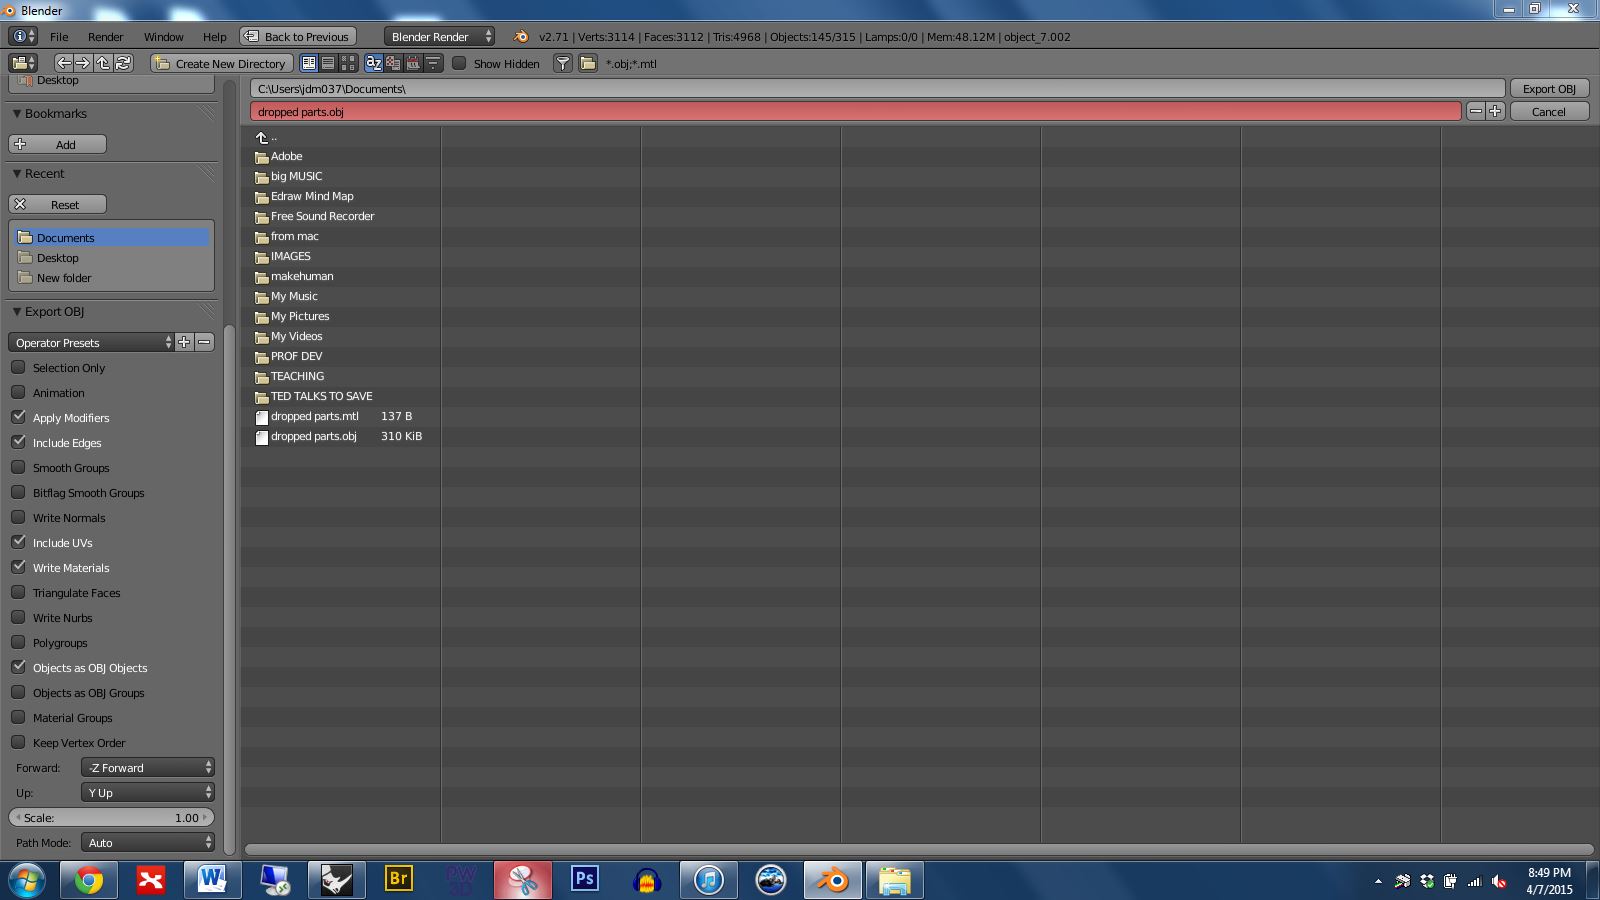
Export just the objects to drop as an OBJ. Use the settings shown below.
Open blender and delete the box, camera, and light.
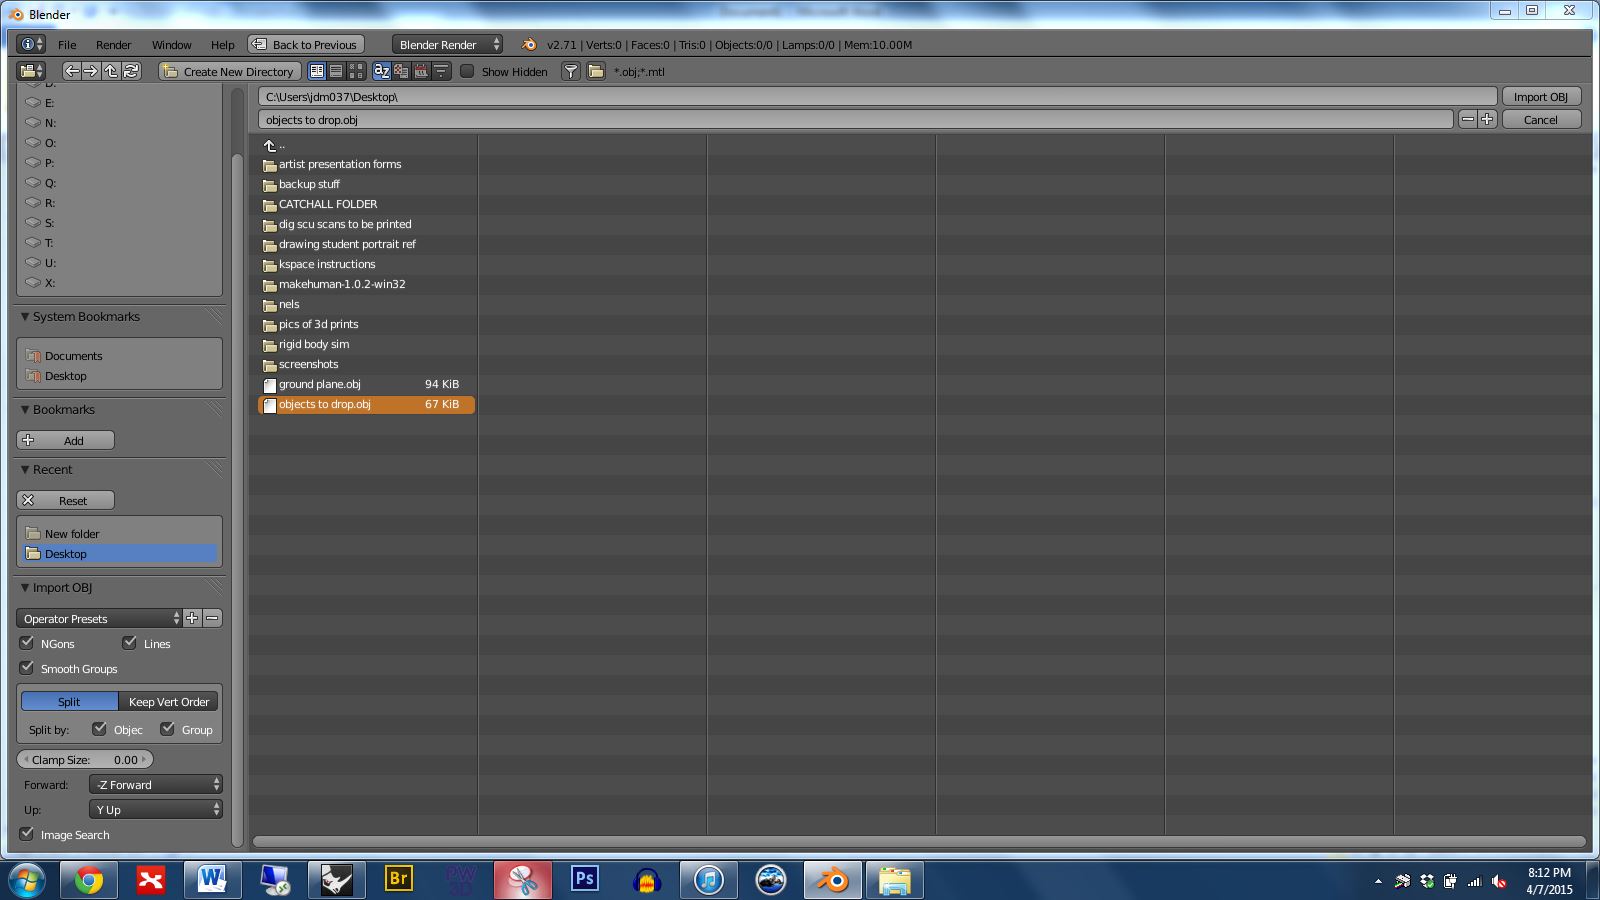
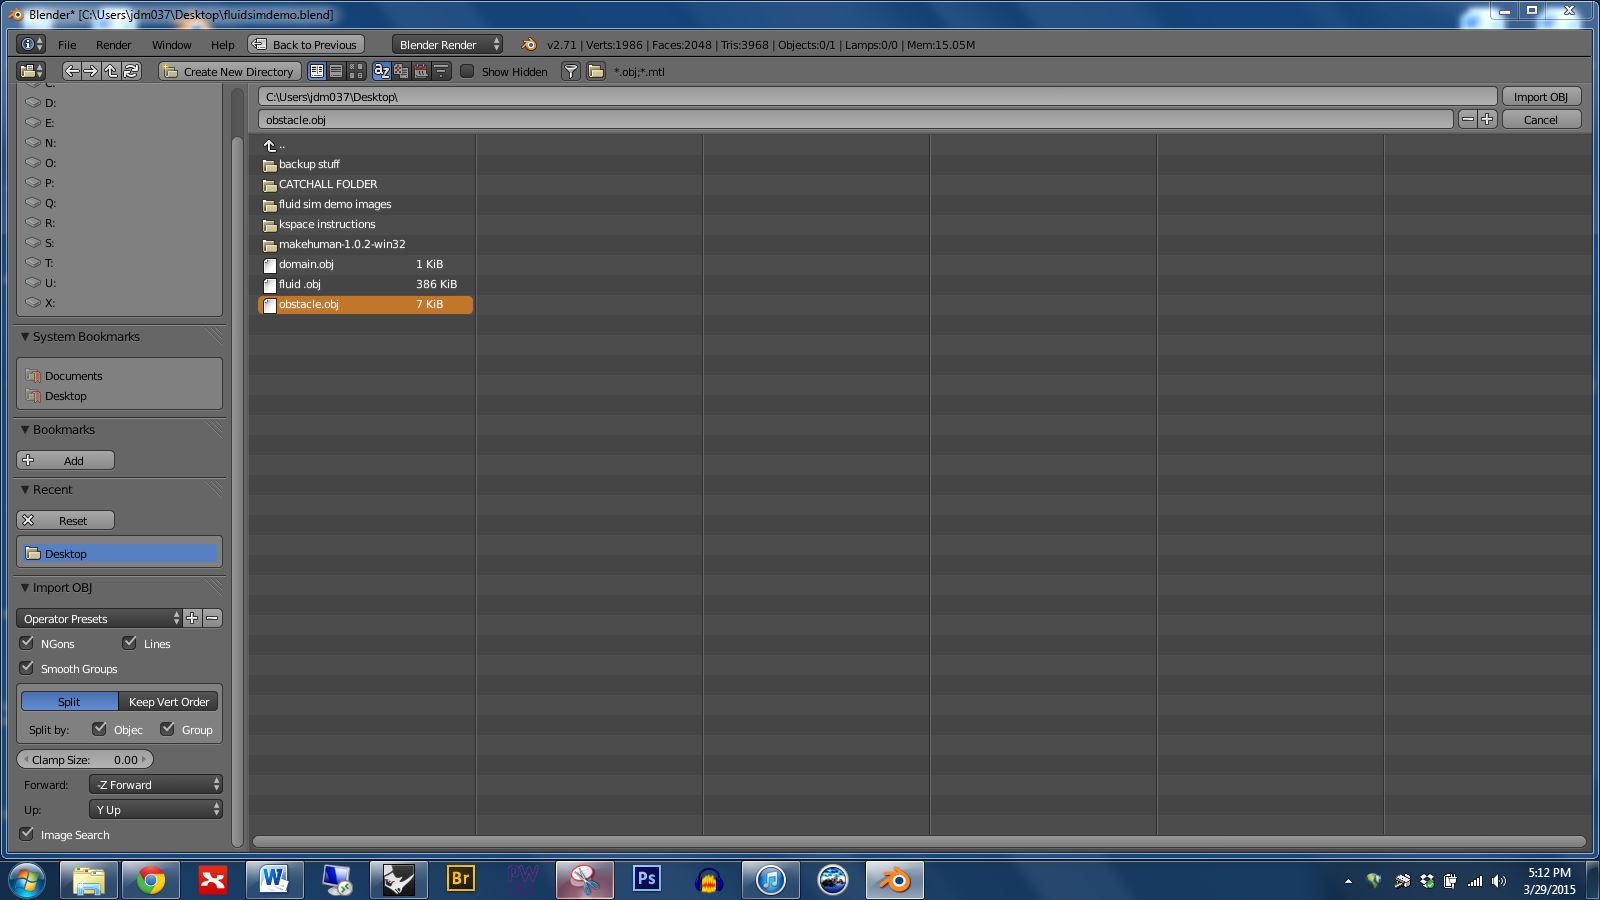
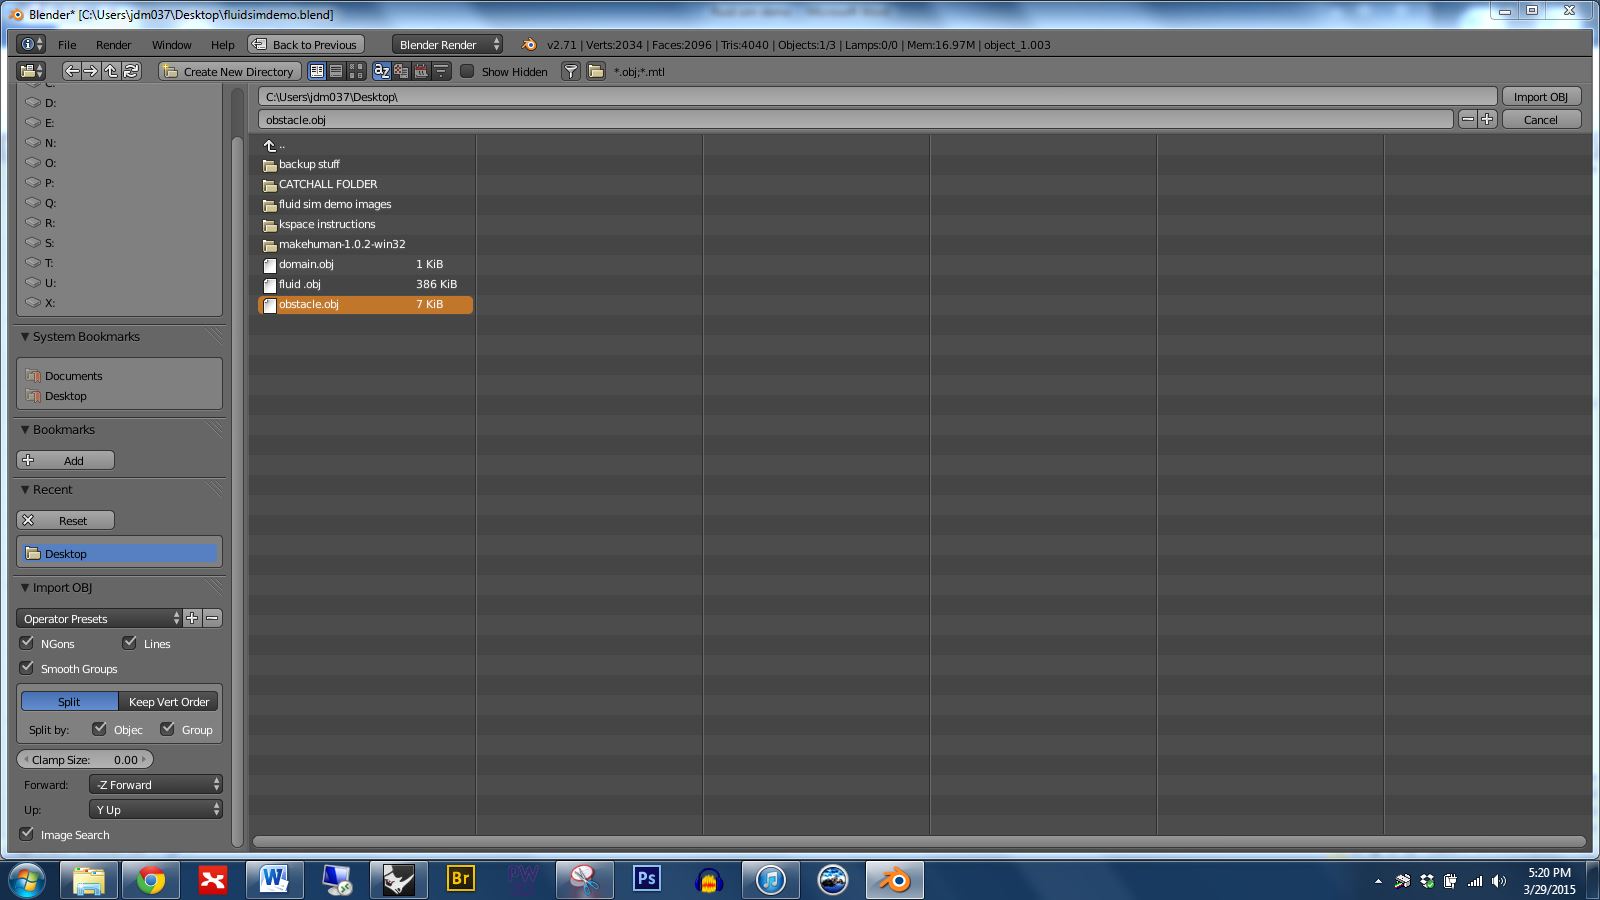
Import your objects to drop. Be sure to use the same settings shown in the lower left of the image below. If your objects appear off center you can zoom-selected by selecting some of the parts and pressing the . key in the keyboard’s numberpad.
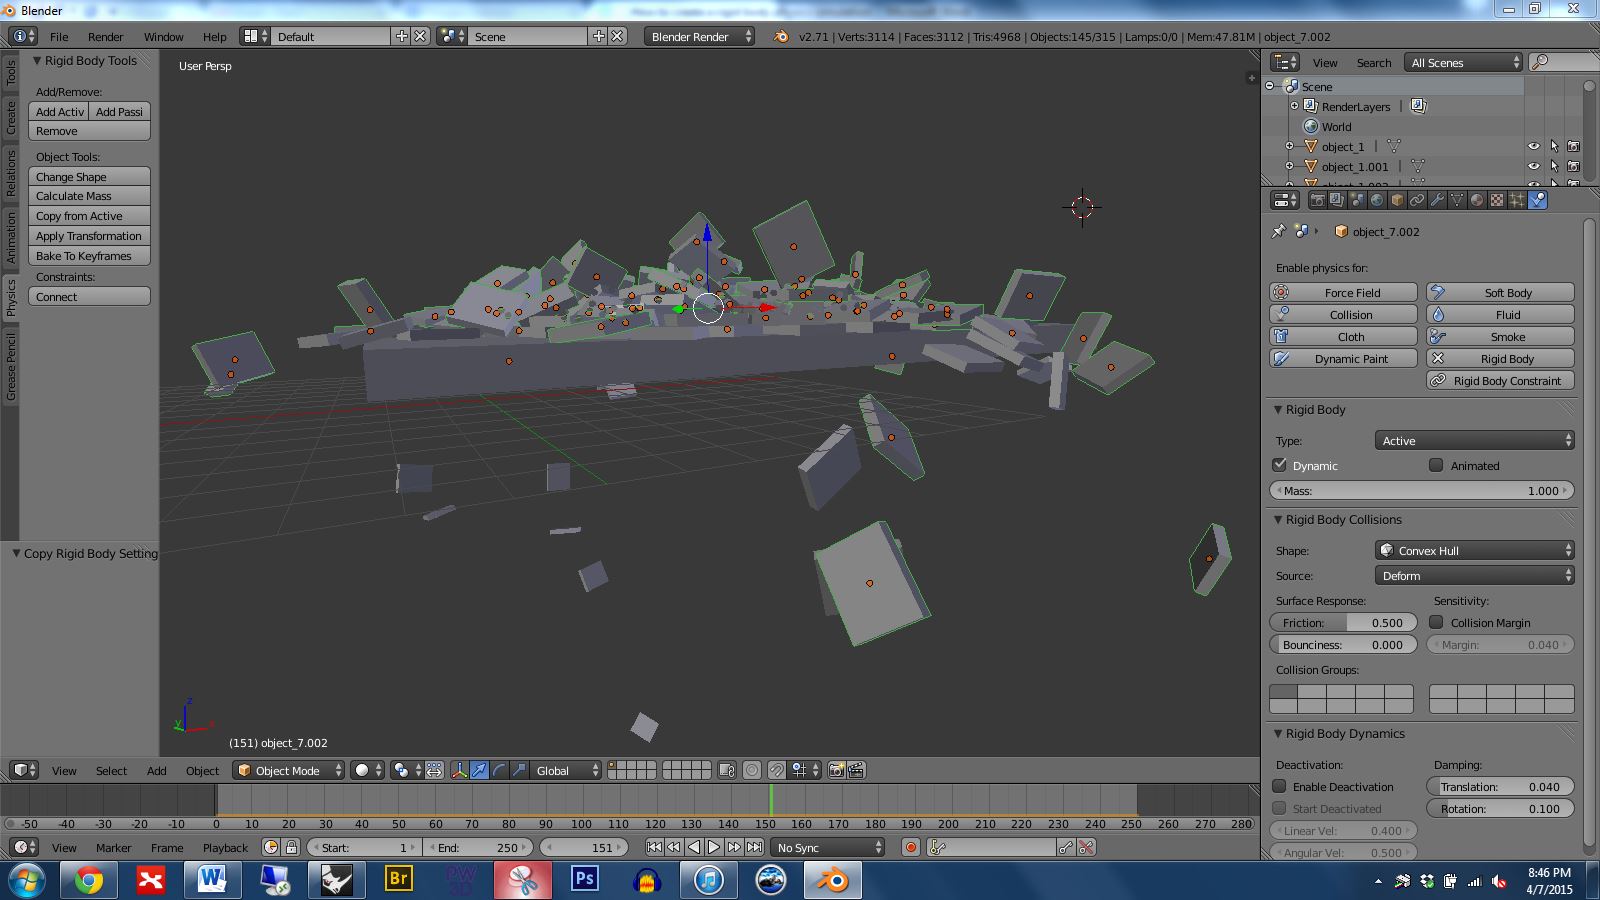
Press B and use the lasso to select all of the parts you want to drop. Then reset object origins by pressing Shift Ctrl Alt and C at the same time, then choose “set origin to geometry”. Notice that a small orange dot appears on each part. *Note: if your objects seem to be joined together in a problematic way you can press P to unjoin them.
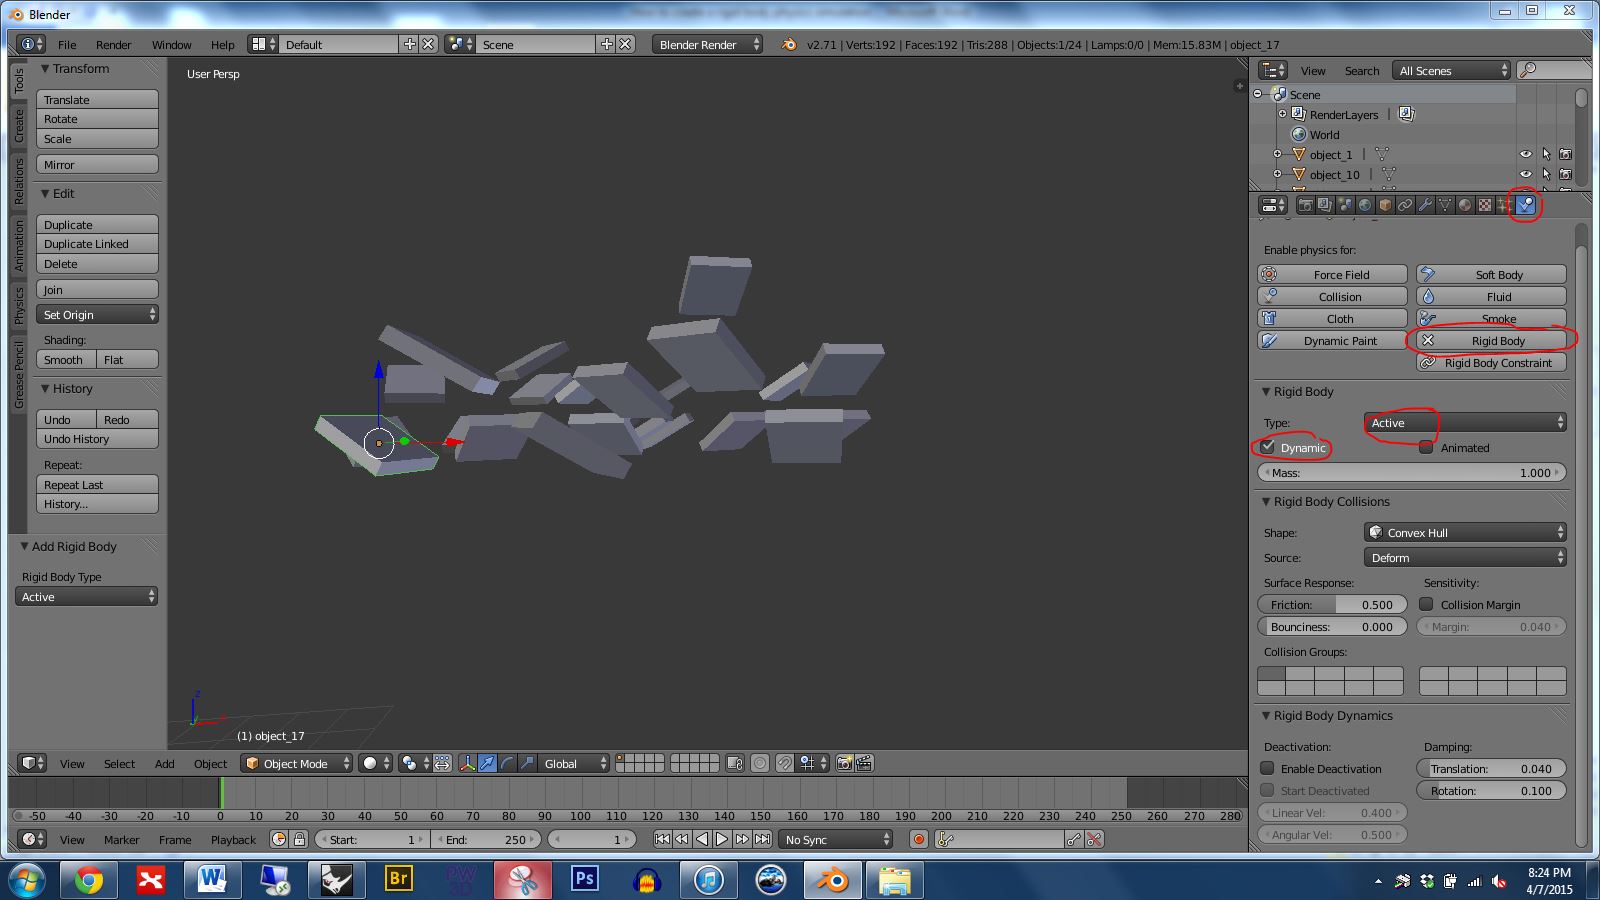
Select one of your drop parts, open the physics panel, and click on rigid body. Set it to be an active AND dynamic object.
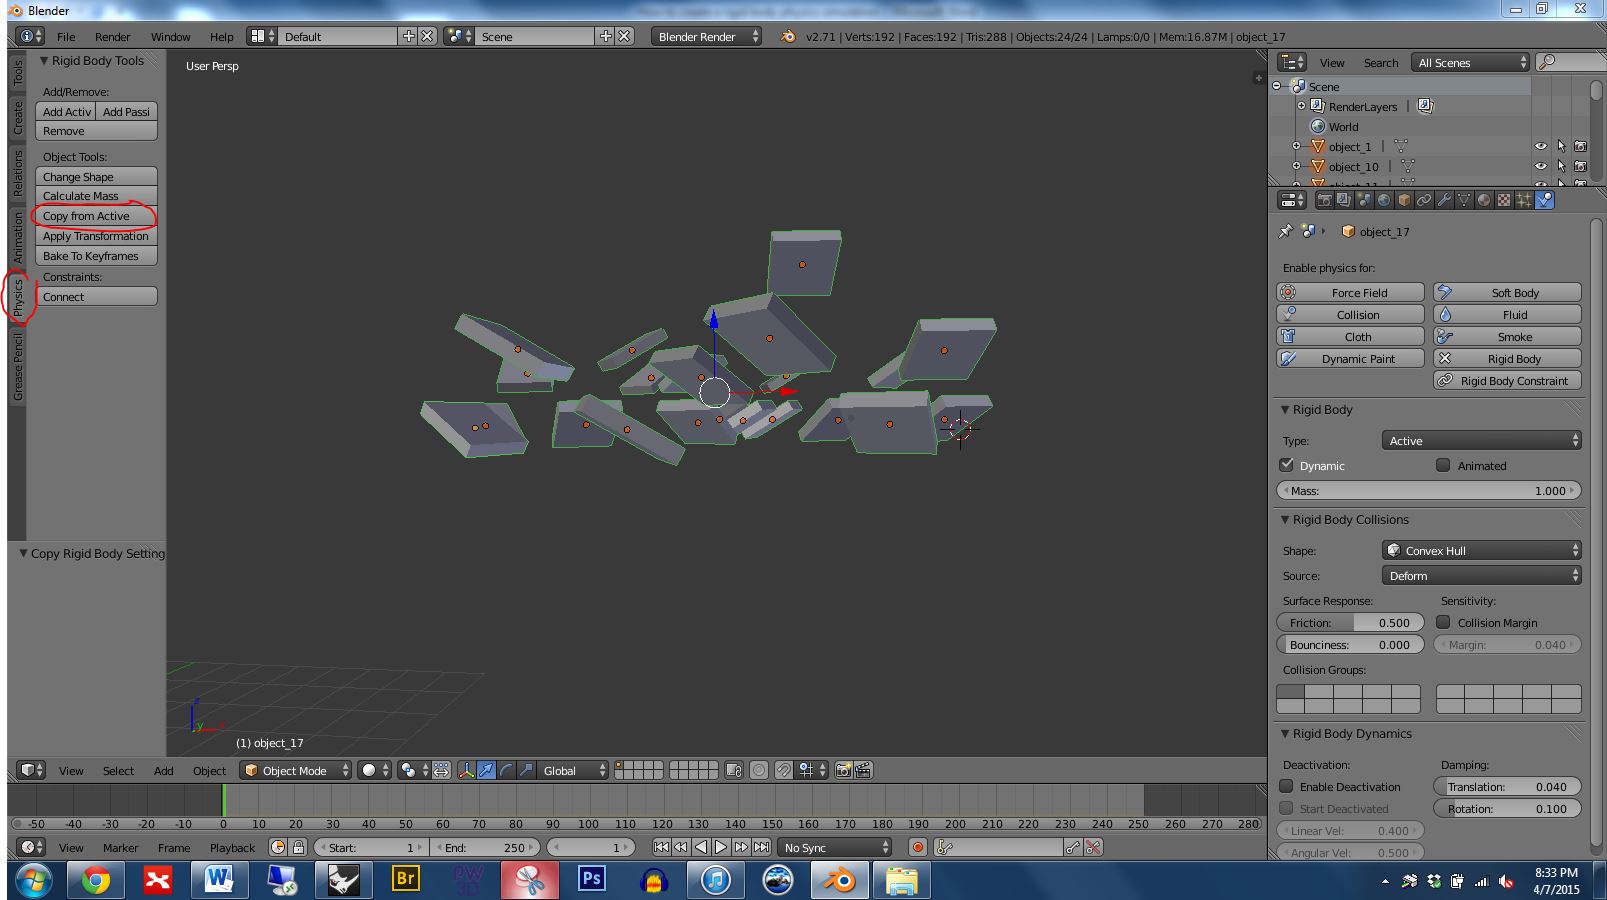
Now we will copy the settings from the first part to the others. Do this with the following steps: 1) Select all object that you wish to copy the physics properties to 2) Select the object you wish to copy the physics properties from (note: we select this one last so that it becomes the active selected object. This is the object that has the desired physics properties.) 3) Then in the left Physics panel under Object Tools choose Copy From Active.
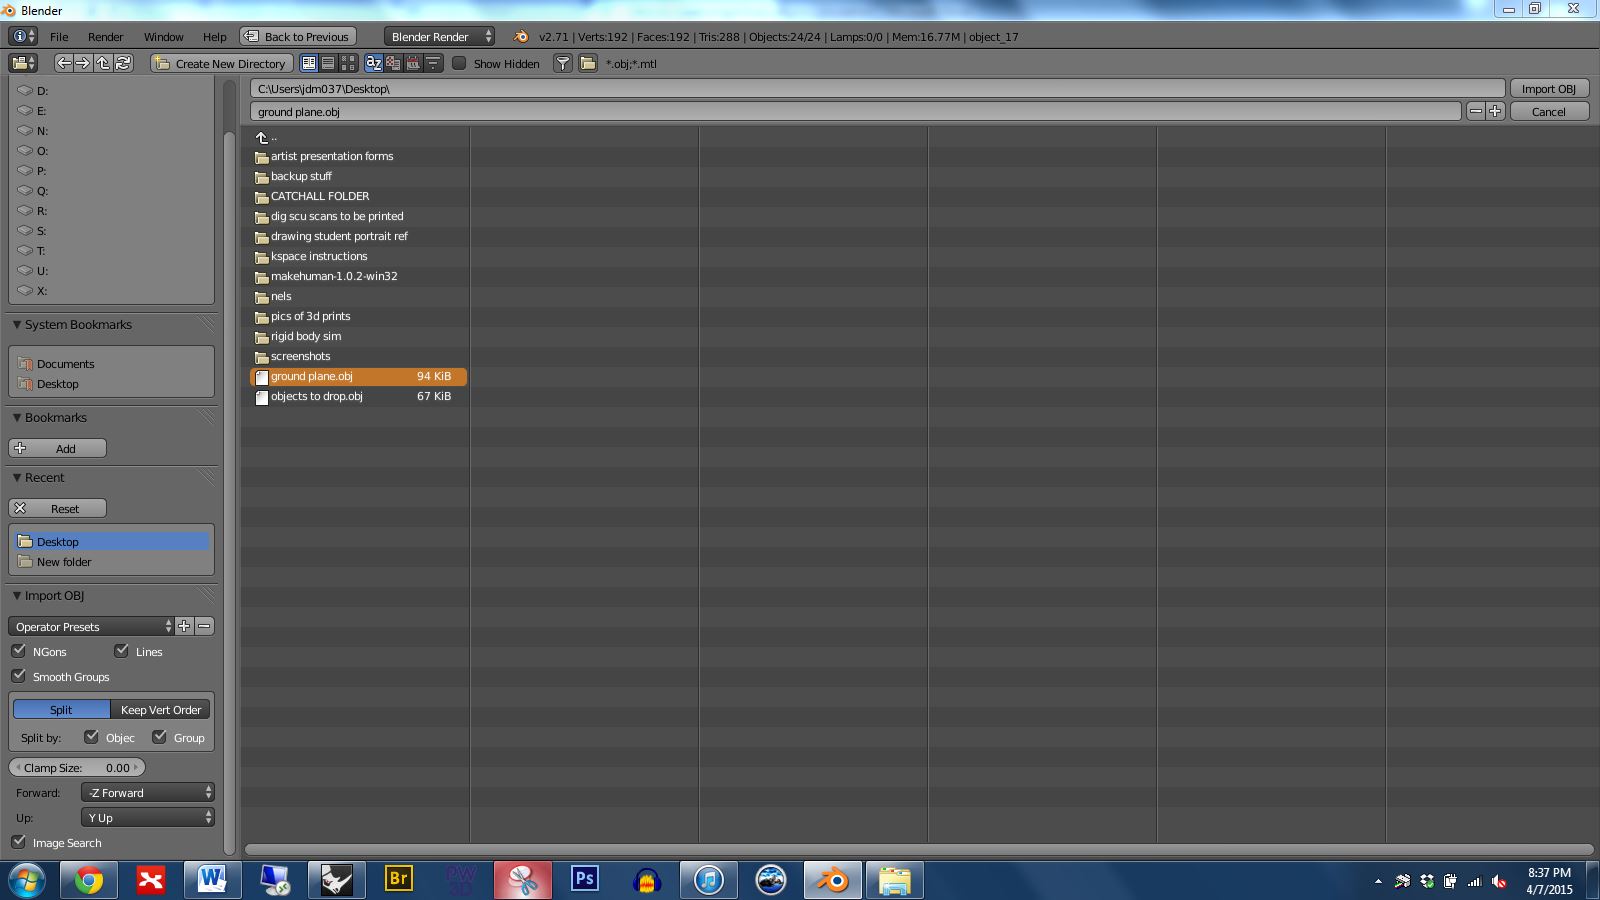
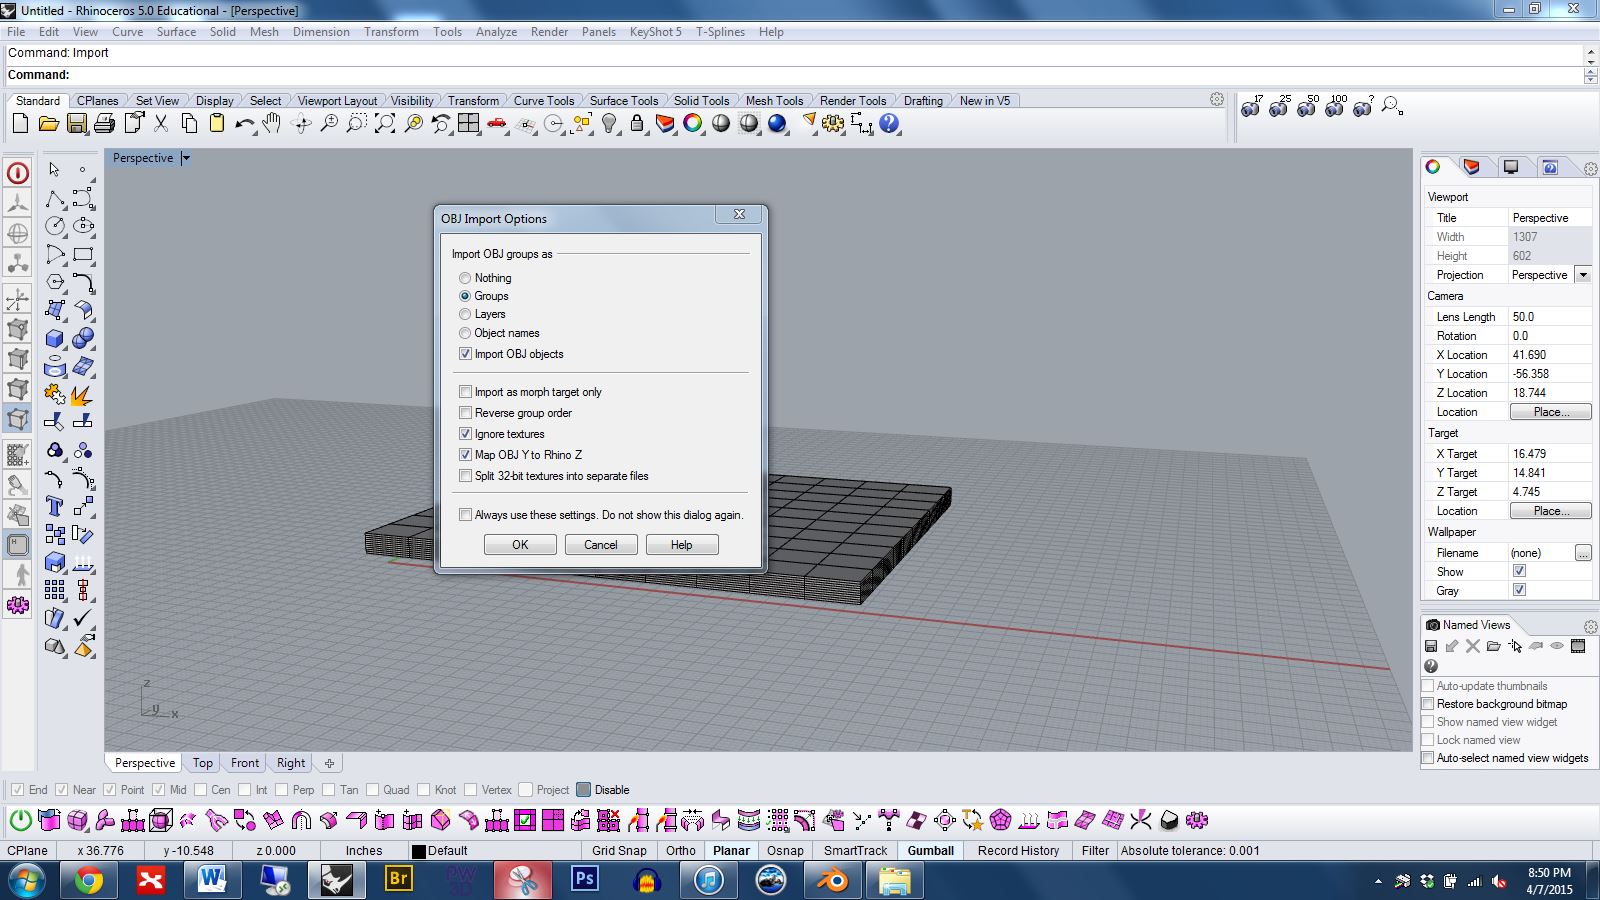
Import the ground plane using the settings shown below.
Select the ground plane, go to the right physics panel, click on rigid body, and set the ground plane to by active but NOT dynamic.

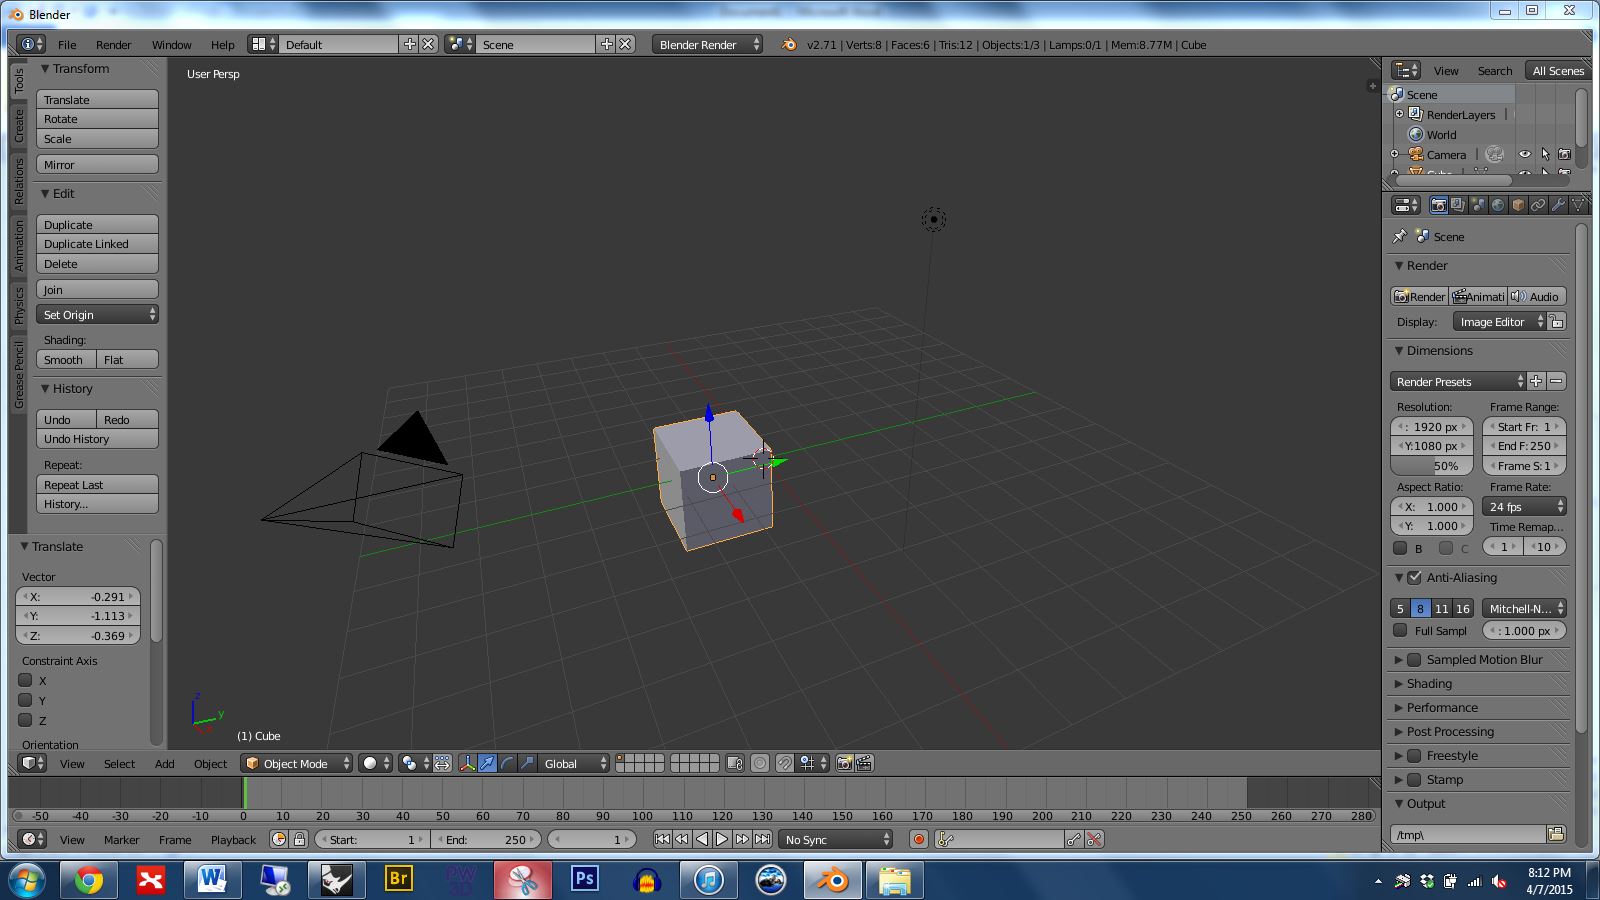
Press the play button shown in the image below to start the simulation. The parts should drop and land on the ground plane. If not, look back over the previous instructions and see if you missed something.

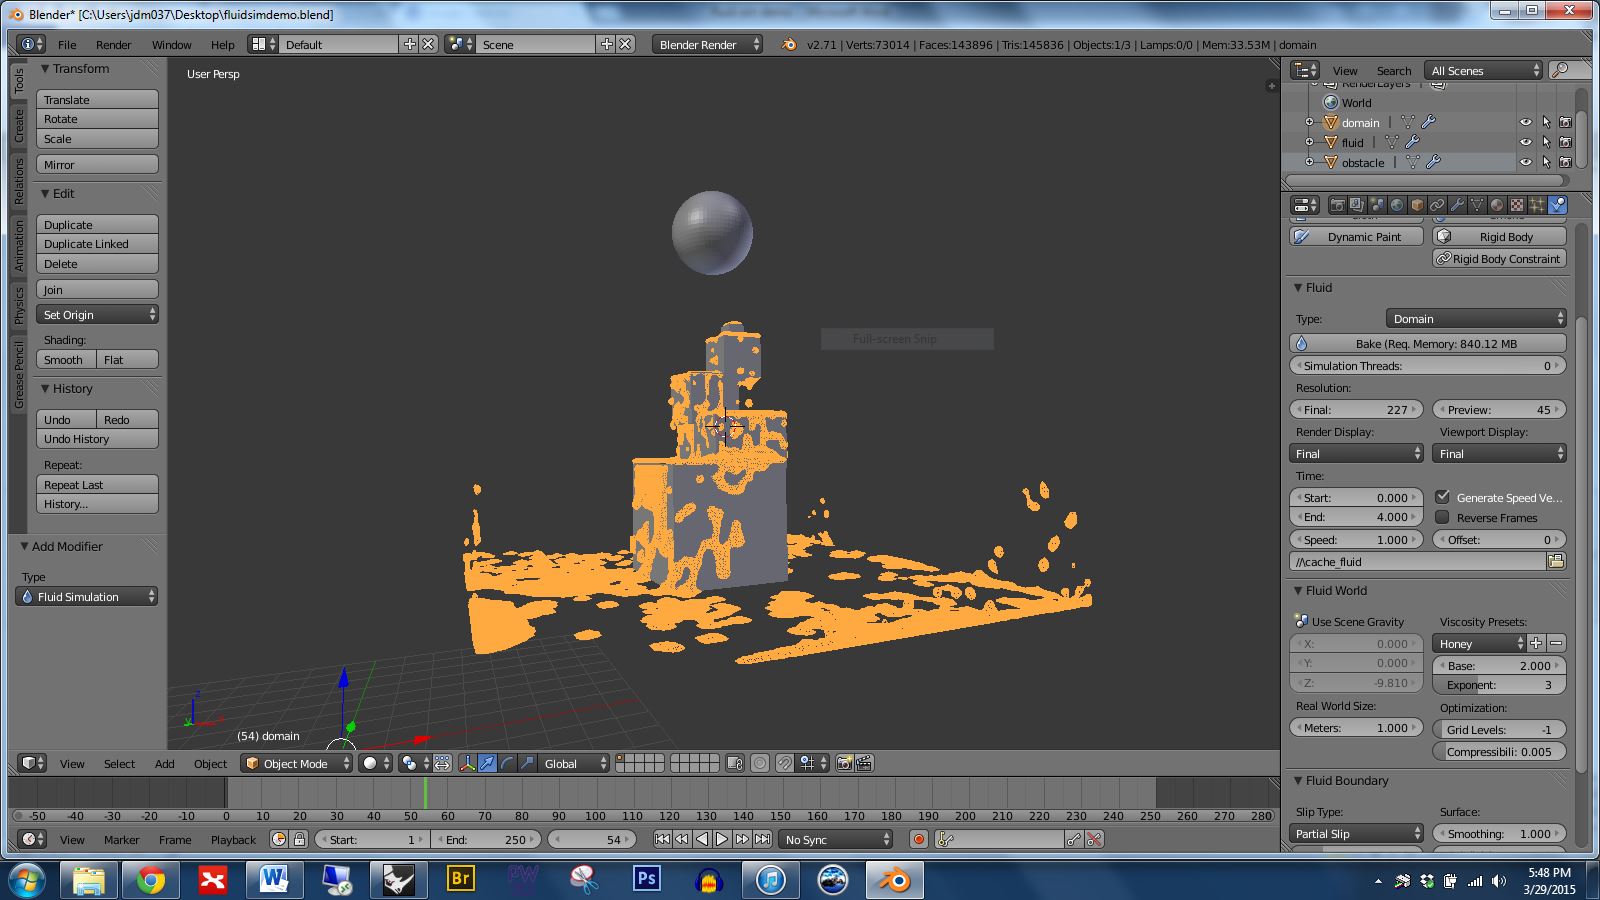
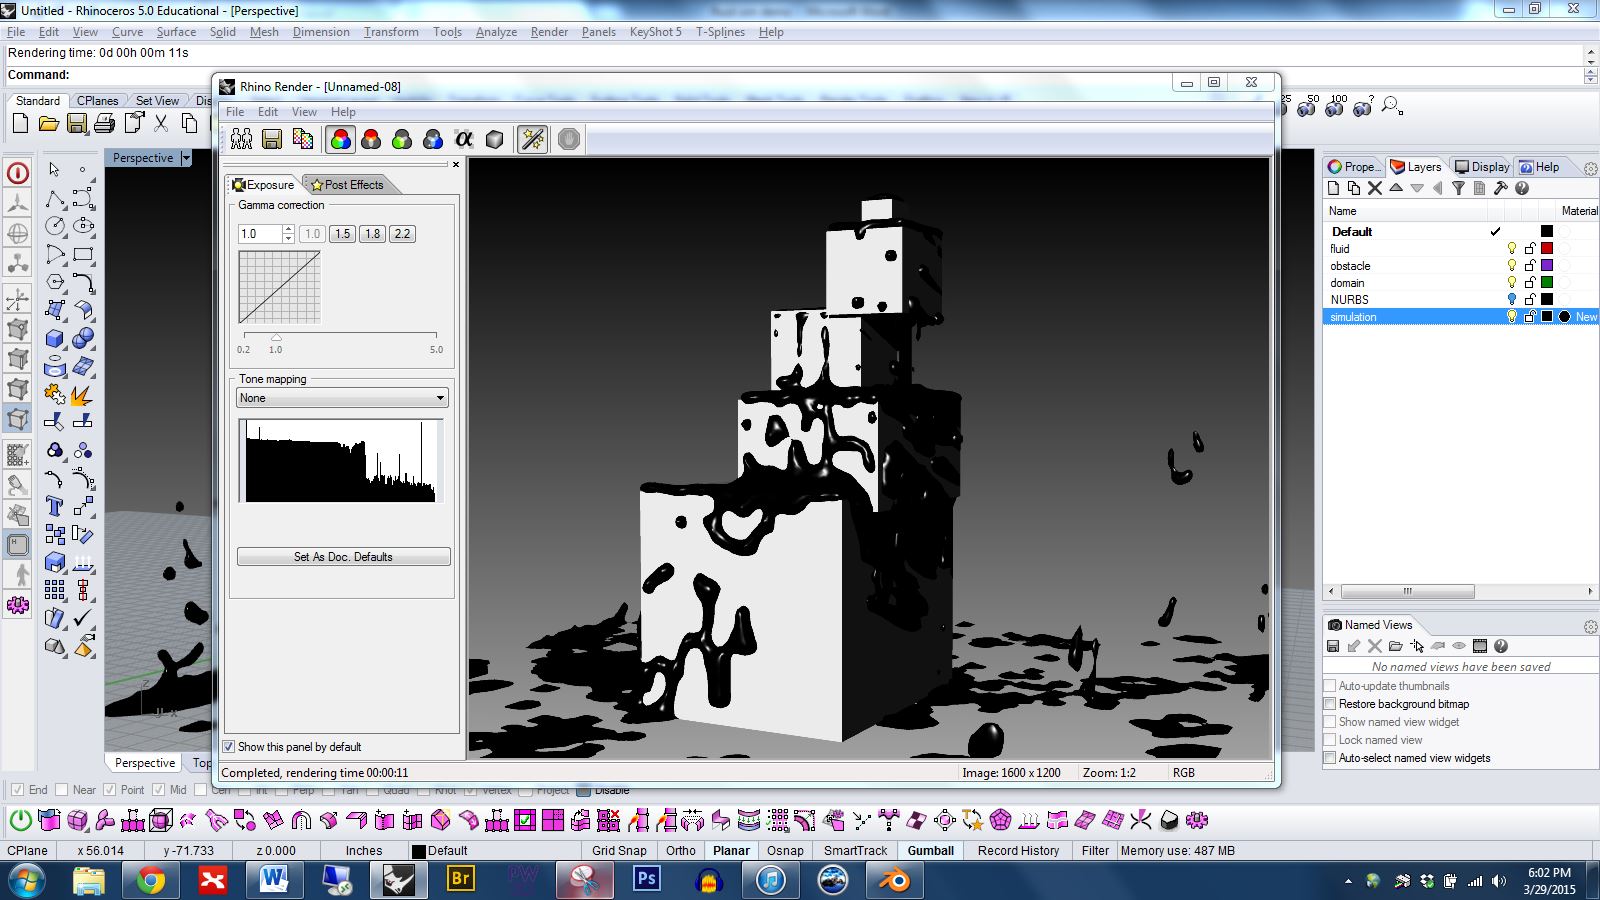
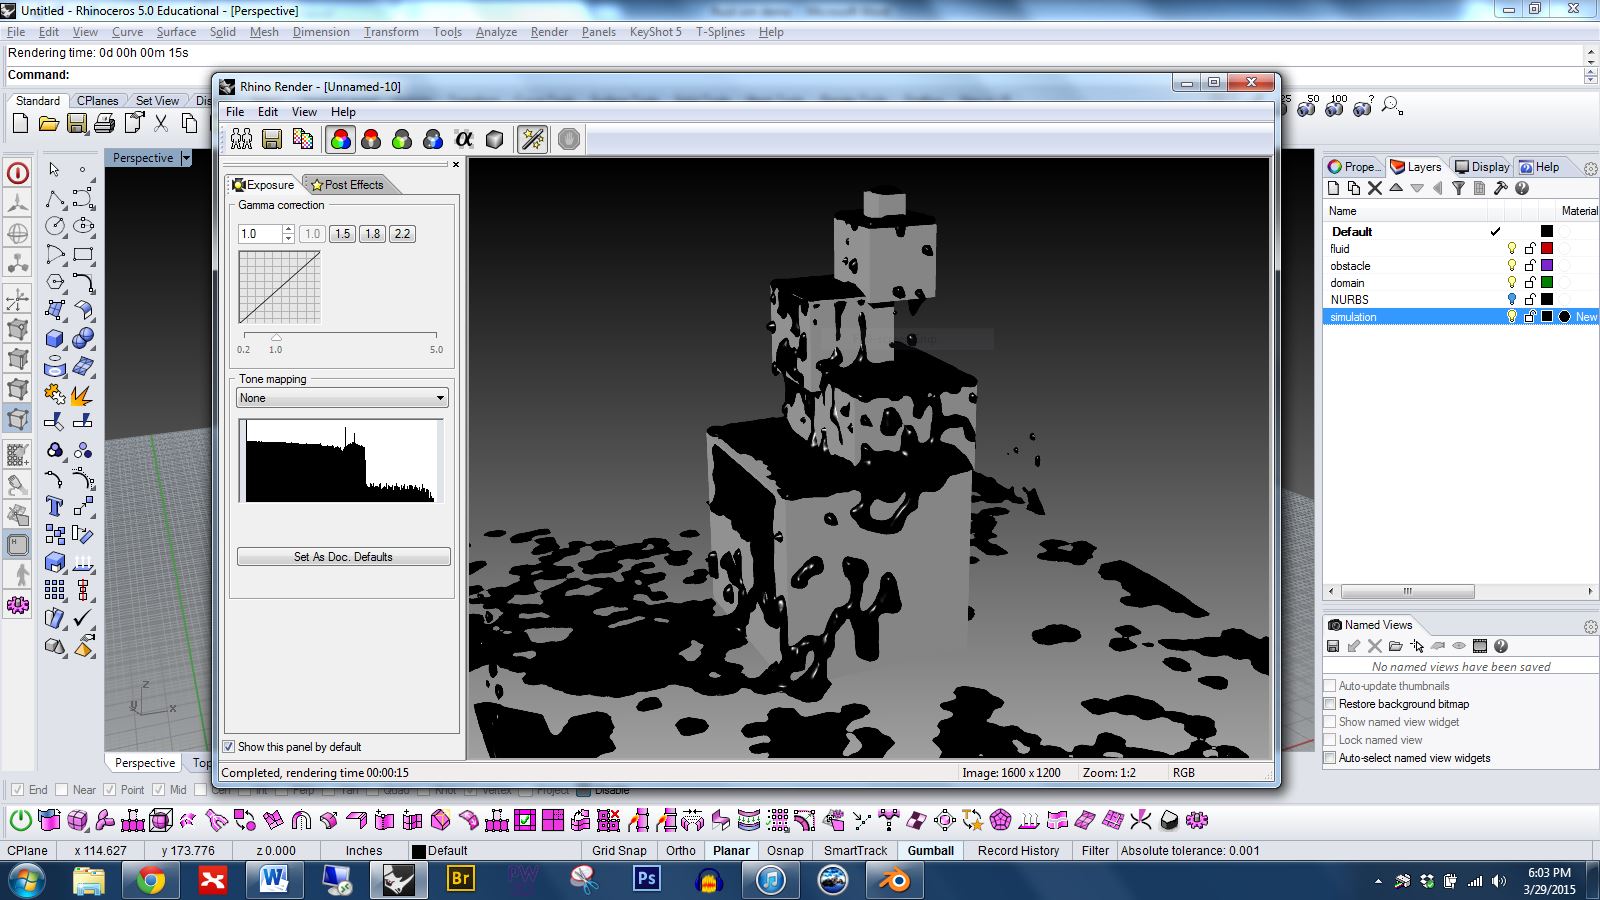
To create a more dramatic result I have copied and pasted the drop parts to create many more. When you are satisfied with the result, scroll the timeline to the moment you want to keep…
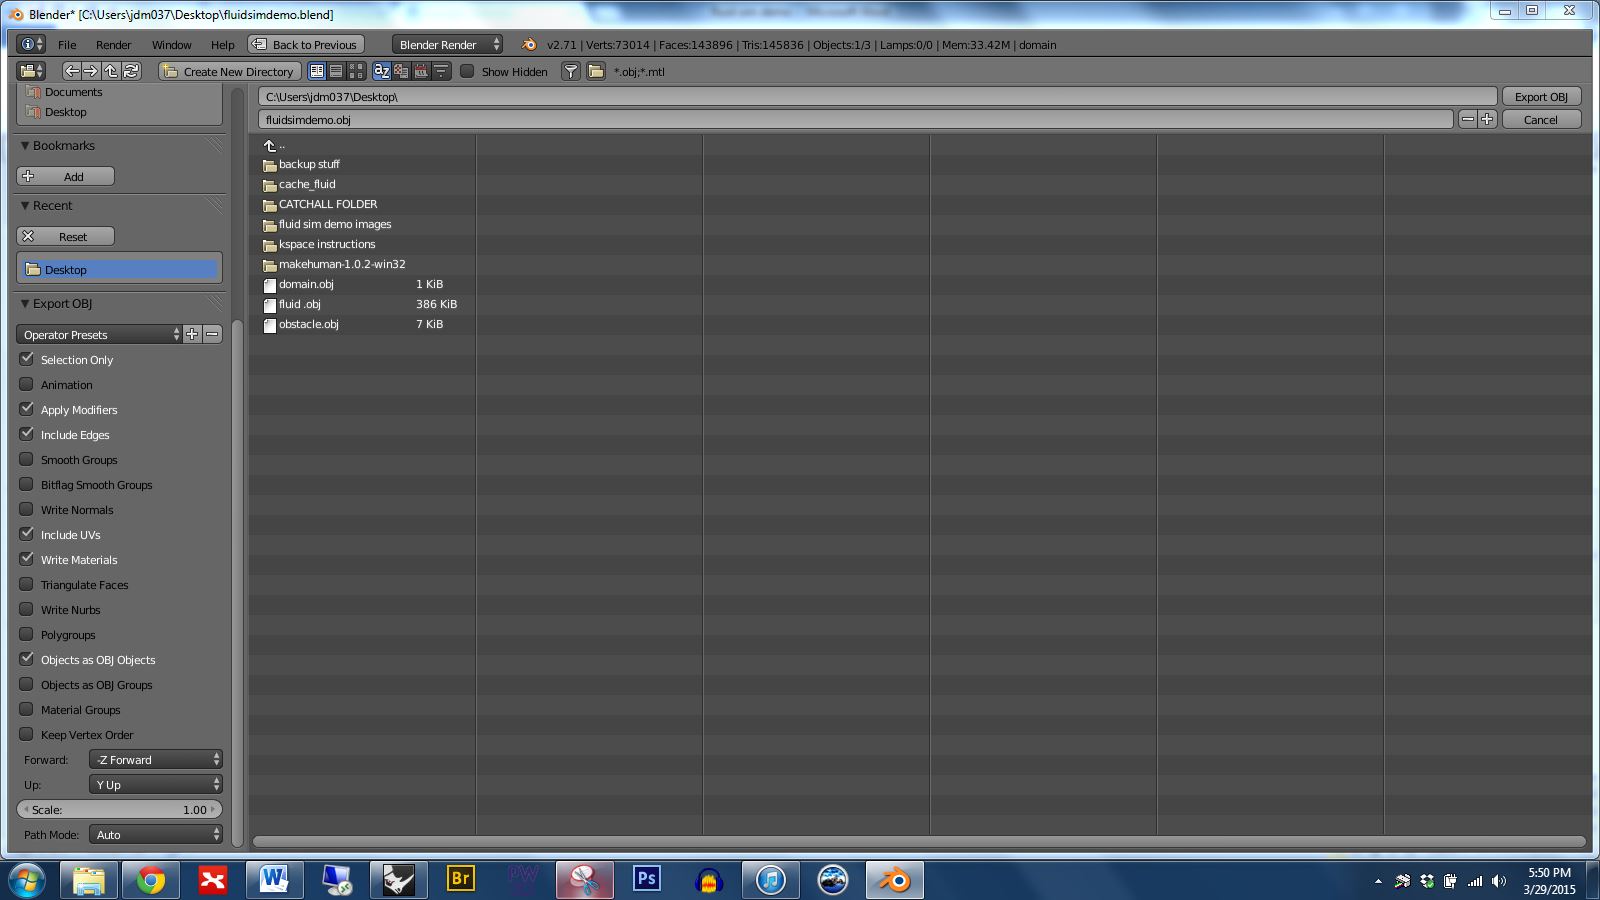
Then export as OBJ using the settings shown in the image below.
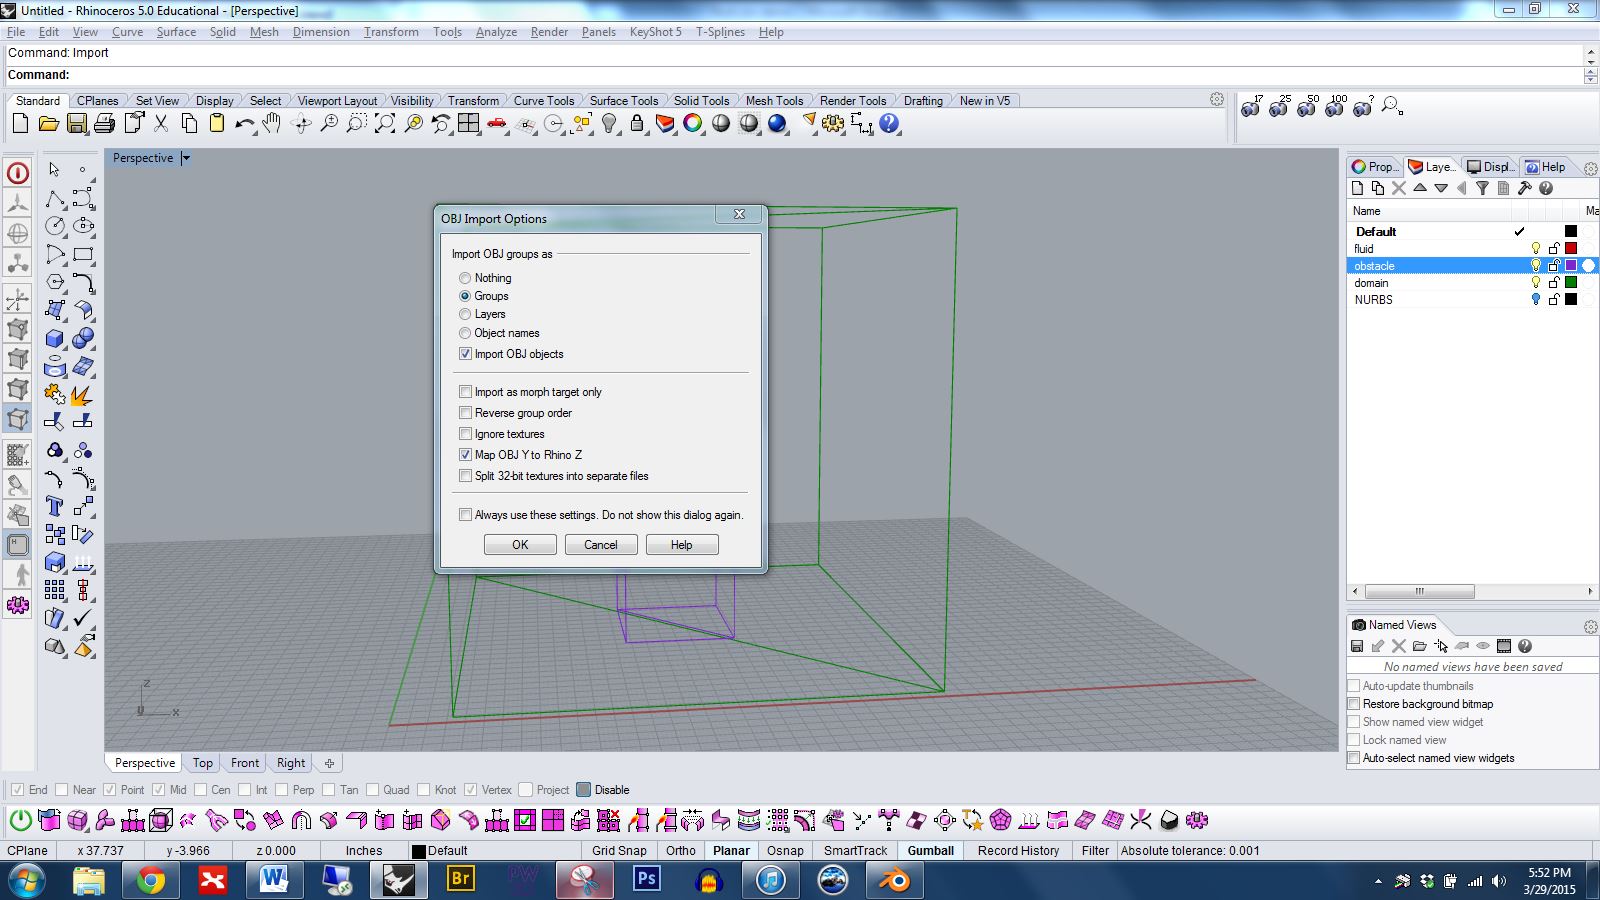
In Rhino, import using the settings shown below.
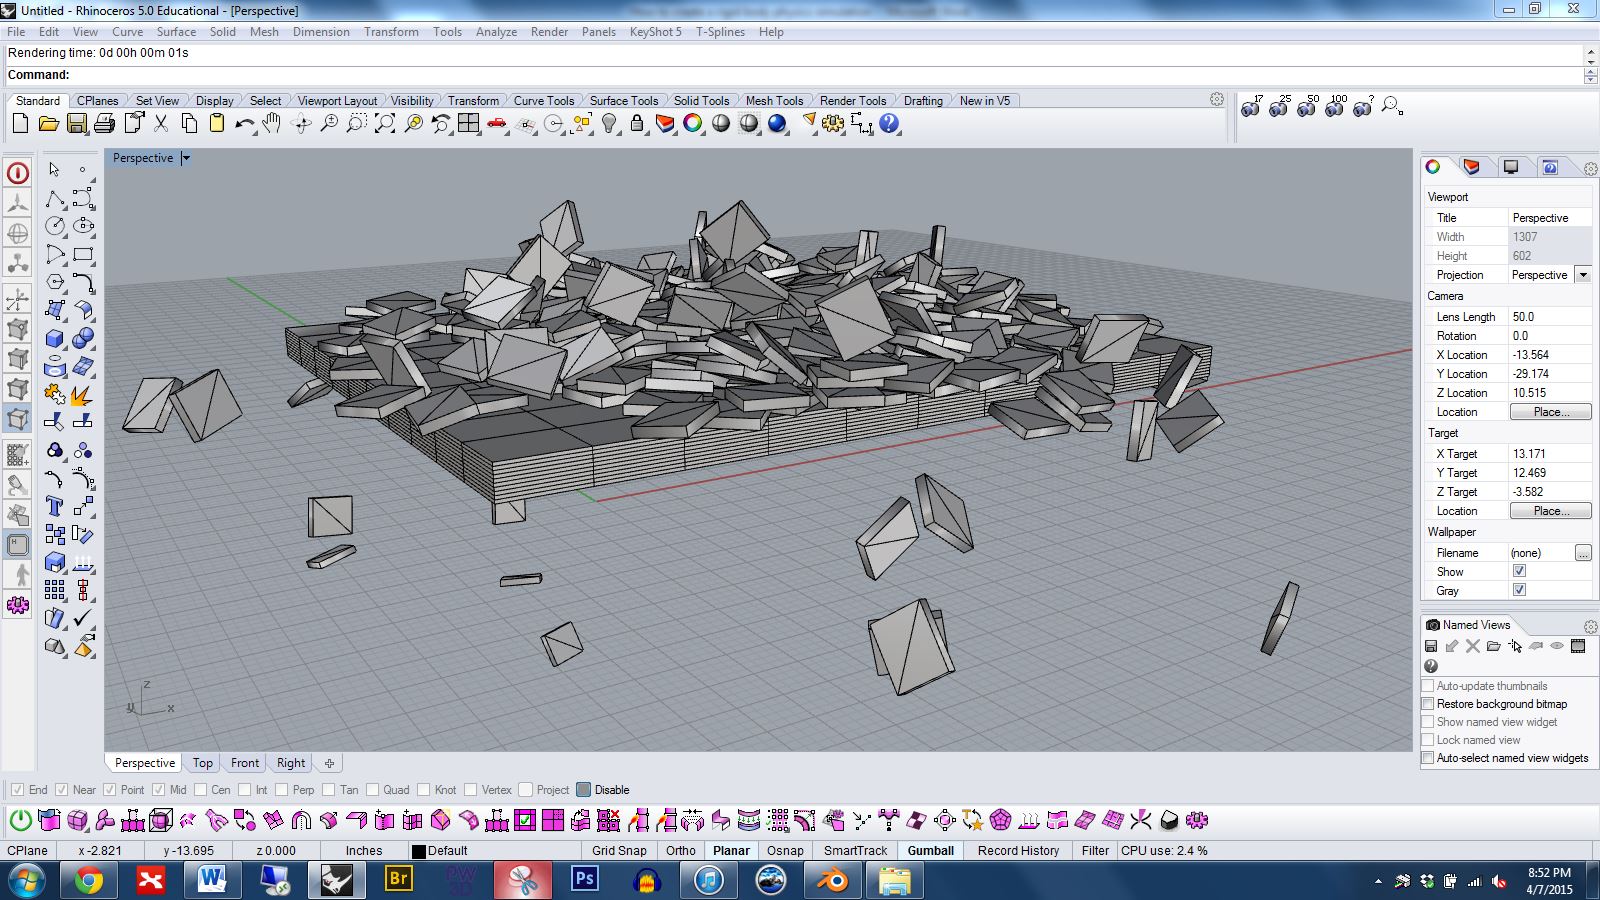
The finished result is shown below.
Additional resources:
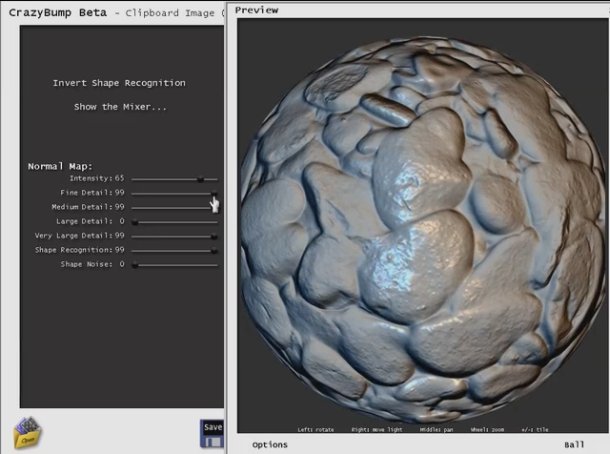
Crazybump can give you five types of texture files: color, displacement, normal, occlusion, and specular (shown below for the cushion part); however, of these, we can only use COLOR, NORMAL, and SPECULAR files in Keyshot
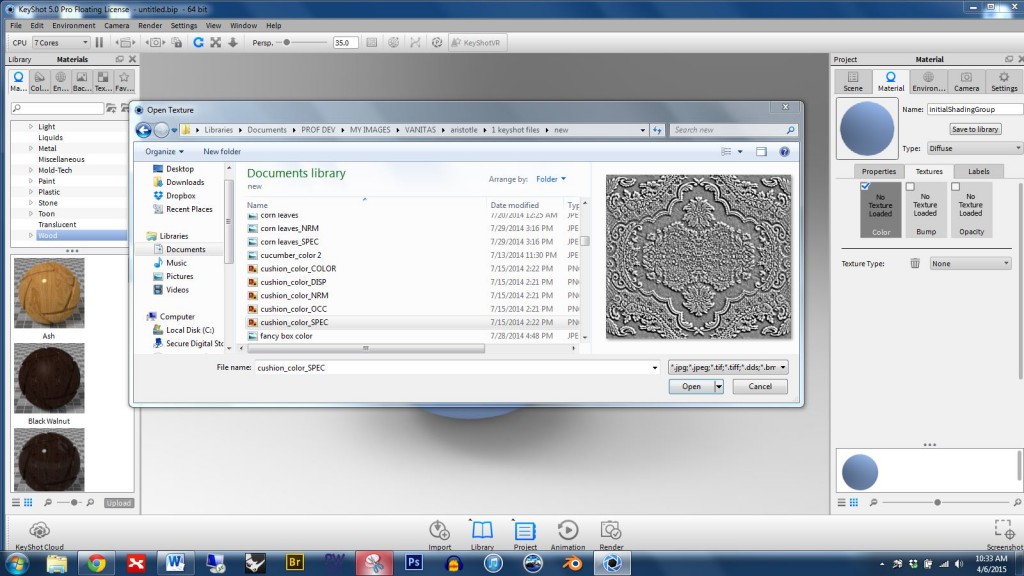
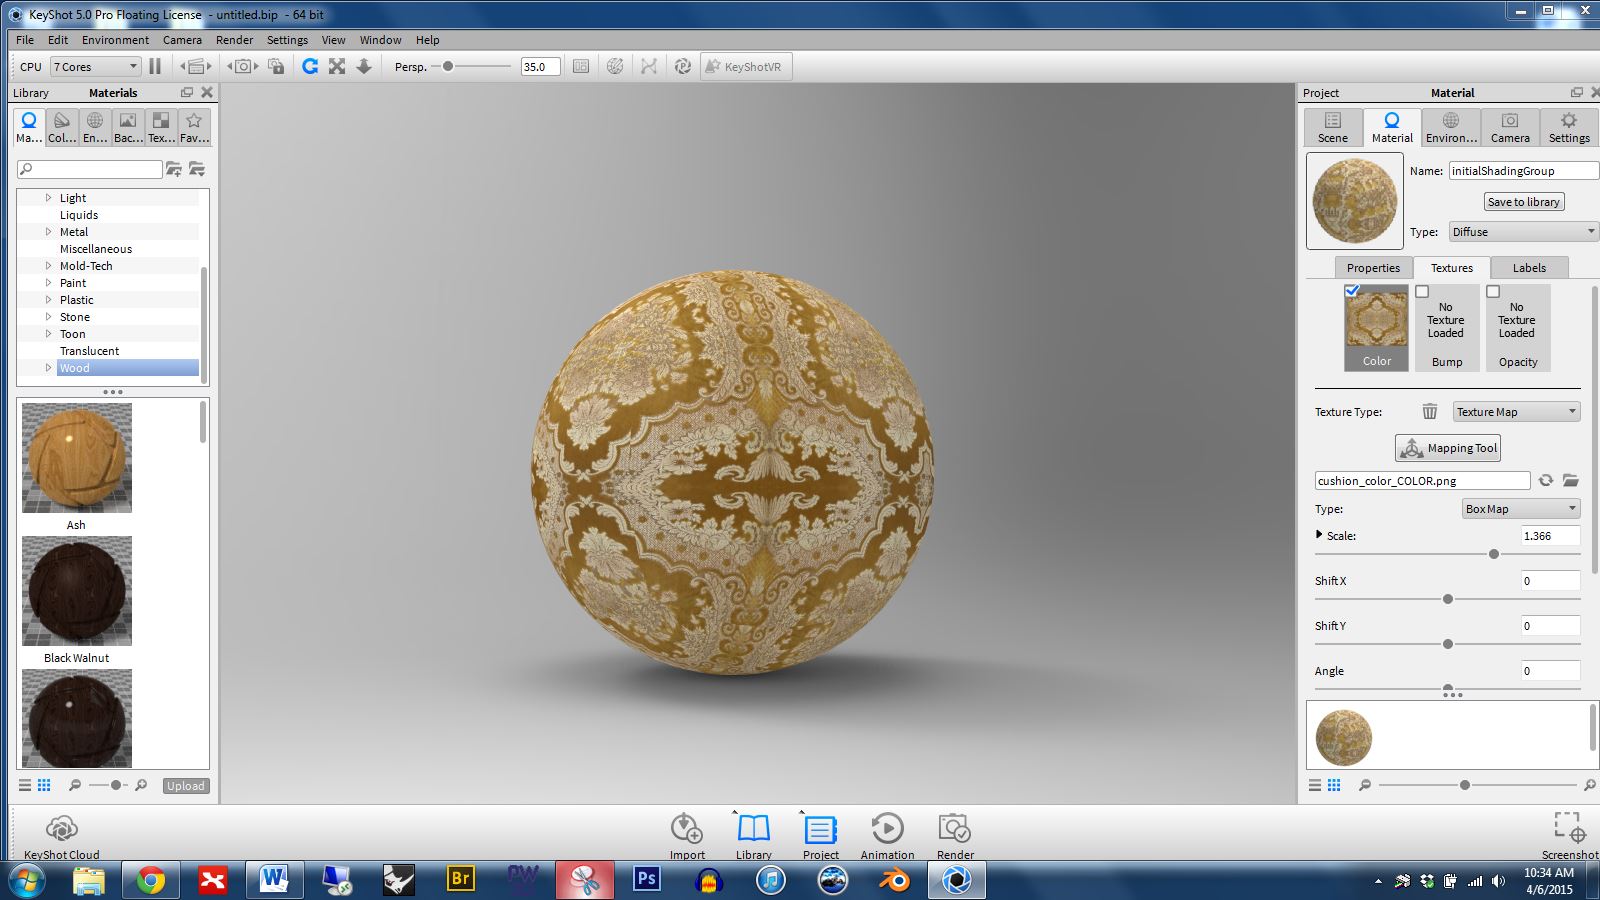
To get started in Keyshot double click on the part you want to apply the material to, go to the texture panel, and click the COLOR box, then select your COLOR file (see below)
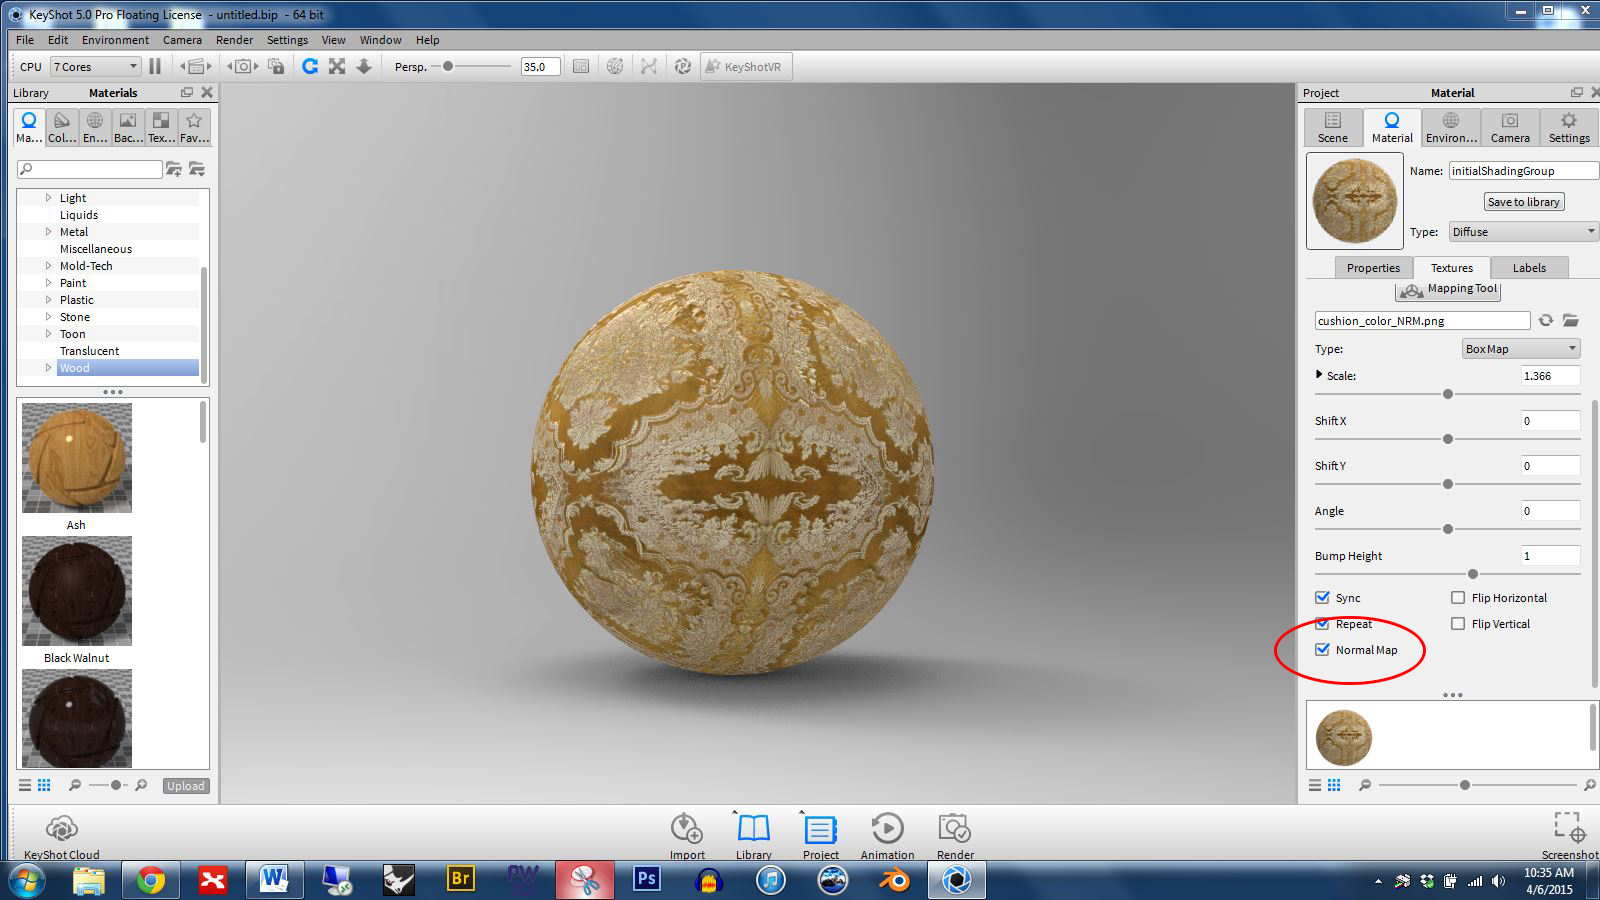
Next, click the BUMP box and select your NORMAL file (see below)

Scroll down in the texture panel and click the NORMAL MAP box — otherwise Keyshot will treat the file like a bump map and give poor results. (See the box circled in red below) Also note that you want the SYNC box to be checked. For your texture maps to line up properly it is important for SYNC to be turned on.
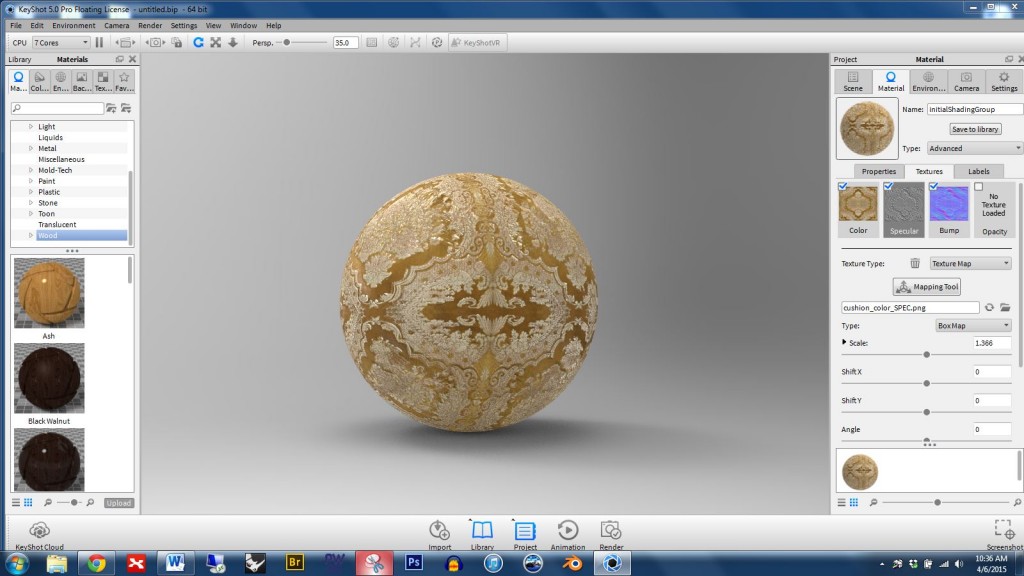
If you want to use a SPECULAR map to selectively adjust the reflectivity of your part you may need to change the material TYPE to ADVANCED (See the box circled in red below)

Click the SPECULAR box and select your specular file as shown below
Step 1: Open an image in Photoshop.

Step 2: In the layer pane, drag the background layer down to the new layer button and release (the new layer button is circled in red below). This will give you a background copy. Then hide the background.
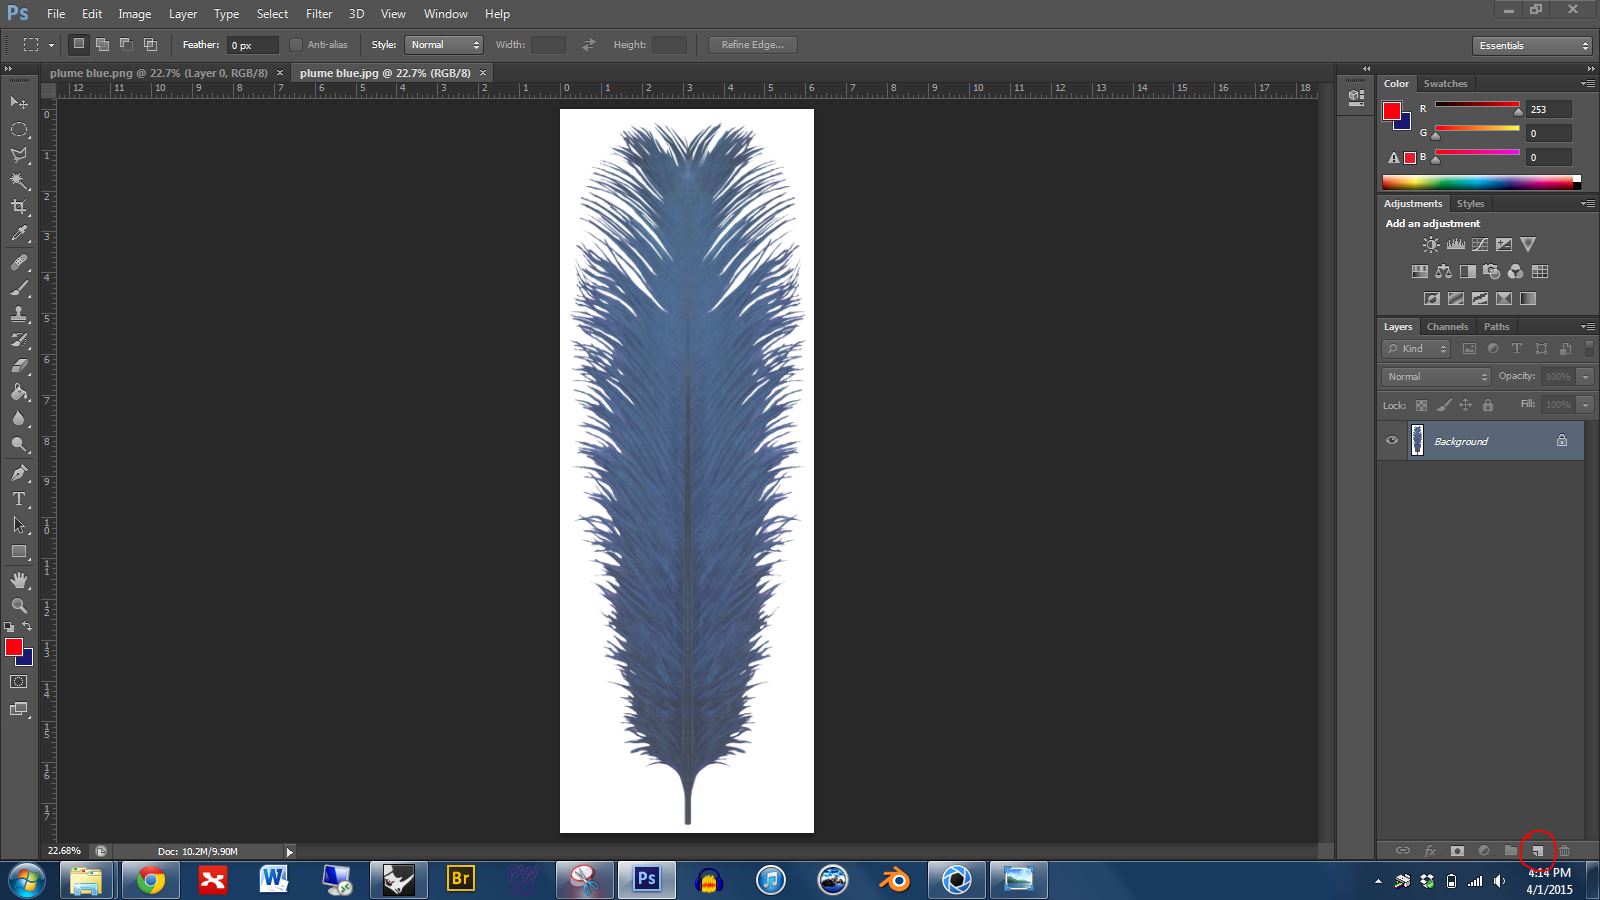
Step 3: Erase parts of the image using the magic wand tool, the polygonal lasso tool, or the eraser.
Note:
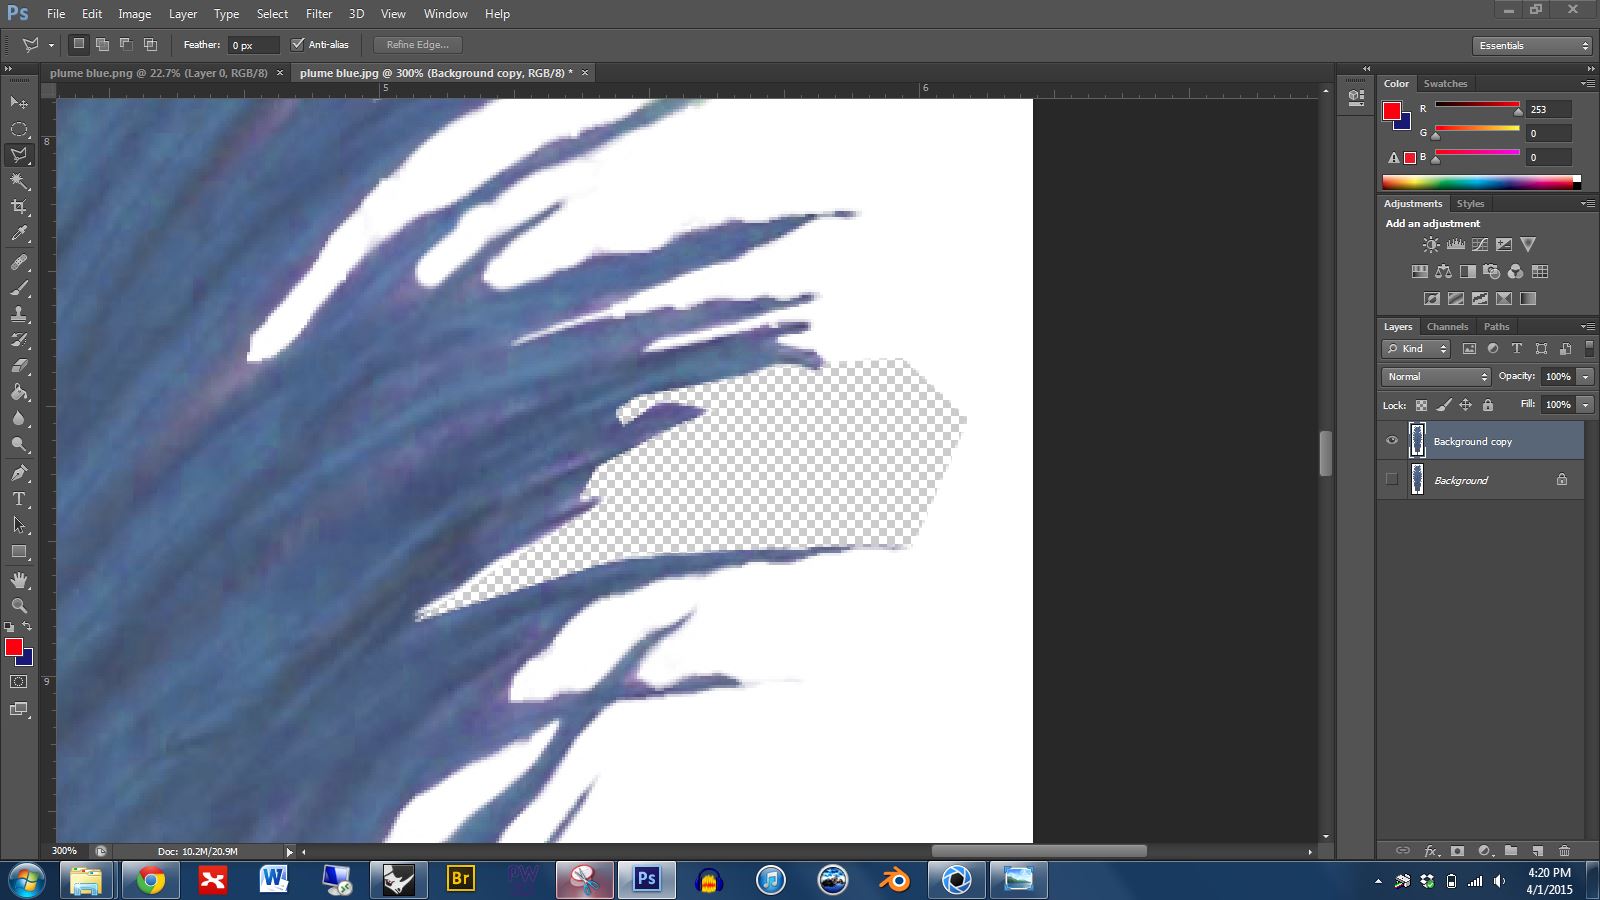
Step 4: When you’re finished deleting unwanted parts of the image you’ll want to save your file as a PNG.

Step 5: Now you need to set up the custom texture mapping. My favorite way to do this (when working with simple planes) is to pictureframe the PNG file in Rhino, then rebuild the plane (add more control points and change degree)… this will build in the UV mapping from the start.

Step 6: Distort the plane as needed.

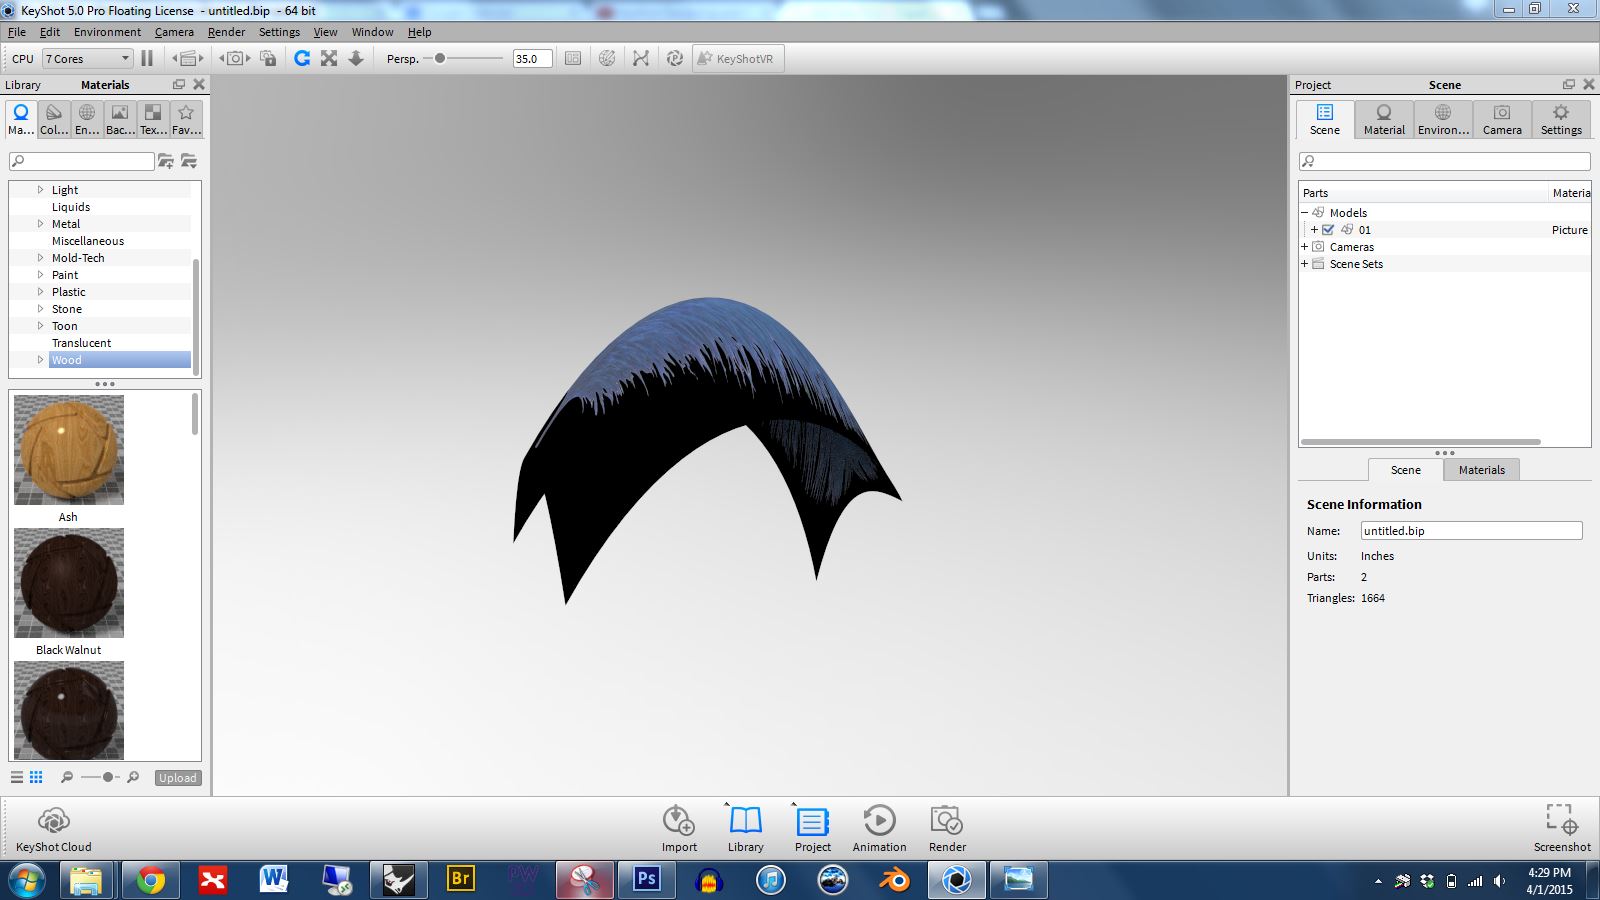
Step 7: Open Keyshot and import the Rhino file. When first imported you’ll see that the blank areas are black.
Step 8: Right click on the part and click to edit the material. In the material properties, in the advanced panel, find the box for “use diffuse map alpha” and click it. The blank pixels will disappear.
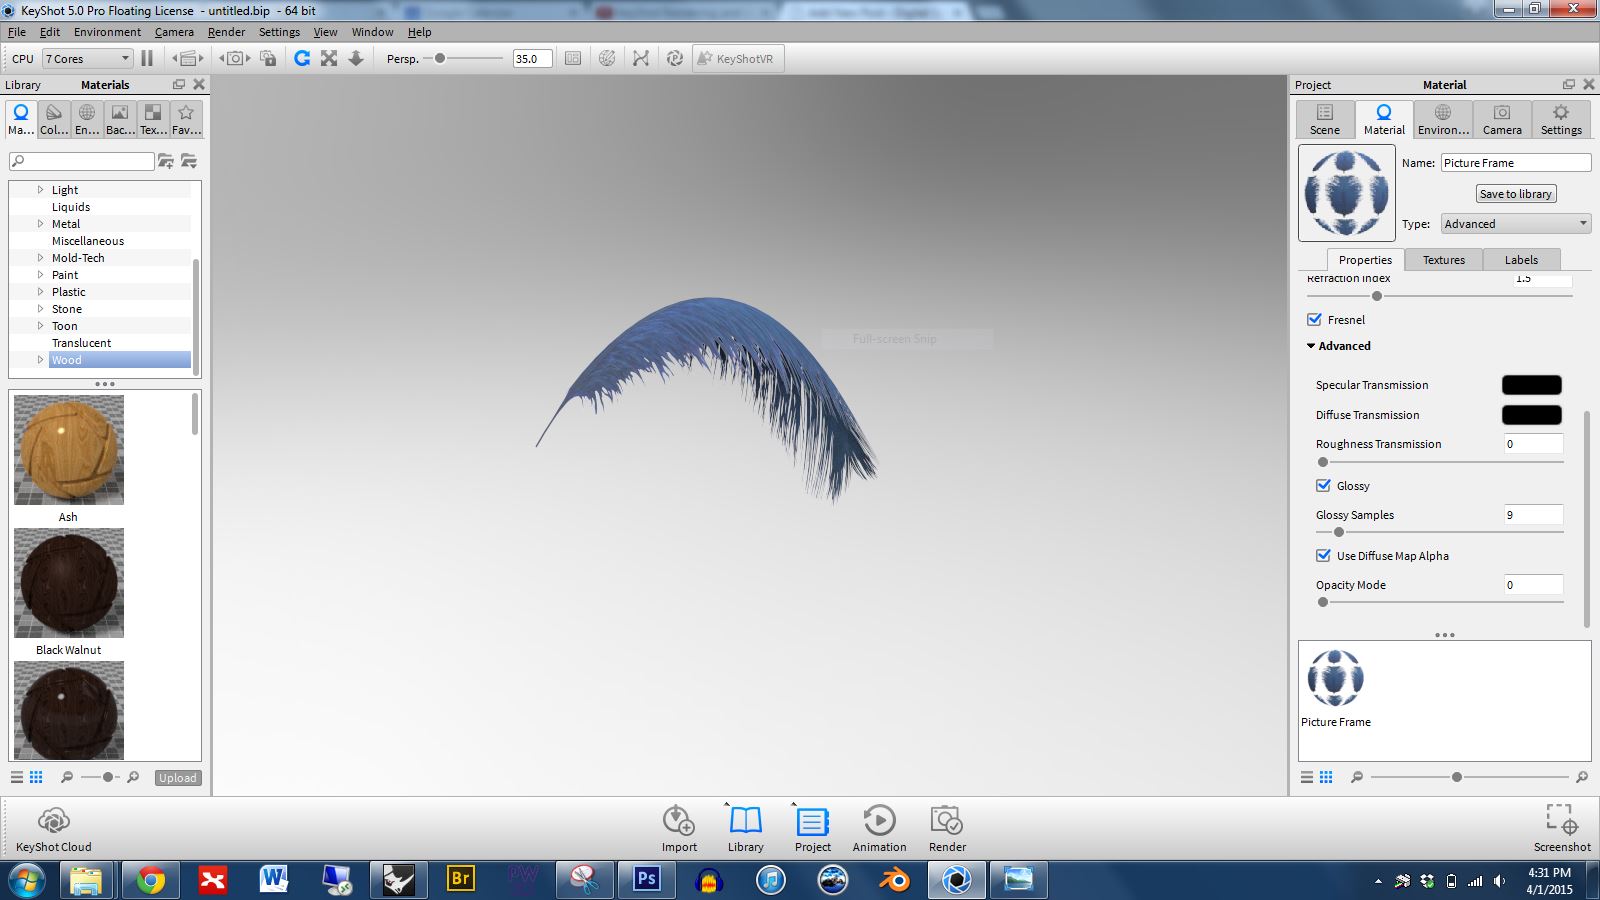
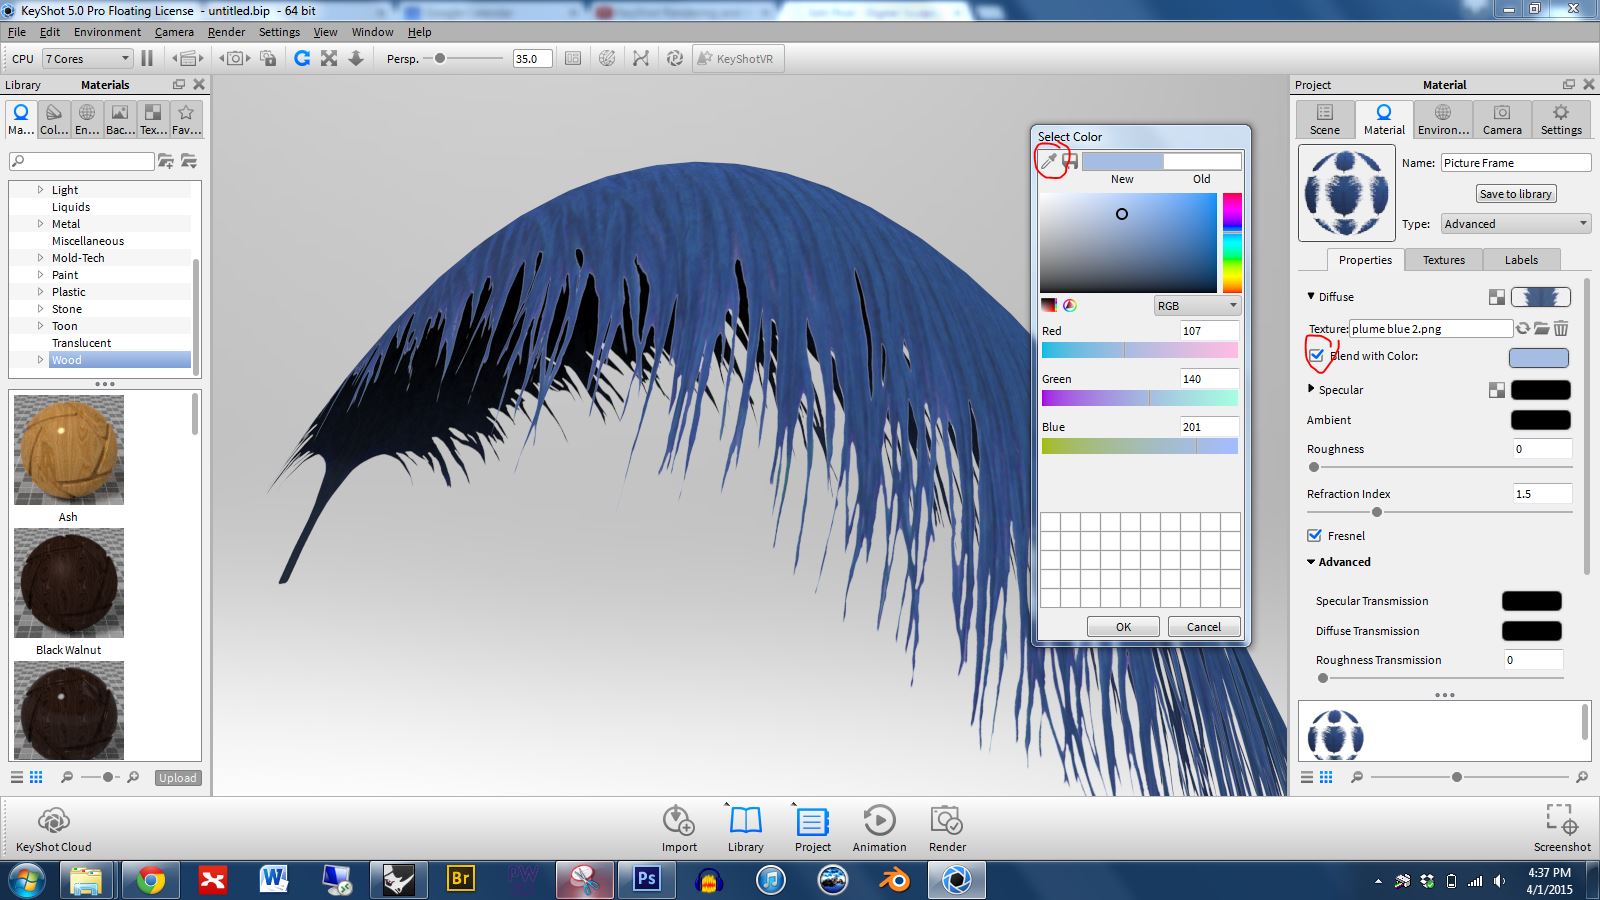
Step 9: Notice that there is a white outline around the feather (see below)
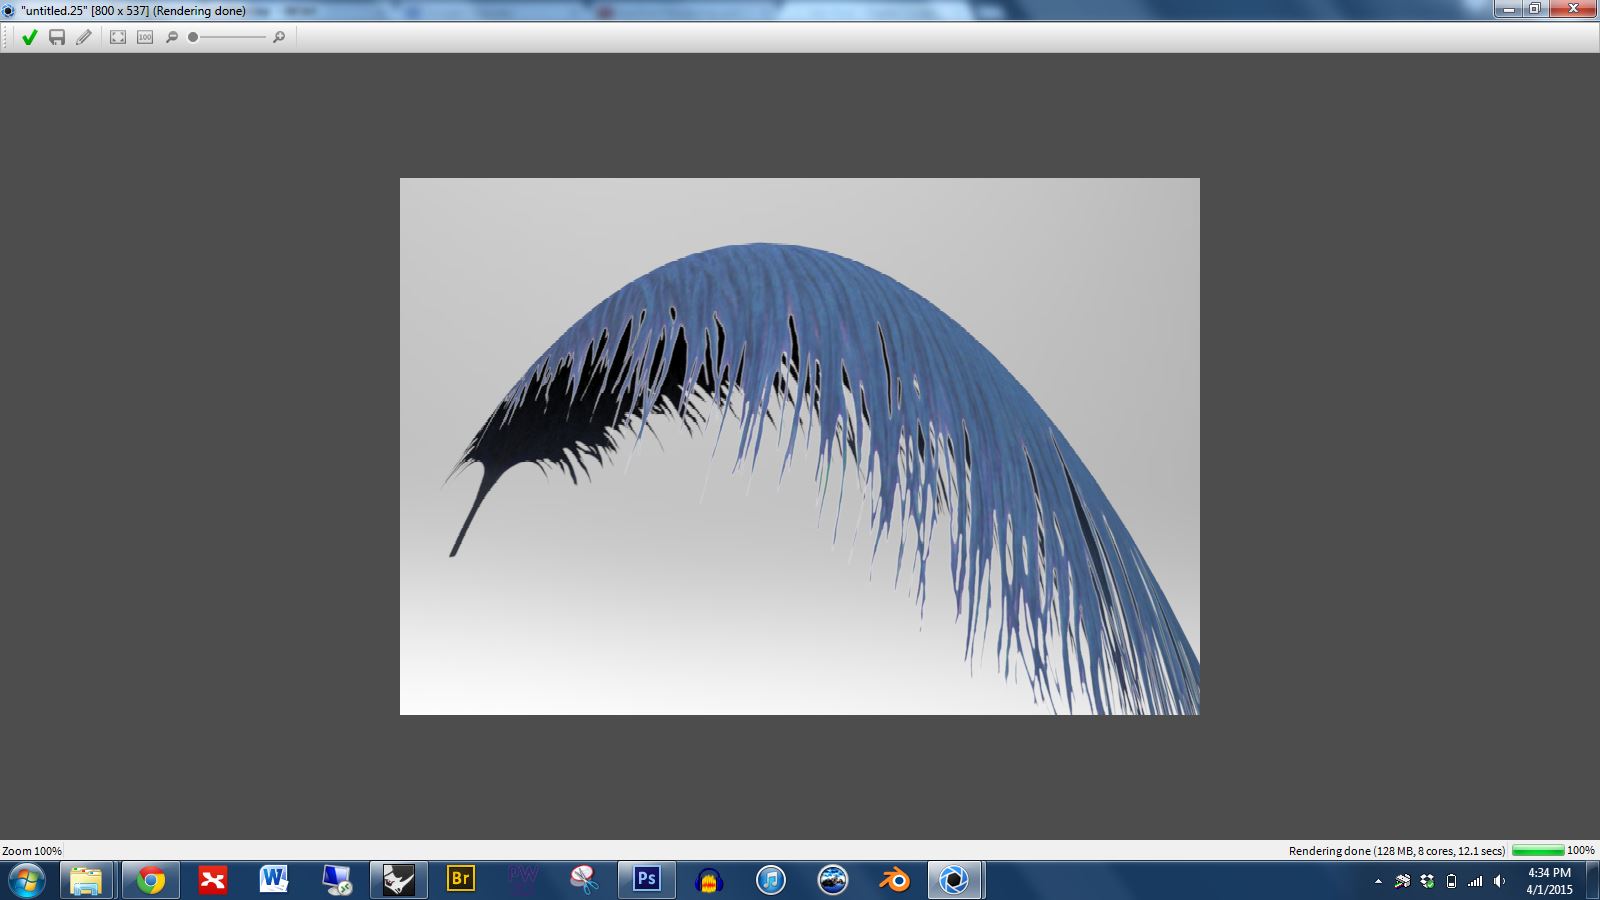
Step 10: We can minimize the outline by editing the material properties. You’ll want to choose to “blend with color” and then use the eye dropper to grab the color of your object, in this case a light blue.
Note: If your geometry is more complex and you’re not able to pictureframe your image then you’ll need to learn how to unwrap and use the UV editor. Check out the section on “Learning how to use UV coordinate mapping when necessary for complex forms” in this tutorial: http://digitalsculpture.blogs.bucknell.edu/creating-custom-materials/
Video tutorials:
Lesson 1: Animation Overview
Lesson 2: Understanding the timeline
Lesson 3: Part animations
Lesson 4: Camera animations
Lesson 5: Copy, paste, and link animations
Lesson 6: Rendering preview
Lesson 7: Final output
Professor’s suggestions on creating animations in Keyshot:
Examples of animations made in Keyshot:
https://www.youtube.com/watch?v=CyFXYjqmwuU
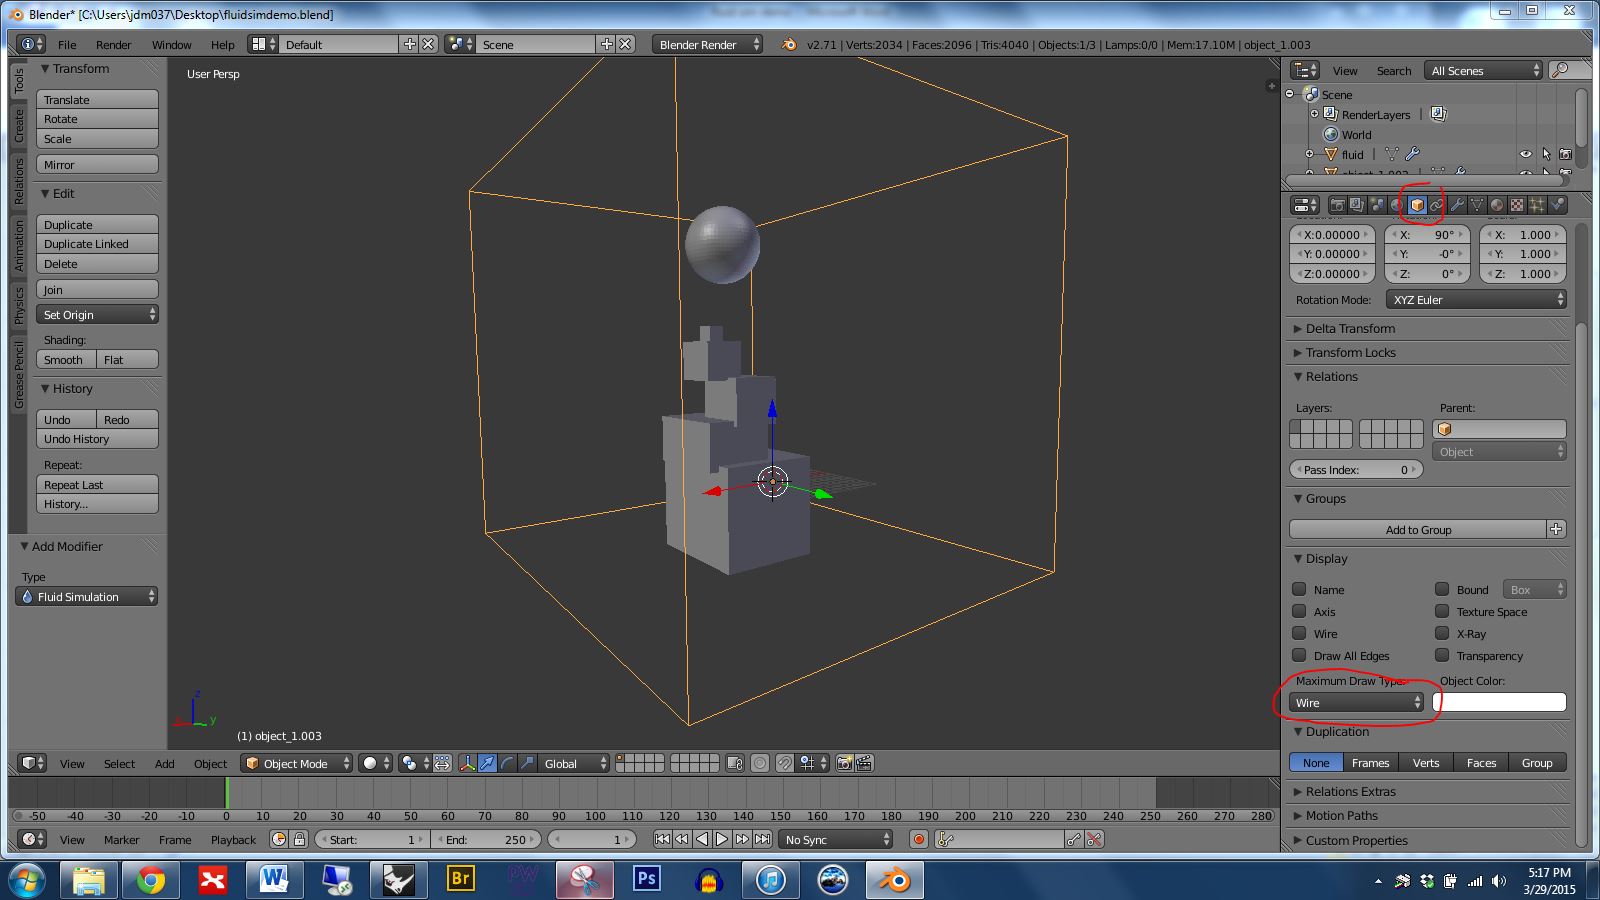

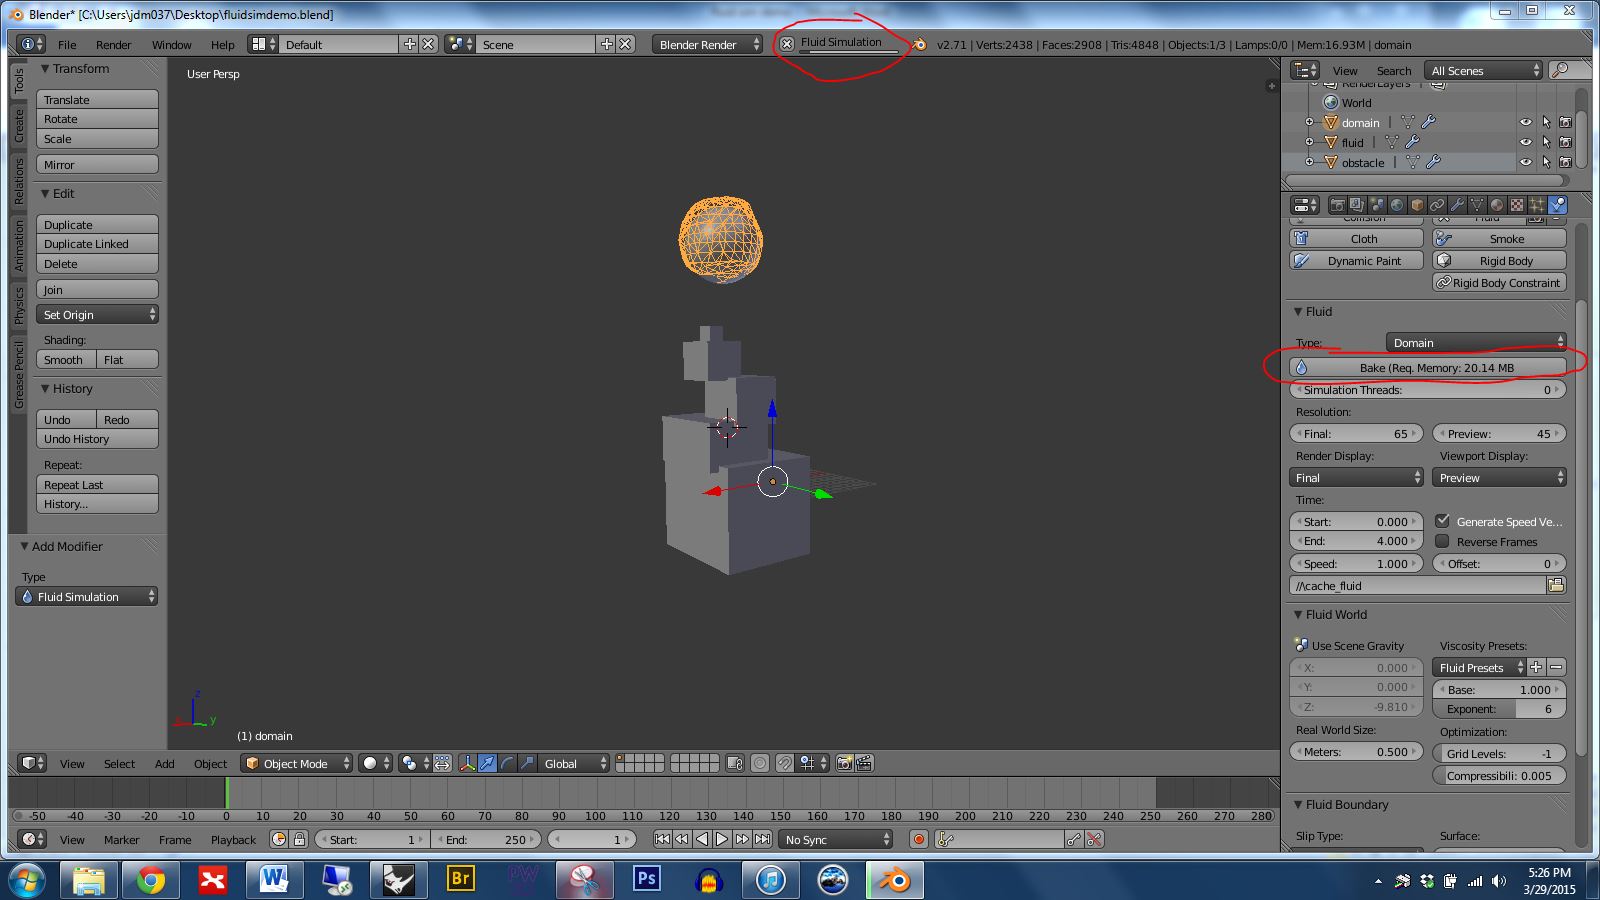
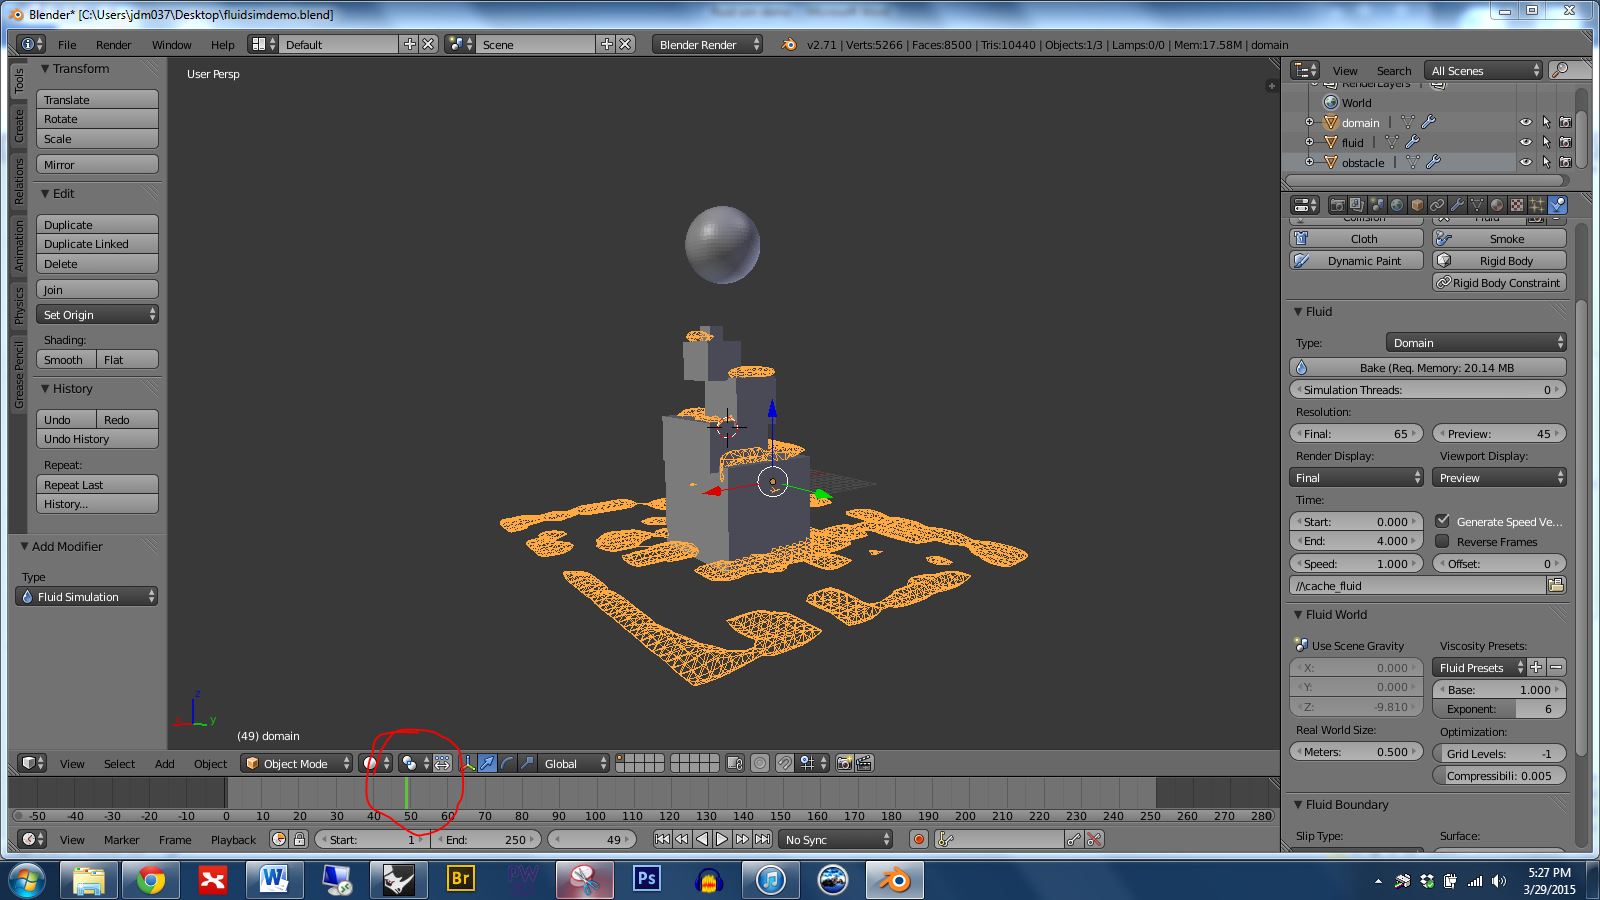
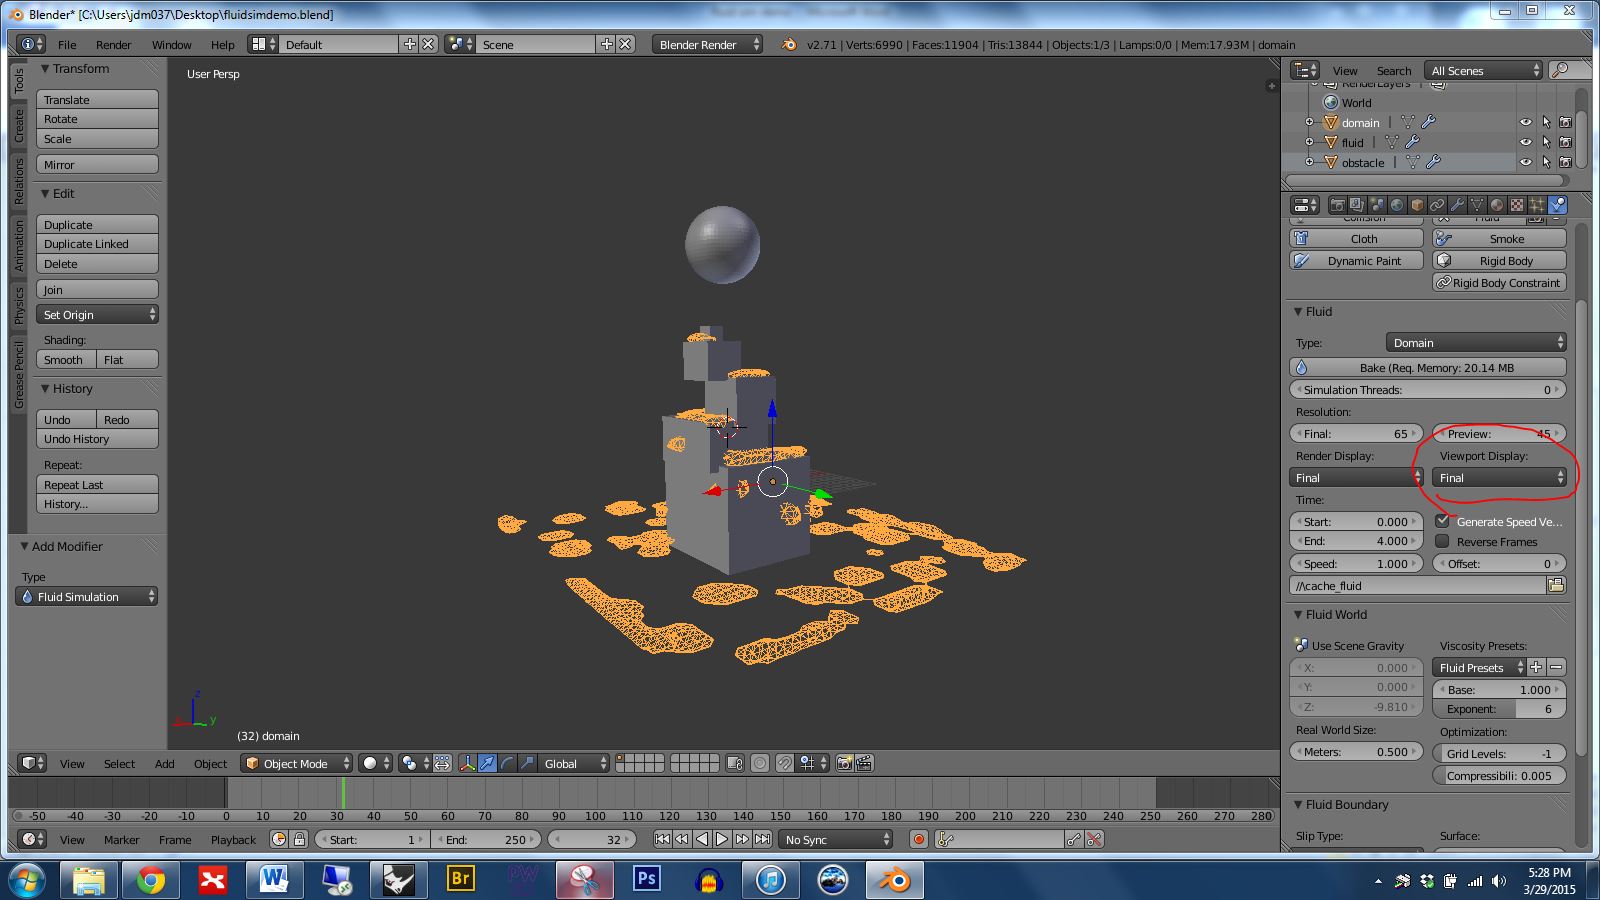
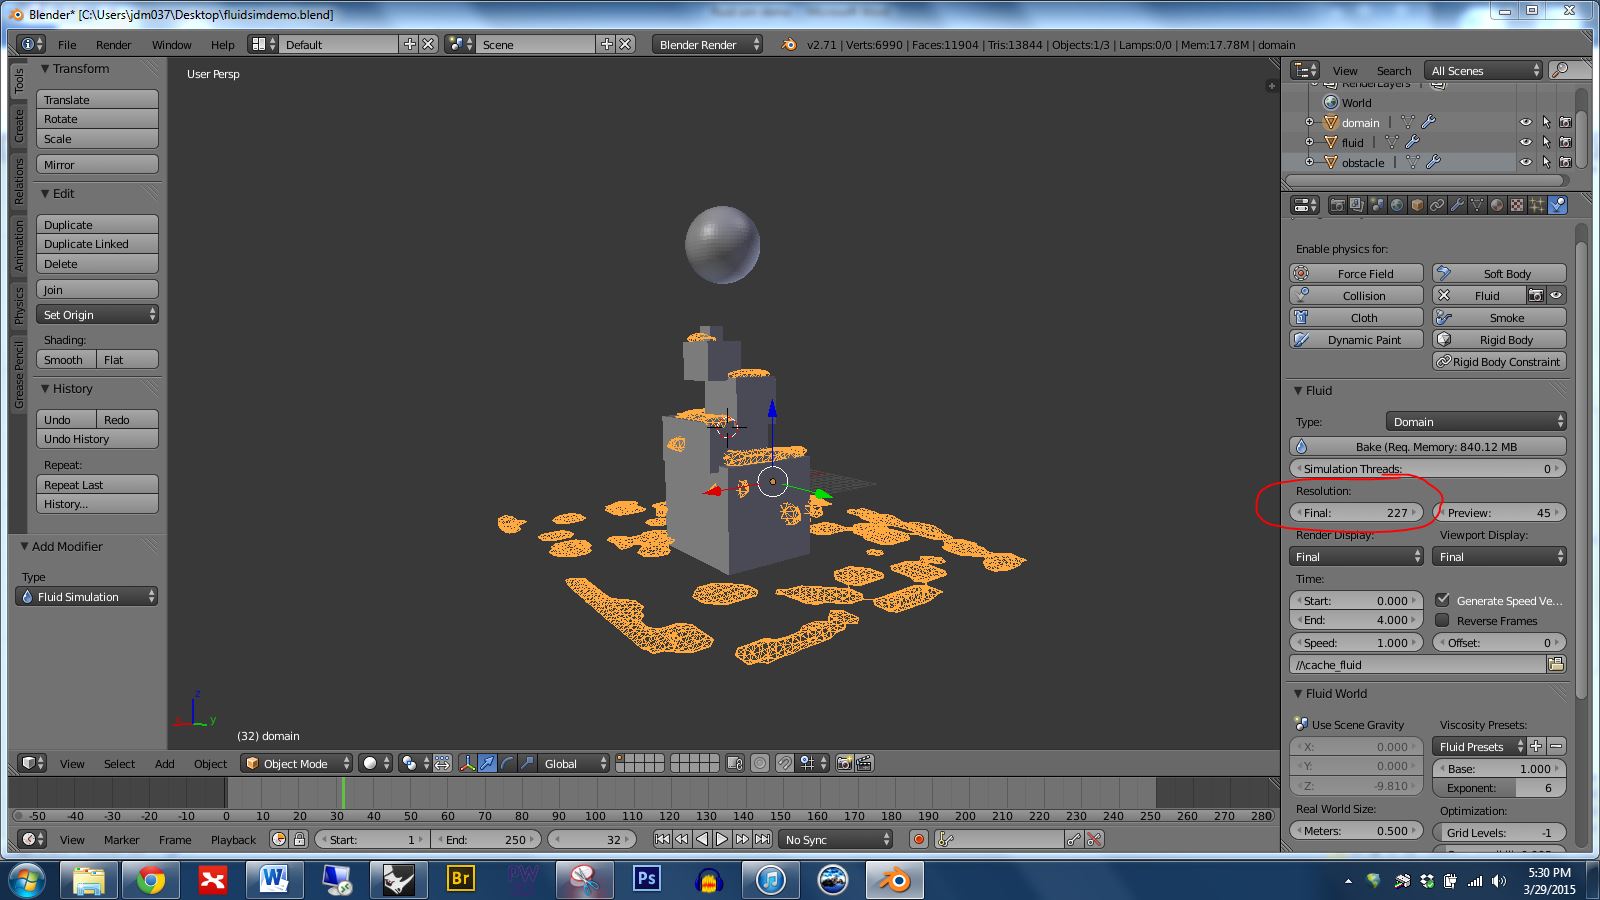
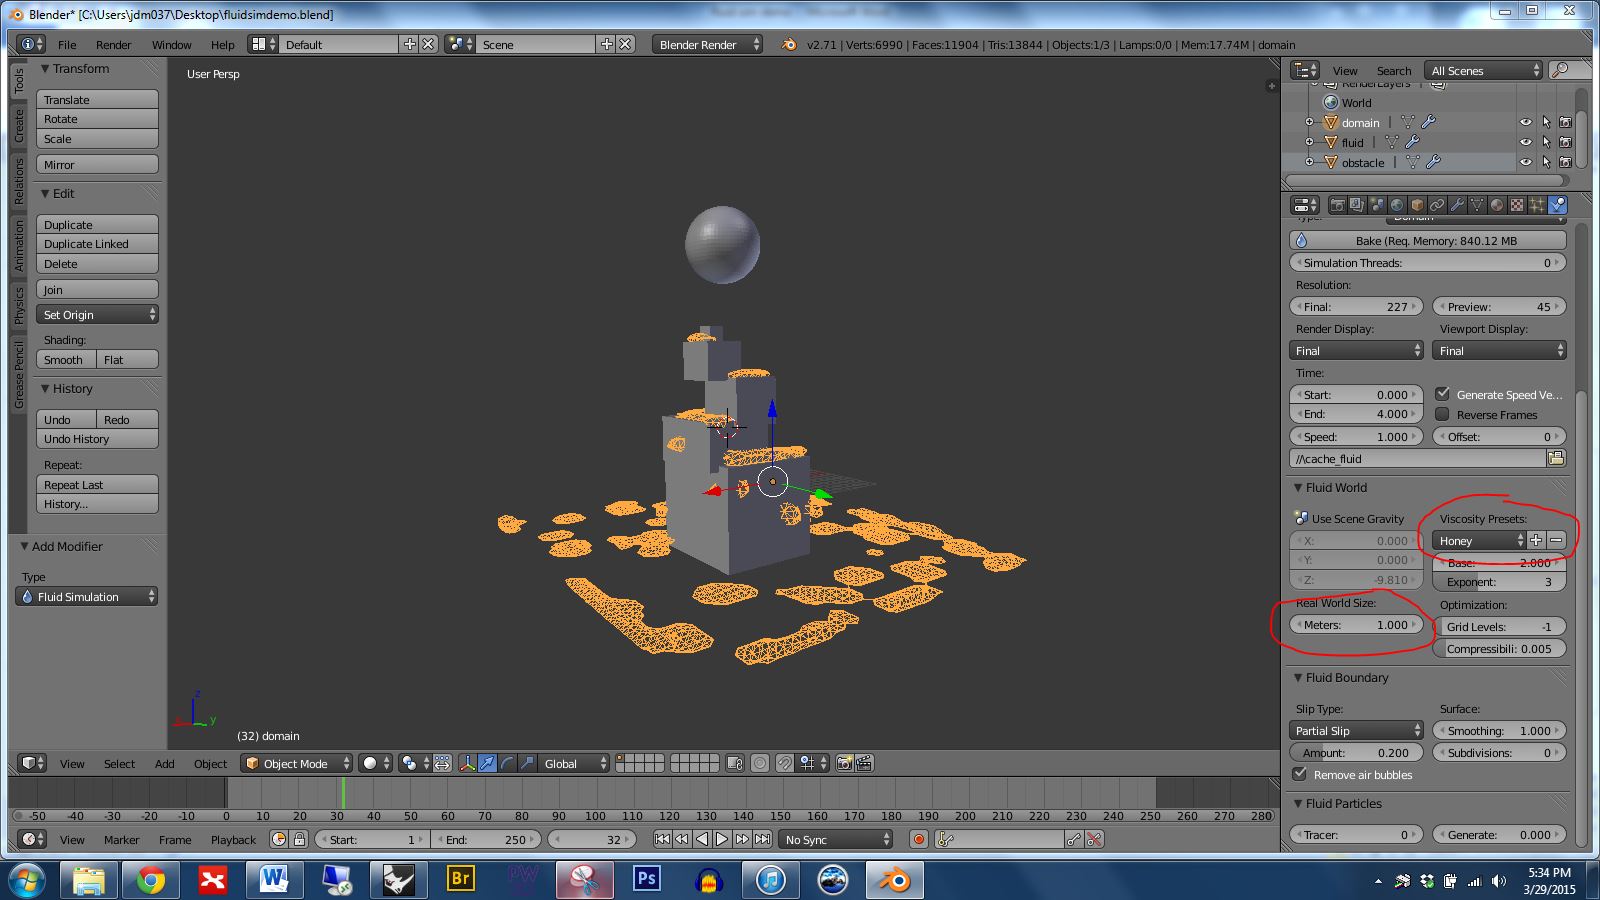
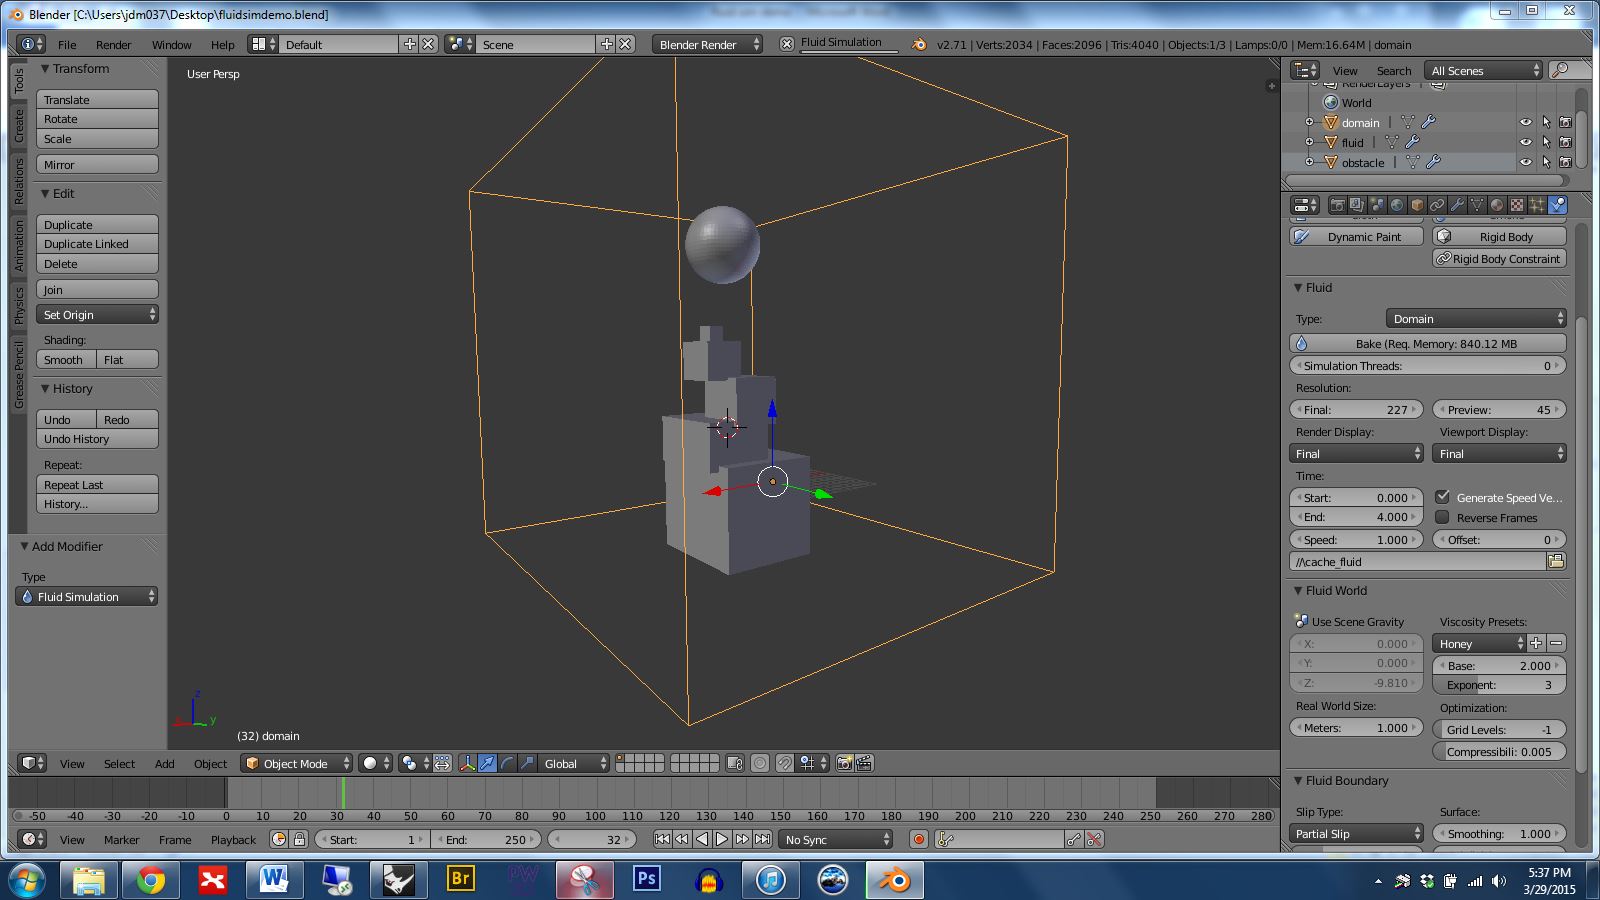
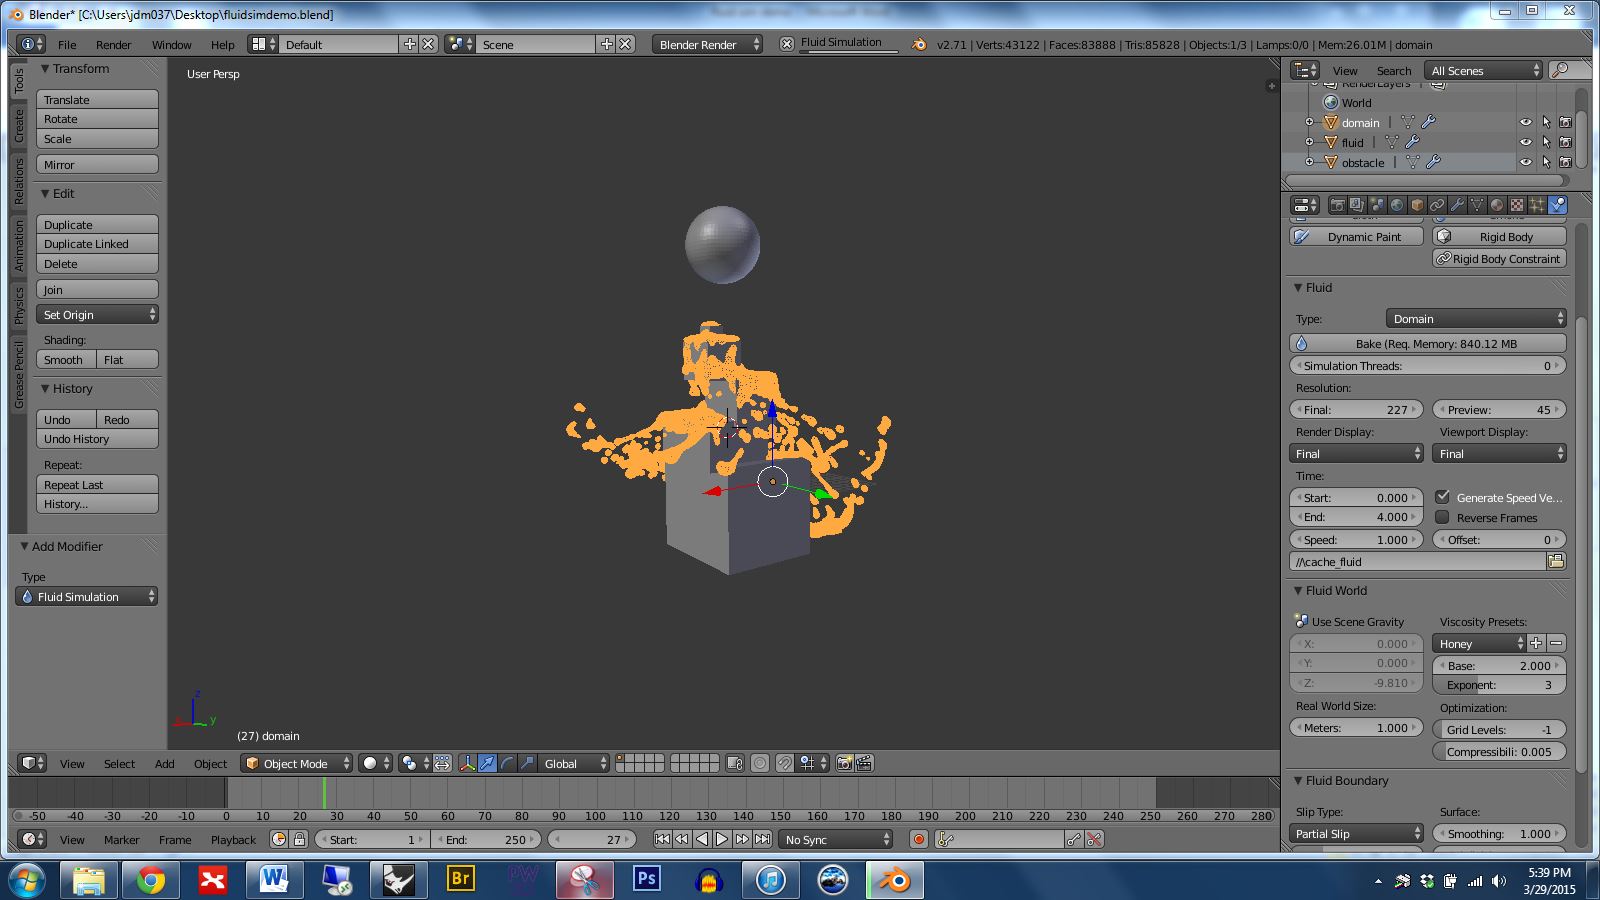


Note that the larger your domain box the harder Blender will have to work to process the result. The program has to account for all of the space inside the box during the simulation. With this in mind you’ll want to keep your domain as small as possible.
Demo files:
If you’d like to learn more then check out these helpful links:
http://wiki.blender.org/index.php/Doc:2.4/Manual/Physics/Fluid
http://wiki.blender.org/index.php/Doc:2.6/Manual/Physics/Fluid/Domain
Video on working with meshes
Note: If these videos don’t display in your web browser, be sure that you’re at http://sculpture1.blogs.bucknell.edu instead of https://sculpture1.blogs.bucknell.edu. Apparently, removing the “S” from the http makes a big difference in the security settings for the page.
Wed, 03/18/2015 – 15:42
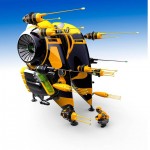
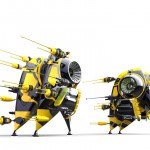
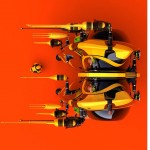
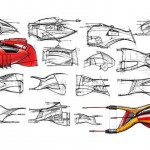
Reynante Martinez, an artist from the Philippines, comes up with some super awesome renders. These are pretty great, but I’ve selected only a few of his pieces. For more of his work, please visit his portfolio at ArtStation. He’ll definitely enjoy it! Cheers. 😉


skip ahead to 0:48
MakerBot index for the Replicator (original) — find under “earlier products”
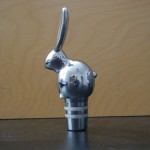
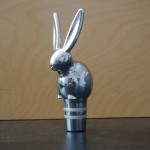
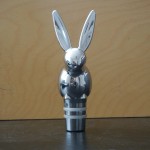
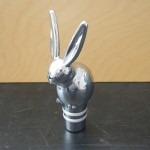
1) Finish your T-Splines bunny. Create a render or screenshots of your work, and post to the public class website.
2) Use Makehuman, Blender, and T-Splines to create something amazing. In this technical exercise please make use of all three programs so that you’ll understand the full workflow. Post screenshots or renders of your work on the public class website.
3) On our the Moodle page for our class, watch the 30-minute video titled Cremaster 3: The Order. This link should take you to the video: http://moodle.bucknell.edu/mod/page/view.php?id=341854
4) Using the steps from of the Art Report, post a written response to this video in the research binder section of the private class website.
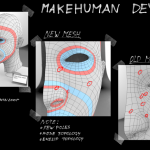
Makehuman
Blender
In Rhino
In the video below, show 3:00 to the end.
T-points and star points
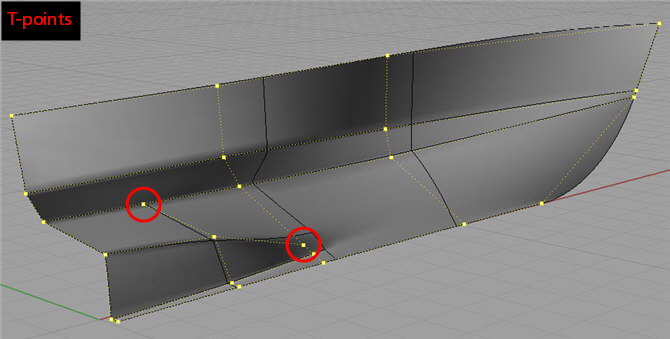
In some subdivision surface programs, if you want to add detail to one area you have to subdivide the entire mesh, which produces heavy and complex geometry. In T-Splines we can add T-points to add complexity just where we need it. Add t-points by inserting an edge in a small area or by inserting a point.
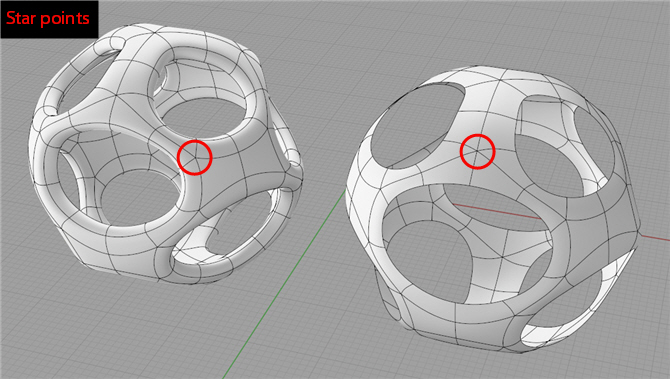
When the topology diverges in two different directions it is necessary to add a star point. We don’t usually have to think much about adding these points because T-Splines inserts them as needed. To see a star point appear simply extrude a face on any form. Star points will appear at the juncture.
Topology in T-Splines
Examples of effective topology are included below. Notice the colorized edge loops in the far right example. Edge loops are very important in T-Splines for proper smoothing of the model.
Effective topology in T-Splines does the following:
These considerations make the model easy to work with, and give the smoothest results.


Examples of how I’ve used T-Splines in my work:
http://cargocollective.com/joemeiser/Process/Horace-process-images
http://cargocollective.com/joemeiser/Process/Kinetic-Radiolarian-Project-work-in-progress
http://payload225.cargocollective.com/1/14/456944/6806896/cuckoo_vulture42_41_1200.jpg
http://cargocollective.com/joemeiser/Process/Hercules-and-the-Centaur-process-images
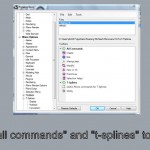
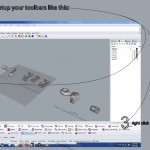
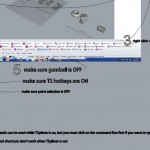
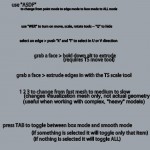
The T-Splines crash course file can be found in the netspace digital sculpture exercise folder. To open this file, select the folder named “Intro to TSplines” and download it to your desktop. Then open the Rhino file contained within the folder.
For easy access, here are screenshots of some of the first instructions covered in this crash course:

For more information, refer to the T-Splines user manual, or the starter guide.
—-
T-Splines Bunny Exercise
T-SPLINES EXERCISE REFERENCE IMAGES
Screenshots of Prof. Meiser’s demo on the bunny
If video fails to load, click here: http://digitalsculpture.blogs.bucknell.edu/t-splines-introductory-exercise/
Before the start of class on 3/18, please go to the link below and watch the introductory video, and the eight videos about the user interface. These videos are very brief, so in total, you should be able to get through all of them within an hour. By watching these videos before class you will have a fundamental understanding of T-Splines that will be very helpful as we get started using the program.
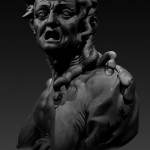
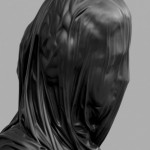
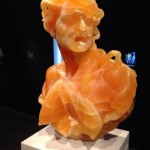
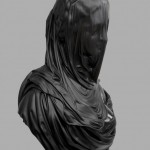


The sculptor Barry X Ball is known for interesting projects. One called ‘Masterpieces’ was especially riveting. He took two Italian sculptures made in the 16th century: Corradini’s La Puria (“Purity (veiled woman)”) and Court’s La Invidia (“Envy”) and created perfected versions of the original. In a statement to his collectors he explains in detail the changes he made and why they are valid artworks on their own and not just copies or appropriations. Ball’s documentation also discusses his process and gives invaluable insight into it.
Both of these sculptures were made using materials other than white Italian marble such as onyx, calcite and black marble. This lends a different dynamic to the work altogether. Unlike white marble, onyx has the ability to glow from within and through the veils of Purity we are able to see light. On the other hand, the calcite material is veined and therefore camouflages Envy’s folds and sweeps creating complexity not there with the original.
Another different perspective on the two Ball pieces is that they are made to depict someone looking into a mirror. This is done with today’s advanced technology and adds a strange narcissistic glance. It’s almost as though we are looking at a more refined version of the sculptures which captures the very old paired with something new. Other changes involved refining of drape, finishing the back and making the pedestals which they are placed much sturdier in order to view the work correctly from all sides.
taken from: http://beautifuldecay.com/2015/03/06/process-behind-making-barry-x-balls-purity-envy-sculptures/
Step 1: Create a new folder for your project
When creating custom materials you’ll be working with a Keyshot file and a number of other image files. From one work session to the next, it’s easy to misplace your images, and if you open a Keyshot file and the program can’t locate the image files, your custom materials won’t show up properly. If this happens you’ll lose time and need to redo a number of steps. To keep this from happening I suggest creating a new folder in your netspace for your Keyshot project, and then save your Keyshot file and all of your custom material image files to that one folder. Then, when you backup your project to an external hard drive you’ll want to copy the whole folder.
Step 2: Create a seamless image with Photoshop
This youtube video will show you how. Watch from the beginning to 4:30.
Contrary to what the narrator suggests, I’ve found that the clone stamp works quite well for removing seams.
Step 3: Create bump/normal maps, and specular maps with Crazy Bump
Watch from 1:00 to 4:00, and from 7:30 to 10:00: http://www.blenderguru.com/tutorials/the-secrets-of-realistic-texturing/
Although Andrew Price’s Blender Guru tutorial covers texturing in Blender, it’s still relevant to our workflow in Keyshot. One key difference, though, is that in Keyshot we’ll use only the following: the color map (which you created in step 1), the bump/normal map, the specular map
Crazy Bump offers a free trial; download it here.
Step 4: Apply your Crazy Bump files in Keyshot
These instructions explain the process
Step 5: Learn about the various methods of texture mapping available in Keyshot
These tutorials will help you determine what kind of mapping (spherical, cylindrical, box, UV, etc.) is most appropriate for your form. The default is box, which works well in most situations.
https://www.keyshot.com/keyshot3/manual/texturing/texture_mapping.html
Keyshot texture overview youtube video
Step 6: Learn how to use UV coordinate mapping when necessary for complex forms
With some really complex forms you’ll find that mapping with box, spherical, cylindrical, etc., doesn’t give good results. It is sometimes necessary to unwrap complex forms and use the UV editor to align the unwrapped form with the image you created in step 1. I had to use this process in my Seneca project because all of the other mapping methods produced visible seams. In the Seneca project, by unwrapping and using the UV editor I was able to put the seams on the back of the warthog’s legs so they wouldn’t show up in the renders. I also used this process in my Aristotle project to make the wood grain align properly with the boat.
Watch this youtube video from 6:30 to 9:00
Additional resources
Advanced Keyshot tutorial videos on material creation (skip to lesson 3 if short on time):
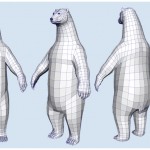
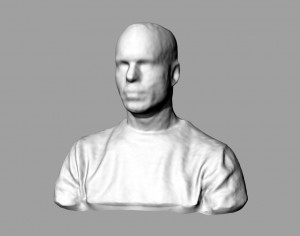
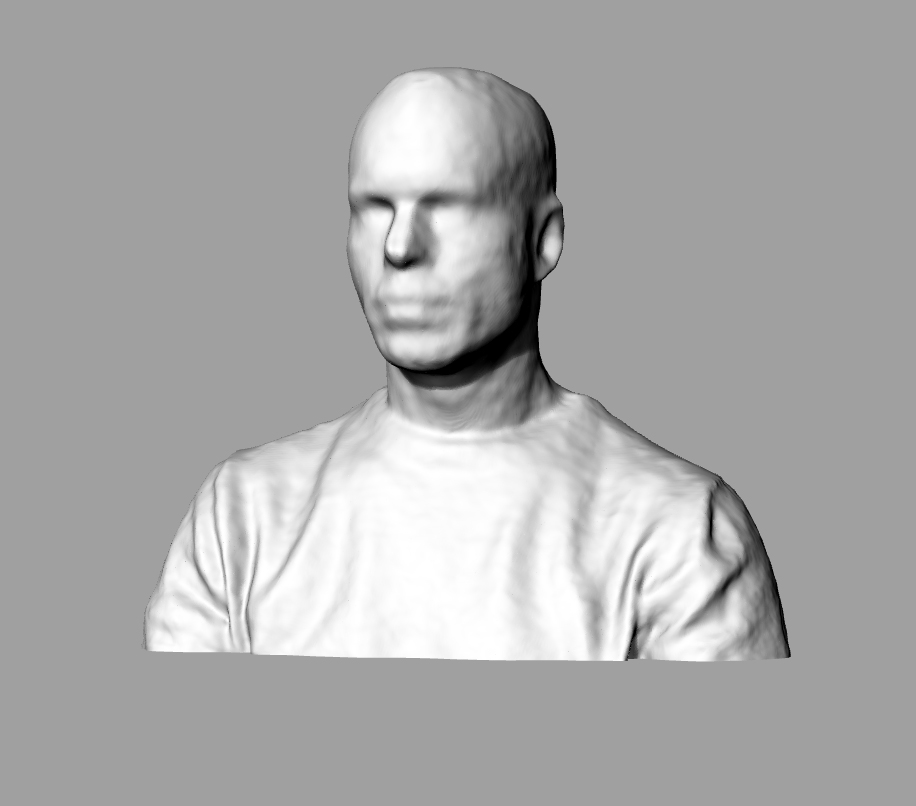
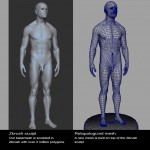
This program can be used to create and pose a figure for your project. Easy to use. Some figures are free; others require a purchase. Finished figures can be imported in Rhino in OBJ or STL format.
For additional help, see:
http://youtu.be/taJOV-YCieI?t=3m7s
Project Overview
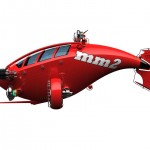
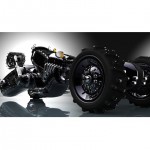
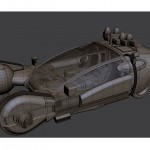
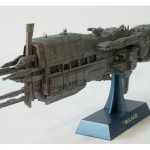
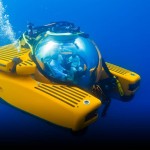
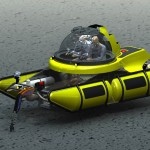
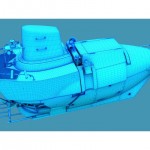
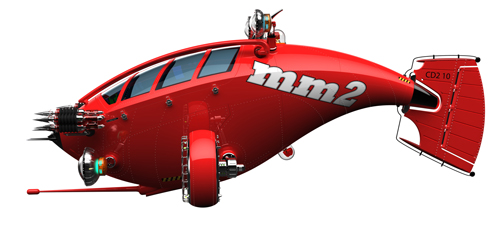
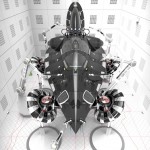
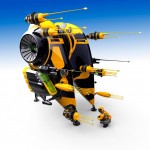
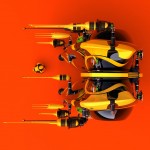
In this project, each student will design a vehicle capable of operating within a particular harsh environment. For example, a submersible ship meant to travel through lava, or a helicopter that can fly through a hurricane. Designs should integrate aspects of a particular preexisting vehicle, but should be significantly transformed to become something new and novel. To spur creative problem solving and integration of disparate influences, each student will use aspects of a famous person’s attributes, preferences, and aversions to inform the vehicle’s design.
Learning Objectives:
Grading Criteria – The best projects/highest performing individuals will:
RESEARCH ASSIGNMENTS
By the start of class on Tuesday, 2/17, each student should do the following:
<1> Review the grading criteria for this project if you have not yet done so. See above.
<2> Create a SIMPLE Rhino model of your vehicle that includes all of the main components. This model will help you conceptualize how the vehicle will look as a whole and exist in space. Examples of simple models from previous semesters are below:


<3> Create a post on the PUBLIC class website that responds to the following prompts. (100 to 20o words; include loads of images) :
*Note: I encourage you to create your post in the format shown here, with descriptive text below each image.
FINAL SUBMISSION OF WORK
By the start of class on 3/5, each students should:
Technical crash course for Keyshot – Professor’s NOTES


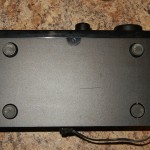
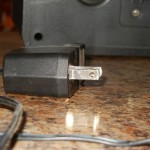
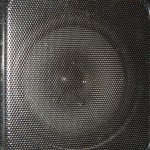
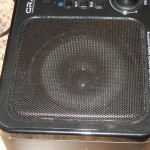
Link to radio images
Note: If this video doesn’t display in your web browser, be sure that you’re at http://digitalsculpture.blogs.
On choosing an artist:
Choose an artist from the list below for your upcoming Art Report and Artist Presentation. The artists on this list all utilize CAD in their work. Please consider the following as you make your selection:
– When you find an artist that interests you, it is strongly recommended that you do a preliminary search for information. Before making your selection you’ll want to ensure that you’ll be able to learn a good deal about the artist’s ideas and intentions. In the best case scenario you’ll find multiple resources including the artist’s own writing, interviews, and/or reviews written by critics. If the information is limited you’ll need to make a judgement call on whether you’ll have enough content to create a highly informative 5-minute presentation.
– Since this is a studio art course we’re looking to discuss meaning and the intellectual content of an artist’s work, but not all digital artists are focused on generating this kind of depth in their work. Artists who are entirely commercially or technically focused would not be good selections. Look for an artist who makes work with rich, thoughtful content.
– Remember that you’ll cover the same artist for your first Art Report and Artist Presentation.
– Once you have made your selection please email the artist’s name to EVERYONE in the class, CCing the professor. Each student should choose a different artist and selections will be made on a first-come-first-serve basis.
Guidelines and rubrics for the Art Report and Artist Presentation:
Contemporary artists who use CAD to create their work:
Anish Kapoor (see especially the work he’s done with 3-d printing)
Wim Delvoye (see especially his gothic cathedrals)
Roxy Paine (see especially his sumaks and dendroids)
Frank Stella (see his work with 3d scanning and 3d printing)
Norwood Viviano (see especially Recasting Michigan)
Andrew Scott (See Scott’s blog also)
Horst Kiechle (see esp. his/her paper torso project)
Helen Marten (see esp. her animation projects)
– – –
Bathsheeba (Not a good option for an artist presentation, but makes some technically interesting forms)
Check out some of the Rhino projects made by students at other schools at: https://www.rhino3d.com/gallery/47
Meetings:
Biweekly. Friday at 3:30 at 7th Street. 2/7, 2/20, 3/6, 3/20, 4/3, 4/17
TASKS for the semester
BLOG
At the end of each work session please make a blog entry at: http://arst349.blogs.bucknell.edu/ in the Lena category. In each blog entry, please include the following:
Notes:
The Coleman 220 computer lab is equipped with Rhino and has good computers. The schedule is posted here: http://digitalsculpture.blogs.bucknell.edu/calendar/
Before each Monday morning, please post hours for the upcoming week on the shared Google Calendar. This will make it possible for Prof. Meiser to drop in to see how things are going when his schedule aligns.
Rubber Duck:
Headphones:
Earbuds:
Your name:
Your major:
Please list a few of your interests, sports you play, or other activities you’re involved in (on or off campus).
Why are you taking this class? What do you most want to get out of it?
Are there any particular topics or techniques that you’re hoping to learn about in this class?
Bucknell email address:
Cell phone number:
Cell phone service provider:
* please double check your contact info for typos *
Follow this link to log on to the class website: https://digitalsculpture.blogs.bucknell.edu/wp-admin
Your name:
Your major:
Please list a few of your interests, sports you play, or other activities you’re involved in (on or off campus).
Why are you taking this class? What do you most want to get out of it?
Are there any particular topics or techniques that you’re hoping to learn about in this class?
Bucknell email address:
Cell phone number:
Cell phone service provider:
* please double check your contact info for typos *
To access the exercise files, go to the digital sculpture folder on Bucknell’s netspace by following this path: click on the start button in the lower left of the screen > computer > projects (\\netspace) > DigitalSculpture > private > exercises > then right click on the 1-15-2015 folder and save to your desktop)
This weekend, when you have finished your reconstruction of the Parthenon, please take a few screenshots of your work from different angles. I suggest using the “snipping tool” to create your screenshots. This can be found by looking in the accessories folder within the computer’s list of programs. To receive credit for your work, please upload your screenshots to the class website by following these instructions:
Required:
1) External hard drive of at least 250 GB. Since all of your projects will be created digitally, you’re bound to run out of space on the network. I use and recommend Western Digital’s My Passport. If you can afford it, I suggest buying a 500GB or 1TB drive. Here’s a link to the Western Digital hard drives that are available on Amazon.
2) Headphones — please bring these to class so that you’ll be able to watch video tutorials during open work time.
Recommended:
Hours of clicking can be hard on your wrist, and an ergonomic mouse can help prevent tendonitis. Click here to link to the 3M ergonomic mouse that I use. (Note that this is a small version– if you have large hands then you may want to consider purchasing a large version of this mouse) Alternatively, a gaming mouse and wrist rest can also be a good combination. Gaming mice are more responsive than basic mice, and they have built-in adjustments of tracking speed, which can be handy when modeling. This is the setup I just bought for my computer, which I’m quite happy with: Logitech Optical Gaming Mouse G400, and 3M Gel Wrist Rest
Not needed, but good to have:
License of Rhino 5 for your personal PC computer. The cost to a student is $138. Follow this link to learn more. If you have a 64 bit computer then be sure to purchase the 64 bit version of the software.
If you purchase Rhino 5 for your personal computer then, as a student, you can download an educational license of the T-Splines plugin for free. Follow this link to learn more.
Lynda.com has some excellent tutorials on Rhino that could be a useful reference for you during the first month or two of working with the software. A 30-day subscription to Lynda’s site will cost you just $20. Here’s a link: Rhino on Lynda.com
If you do a lot of 3D modeling, it can also be handy to purchase a 3D mouse which can help with navigation of 3D space. I use the Space Navigator by 3Dconnexion. I’m not sure that we’ll be able to hook these up in our lab because there is some basic software that must be installed on the associated computer. Check with me first if you’re thinking about ordering one and I’ll bring mine over to the lab and test it out.
Before getting started in Keyshot I encourage you to watch these two videos and apply some of the methods to improve your headphones:
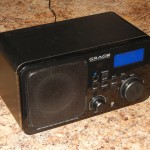
Examples of my past students’ Keyshot radio renders are available at the bottom of this page:
http://arst349.blogs.bucknell.edu/page/6/
—-
Your assignment this weekend is to create a minimum of 5 different Keyshot renders of your radio and headphones, and post your images on the public class website. Students are expected to visit Keyshot’s website and watch the brief tutorial videos listed below. Students are encouraged to include additional items of interest, and experiment with various materials, textures, environments, backplate images, camera lenses, etc.
– – –
Please watch the following Keyshot tutorials, which are available here: http://keyshot.com/learning/tutorials/
Rendering
Lesson 1: Rendering Overview
Lesson 2: User interface
Lesson 3: Working with cameras
Lesson 4: Importing and working with data
Lesson 5: Assigning and editing materials
Lesson 6: Texture overview
Lesson 7: All about labels
Lesson 8: Adjusting lighting
Lesson 9: Realtime settings
Lesson 10: Using backplates
– – –
Notes from the professor
The keypad code for the Sculpture Lab is: 1306#
Kendra’s hours and the schedule for courses meeting at the Sculpture Lab are listed below:
Appearing by telepresence robot, Edward Snowden speaks at TED2014 about surveillance and Internet freedom. The right to data privacy, he suggests, is not a partisan issue, but requires a fundamental rethink of the role of the internet in our lives — and the laws that protect it. “Your rights matter,” he say, “because you never know when you’re going to need them.”
HELPFUL LINKS
List of Rhino commands covered in class
Using Makehuman, Blender, and T-Splines to work with a human form
How to create custom materials in Keyshot
How to create a fluid simulation in Blender
3D scanning / video on working with found meshes
Keyshot animations: tutorials and examples
Working with blank pixels in Keyshot
How to create a rigid body physics simulation
What is posthumanism/transhumanism?
The idea that humans’ relationship with technology has fundamentally changed the nature of our existence, to the extent that we are becoming a new species.
Some quick examples of the profound impact technology has had on human existence:
In this project you will create a thesis statement about the posthuman, and then create a digital sculpture project to explore your thesis. Here are some examples of posthuman thesis statements:
1) As a result of biomedical advances, we are facing the possibility of a future in which our humanity itself will be altered beyond recognition (Francis Fukuyama). Artist Patricia Piccinini often uses her work to address concerns about biotechnology, such as gene therapy and ongoing research to map the human genome.
2) The notion of achieving immortality by “mind uploading” is a self indulgent power fantasy that shows contempt for the flesh. (Mary Midgley)
Ray Kurzweil writes about the advance of technology, the limits of biology, and the future of the human species. He hopes to stay alive long enough to digitize his consciousness.
3) Now that we have sequenced the genome, humans ARE data.
4) The emergence of big data and new methods of spying and surveillance have created a world in which privacy is no longer possible.
5) It would be morally wrong for humans to tamper with fundamental aspects of themselves (or their children) in an attempt to overcome universal human limitations, such as vulnerability to aging, maximum life span, and biological constraints on physical and cognitive ability. Human lives would no longer seem meaningful in a world where such limitations could be overcome technologically (Bill McKibben) The movie Gattaca addresses some of the potential consequences of such tampering. Here’s a link to the trailer.
6) Bill McKibben suggests that emerging human enhancement technologies would be disproportionately available to those with greater financial resources, thereby exacerbating the gap between rich and poor and creating a “genetic divide”.
7) According to the artist STELARC, “Bodies are both zombies and cyborgs. We have never had a mind of our own and we often perform involuntarily conditioned and externally prompted. Ever since we first evolved as hominids and developed bipedal locomotion, two limbs became manipulators and we constructed artifacts, instruments, and machines. In other words we have always been coupled with technology. We have always been prosthetic bodies. We fear the involuntary and we are becoming increasingly automated and extended. But we fear what we have always been and what we have already become — zombies and cyborgs.”
STELARC‘s quote from above is poignantly expressed in his “ping body” and “amplified body” projects.
8) Biopolitical activist Jeremy Rifkin and biologist Stuart Newman accept that biotechnology has the power to make profound changes in organismal identity. In the extreme, this could lead to the manufacturing and enslavement of “monsters” such as human clones, human-animal chimeras or bioroids, but even lesser dislocations of humans and non-humans from social and ecological systems are seen as problematic. The film Blade Runner (1982), the novels The Boys From Brazil (1978) and The Island of Dr. Moreau (1896) depict elements of such scenarios
9) Joy’s 2000 essay “Why the future doesn’t need us” argues that human beings would likely guarantee their own extinction by developing the technologies favored by transhumanists. It invokes, for example, the “grey goo scenario” where out-of-control self-replicating nanorobots could consume entire ecosystems
10) The proliferation of social media has fundamentally changed the way we relate to others. We are now more interconnected than ever before, and paradoxically, more isolated.
11) Technology can enable one to be an architect of their own identity.
Relevant articles:
Buchanan-Cognitive Enhancement in Education
Buchanan-Beyond Humanity: The Ethics of Biomedical Enhancement
Buchanan-Moral Status and Human Enhancement
Henrich – The Weirdest People in the World
Thacker-Biotechnology and the Discourse of the Posthuman
RESEARCH ASSIGNMENTS
By the start of class on Tuesday March 31st, students should post the following on the public class website:
• The thesis statement about the posthuman that you’ll explore in your project. (1-3 carefully written, descriptive sentences)
• 20 images collected as visual research.
• Evidence of additional research. Watch a video or movie, read an article, examine some resources on the web, and then write a brief description of what you learned.
In addition, please create some sketches of what you plan to create. Students are not required to post their sketches on the web if they prefer to submit them in hard copy form at the end of the semester.
GRADING CRITERIA The highest performing students will:
FINAL SUBMISSION OF WORK
By the start of class on Thursday, 4/16 each student should:
In approximately 300 words, please write a response to the following questions. Post your work in the “research binder” category.
1) Rotate part to desired orientation
2) Run the “fillmeshholes” command
3) To be 3-D printed, meshes must be watertight solids
4) If an error occurs or you cannot close the mesh, run the “meshrepair” command and follow the prompts. You may need to adjust the settings and/or run this command a couple of times to fix all of the problems.
5) Once your mesh is closed, you’ll want to give it a flat bottom by doing as follows:
Create a NURBS box that intersects your mesh as shown below

Select the NURBS box and run the “mesh from NURBS object” command. This is one of the first options in the mesh menu at the top of the screen. (Or type “mesh” in the command line)
Run the “meshbooleandifference” command. Select your body mesh first, then the box. This command may take a few moments to process. Your result should be as shown below:
If the mesh boolean difference command repeatedly fails then you may need to create a new box with a mesh of greater density, as shown below.


If you want to join additional features to your mesh then you can use a similar process, but with the “meshbooleanunion” command
If you’d like to learn more about preparing Rhino files for 3D printing then watch this video: https://vimeo.com/80478910
Since 1999 Stephen Cartwright has recorded his exact latitude, longitude and elevation every hour of every day. Cartwright uses digital and traditional fabrication techniques to translate his collected data into his sculptural projects. Since the inception of the Latitude and Longitude recording project Stephen Cartwright has completed several grand bicycle journeys through North America, Europe and Asia, totaling more than 20,000 miles. Prolonged observation of his location has led Cartwright to his recent work investigating the use and alteration of the landscape.

 Mark your calendar for Simon Williamson’s visit! On February 28 at 1:00pm he will give a lecture about his work in the Gallery Theater, located on the top floor of the LC. Then from 2-5pm he will hold a workshop on Rhino and Keyshot in the BERT 012 Computer Lab. Students in Digital Sculpture are expected to attend if at all possible. Attending the lecture and workshop will count for two artsXpose.

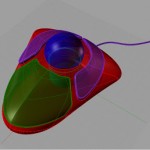
Three-dimensional NURBS surfaces can have complex, organic shapes. Control points influence the directions the surface takes. The outer form–which resembles a wire basket–shows the location of the control points, and the inner organically-shaped form is the resultant surface…. click here to read more
Re: Expectations of Email Etiquette
Dear Students,
Email is one of the most common means of textual communication in the professional world, and it requires a higher degree of etiquette than social media or text messaging. Over the past few years I have received many emails from students that were written in an unprofessional manner. As a professor I feel a responsibility to prepare my students for the professional world, so I have decided to implement an official policy on email etiquette in all of my courses. If I receive an email from a student that I deem to be problematic in some way, I will send a link to this message and request revision. Please adhere to the following standards of etiquette when corresponding with me by email this semester:
– Please use a subject line that is meaningful and relevant to your message.
– Please begin your message by addressing me directly. When I receive an email from a student, I expect something to the effect of “Dear Professor” or “Hello Professor”. When a message is missing this crucial element it can seem impolite. Launching immediately into the body of your message, or beginning simply with “Hey,” or “Hi,” is not up to professional standards.
– Before sending, please re-read and edit your message to ensure that it is clearly written and grammatically correct.
– Emails should end with a closing of some kind. It is suitable to end your messages with “Thanks” and your name, or “Sincerely” and your name, or if you’re in a hurry, at least include your first name or initials to indicate the conclusion of your message.
Thanks in advance for adhering to these guidelines.
Best regards,
Professor Meiser
–
Joe Meiser
Assistant Professor of Art in Sculpture
Department of Art & Art History
Bucknell University
Lewisburg, PA 17837
studio phone: 570.577.3044
website: http://www.joemeiser.com
http://ericvanstraaten.com/
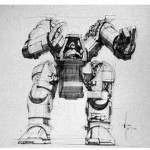
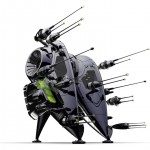
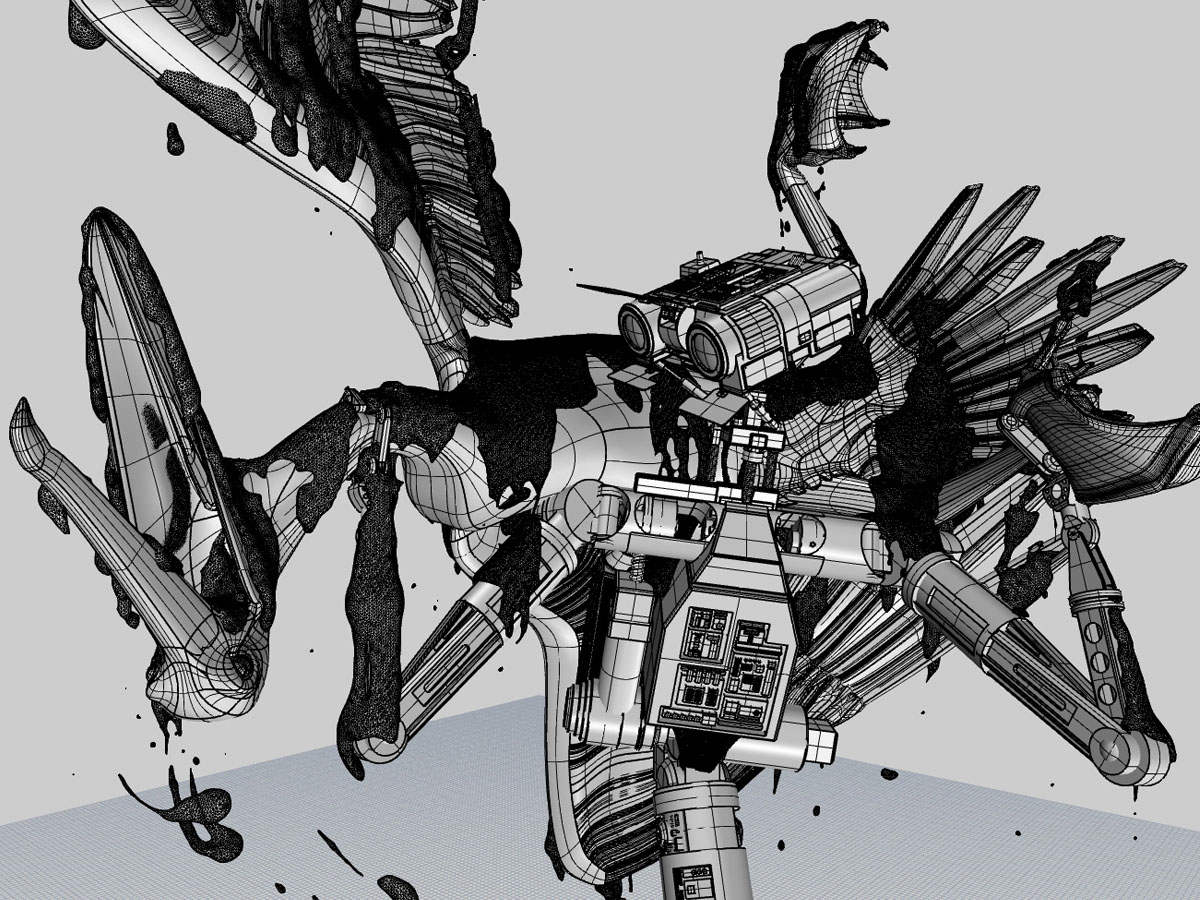
Phil was right. I’m bound to have apocalyptic nightmares tonight after seeing this robot in action.
This work may not be very conceptually developed but it is technically amazing.
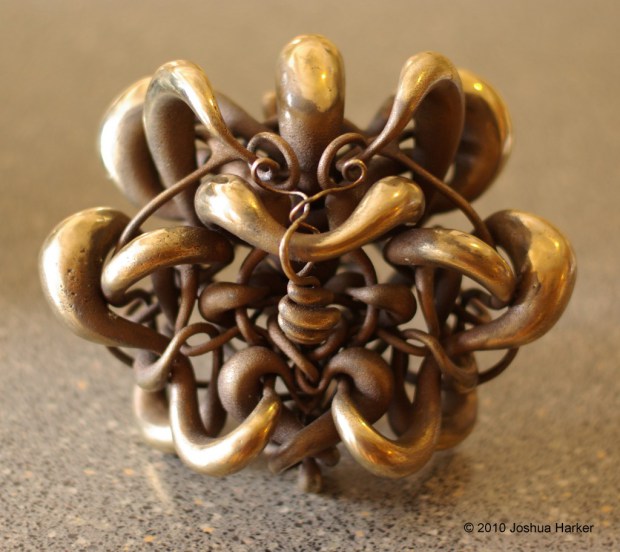
Joshua Harker has been a maker and artist his whole life. He worked professionally as a product and toy designer for a few years before turning to 3D art. Within the last year and a half, he’s created the first and fourth most funded sculpture projects on Kickstarter, and sold thousands of beautiful works of art, all created with 3D Printing. I spoke to him about his process and his views on the current state of the 3D Printing industry. Read more here: http://blog.makezine.com/2013/04/18/a-conversation-with-3d-artist-joshua-harker/
How did you split apart the T-splines surfaces for your pelican for keyshot? Converting the surface to NURBS and exploding does not seem like the best move for this.
– – –
Hi Phil,
There are many different approaches that can work for splitting surfaces up, but I found a couple of methods to be particularly effective when I prepared my pelican model for keyshot:
1) If you want to split the surface in a way that works with your existing isocurves then you can run the “split by isocurve” command. On your left main Rhino menu you should be able to right click on the “split” button to initiate the “split by isocurve” command. You’ll then be able to drag the split boundary where you want it — note that you can toggle the U and V orientation.
2) If you want to split the surface in way that does not work with your existing isocurves then you’ll need to create curves on the surface of your model and use them to split it apart. To do this you can project curves to the surface, or you might also try interpolating curves on the surface (I had really good luck with this method around the pelican’s eyes and beak). I believe you can find this command in the left main Rhino menu– look under in the submenu associated with control point curves.
Please let me know if these methods help you achieve the result you’re looking for.
take care,
Prof. Meiser
Prof. Meiser,
http://hackaday.com/2013/02/
http://hackaday.com/2013/03/
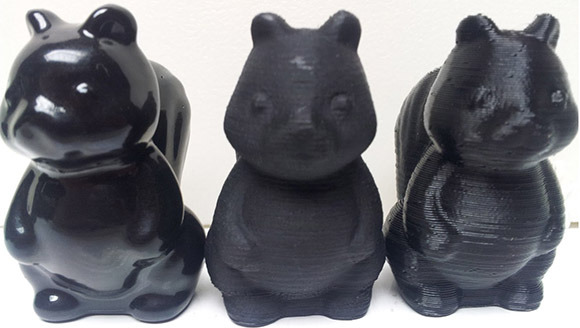
No matter how good a 3D printer gets, you’re always going to have visible print layers. Even with very high-quality prints with sub-0.1mm layer height, getting a shiny and smooth finish of injection molded plastic is nearly impossible. That is, of course, until you do some post-print finishing. [Neil Underwood] and [Austin Wilson] figured out a really easy way to smooth out even the jankiest prints using parts you probably already have lying around.
The technique relies on the fact that ABS plastic and acetone don’t get along together very well. We’ve seen acetone used to smooth out 3D printed objects before – either by dunking the parts in an acetone bath or brushing the solvent on – but these processes had mixed results. [Neil] and [Austin] had the idea of using acetone vapor, created in a glass jar placed on top of a heated build plate,
The process is pretty simple. Get a large glass jar, put it on a heated build plate, add a tablespoon of acetone, and crank the heat up to 110C. Acetone vapor will form in the jar and react with any printed part smoothing out those layers. The pic above shows from right to left a 3D printed squirrel at 0.35 mm layer height, 0.1 mm layer height – the gold standard of high-end repraps – and another print with 0.35 layer height that was run through a vapor bath for a few minutes. Amazing quality there, and cheap and easy enough for any 3D printer setup.
You can check out the tutorial video after the break along with a video showing exactly how dangerous this is (it’s not, unless you do something very, very dumb).
Dear Students,
I wanted to send a quick note to reiterate the importance of reading the T-Splines manual and watching the video tutorials available online. These resources were incredibly helpful to me as I was learning to use the software, and I think you’ll gain a good understanding of the program from them.
For getting started I suggest the basic tutorials at: http://www.tsplines.com/
As you progress with your model, try to also watch some of the advanced tutorials available on this page: https://www.tsplines.com/
Please take a look at the class calendar for instructions on submitting your weekend exercise. Do let me know this weekend if you have any trouble with your models. I’ll be happy to try to answer your questions by email, talk with you over the phone, or setup a meeting with you to talk in person.
take care,
Prof Meiser
Hello Professor,
Thank you,
Jordan Rivera
Jordan,
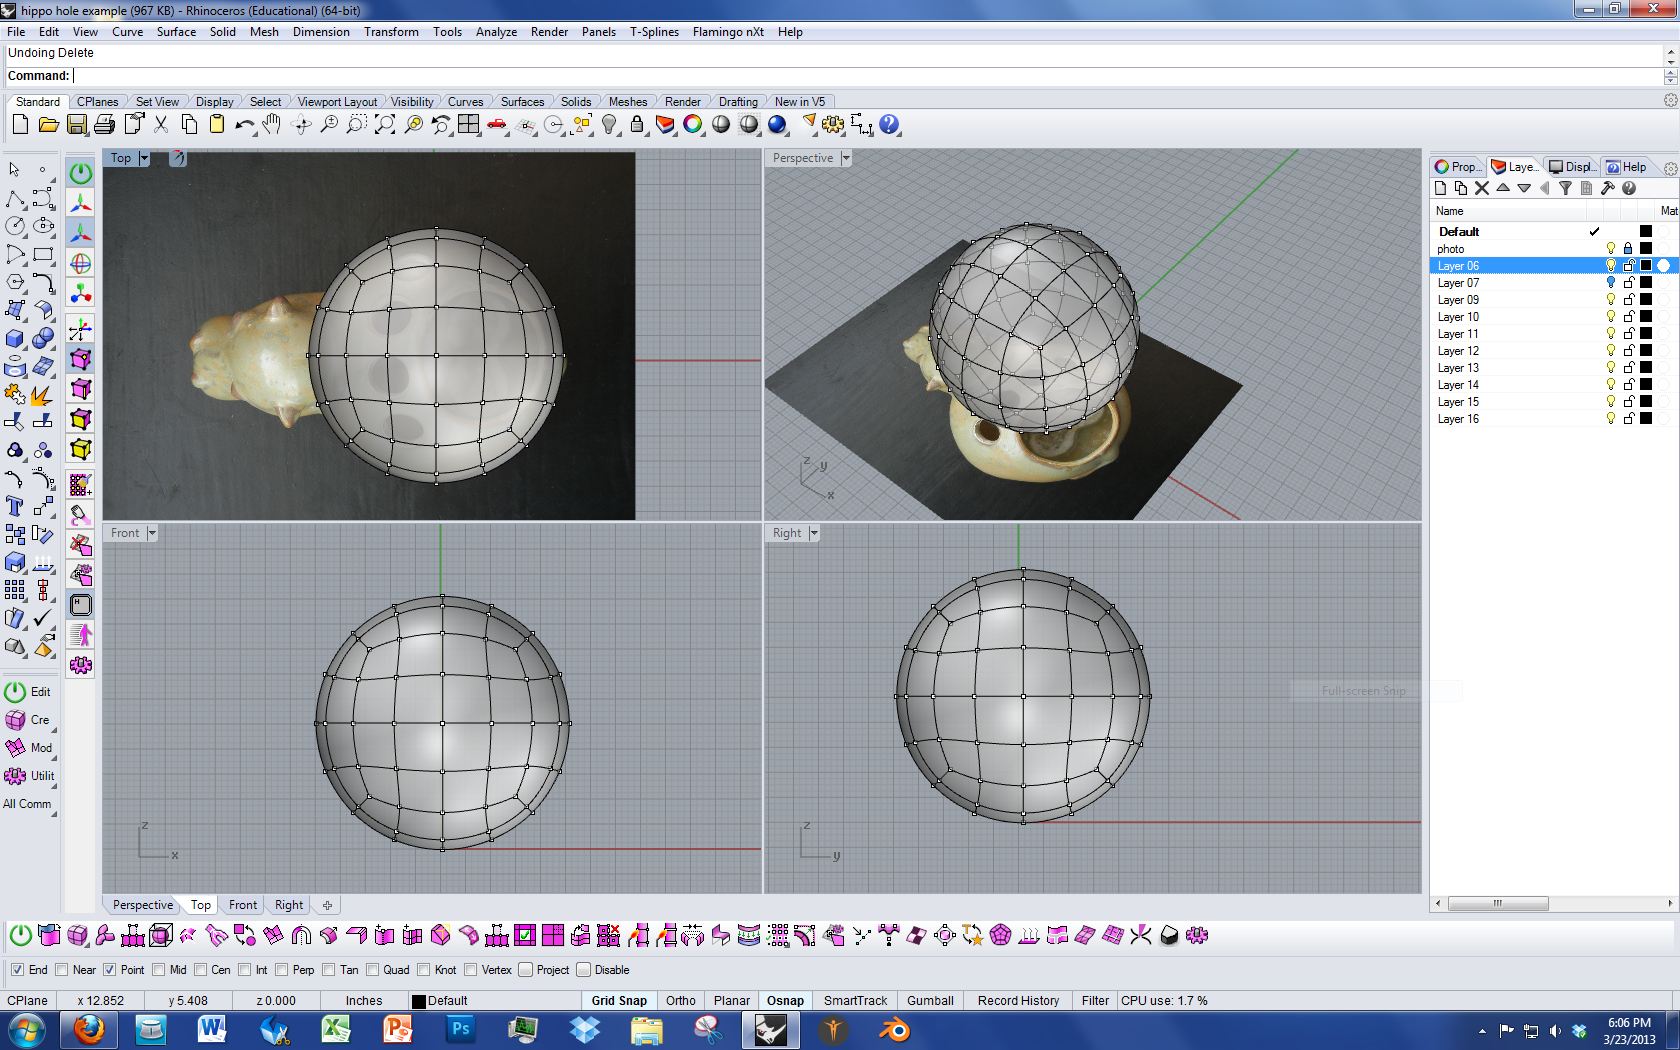
Your model looks great! It looks like you’ve been working very hard on the exercise. I suggest adding the holes in T-Splines. I created an example below that illustrates the basic strategy for doing so…
To get started with this example, I created a quad ball and then subdivided it.
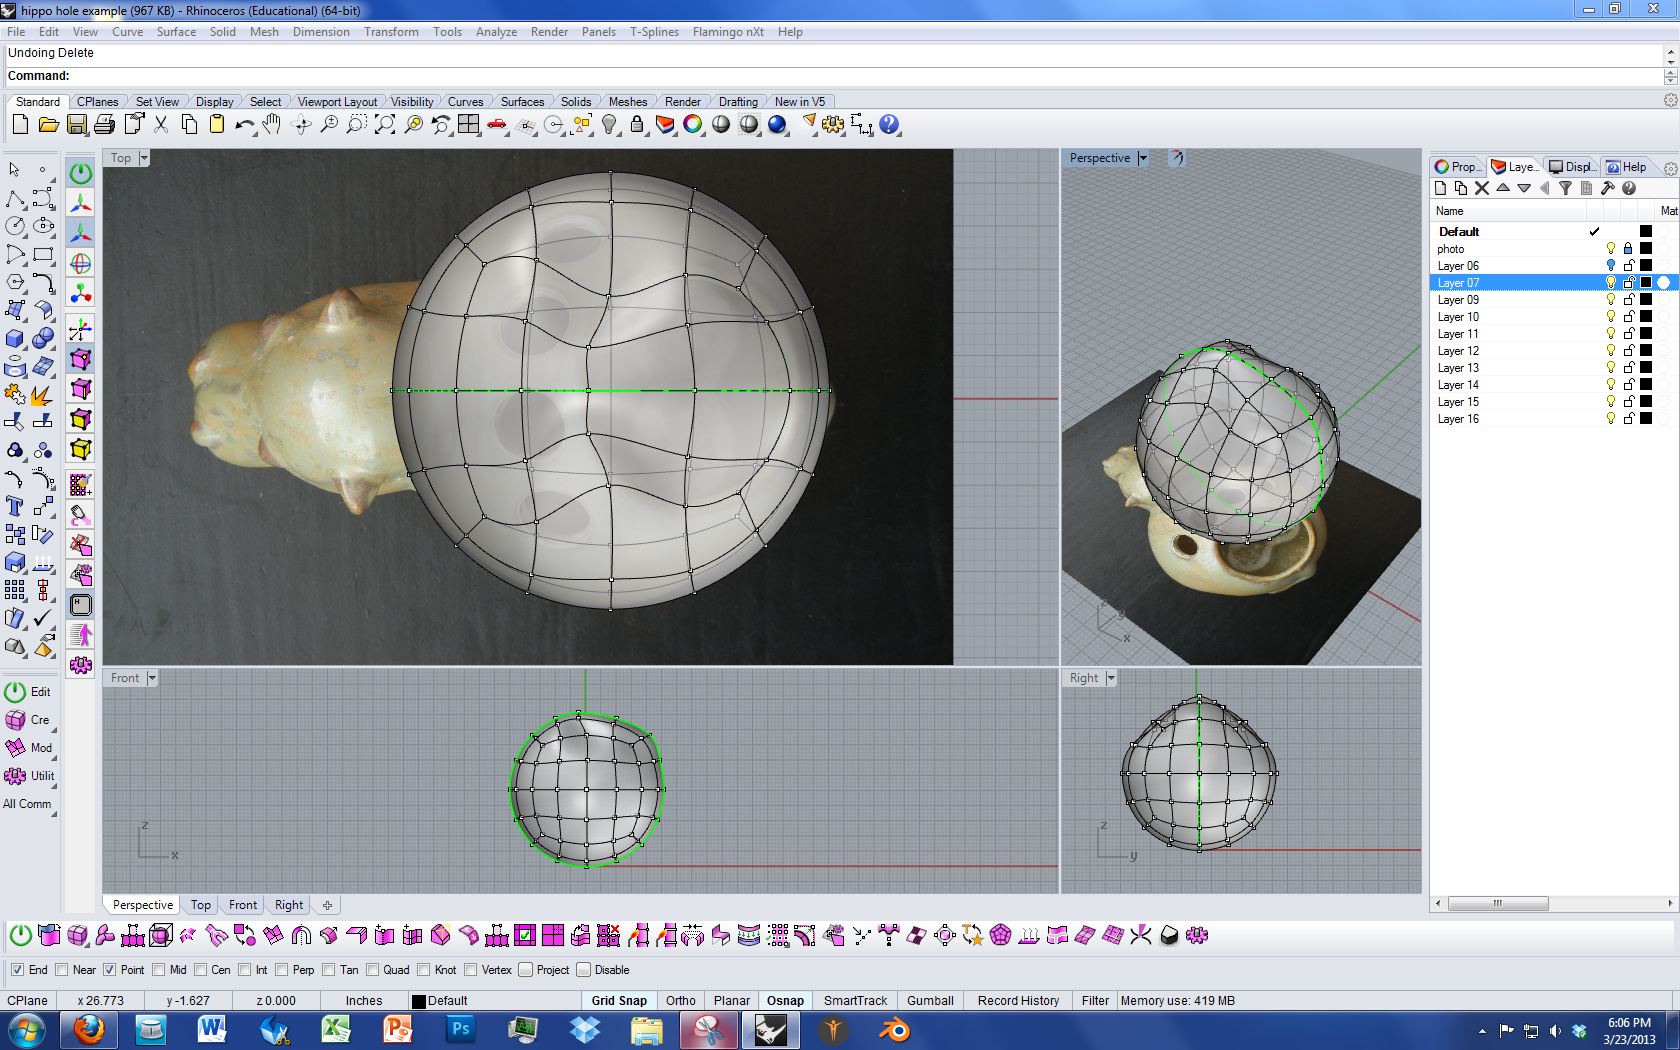
Then I started aligning the edges to the desired location of the big hole.
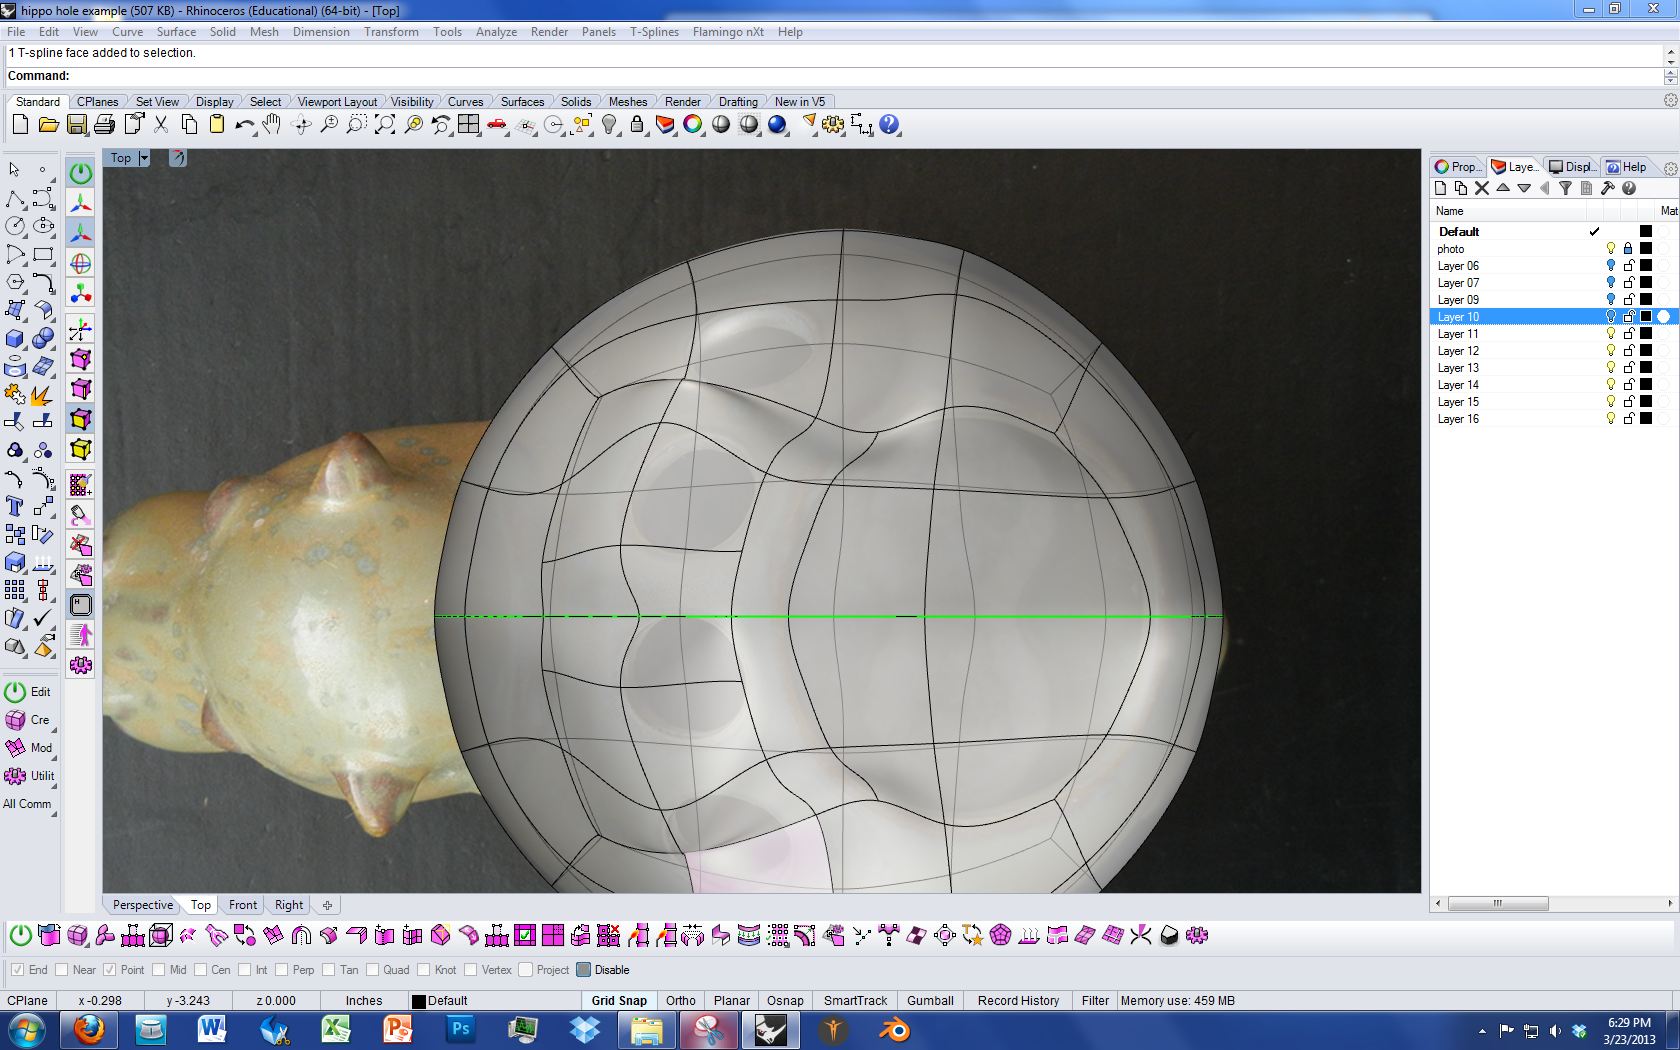
And did this for the small holes as well.
And then I selected all the faces I wanted to delete.
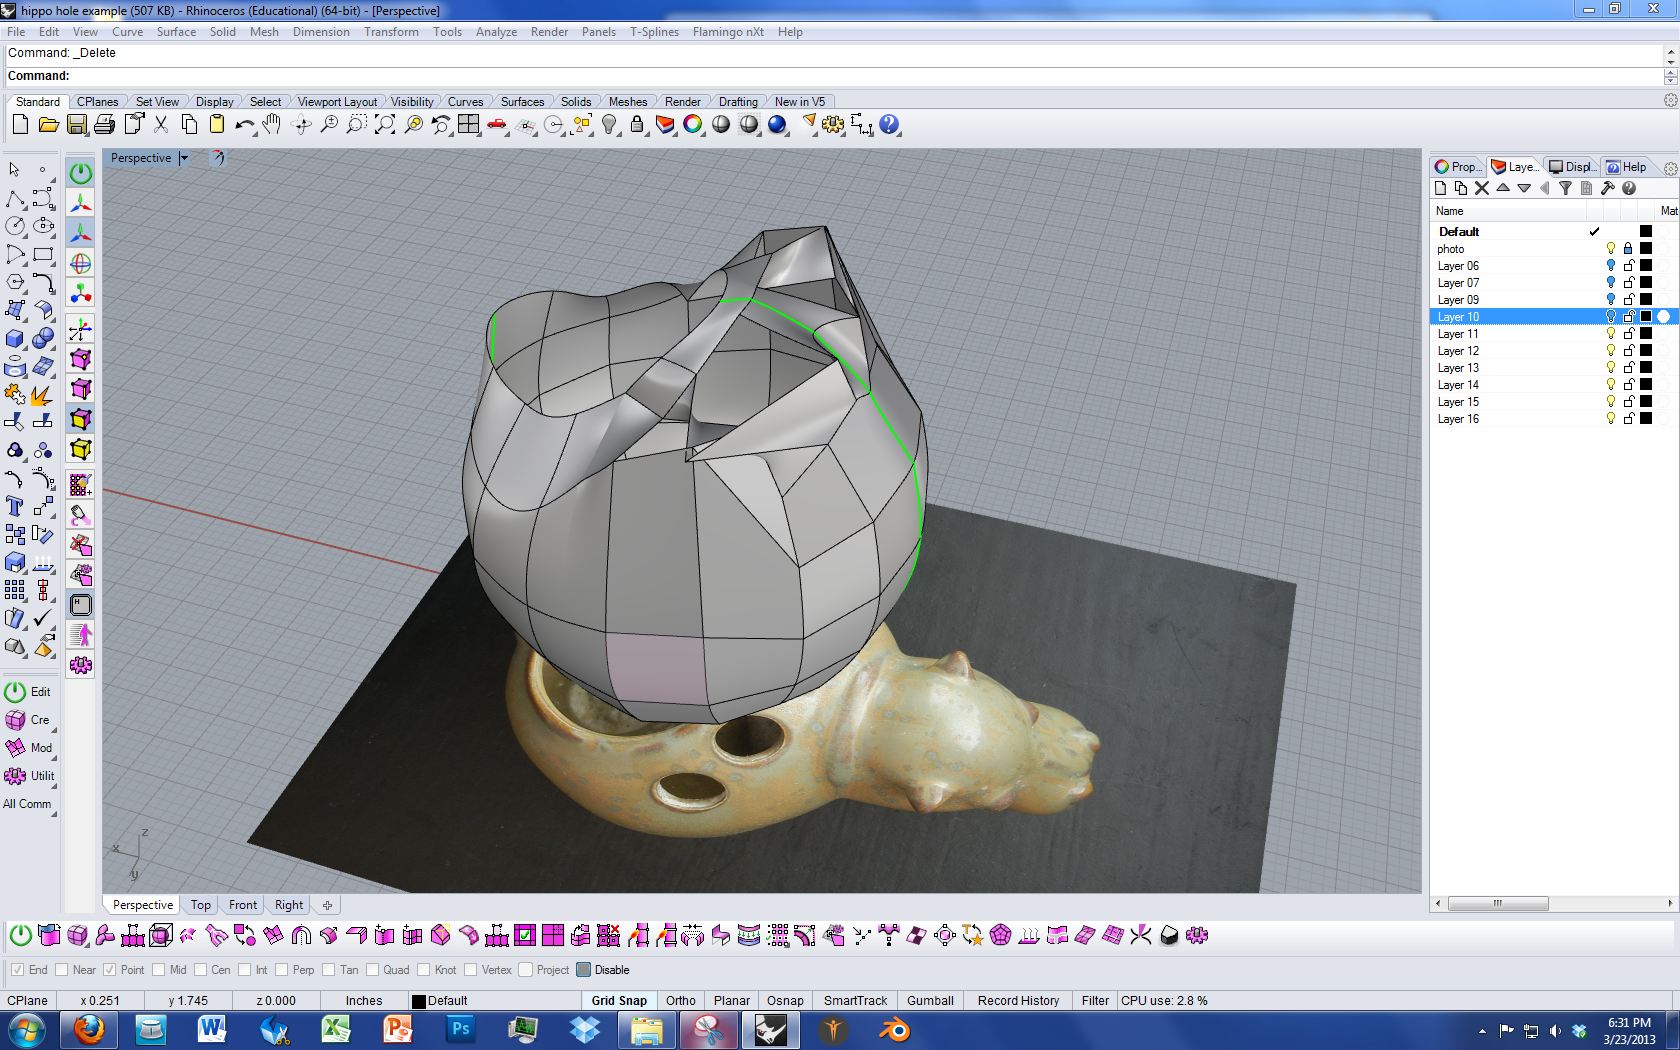
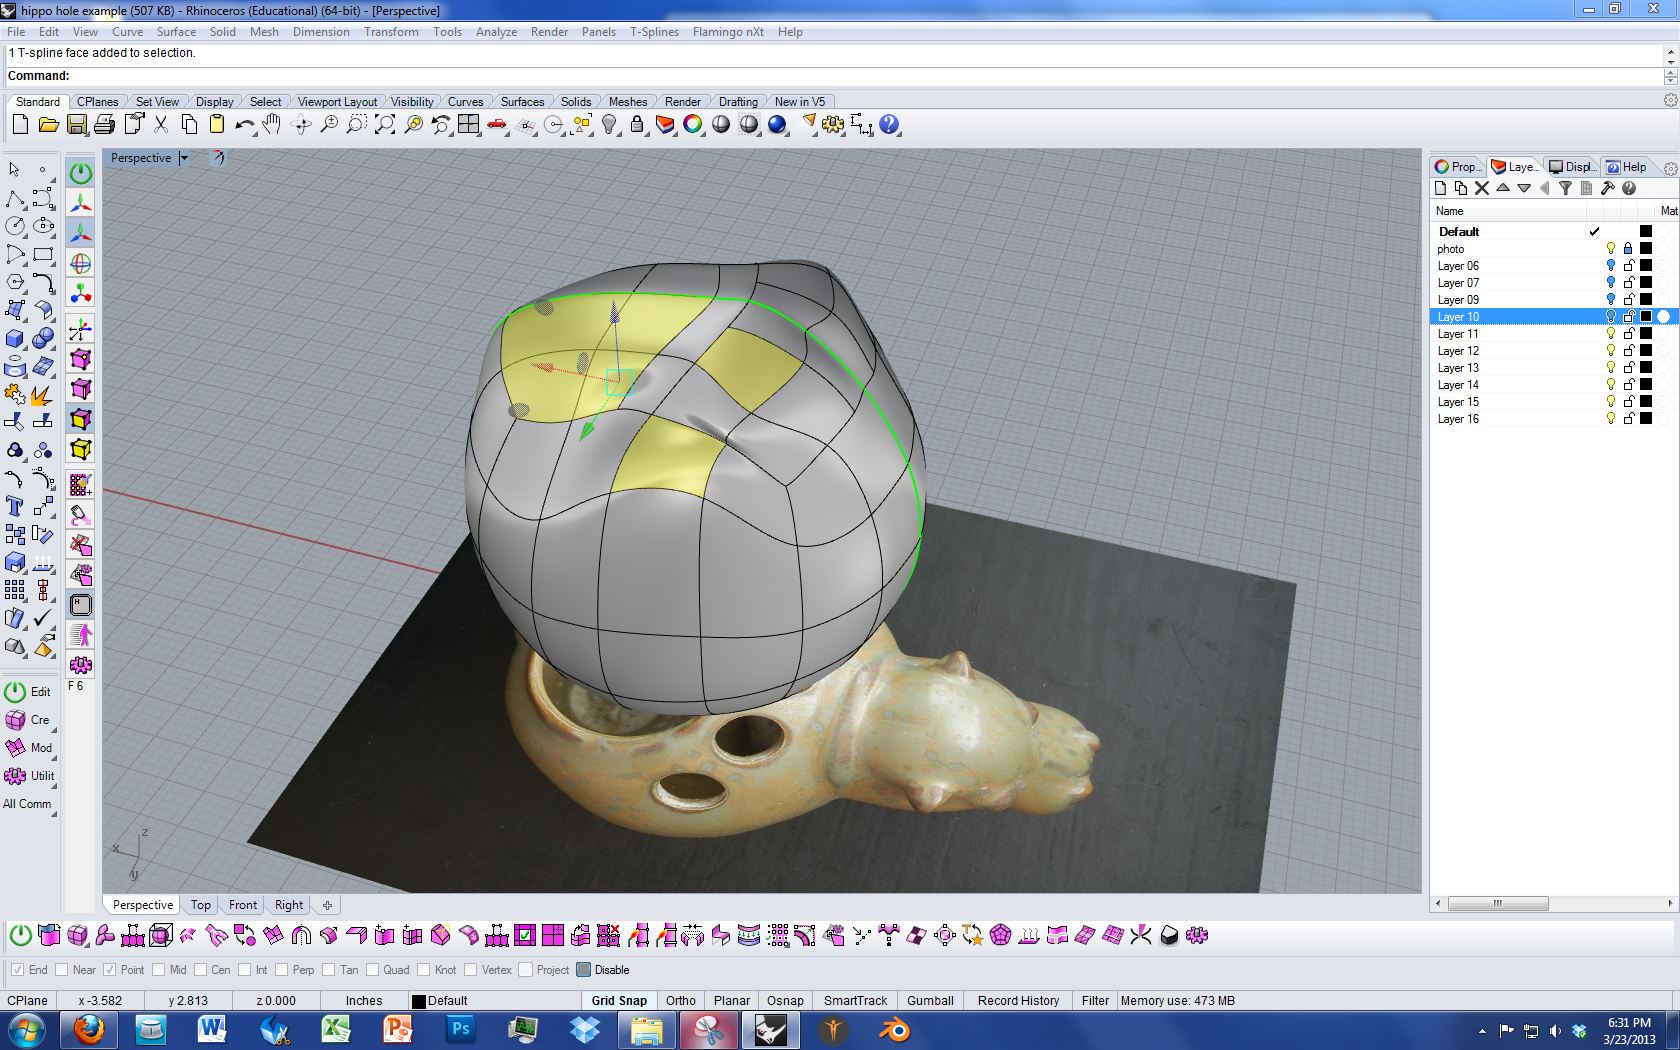
And as you can see, the model went crazy when I did the faces, because in T-Splines what you do to one edge will have an effect three edges out, so the hole interfered with the smoothness of the neighboring faces.

Next I adjusted the points to get them basically where I thought they needed to be, ignoring the semi jagged nature of the geometry.
Then I selected the edges of the holes and extruded them down a couple of times. Doing this makes it possible for the faces surrounding the holes to smooth out. You could achieve the same result by thickening at this point; however, there’s still a lot of refining to do to the outer form, and if you thicken now you’ll need to adjust both the inside and outside points at once in order to preserve a consistent wall thickness. So it’s better to just use temporary extruded edges to make the model smooth while you continue to refine it.
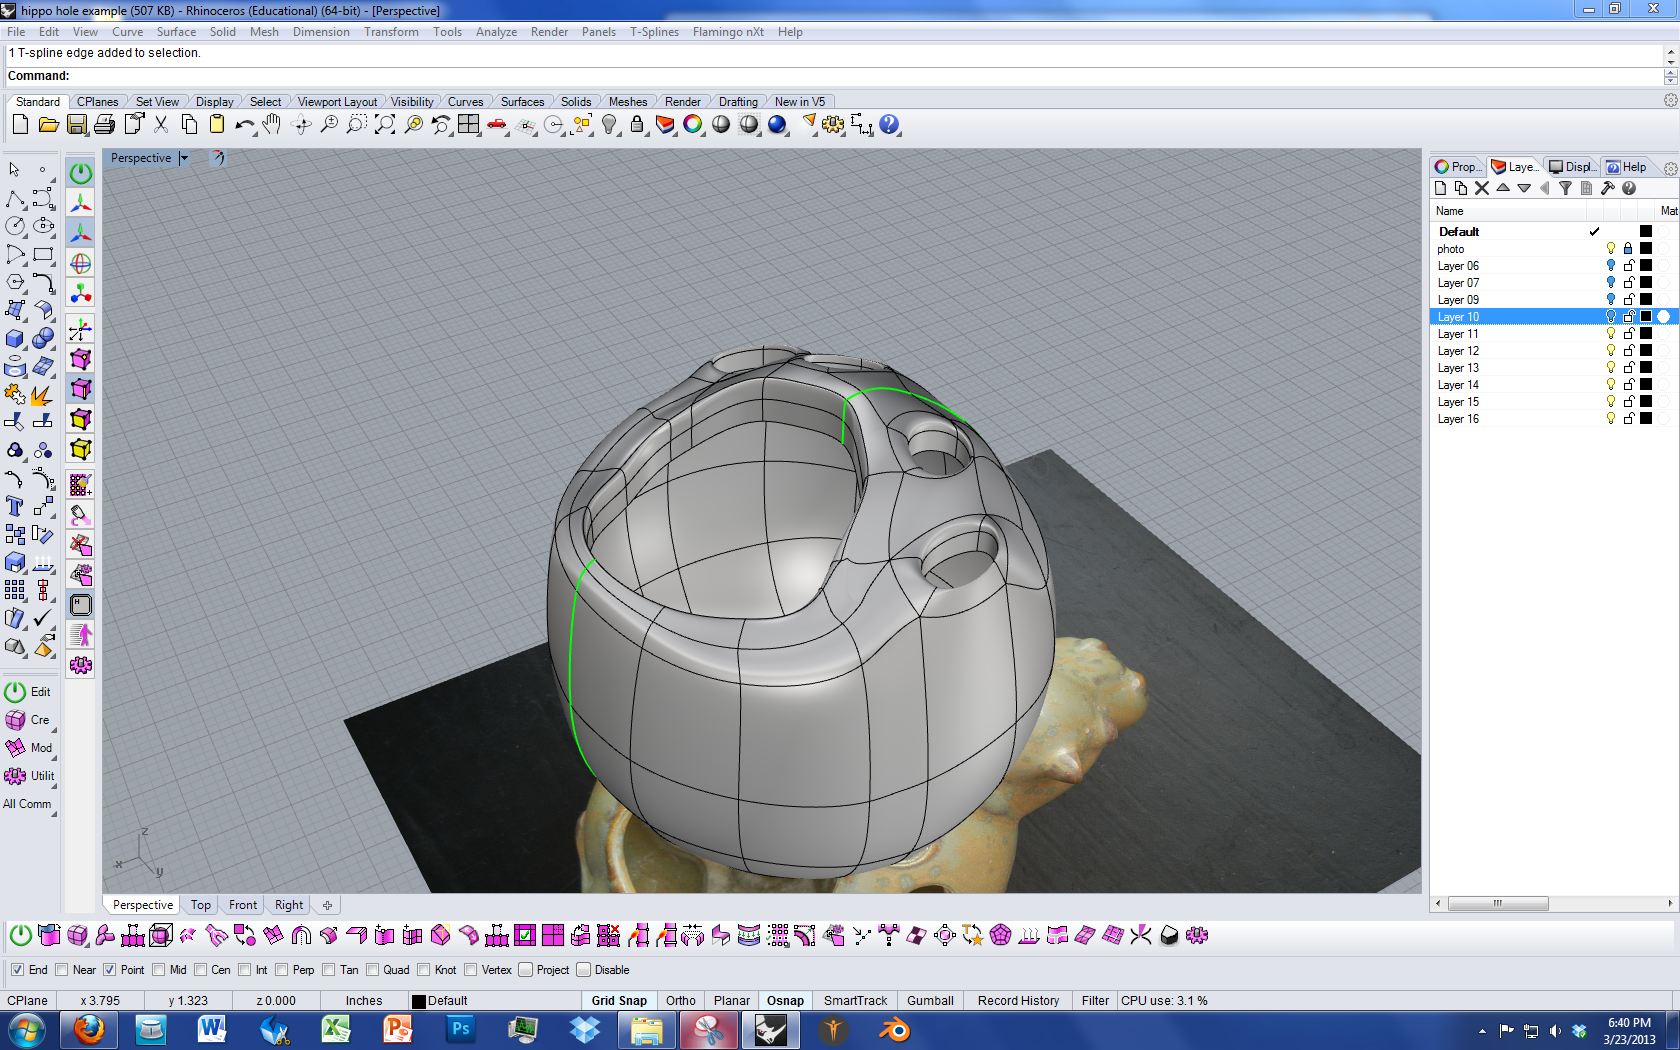
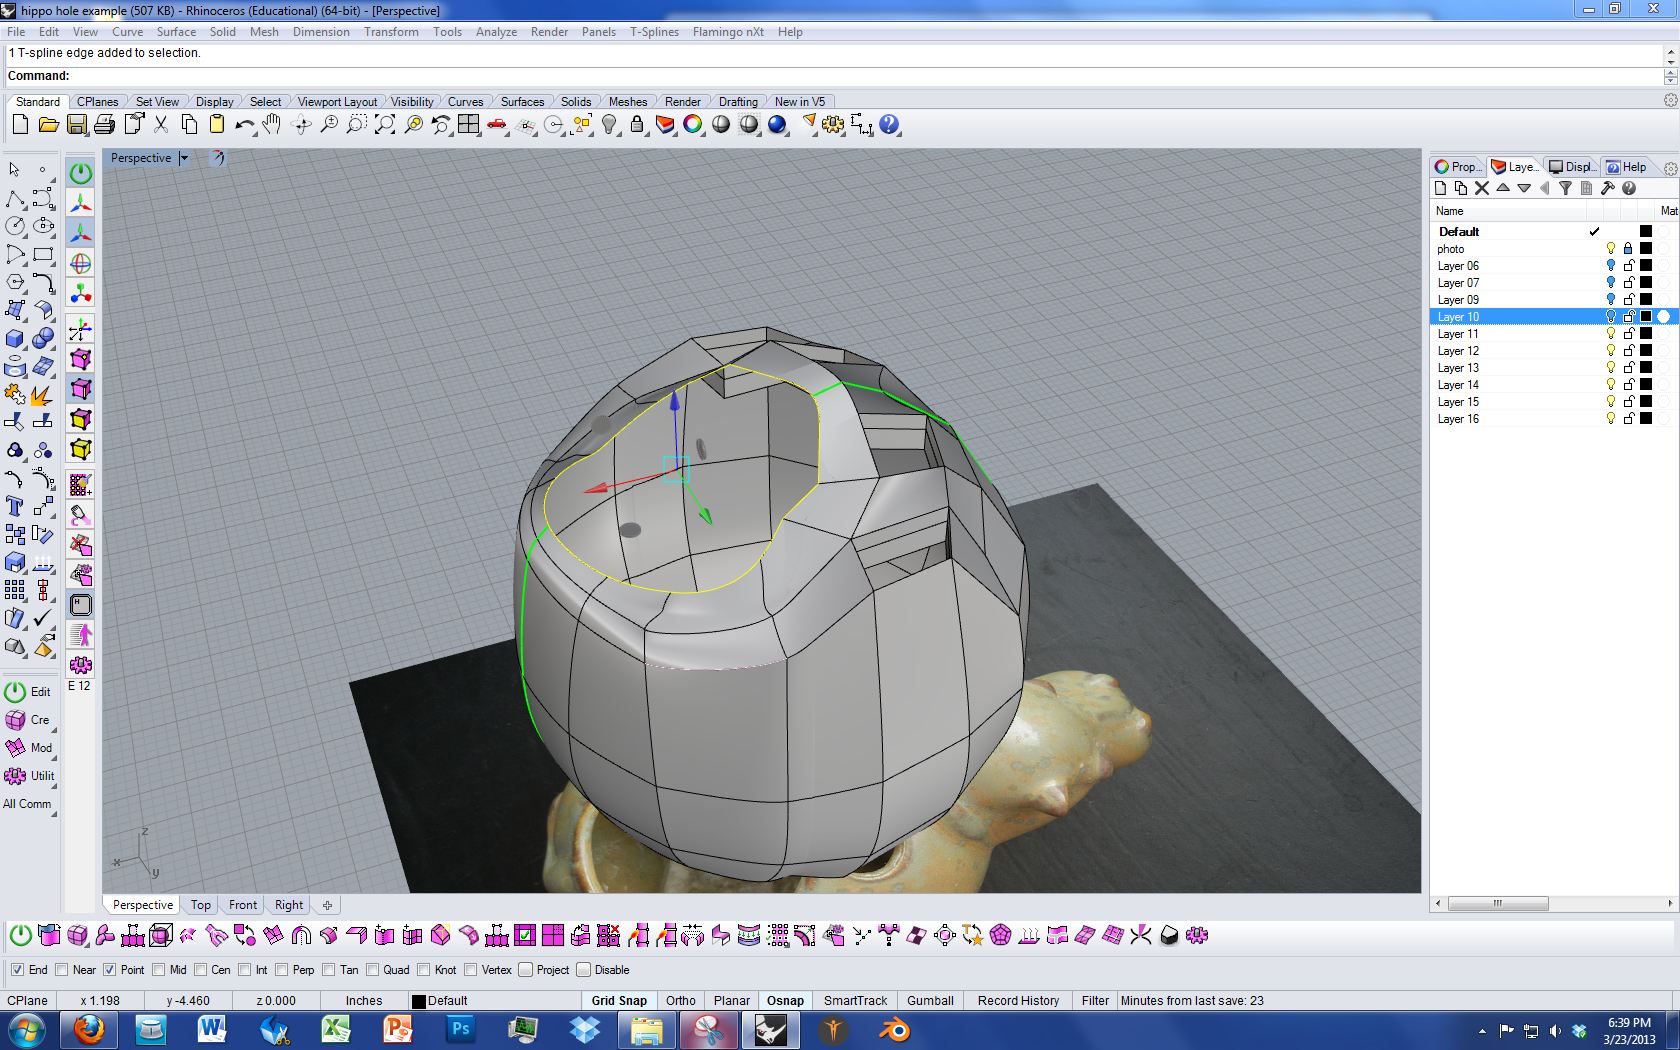
Next, I worked on adjusting the points to create a better looking, more even surface.
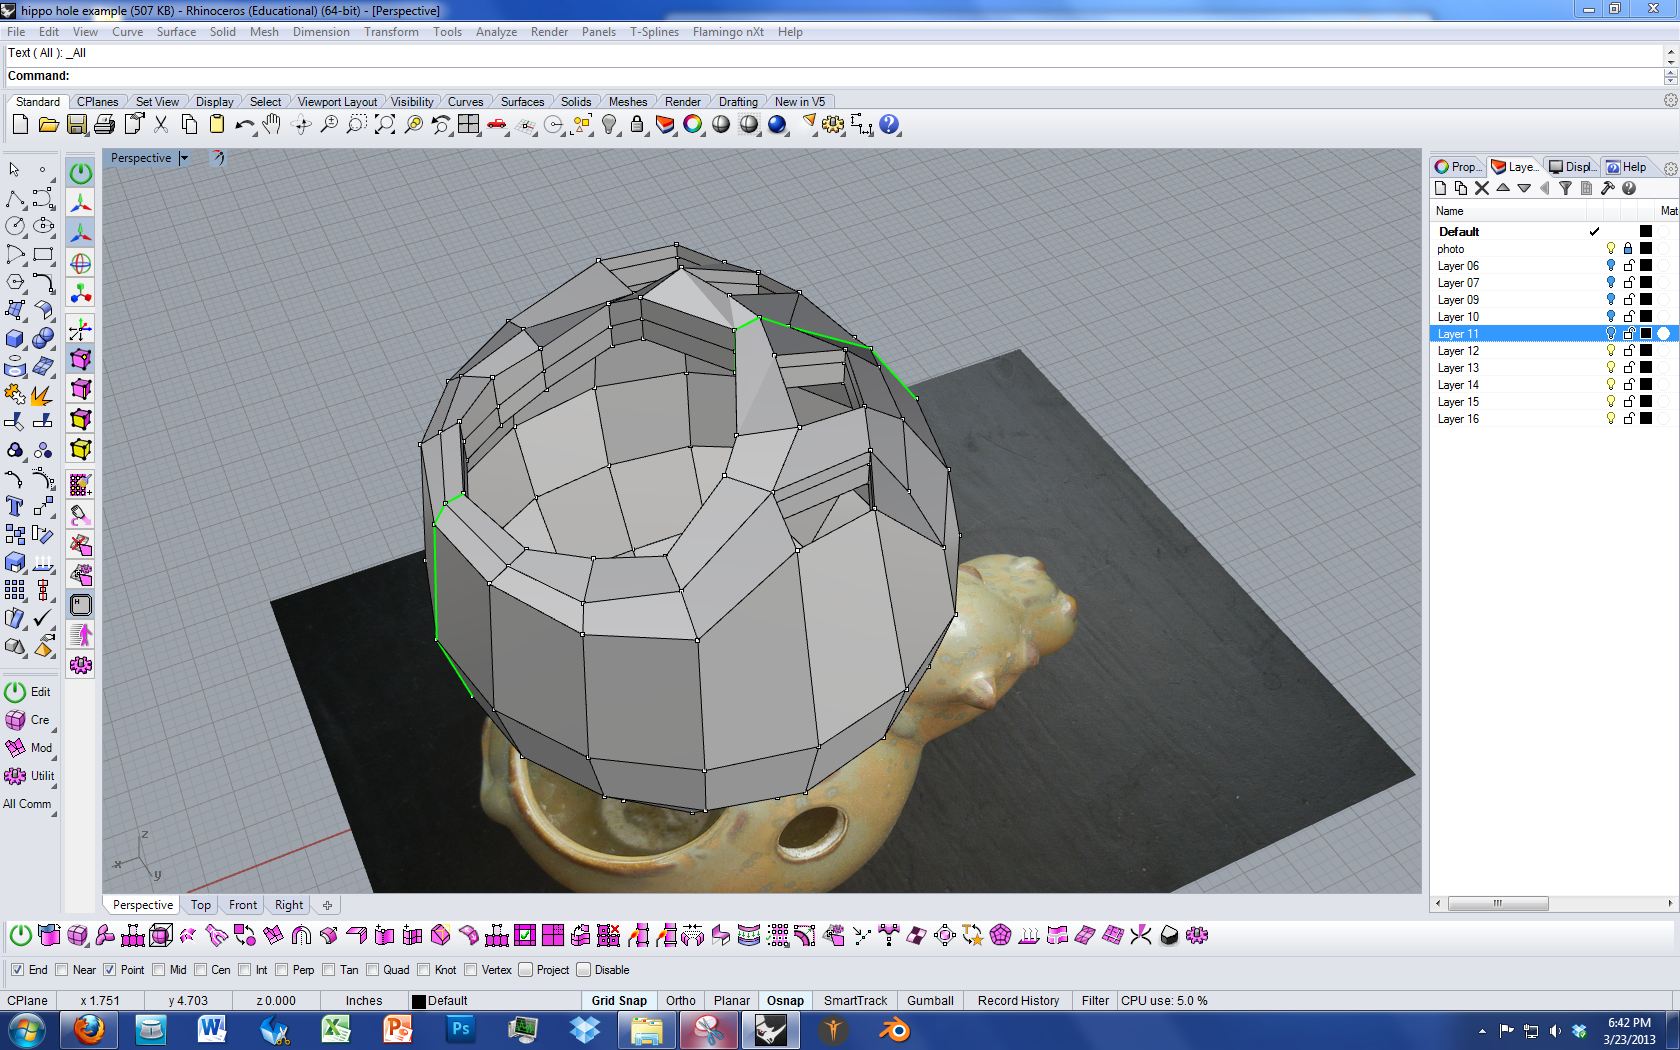
It’s helpful to toggle to box mode so that you can be sure the underlying geometry is consistent and regular.

When you’re totally finished refining your model you’ll want to select those edges you extruded inward earlier and delete them.
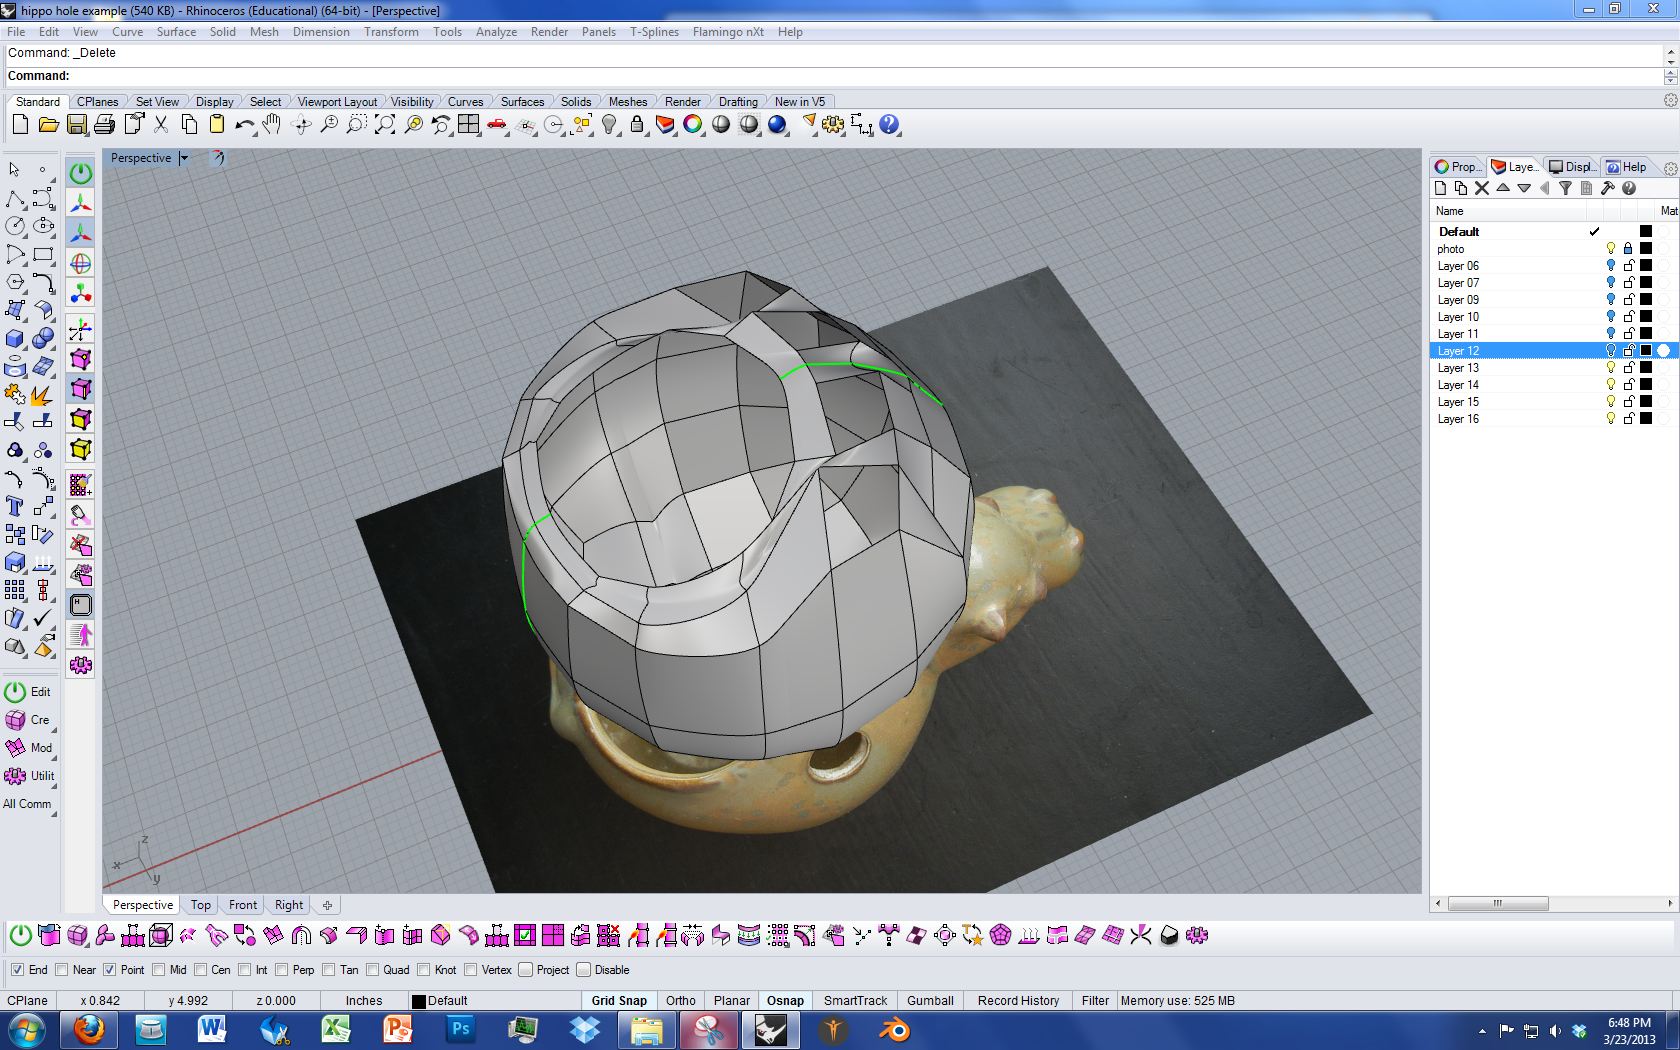
Again, your model will go crazy, but this is temporary.
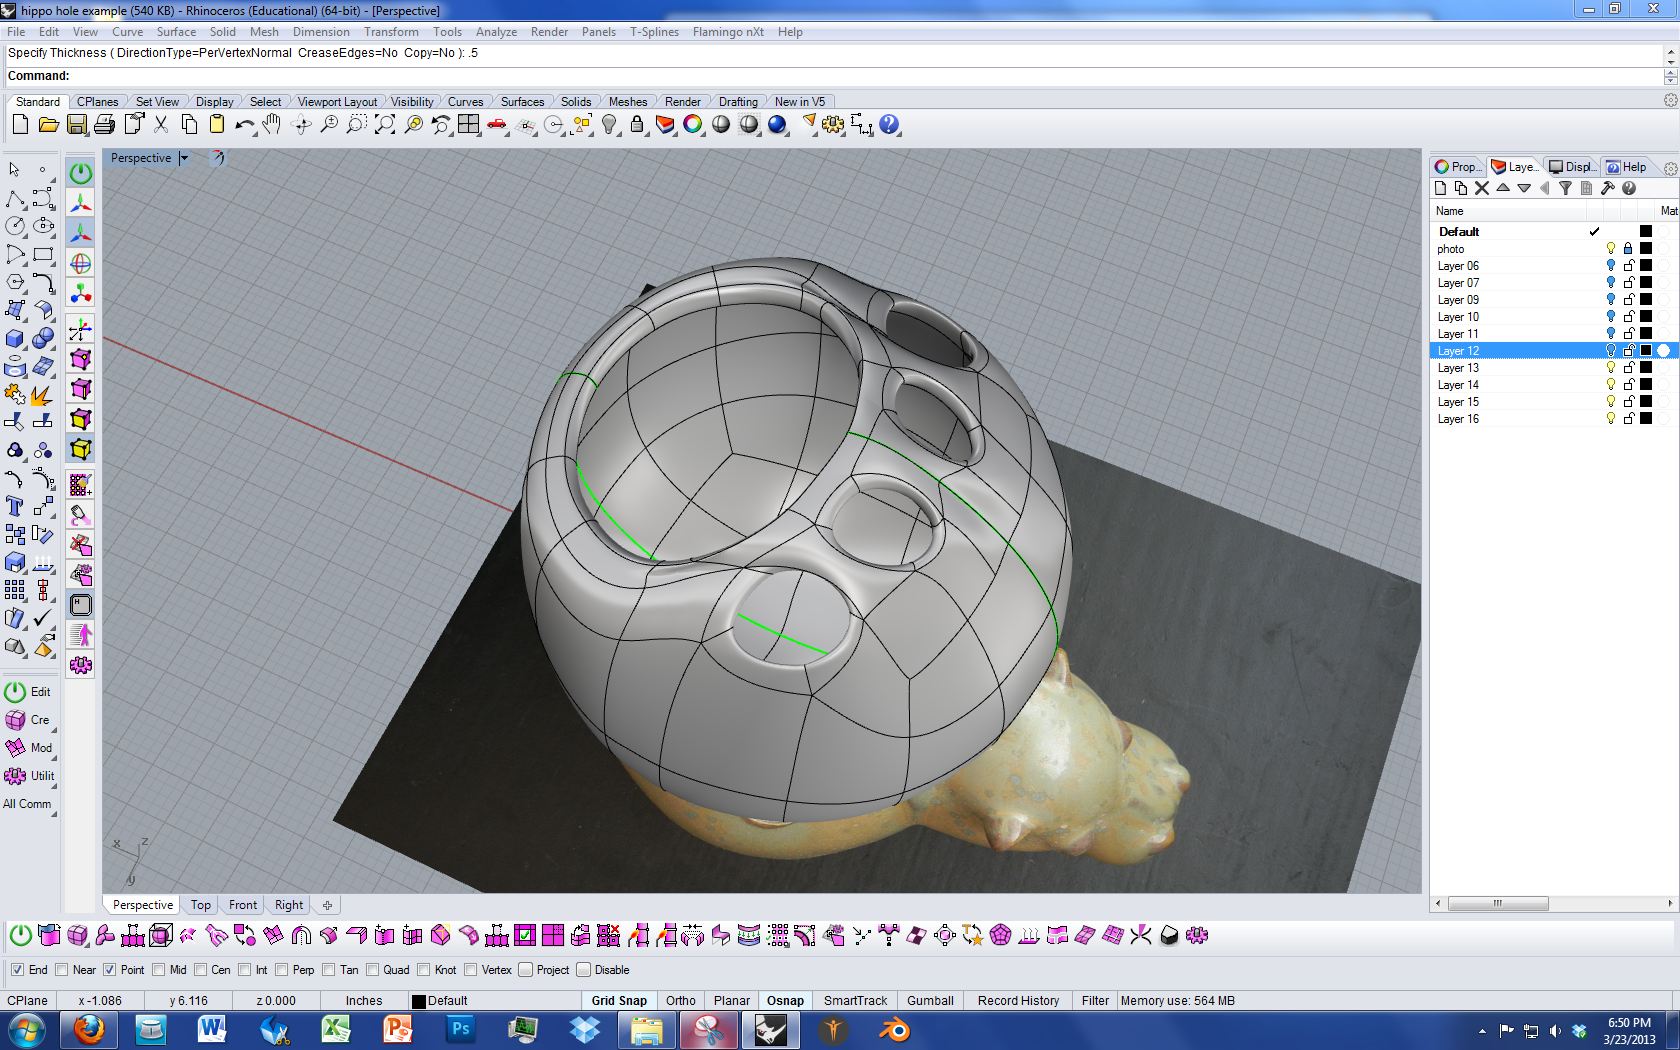
Once you use the thicken command your model will smooth back out. If, while running the thicken command you get a strange result, then try selecting smooth edges rather than creased edges in the command line.
This example isn’t perfect. If I were doing this for my own artwork I would refine the topology much more to get a smoother result, but this quick example at least illustrates the basic strategy for adding holes to a model.


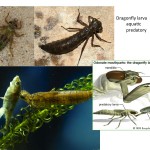

I couldn’t resist sending some weblinks for more information (excuse the generality of wikipedia, but it is a good source to start!)
Let me know if you’d like more!
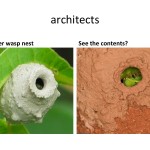
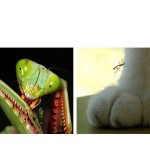
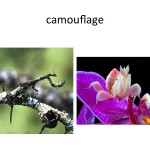
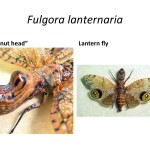
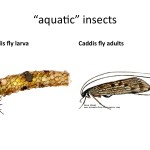
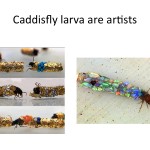
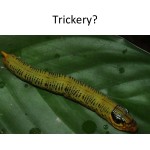
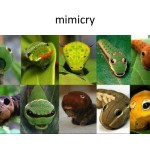
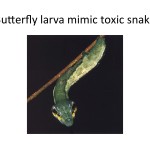
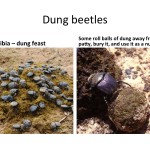
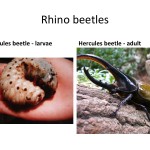
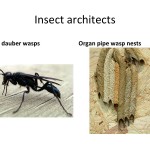
Pillbugs:
http://en.wikipedia.org/wiki/
Insects as Food (for people!)
http://en.wikipedia.org/wiki/
Tsetse fly trypanosomiasis
http://www.who.int/
Sleeping sickness & tsetse life cycle:
http://en.wikipedia.org/wiki/
Another tropical disease vectored by insects: river blindness
http://en.wikipedia.org/wiki/


T-Splines is a powerful solution for creating organic forms. You’ll be amazed at what can be accomplished with the program.
http://www.youtube.com/watch?feature=player_embedded&v=9kYdmBfmh4M
Basic T-Splines Tutorials: http://www.tsplines.com/support/basictutorials.html
Advanced T-Splines Tutorials: https://www.tsplines.com/store/tstutorials.html
Make Human: An open source tool for making 3D characters http://www.makehuman.org/
A new plugin has been installed in BERT 012 that links Rhino and Keyshot.
A note from our IT staff: “When testing the plugin, I found that you need to have Keyshot running before using the plugin in Rhinoceros because the plugin asks for the Keyshot license server. This setting is automatically set when you launch Keyshot.”
Unlike other plugins, a KeyShot plugin only “links” the 2 applications together, rather than putting KeyShot inside the modeling application. This makes the installation and use extremely simple and efficient. Since the two applications remain separate, they can easily operate side by side.
Each plugin works the same. Simply open the model in the supported application, and look for the KeyShot button in the menu bar. Select “Render”, and follow the instructions on the screen. Within seconds, KeyShot will open and drop your design into the default scene. Apply materials, change the lighting, move the camera. Done!
With KeyShot 4, we have taken the plugins for Creo, Pro/ENGINEER, SolidWorks and Rhino to the next level. When you download the plugin for KeyShot 4, you can now link KeyShot and the CAD application together. Now you can continue to work on your design, and update the model inside KeyShot with a simple button push. All your materials, animations, lighting, camera – simply everything – will be maintained. Do this today, tomorrow, or next week. All you need to do is open your model in the CAD application, and the scene in KeyShot – and you are live linked!
Another great feature of the plugins for Creo, Pro/ENGINEER, SolidWorks and Rhino is that KeyShot doesn’t have to be installed to get your design out of the CAD application into KeyShot. Simple select the EXPORT button in the plugin menu, and all the geometry, structure along with colors gets exported to KeyShot’s native file format.
http://keyshot.com/downloads/plugins/
On Fri, Mar 1, 2013 at 3:26 PM, Tali Sason <tjs024@bucknell.edu> wrote:
Hey Seth
We are loading our rhino file into keyshot and the front wheels won’t load. We have no idea why this is happening. We had issues with other components because they were excruciation objects but we fixed that. The back wheels show up totally fine and they are an exact copy of the front wheels.
Help!
Any ideas?
Thanks-
Tali
– – –
On Fri, Mar 1, 2013 at 6:40 PM, Seth Berry <sethberry3@gmail.com> wrote:
i have no idea. try:
seth
– – –
On Sun, Mar 3, 2013 at 12:52 PM, Tali Sason <tjs024@bucknell.edu> wrote:
Exporting to Rhino 4 worked!
Thanks so much
Tali

Picture an assembly line not that isn’t made up of robotic arms spewing sparks to weld heavy steel, but a warehouse of plastic-spraying printers producing light, cheap and highly efficient automobiles.
If Jim Kor’s dream is realized, that’s exactly how the next generation of urban runabouts will be produced. His creation is called the Urbee 2 and it could revolutionize parts manufacturing while creating a cottage industry of small-batch automakers intent on challenging the status quo. click here to read more
http://youtu.be/JX1nl3LaUOY?t=12m47s
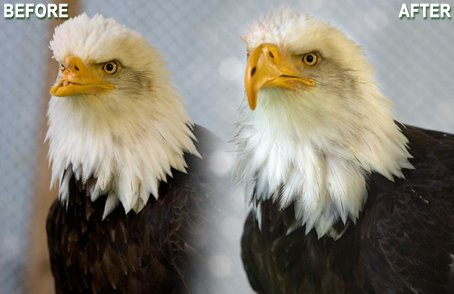
Photo courtesy of Birds of Prey Northwest.
Sometime in 2005, Beauty the bald eagle was shot in the face by a poacher, which damaged her beak badly enough that she couldn’t eat on her own. Animal rescue workers found her before she starved to death, and volunteers at the nonprofit group Birds of Prey Northwest nursed her back to health via tube-feeding and, later, hand-feeding with forceps. But it became increasingly clear that her beak was never going to grow back — meaning that Beauty would never be able to feed herself. She was on track to be euthanized.
But raptor specialist Jane Fink Cantwell, who dresses like Indiana Jones, refused to take “dead bald eagle” for an answer. She joined forces with mechanical engineer Nate Calvin of Kinetic Engineering Group, and together with other scientists, engineers, and even a dentist, they designed a nylon polymer beak that would perfectly replace Beauty’s lost upper mandible.
Calvin developed the new beak using a 3-D modeling program, then used a 3-D printer to fabricate it. After an arduous procedure to attach her prosthetic, Beauty was able to eat, drink, and preen herself on her own.
Beauty’s new beak isn’t secure enough for her to return to the wild, so Cantwell is still caring for her. But she’s a lot more self-sufficient than she was — and her case may help pave the way for making better prosthetics for wildlife in the future.
I’ve seen so many bald eagles crying a single tear over terrorism or gay marriage or whatever that it’s really hard not to interpret this as some kind of metaphor about America. Ruined by guns, kept alive by nonprofits, technology comes to the rescue? Sure, I think it works.
https://vimeo.com/15184546
http://grist.org/list/injured-bald-eagle-gets-new-3-d-printed-beak/


Images showing IaaC’s Contribution to Mireya Masó exhibition on Antartica. The exhibition titled: Antartica-Times of Change, depicts the changing climate of Antartica. One aspect of the exhibition included a study on Diatoms and Radiolaria, microscopic organisms that produce shells formed under whatever conditions are present at the time. The work produced by IaaC students was done in collaboration with Director Marta Malé-Alemany (Digital Fabriation) and Luis Fraguada (Digital Tools) with the assistance of Cesar Cruz Cazares.
click here for the flikr stream: http://www.flickr.com/photos/fraguada/page17/
“Our first priority is making America a magnet for new jobs and manufacturing. After shedding jobs for more than 10 years, our manufacturers have added about 500,000 jobs over the past three. Caterpillar is bringing jobs back from Japan. Ford is bringing jobs back from Mexico. After locating plants in other countries like China, Intel is opening its most advanced plant right here at home. And this year, Apple will start making Macs in America again.
“There are things we can do, right now, to accelerate this trend. Last year, we created our first manufacturing innovation institute in Youngstown, Ohio. A once-shuttered warehouse is now a state-of-the art lab where new workers are mastering the 3D printing that has the potential to revolutionize the way we make almost everything. There’s no reason this can’t happen in other towns. So tonight, I’m announcing the launch of three more of these manufacturing hubs, where businesses will partner with the Departments of Defense and Energy to turn regions left behind by globalization into global centers of high-tech jobs. And I ask this Congress to help create a network of fifteen of these hubs and guarantee that the next revolution in manufacturing is Made in America.”
By the start of class on Tuesday, 2/19, each student TEAM should do the following:
<1> Please review the grading criteria for this project if you have not yet done so: http://digitalsculpture.blogs.bucknell.edu/project-1
<2> Prepare a 3-5 minute group presentation to tell about your vehicle’s design. This presentation will count toward your project grade. Presentations should be supported by visuals that are posted to the class website. Please put your post in your team’s designated category. Click here for instructions on how to post images to the class website.
In this presentation your group should describe the vehicle that you intend to design. Please cover the following points:
<3> Create a SIMPLE Rhino model of your vehicle that includes all of the main components. This model will help your team conceptualize how the vehicle will look as a whole, and will help convey your design during your presentation. If you’re able to create more than one version of this simple model then this would be an asset to your design process.
**Note: There is a “shared” folder in the digital sculpture netspace that will make it easier for team members to share files. To find the folder follow this path: netspace > projects > digital sculpture > private > shared


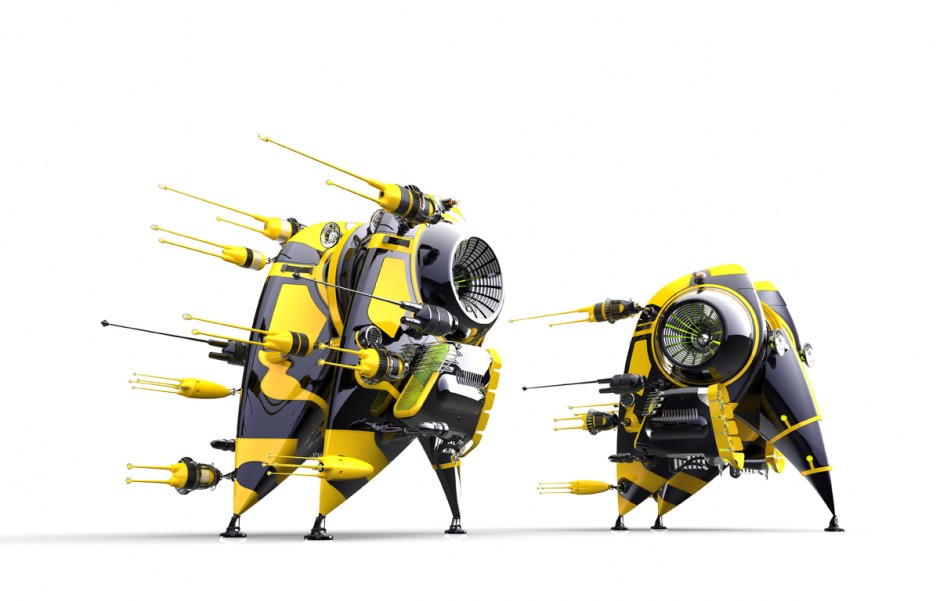
Check out some of these cool product designs I found on the web. See more at: http://elds205.blogspot.com/
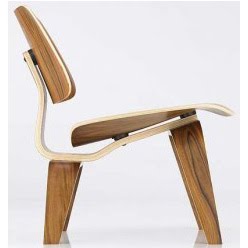
In this assignment you’ll follow along with the video tutorial below to model a bent plywood chair.
Here are the reference images you’ll need:

This is an example of a well written Art Report from a previous semester. Keep in mind that this student was following a slightly different set of instructions–your response will only be about half as long as this example. Click here to view the Art Report guidelines.


After finding the piece Bondi Beach by Gregor Schneider in the book Art Now on page 424, I was initially reminded of a large dog pound on an otherwise pleasant beach. I became focused on the limited space provided for the individuals inside and immediately was struck by a sense of claustrophobia along with a confusion as to why people would chose to enter the cages. I found it humorous that inside the extremely small spaces were efforts to instill comfort such as an umbrella, air mattress, and trash bag for convenience. The cages are an eye-sore at a beautiful beach, and an inconvenience for those wishing to relax in a calm area; however, people on the sand do not seem to be daunted by the cages. The people inside are content with their position, and those strolling the beach outside the fences do not even look over at the piece. Schneider’s work is a study of human behavior as well as an aesthetically engaging piece.
Objective Description
Gregor Schneider’s Bondi Beach consists of a free-standing connection of metal cages located on a populated public beach. The walls of the cages are twice the height of the average person and are of the standard design used in chain-link fences that are usually used in humane societies. The chain-linked fence allows for those inside to see the ocean as well as those outside to look in on those inside the cages. There are twenty-one cells, each of small dimensions, conveniently equipped with a beach umbrella, air mattress, and trash bag. The installation of these items give those inside a reason to be fully content with their choice of captivation. The number of people inside each cage varies. Some cages are empty, some have one person, and some are overcrowded; however, no one has made the decision to move to the empty cages. Also, there are numerous people freely wandering along the beach outside of the cage.
Technical Decisions
Schneider chose to construct his piece out of common materials which helps to depict a sense of “normality” in his work. Instead of constructing an abstract work, he constructed a common object (a cage) and placed it in an odd environment and altered its purpose. Instead of the cages being located at a local humane society, a knowingly unpleasant area, Schneider placed them at a typically beautiful, free location. Also, he replaced the animals expected to be inside with humans. What is unique about Bondi Beach is that the viewer becomes apart of the work. Whether he or she chooses to enter the cage or remain outside does not matter, either choice the individual makes adds to his piece. The fences are not all that is important, the items inside and the colors selected hold great value as well. The white umbrella attempts to add a mirage of tranquility as the blue air mattress mimics the color of the ocean directly outside of the cage to forge a connection with nature.
The Work in the World
As mentioned earlier, Bondi Beach is a direct reminder of dog cages at humane societies. They work as a confinement for seemingly “useless” things which add nothing substantial to society. Abandoned dogs that are typically in these types of cages are seen as a nuisance until a human, a species of higher rank, selects the dog to aid his or her life through companionship or more simply: entertainment. Schneider’s piece is also a distinct reminder of prisons or jail cells. However, this work deviates from a jail or prison cell in the sense that people willingly enter these cages. At a quick glance, these cages can remind one of internment camps as well; however, this connection fails for the same reason the jail and prison cell connection fails. These people contained in the cages are not confined, they are not restricted, they freely choose to give up their freedom and abandon their ability to wander for the comfort of modern day items.
The Story it Tells
Schneider’s message behind the work is clear: humans have become enslaved by their own creations. He constructed the piece out of previously man-made objects (the fence, umbrella, air mattress, and trash bag.) The man-made fence works as a barrier, the man-made umbrella serves as unnecessary protection, the man-made air mattress becomes luxurious comfort, and the man-made trash bag holds waste from manufactured items. Each of these things symbolizes the ways in which society has over-developed. We produce more than we need, which in turn destroys our natural instincts of survival. We rely on our inventions, even if they rob us of natural beauty, for example the construction of cities and elimination of forests. Even though we may realize we are walking into our own trap, such as the people entering the cages, we cannot deny the comfort that is granted inside.
Your name:
Your major:
Please list a few of your interests, sports you play, or other activities you’re involved in (on or off campus).
Why are you taking this class? What do you most want to get out of it?
Are there any particular topics or techniques that you’re hoping to learn about in this class?
In your opinion, what makes a work of art interesting, worthwhile, or compelling—to put it simply, what makes a work of art good? Why do you feel this way?
Email address:
Cell phone number:
Cell phone service provider:
* please double check your contact info for typos *


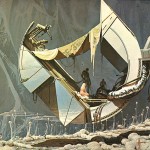
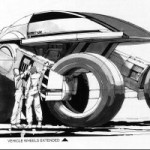

Sydney Jay Mead, commonly Syd Mead (born July 18, 1933), is a “visual futurist” and concept artist. He is best known for his designs for science-fiction films such as Blade Runner, Aliens and Tron. Of his work, Mead was once moved to comment: “I’ve called science fiction ‘reality ahead of schedule.'” —http://en.wikipedia.org/wiki/Syd_Mead


See more at: http://bathsheba.com
* 2 ArtsXpose are due at midterm, 2 are due at final. Not accepted late. *
ArtsXpose Learning Goals:
1. To familiarize students with local arts venues, resources and events.
2. To facilitate students’ critical awareness and their abilities to make meaningful connections between the various forms, media and formats found in theater, film, dance, literature and the visual arts.
3. To promote students’ active participation in the Art & Art History Department, Bucknell University, and the local art community.
Events that fulfill the ArtsXpose requirement include:
Instructions for submitting ArtsXpose:
All ArtsXpose assignments will be submitted on the class website, but you can choose to either submit a photograph of yourself at the event, OR a detailed textual response to the event.
Click here to see an example of how to post using the FORM option
Click here to see an example of how to post using the PHOTO option
Regardless of whether you choose the form or photo option, you’ll need to begin by creating a post here on the class website, and to do so you can follow these steps:
Example of how to submit artsXpose with the PHOTO option
For each artsXpose you complete, you may submit either a form OR a photo–it is not necessary to submit both. Included below is an example of how you may submit artsXpose using the PHOTO option. For the sake of efficiency, you may want to cut-and-paste the text below directly into your post and then appropriately revise the information.
Your photograph should depict you at the event with some distinctive features. This will make it obvious that you attended.
– – –
Title of Event: Joe Meiser Artist Lecture
Date & Time of Event: Friday February 3rd 7 pm
Location of Event: Samek Art Gallery
Type of event: Artist lecture and reception
Example of how to submit artsXpose with the FORM option
For each artsXpose you complete, you may submit either a form OR a photo–it is not necessary to submit both. Included below is an example of how you may submit artsXpose using the FORM option. For the sake of efficiency, you may want to cut-and-paste the text below directly into your post and then appropriately revise the information.
– – –
Title of Event: Bill T. Jones Lecture
Date and time of event: Monday January 30th 7:30 pm
Location of Event: Harvey Powers Theater
Type of Event: Guest Artist Lecture
1.) Provide a brief detail-oriented technical description or summary of the event you attended. (This section should remain journalistic and should not be reflective of your opinion.)
Bill T. Jones gave an hour lecture with almost a full half hour of questioning. During the lecture he spoke from memory and showed a 15 minutes video of one of his dances being performed by different dancers. He also showed brief examples of his movement throughout the lecture.
2.) Use the section below to write a well-structured paragraph focusing on your personal criticalinsight / response to the event. How did you interpret or react to what was presented to you?
It was clear that Jones was a stage performer. Even in a lecture he had an amazing presence and was very confident. I enjoyed seeing him show bits of his dance moves. He also told a lot of very interesting stories about both his dad and his long time partner. One thing that I found interesting was at the beginning of the lecture he talked a lot about being a part of a counter culture and pushing against society. He described how fruitful it was for him to live in an artist colony that had no concern for material success. However at the end of the lecture he was described some of his current financial realities and the trouble of maintaining a dance company.
3.) What information, ideas, images, etc. most impressed you and why?
I was most impressed by his presence, story telling, and his brief dance moves. They were all very clear but also very unique.
4.) Overall, how would you rate this event (10 being the most worthwhile)?
(10 / 9 / 8 / 7 / 6 / 5 / 4 / 3 / 2 / 1 )
eight
5.) Justify your rating in the question above:
I think for he was a really articulate speaker and was also entertaining. He also gave me two really valuable messages: don’t let yourself get in the way of the work, and why does it have to be anyone in particulars body?
http://www.youtube.com/watch?v=WmVLQHAH-V4&feature=player_embedded
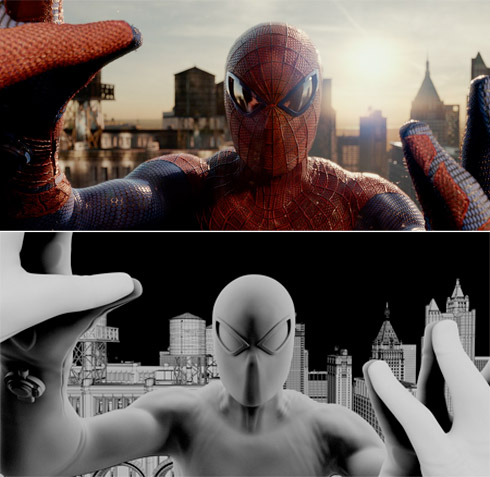
http://www.youtube.com/watch?v=W_rbYv_teIM
See a longer version here: http://www.itsartmag.com/features/the-vfx-of-the-amazing-spiderman/
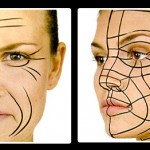
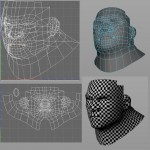
3D Modeling tutorial for the human head. Focus on edge flow: http://www.youtube.com/watch?v=xls25e08sSg