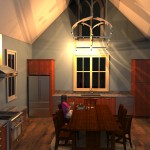
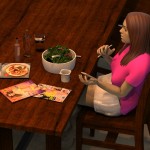
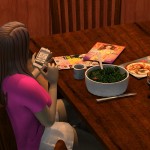
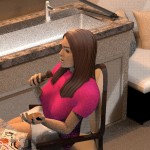
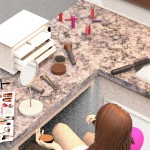
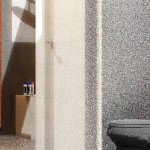
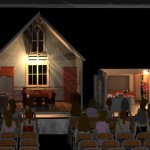
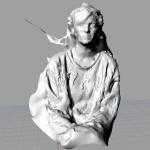
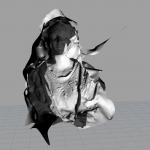
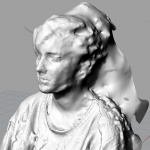
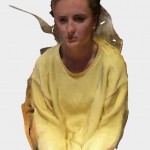
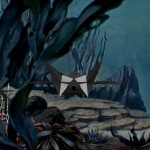
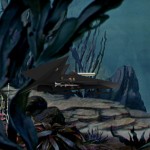
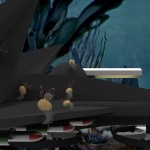
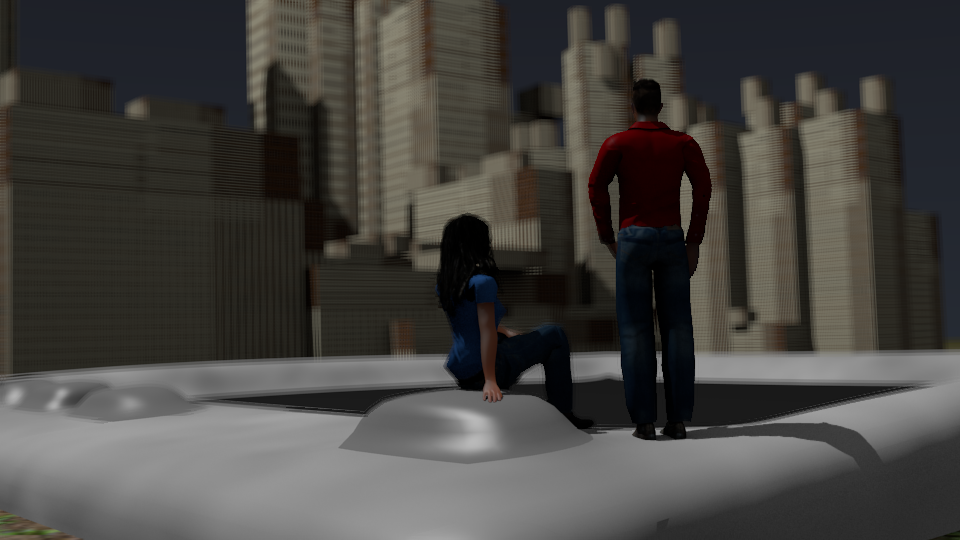
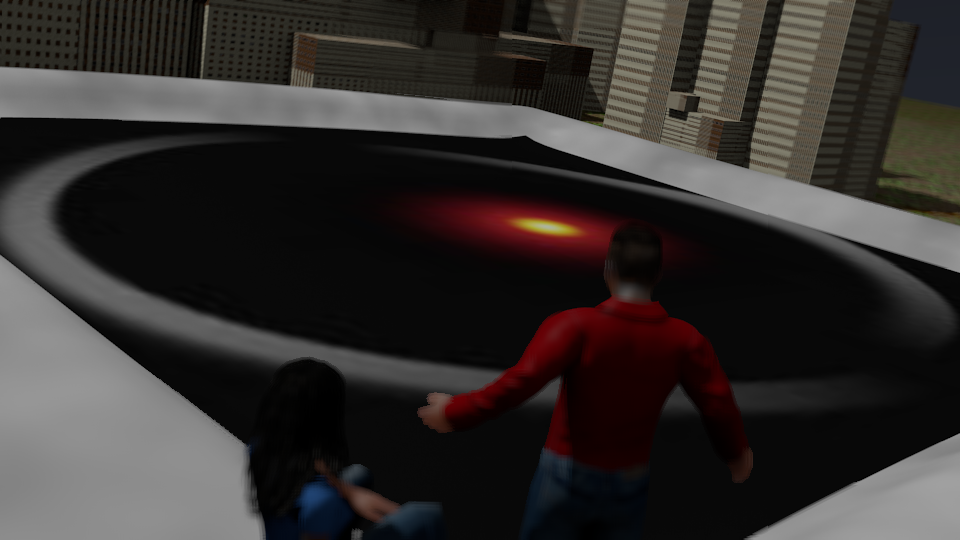
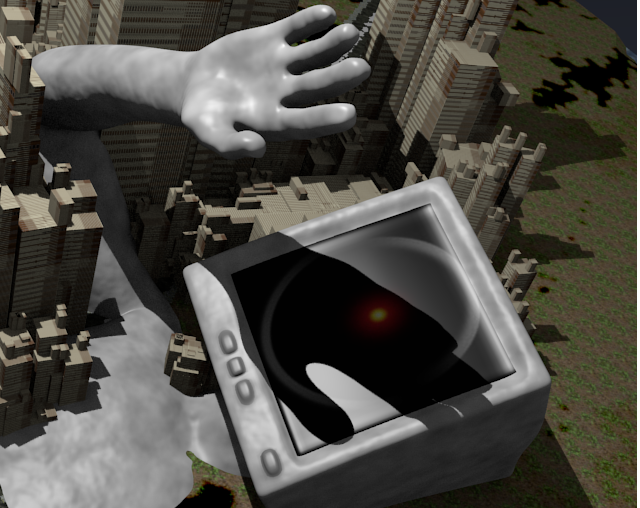
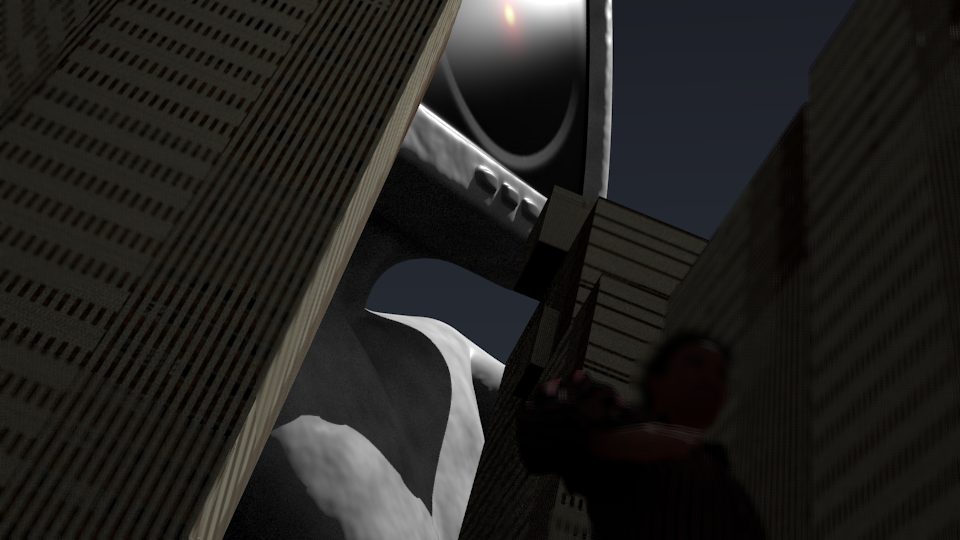
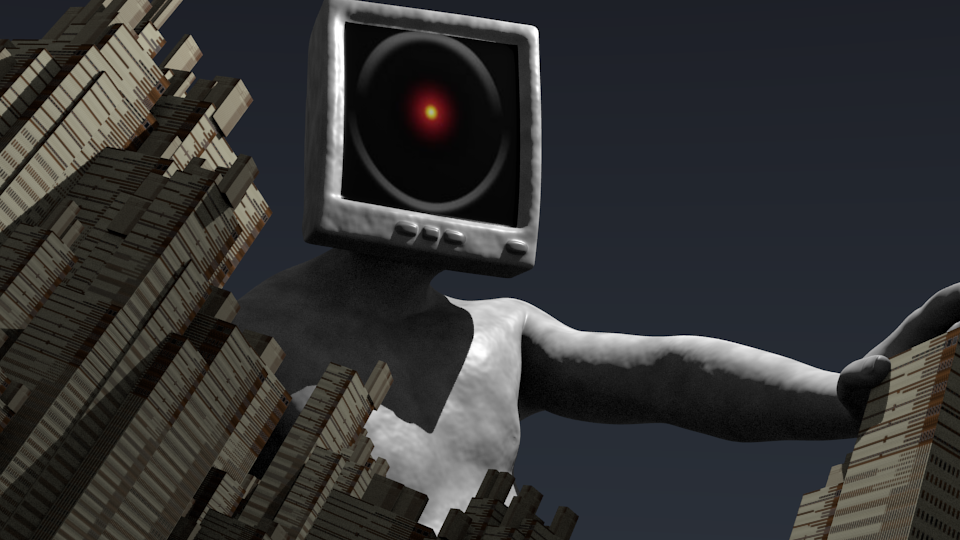
Thesis: For my final project, this series captures the intimate and private moments of one young woman who is preparing herself for her evening. She is intended to represent a much larger phenomenon in society and our obsession with beauty, and what these expectations are in order to meet the standard ‘beautiful’. This medium lends itself well to this concept in that the superficial application of makeup and our physical obsession with weight is expressed in this artificial, intangible form of digital sculpture. In this private space, one can see the figure impacted by the influence of social media, and how she responds with her own figure. These isolated scenes are intended to be observations as a voyeur, which is something that is revealed in the very end with an entire audience watching this series, as if it is a live show. I am interested in the juxtaposition between the privacy and behaviors in these spaces, with an audience (society) ever present and always ‘regarding.’
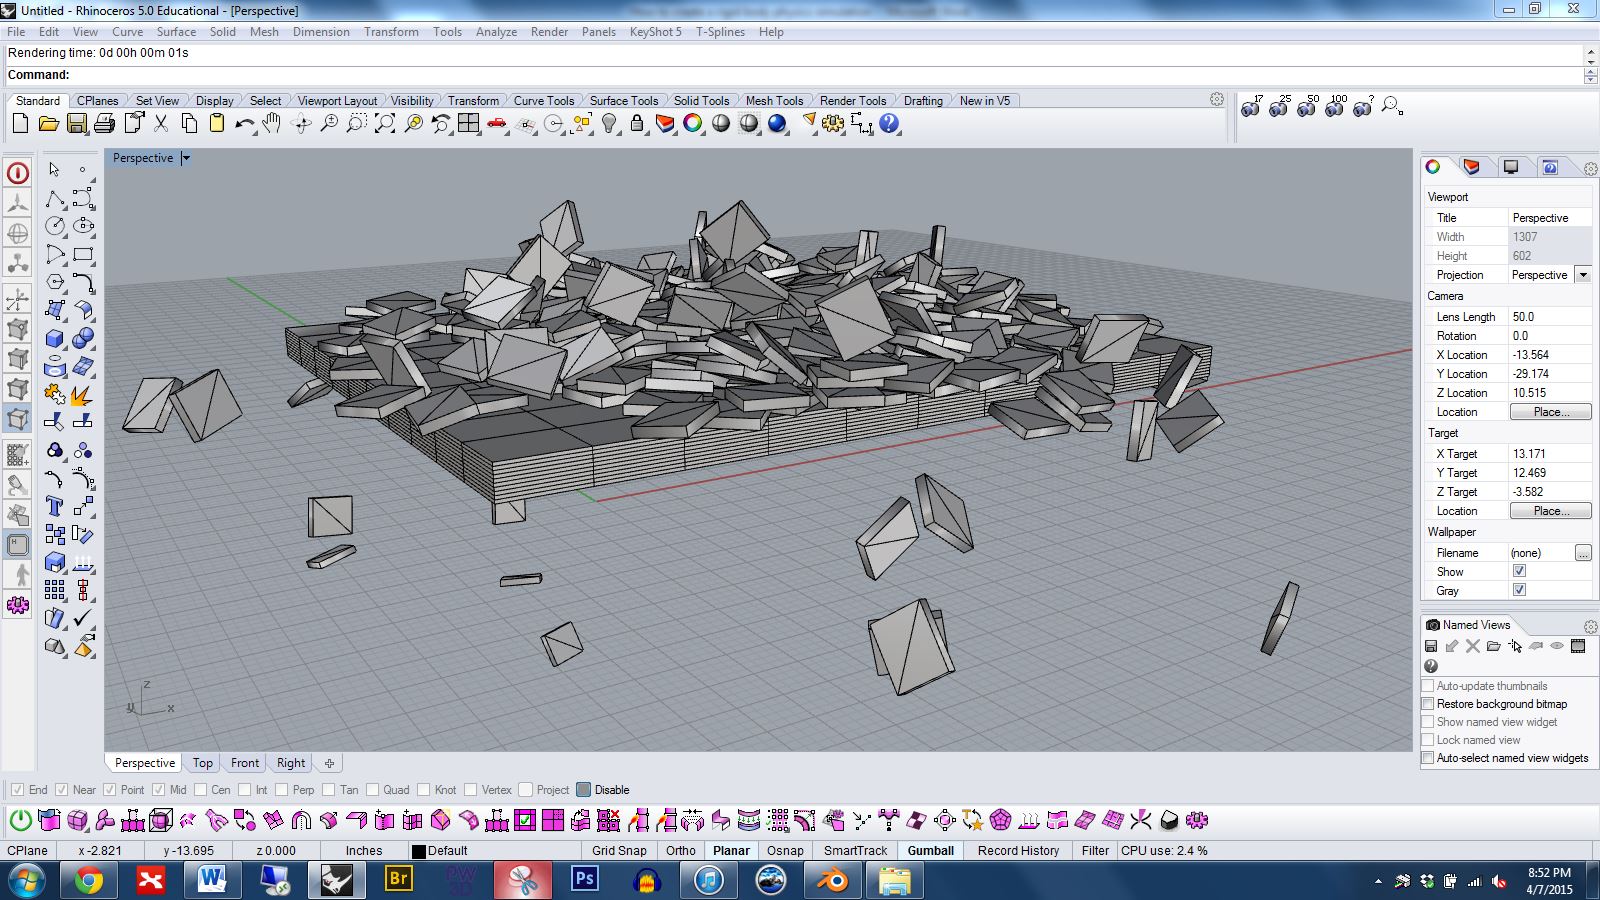
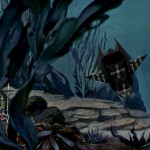
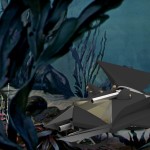
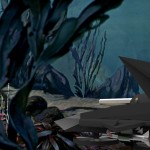
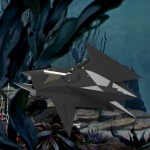
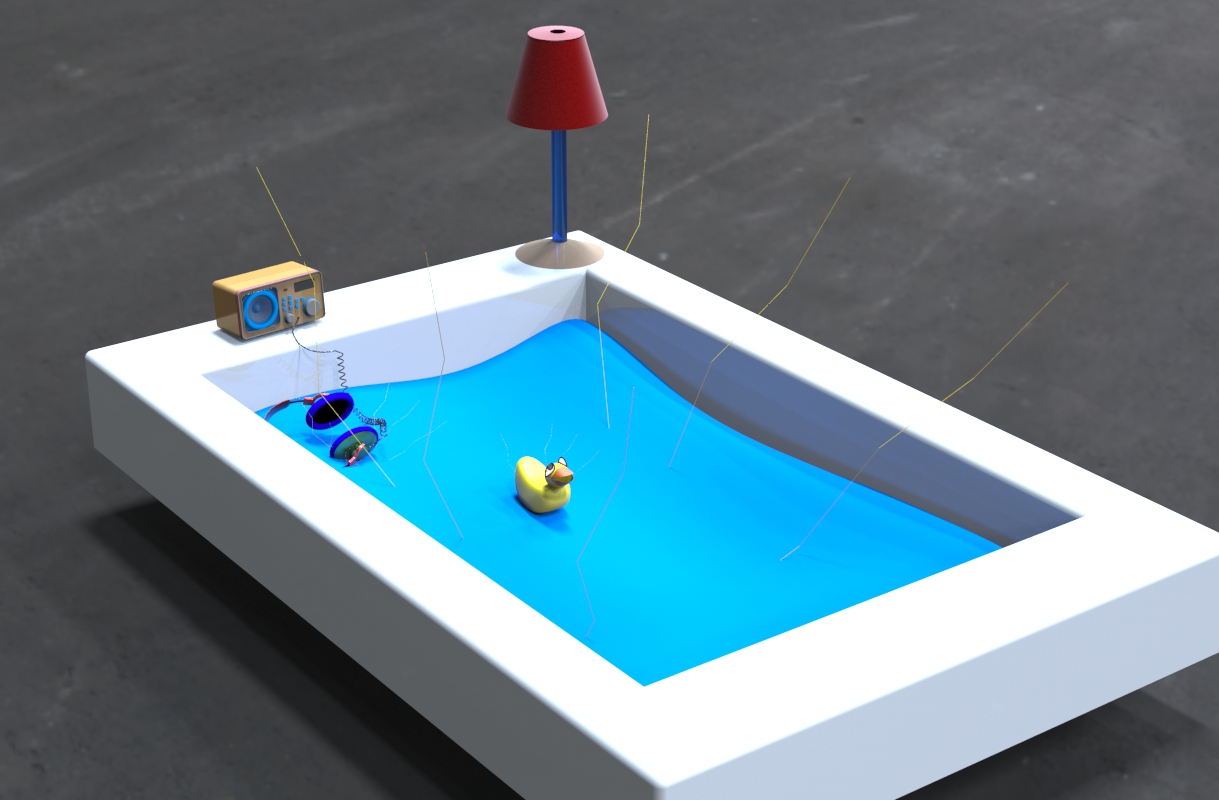
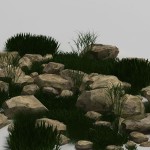
I used a rigid body physics simulation to create the dropped blocks in the image below. This project is a part of my “Liminal Construct” series.
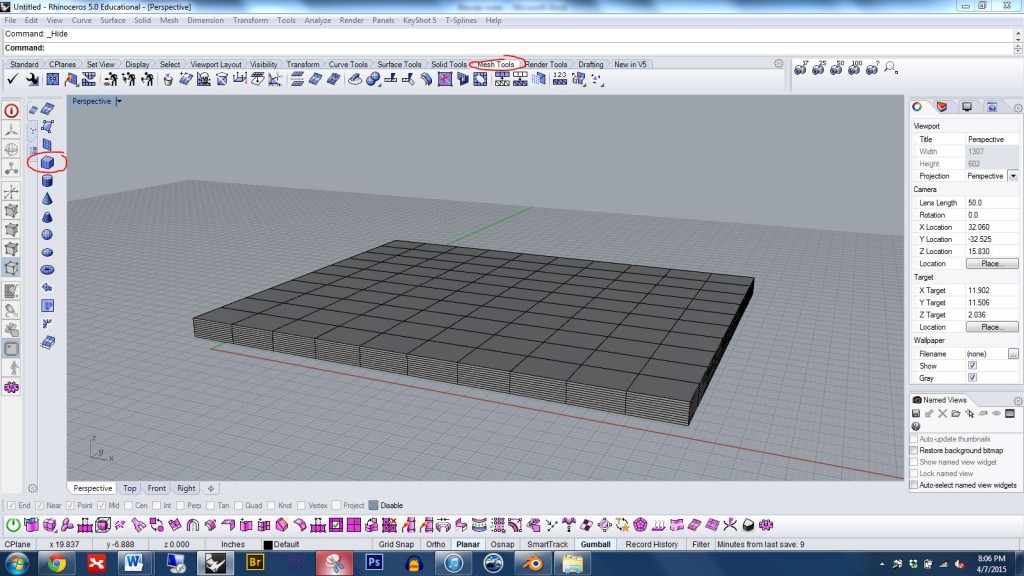
To get started, open Rhino, and by clicking the buttons circled in the image below, open the mesh panel and create a mesh box. This will serve as the ground plane for the collision. (Using a mesh box rather than a NURBS box converted to a mesh will give more vertices and yield better results.)
Create and position the objects you wish to drop. It is fine for these to be NURBS objects. We’ll mesh them when we export.
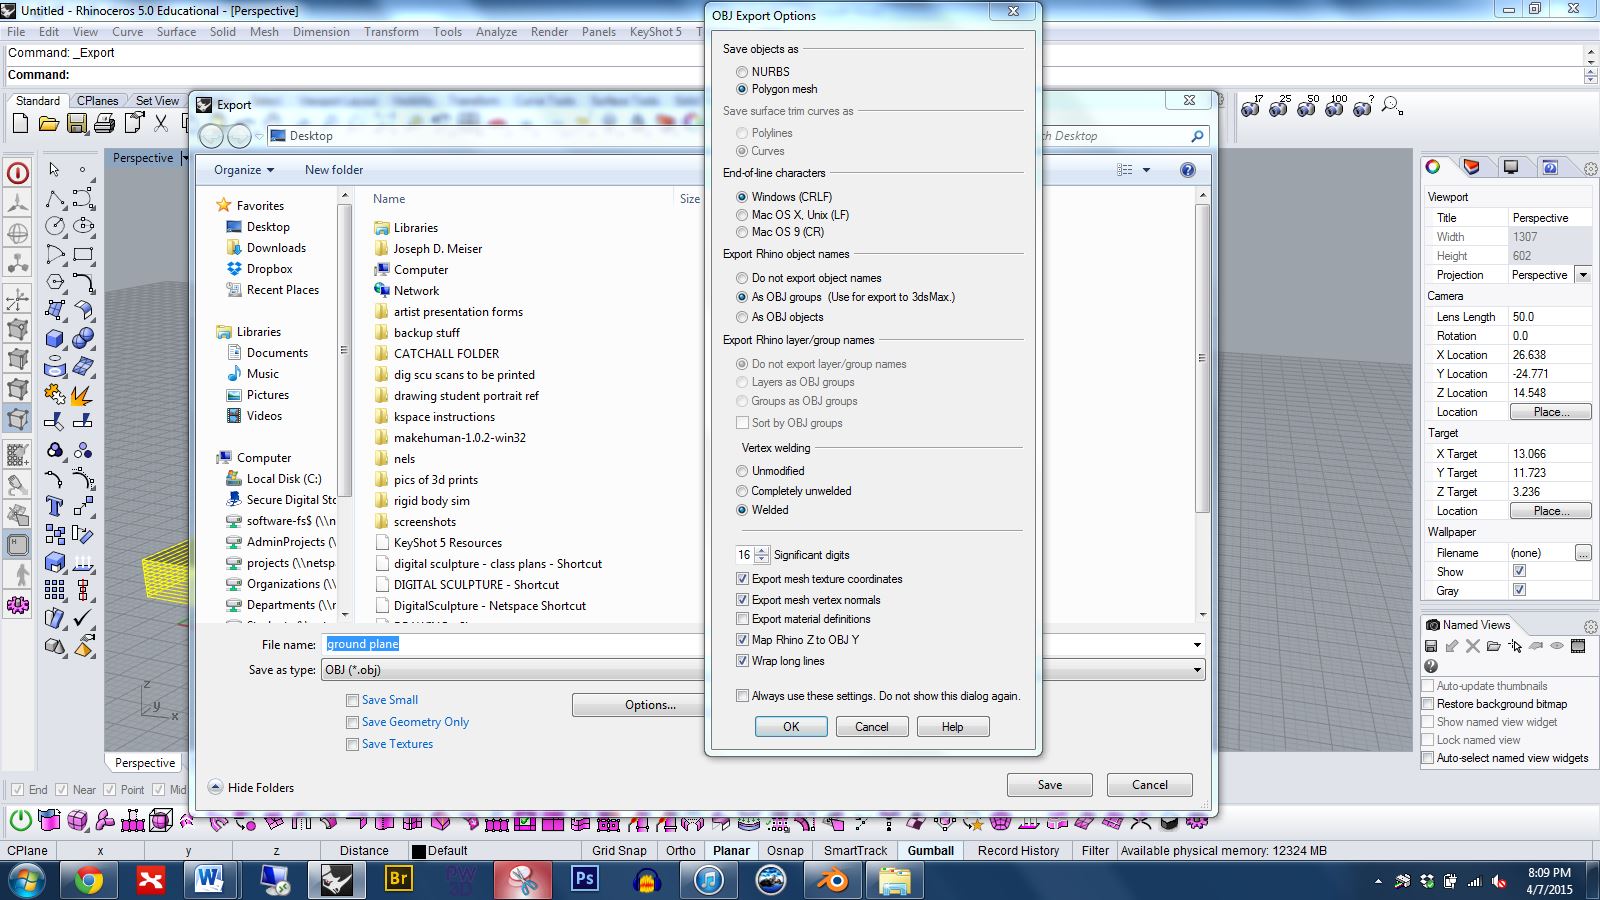
Export just the ground plane as an OBJ. Use the settings shown below.
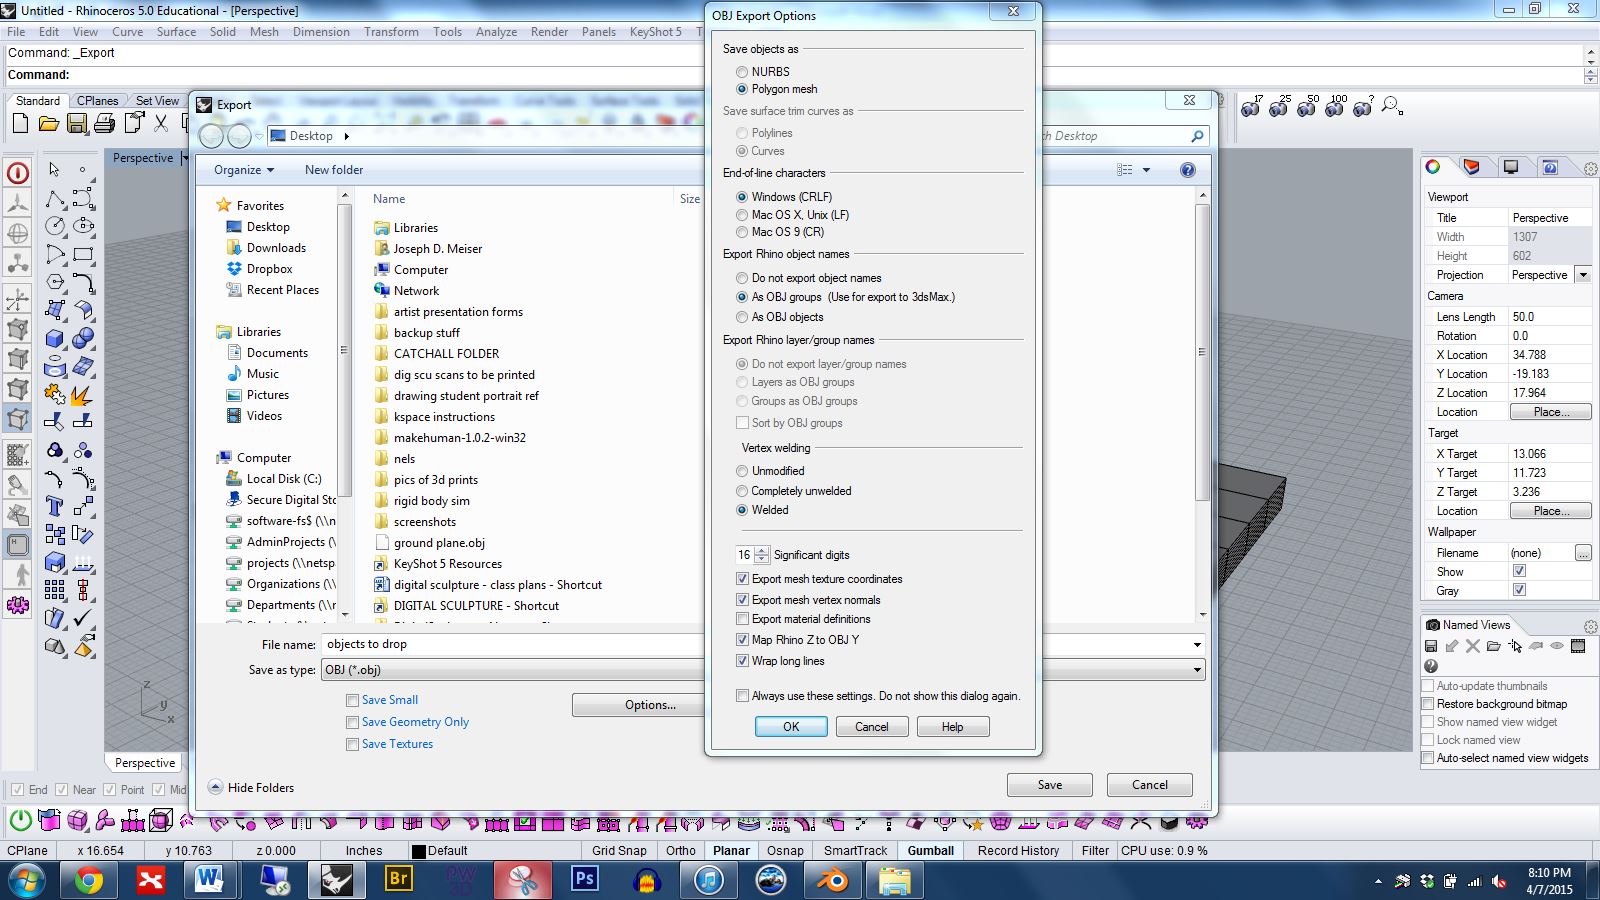
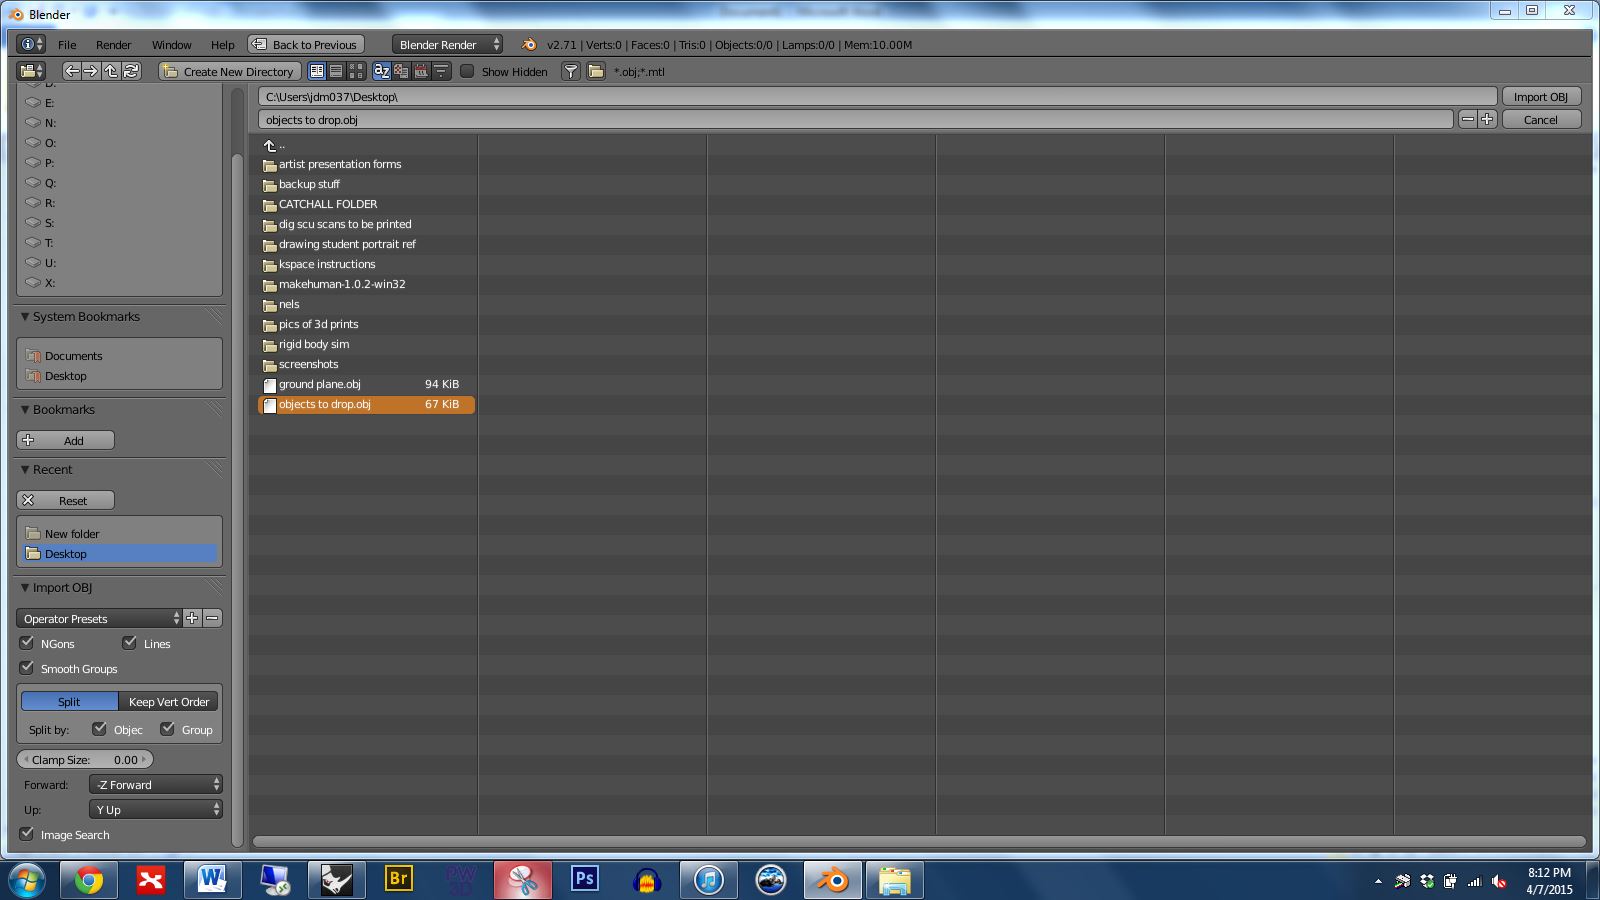
Export just the objects to drop as an OBJ. Use the settings shown below.
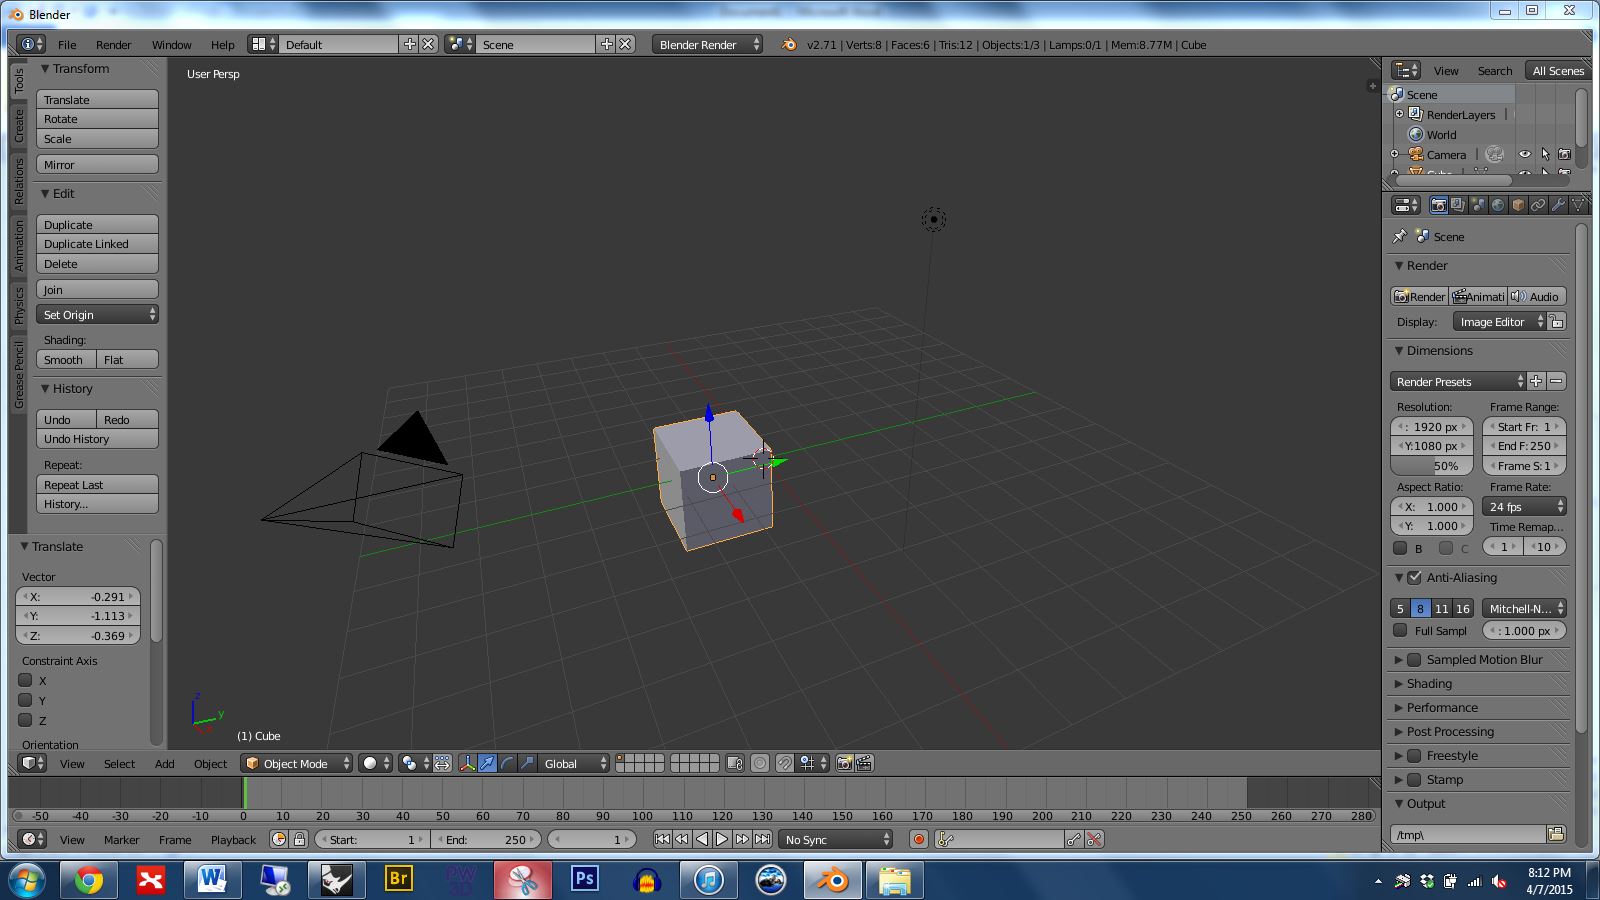
Open blender and delete the box, camera, and light.
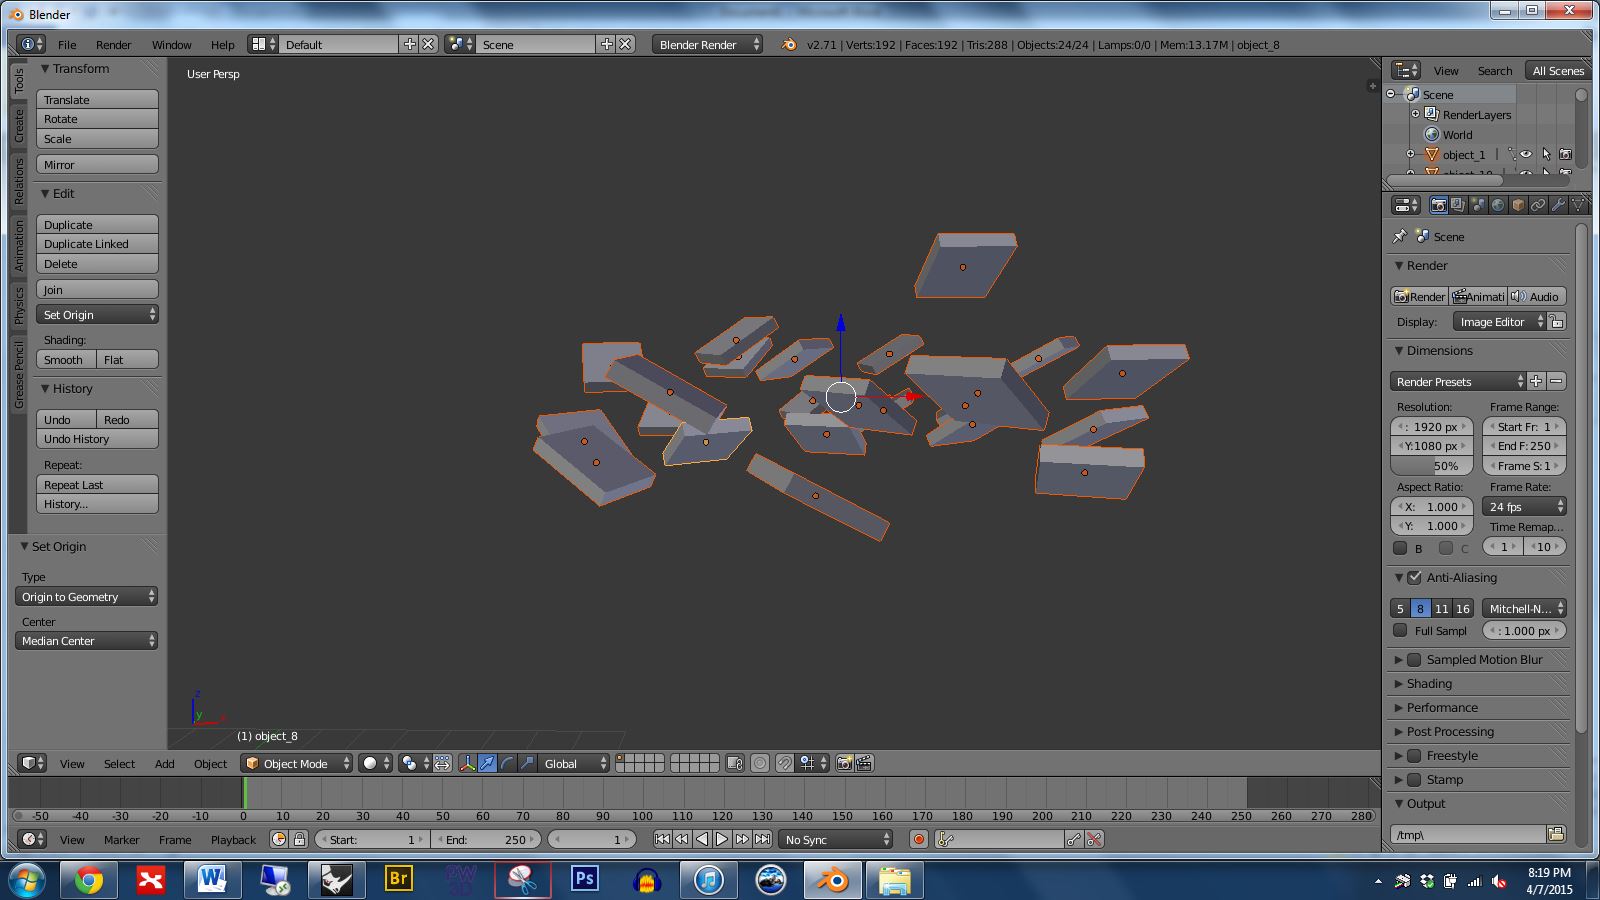
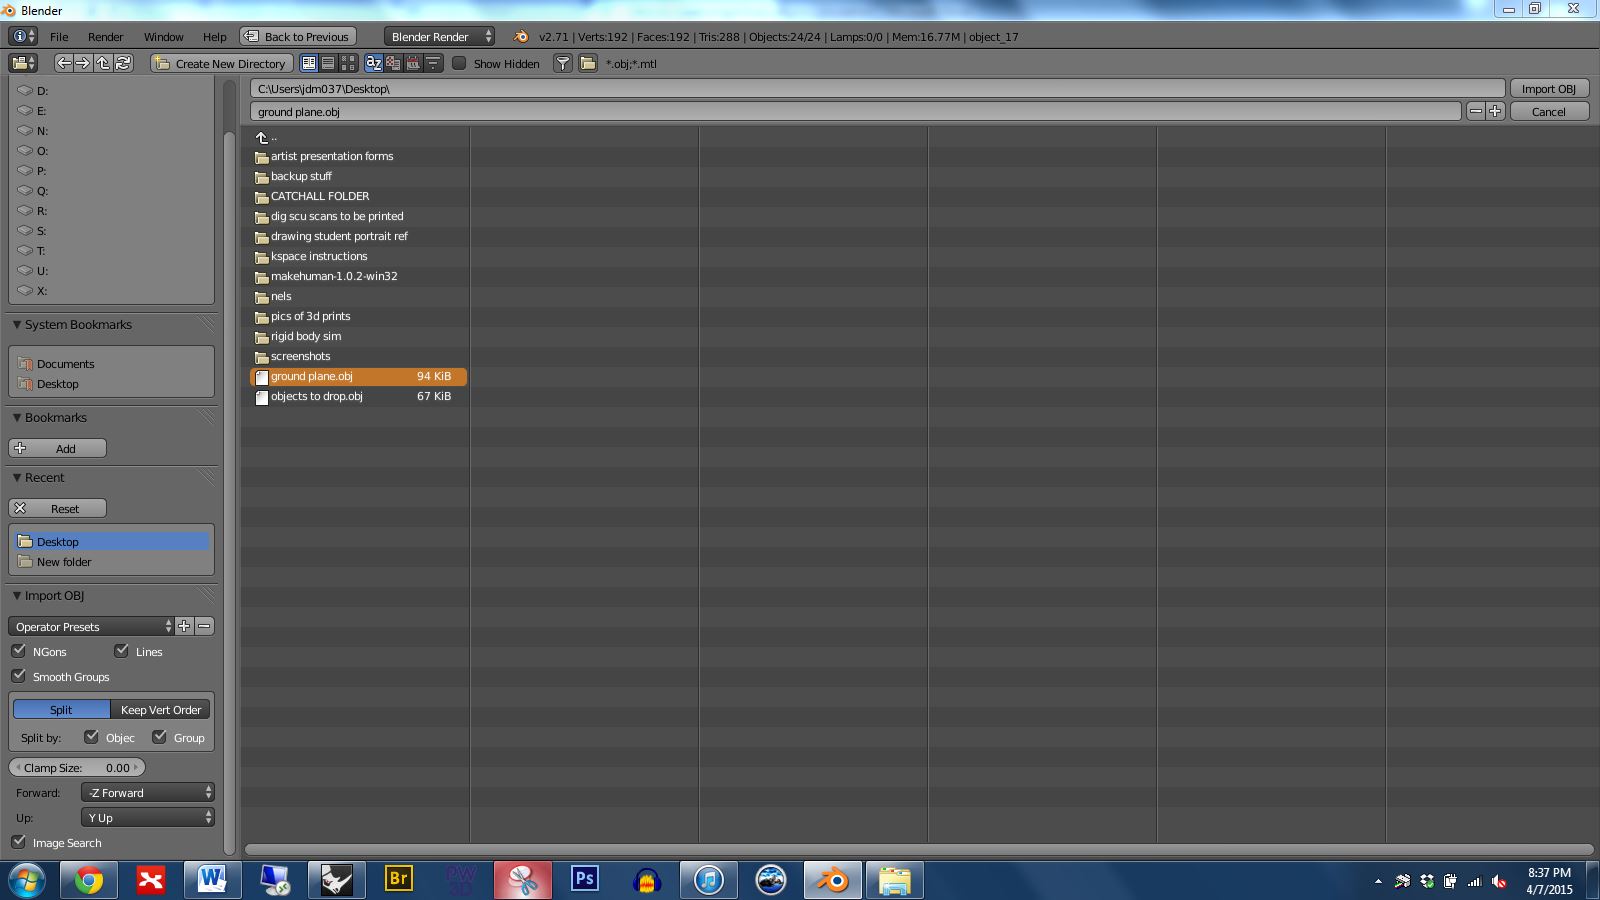
Import your objects to drop. Be sure to use the same settings shown in the lower left of the image below. If your objects appear off center you can zoom-selected by selecting some of the parts and pressing the . key in the keyboard’s numberpad.
Press B and use the lasso to select all of the parts you want to drop. Then reset object origins by pressing Shift Ctrl Alt and C at the same time, then choose “set origin to geometry”. Notice that a small orange dot appears on each part. *Note: if your objects seem to be joined together in a problematic way you can press P to unjoin them.
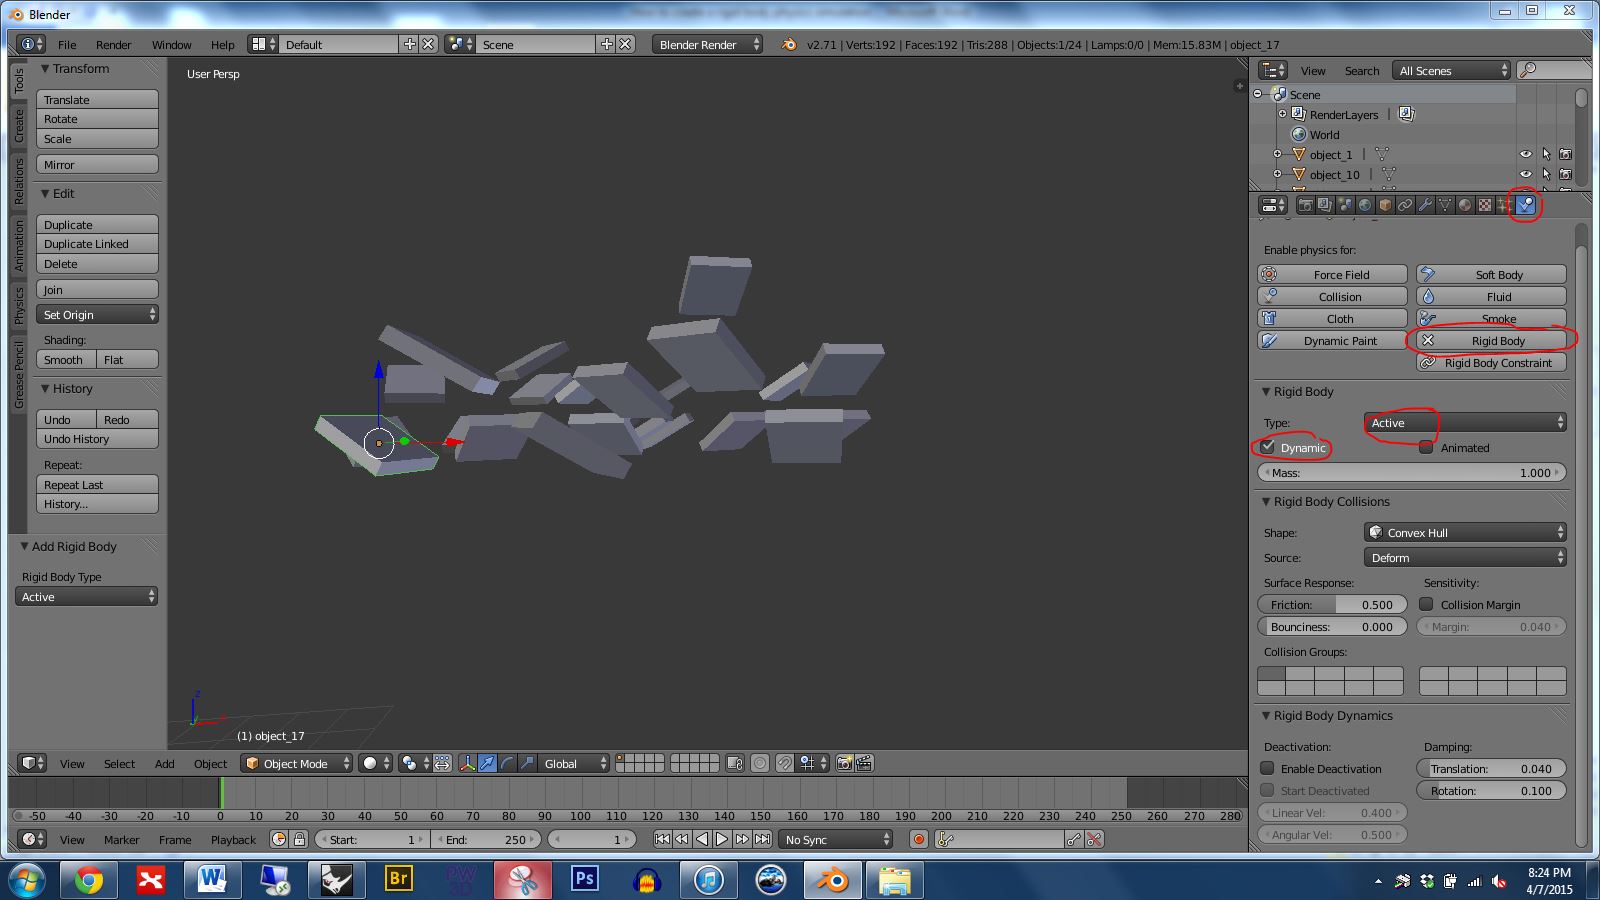
Select one of your drop parts, open the physics panel, and click on rigid body. Set it to be an active AND dynamic object.
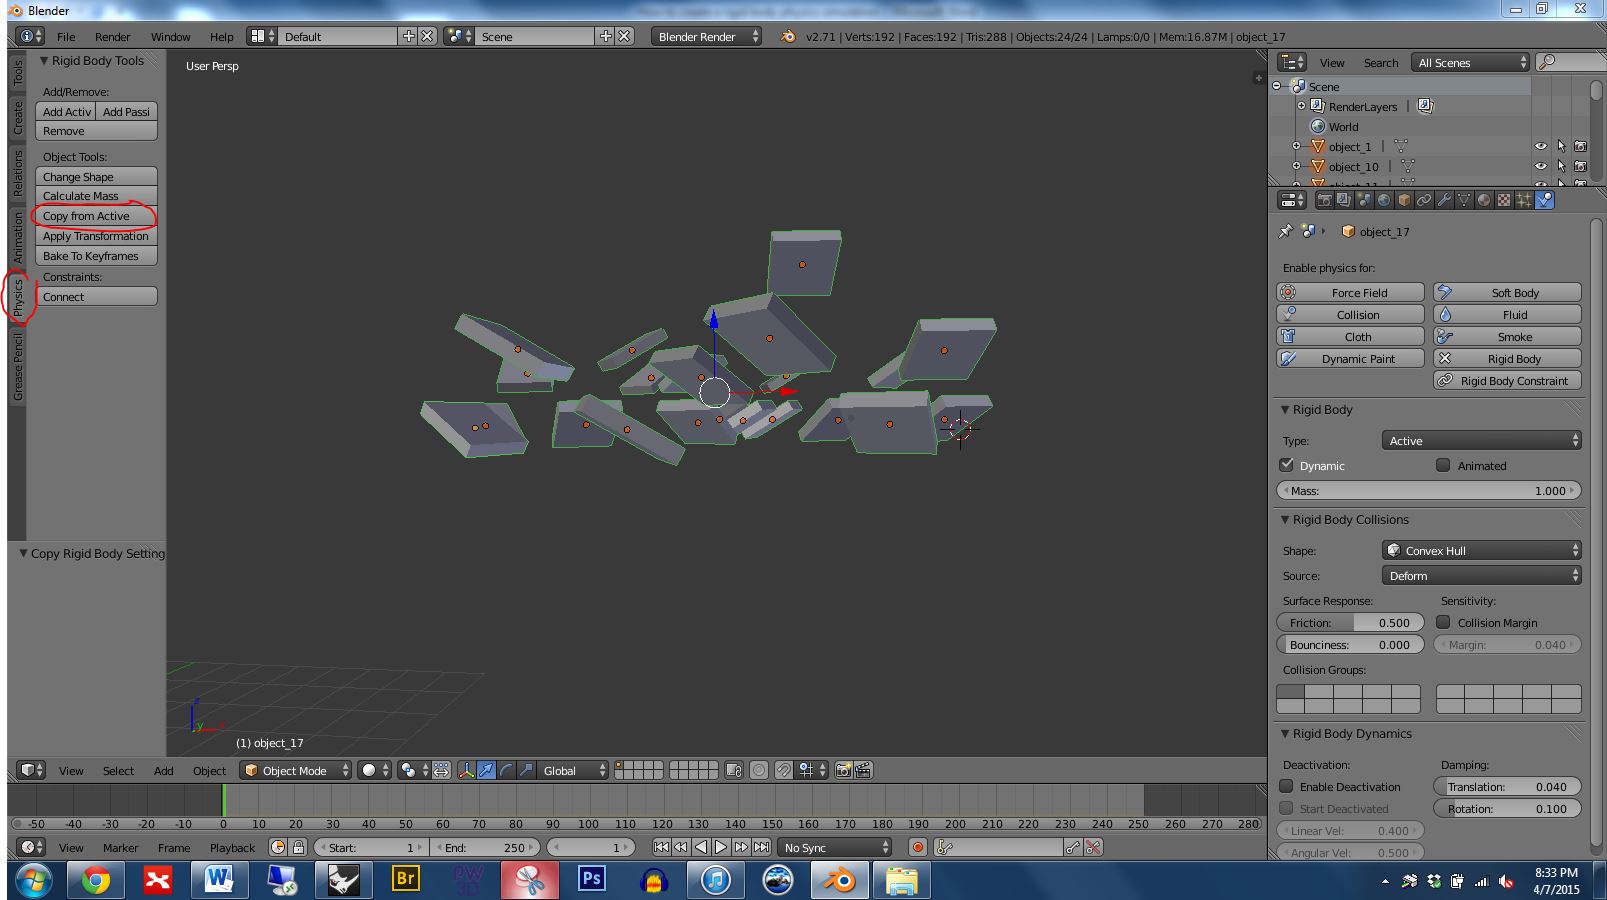
Now we will copy the settings from the first part to the others. Do this with the following steps: 1) Select all object that you wish to copy the physics properties to 2) Select the object you wish to copy the physics properties from (note: we select this one last so that it becomes the active selected object. This is the object that has the desired physics properties.) 3) Then in the left Physics panel under Object Tools choose Copy From Active.
Import the ground plane using the settings shown below.
Select the ground plane, go to the right physics panel, click on rigid body, and set the ground plane to by active but NOT dynamic.
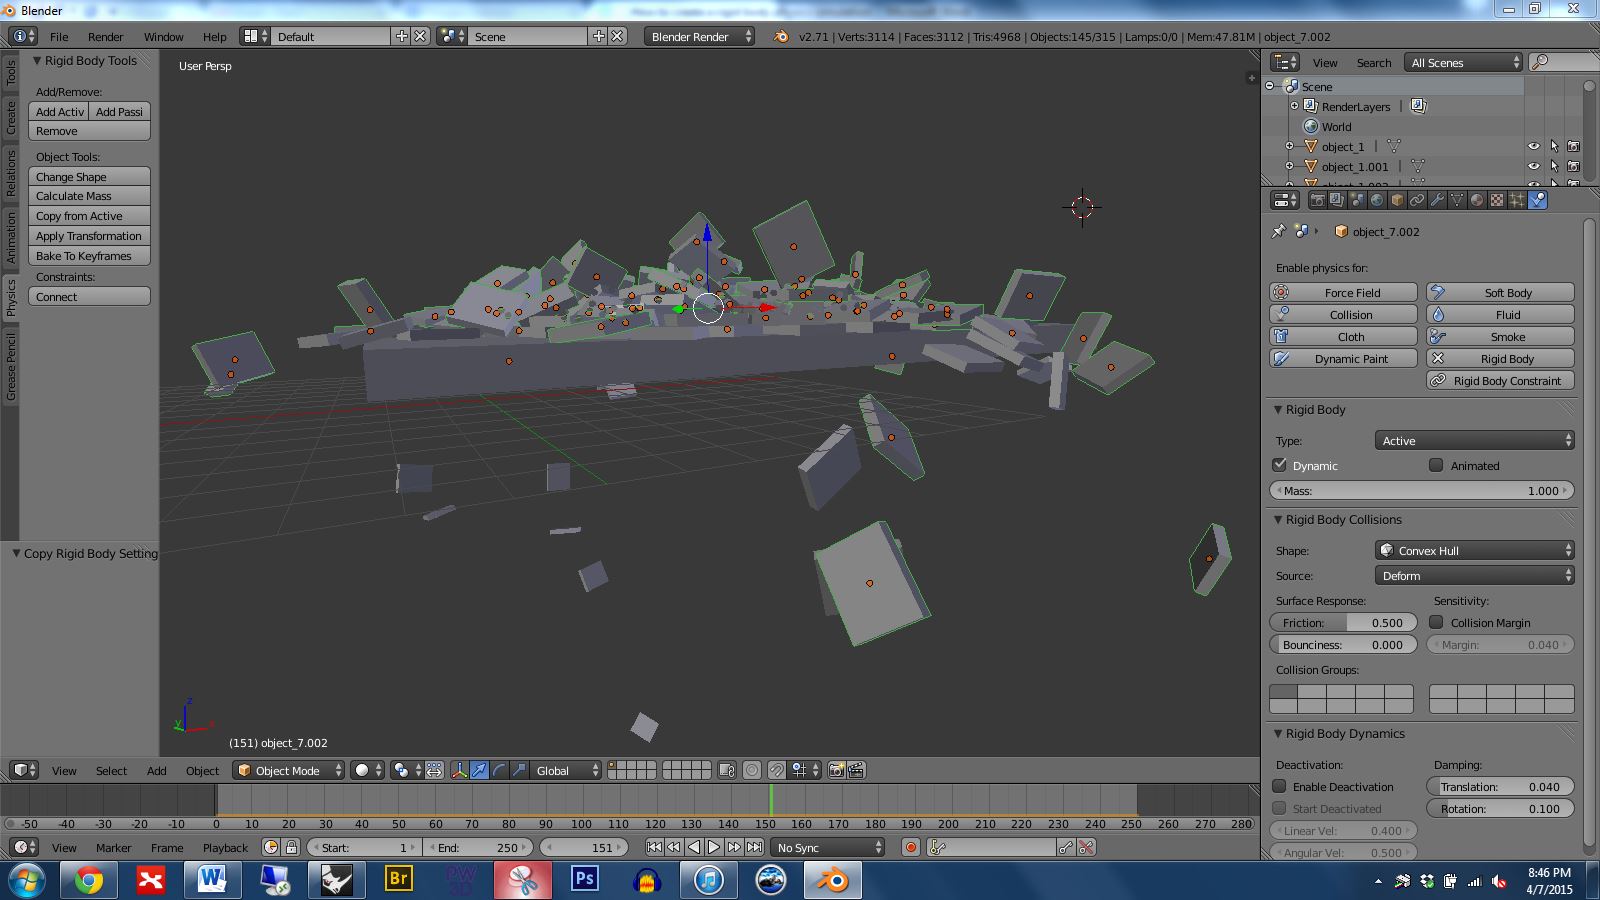
Press the play button shown in the image below to start the simulation. The parts should drop and land on the ground plane. If not, look back over the previous instructions and see if you missed something.
To create a more dramatic result I have copied and pasted the drop parts to create many more. When you are satisfied with the result, scroll the timeline to the moment you want to keep…
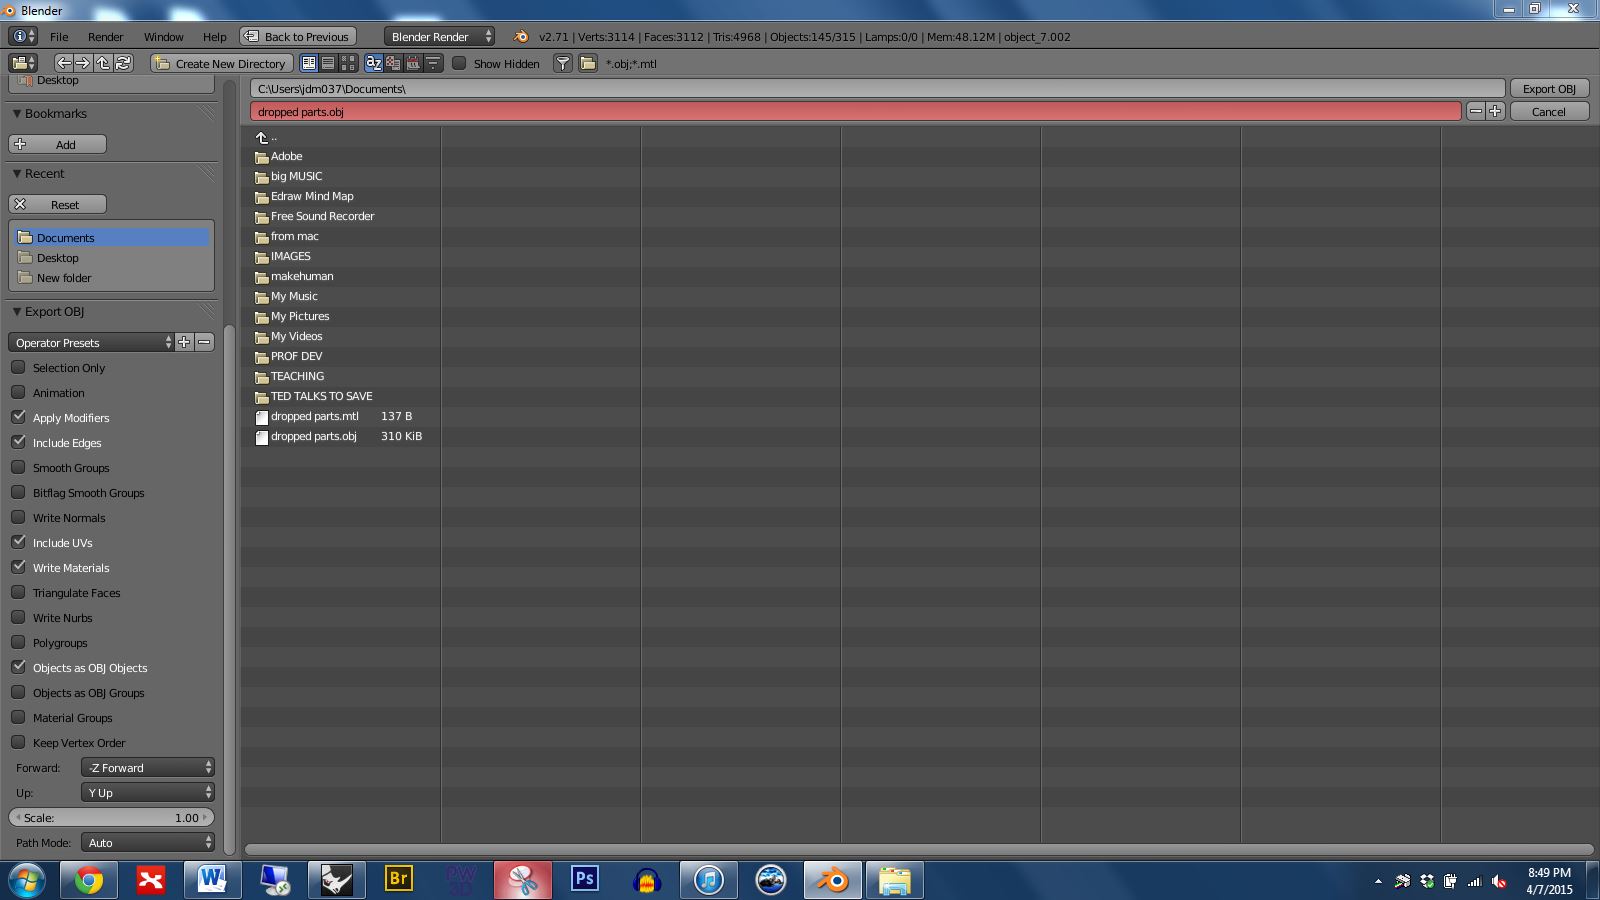
Then export as OBJ using the settings shown in the image below.
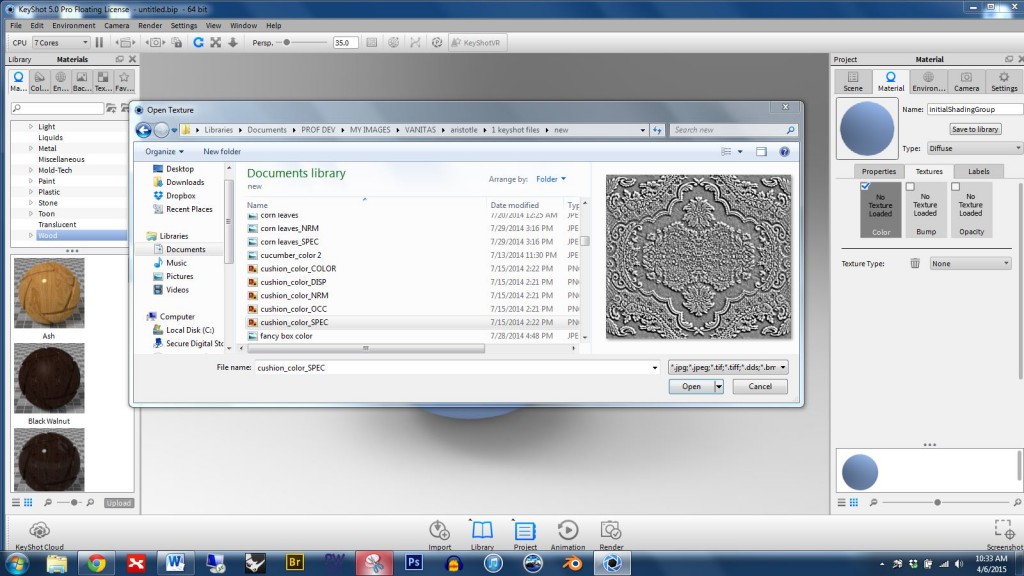
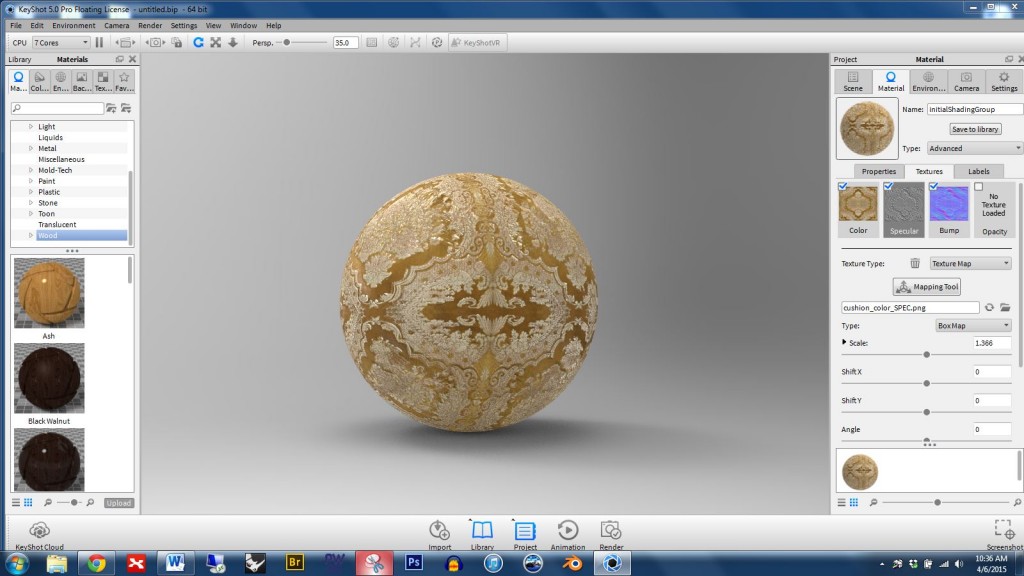
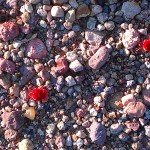
Crazybump can give you five types of texture files: color, displacement, normal, occlusion, and specular (shown below for the cushion part); however, of these, we can only use COLOR, NORMAL, and SPECULAR files in Keyshot
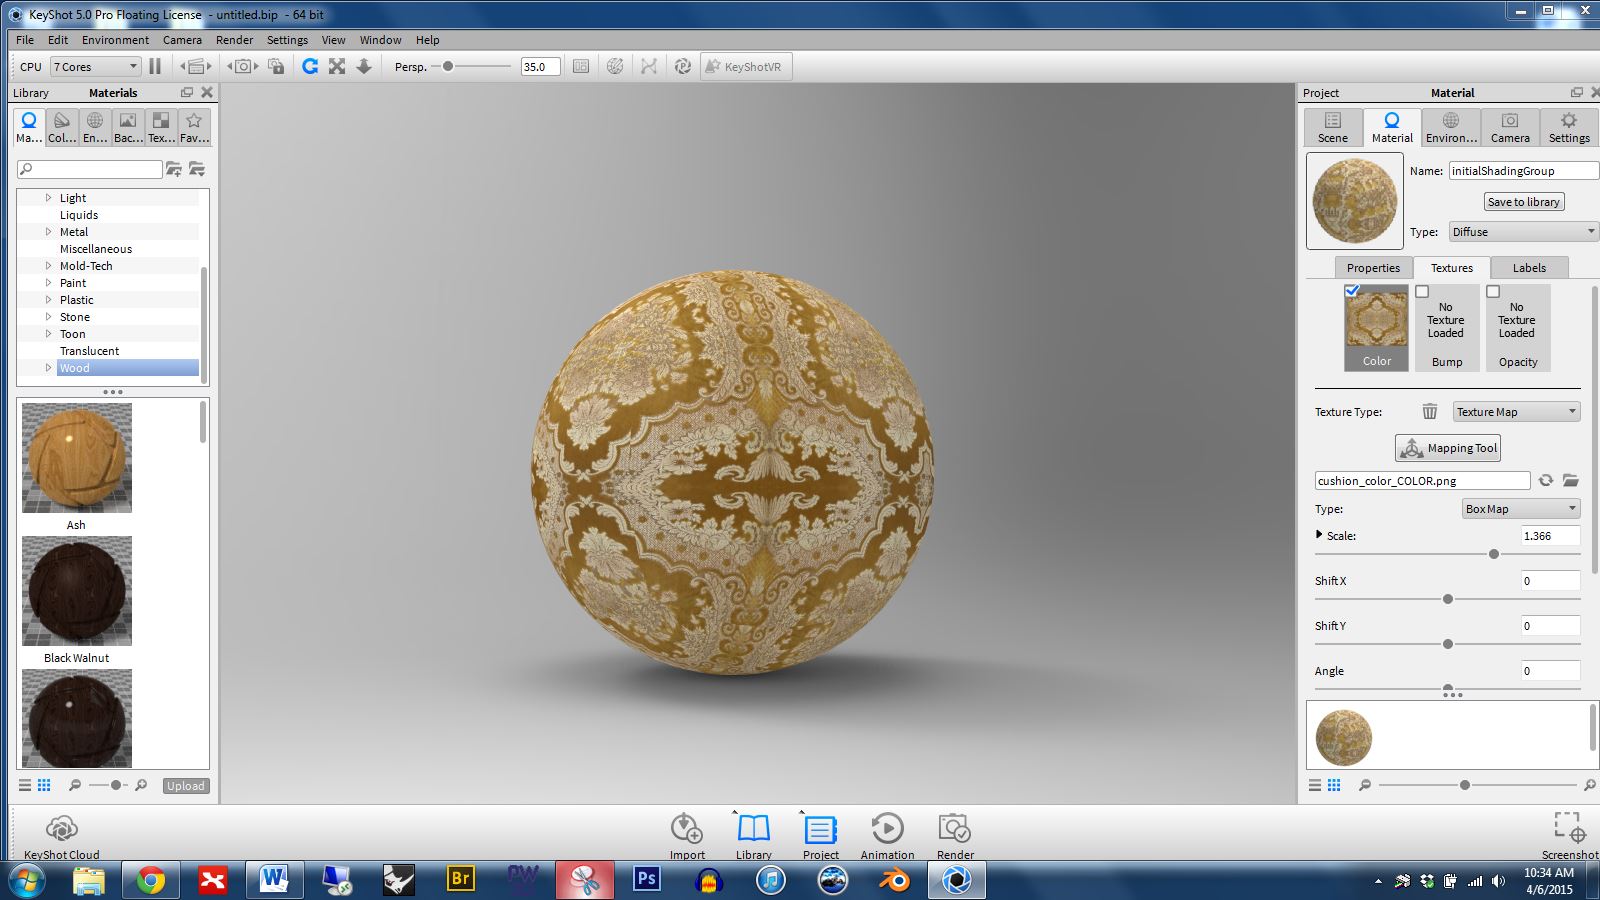
To get started in Keyshot double click on the part you want to apply the material to, go to the texture panel, and click the COLOR box, then select your COLOR file (see below)
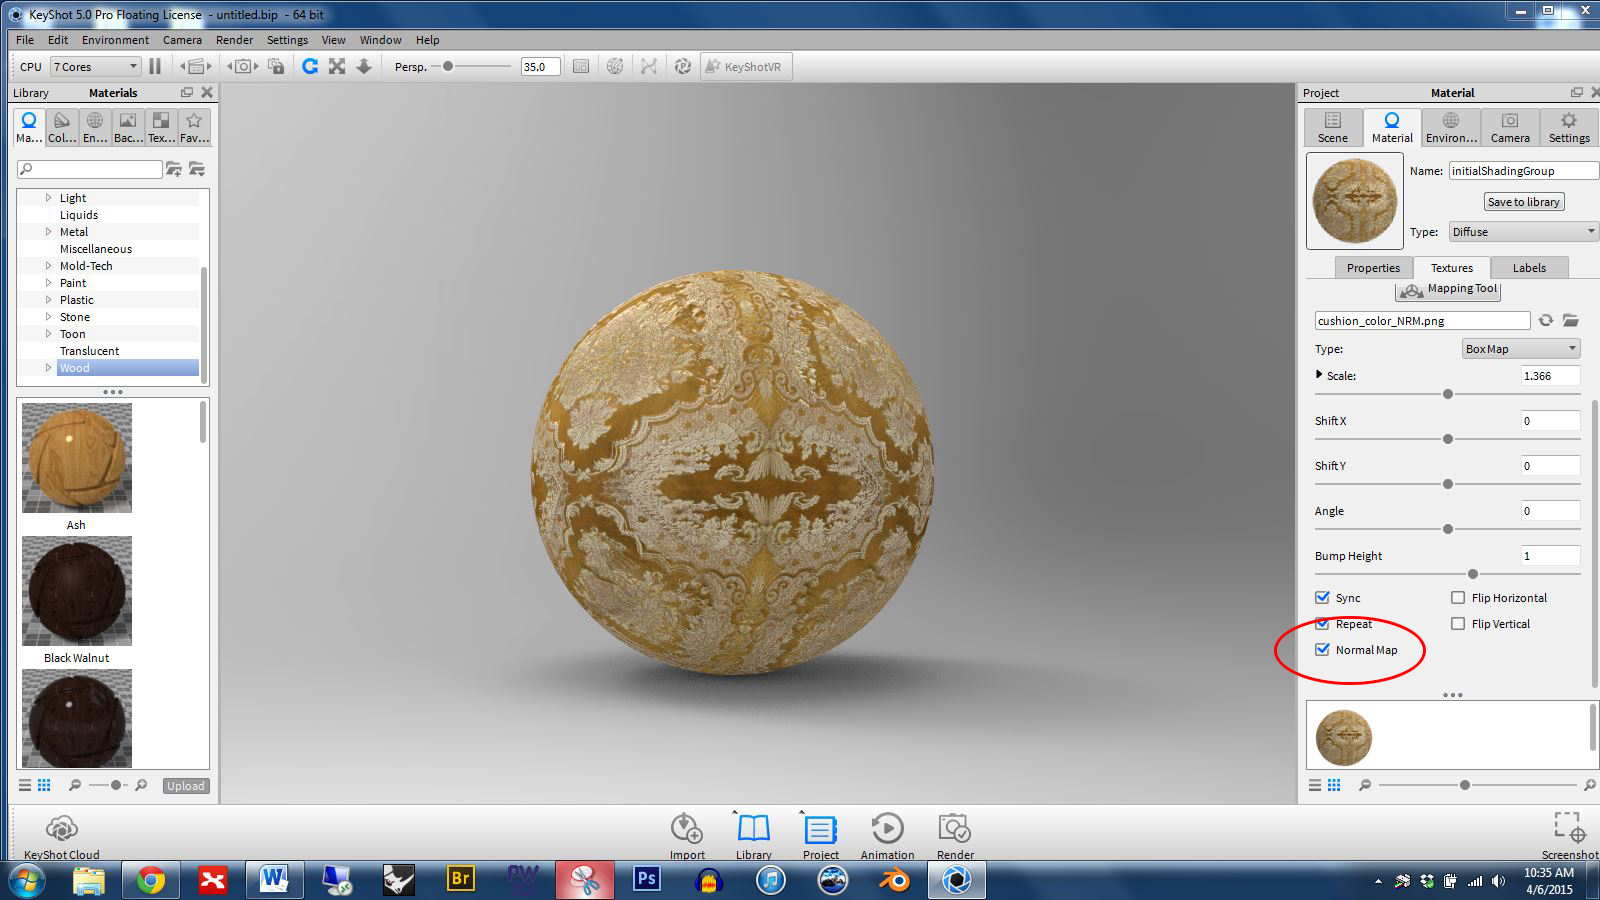
Next, click the BUMP box and select your NORMAL file (see below)
Scroll down in the texture panel and click the NORMAL MAP box — otherwise Keyshot will treat the file like a bump map and give poor results. (See the box circled in red below) Also note that you want the SYNC box to be checked. For your texture maps to line up properly it is important for SYNC to be turned on.
If you want to use a SPECULAR map to selectively adjust the reflectivity of your part you may need to change the material TYPE to ADVANCED (See the box circled in red below)
Click the SPECULAR box and select your specular file as shown below
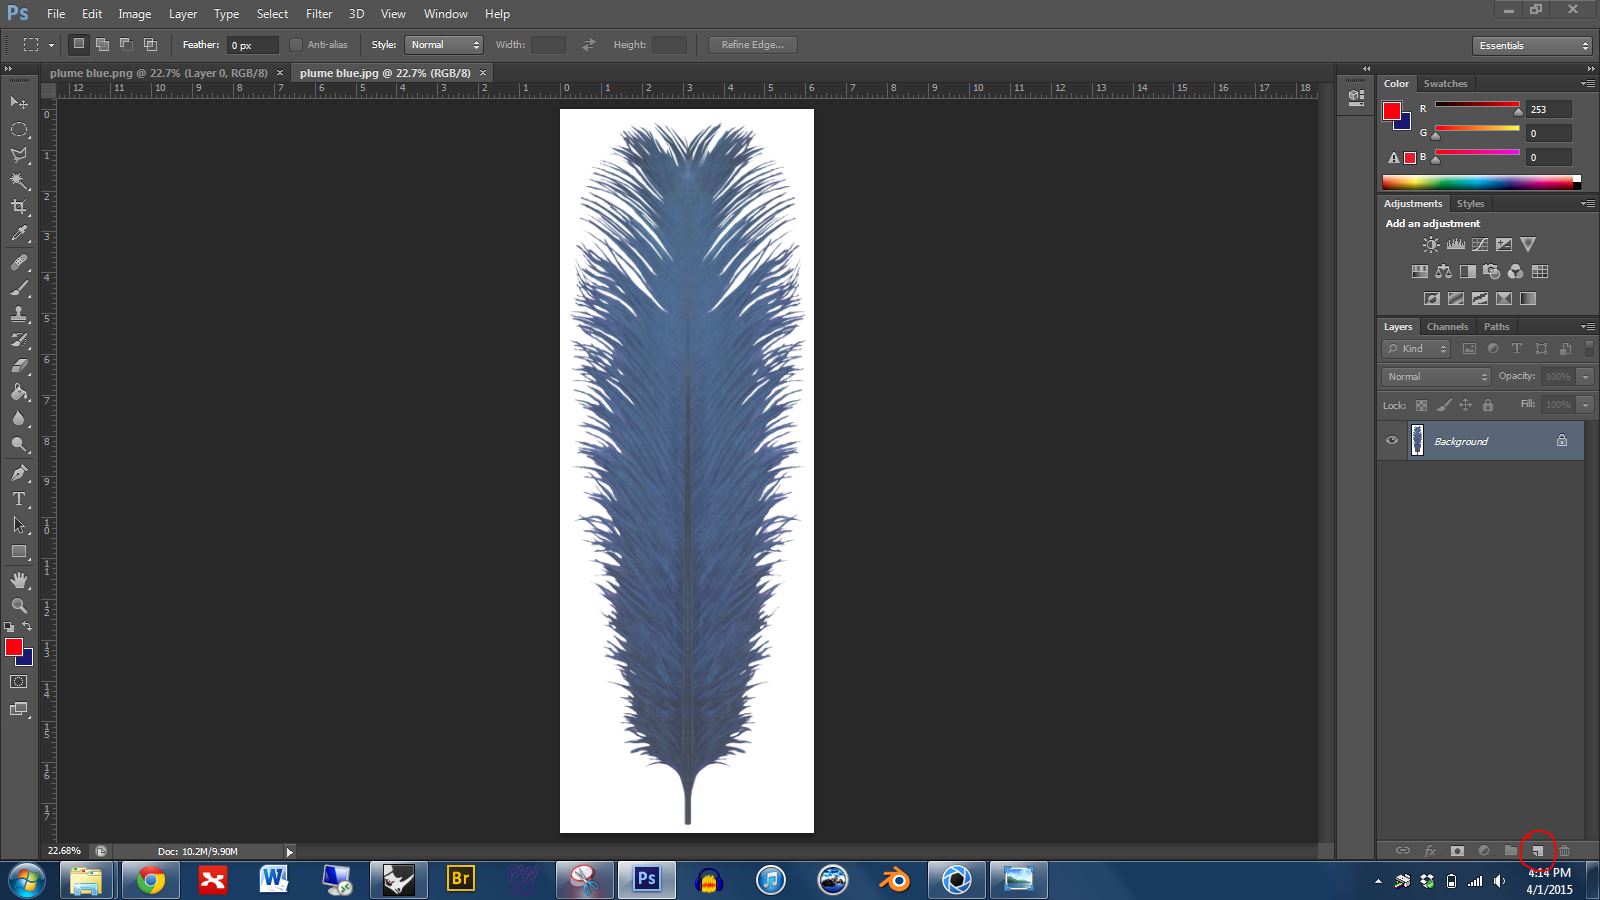
Step 2: In the layer pane, drag the background layer down to the new layer button and release (the new layer button is circled in red below). This will give you a background copy. Then hide the background.
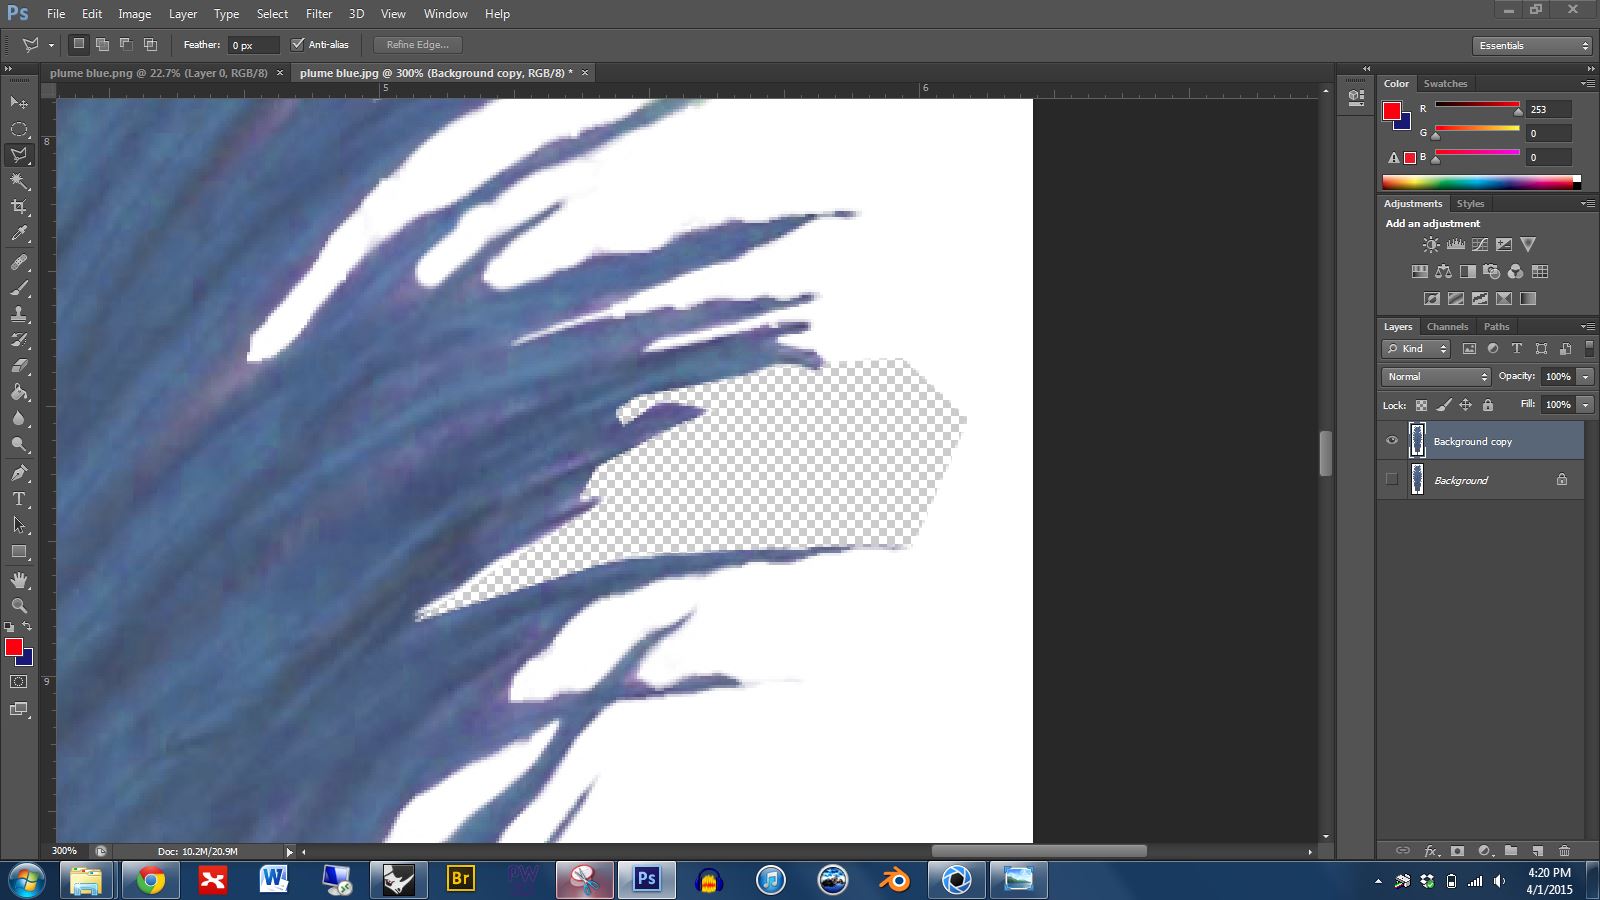
while zoomed in, if you push the space bar a little hand will appear that will allow you to move around
press control d to deselect
Step 4: When you’re finished deleting unwanted parts of the image you’ll want to save your file as a PNG.
Step 5: Now you need to set up the custom texture mapping. My favorite way to do this (when working with simple planes) is to pictureframe the PNG file in Rhino, then rebuild the plane (add more control points and change degree)… this will build in the UV mapping from the start.
Step 6: Distort the plane as needed.
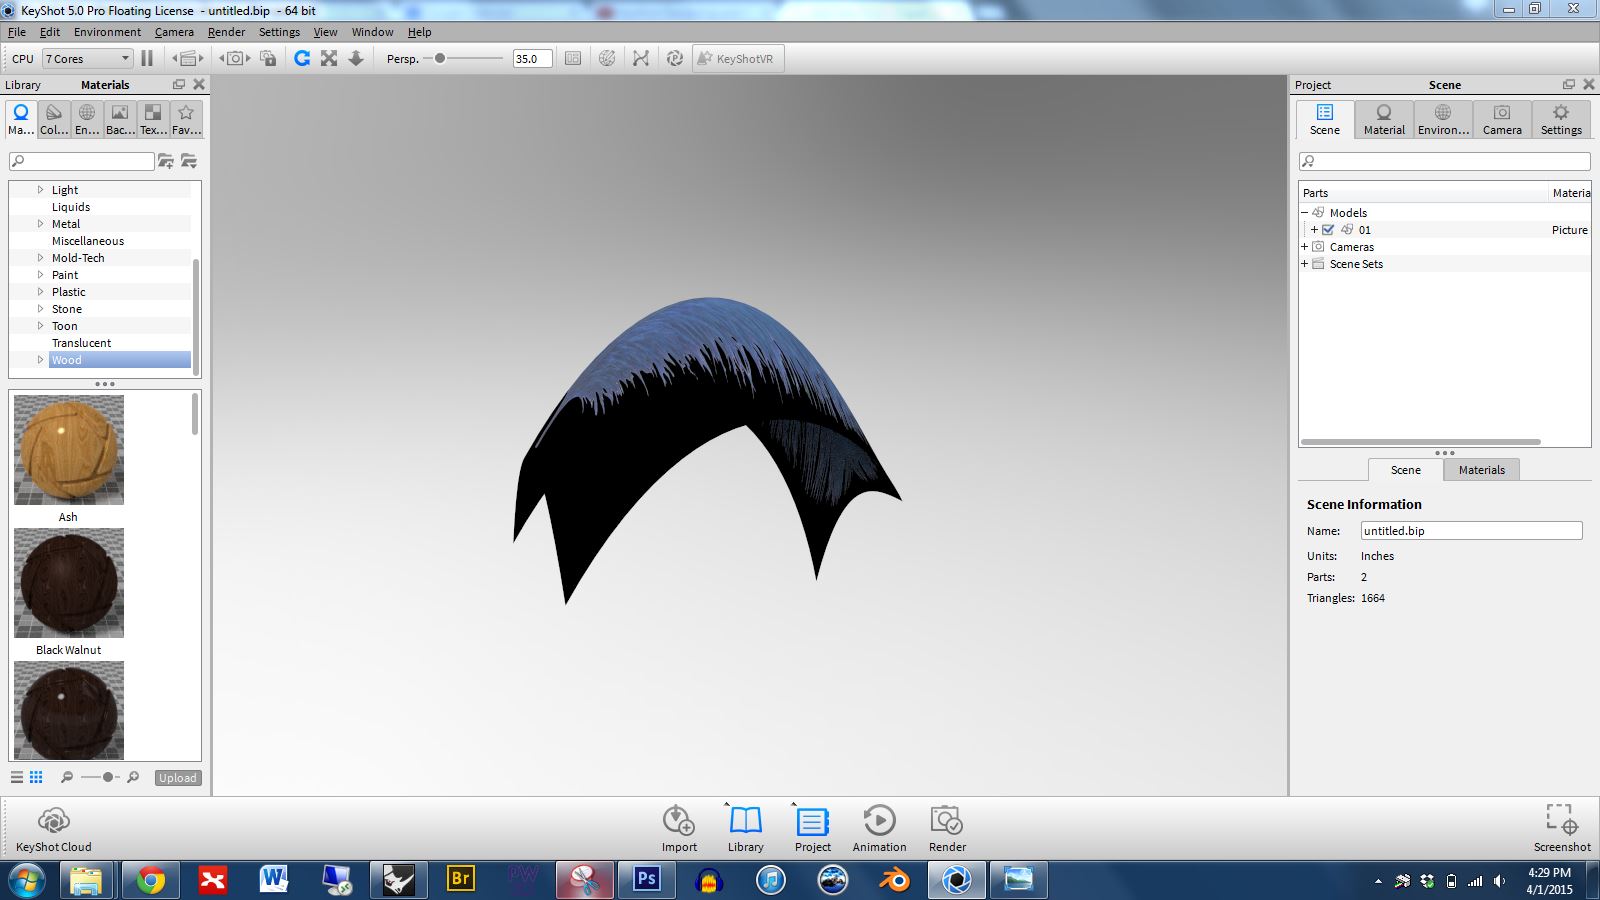
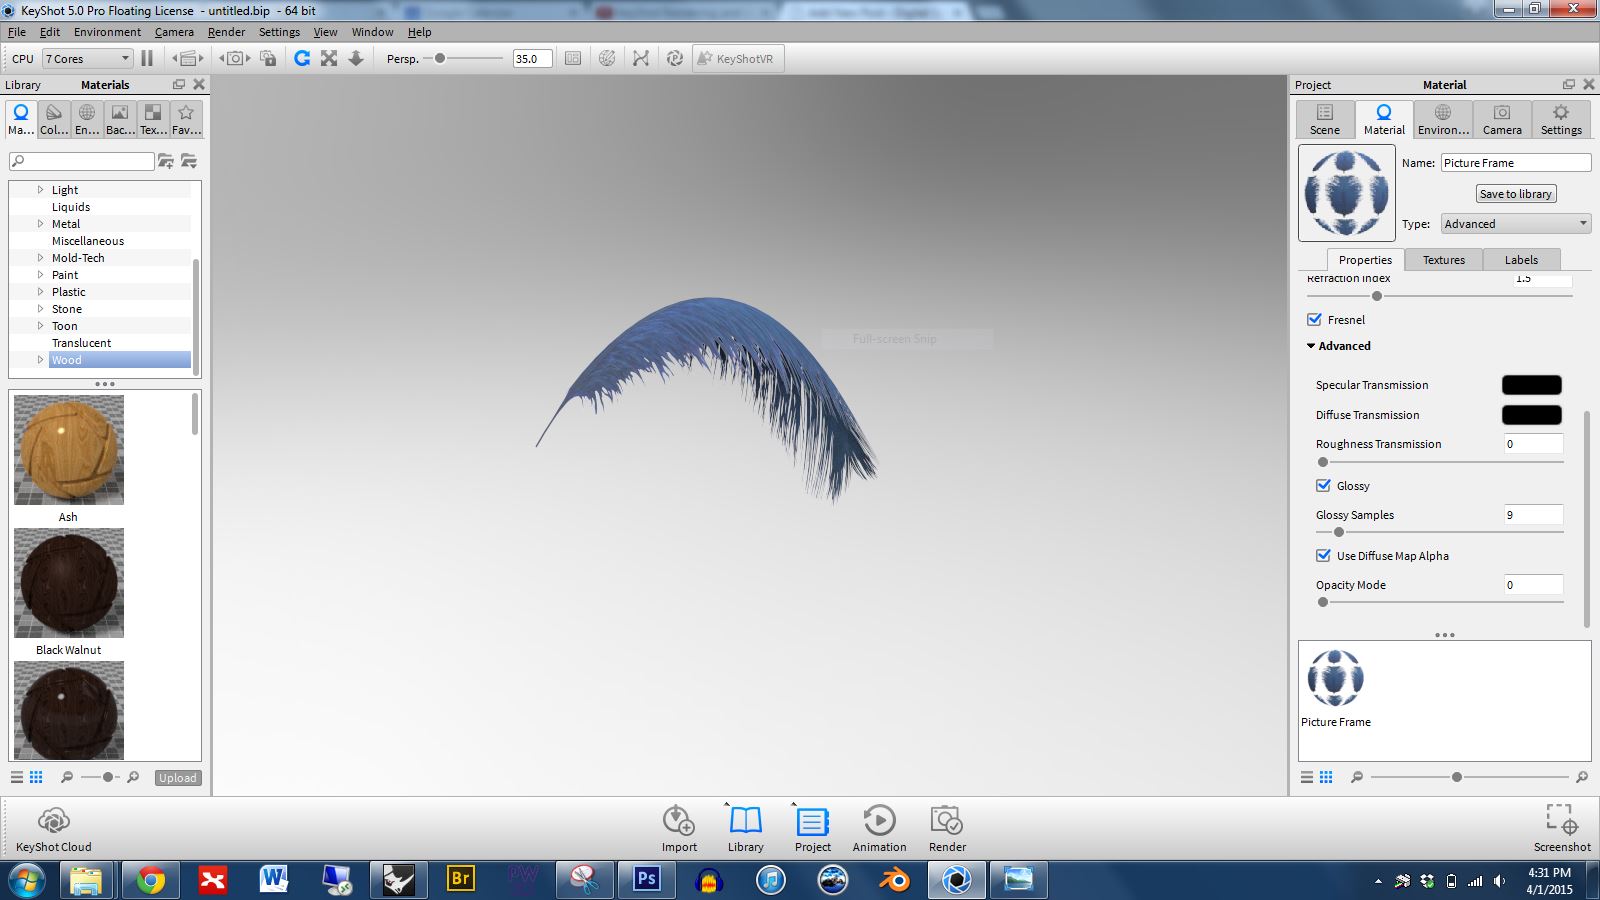
Step 7: Open Keyshot and import the Rhino file. When first imported you’ll see that the blank areas are black.
Step 8: Right click on the part and click to edit the material. In the material properties, in the advanced panel, find the box for “use diffuse map alpha” and click it. The blank pixels will disappear.
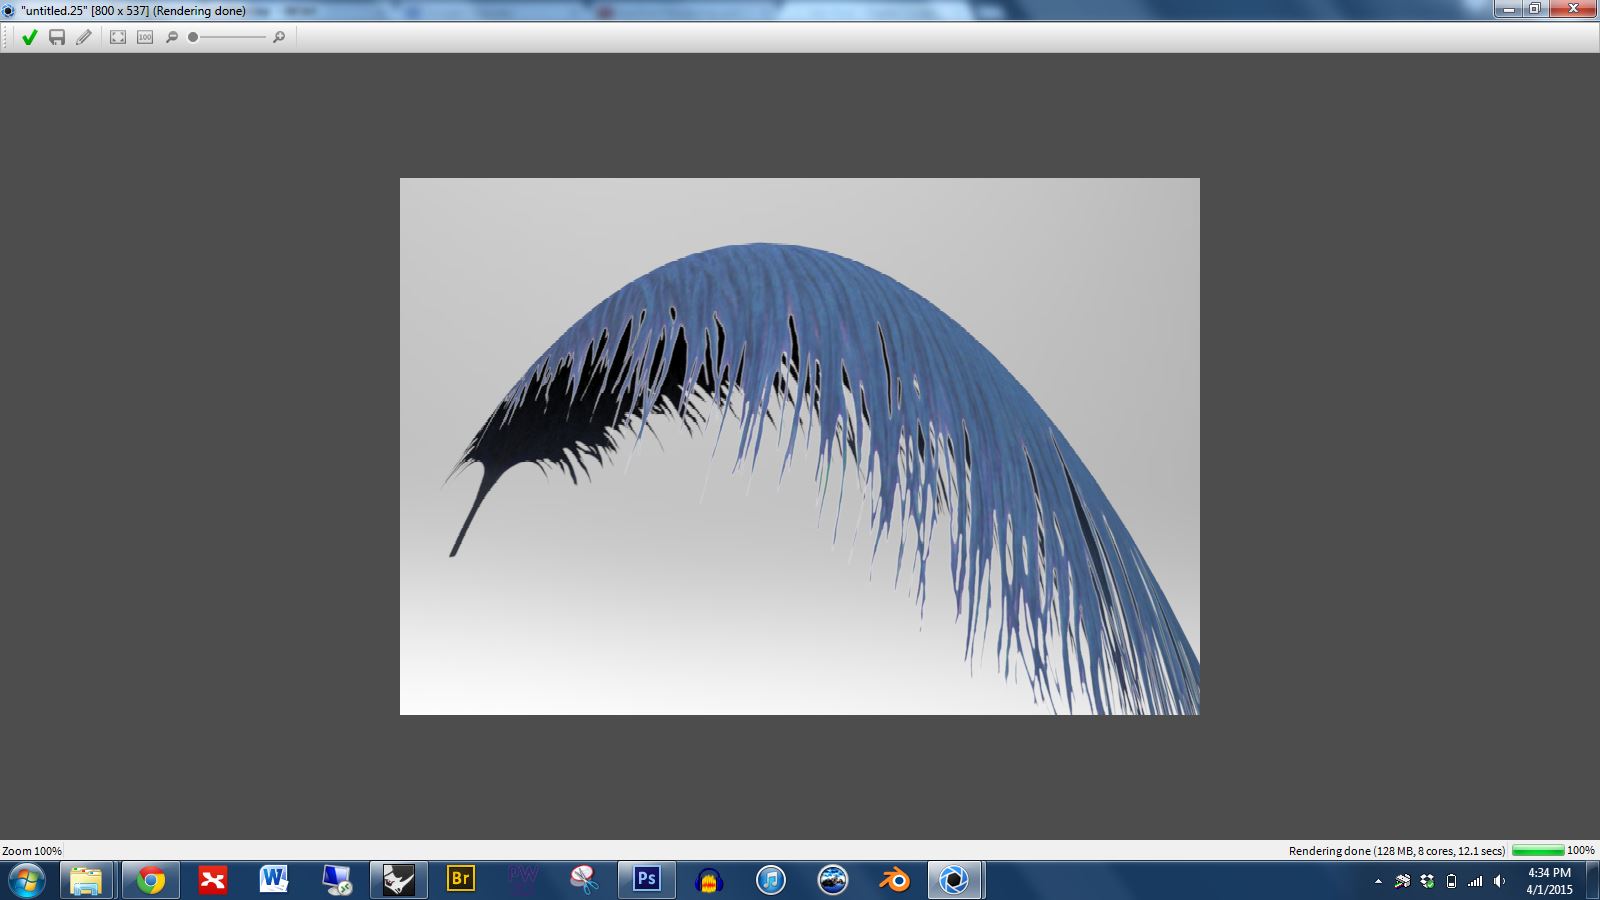
Step 9: Notice that there is a white outline around the feather (see below)
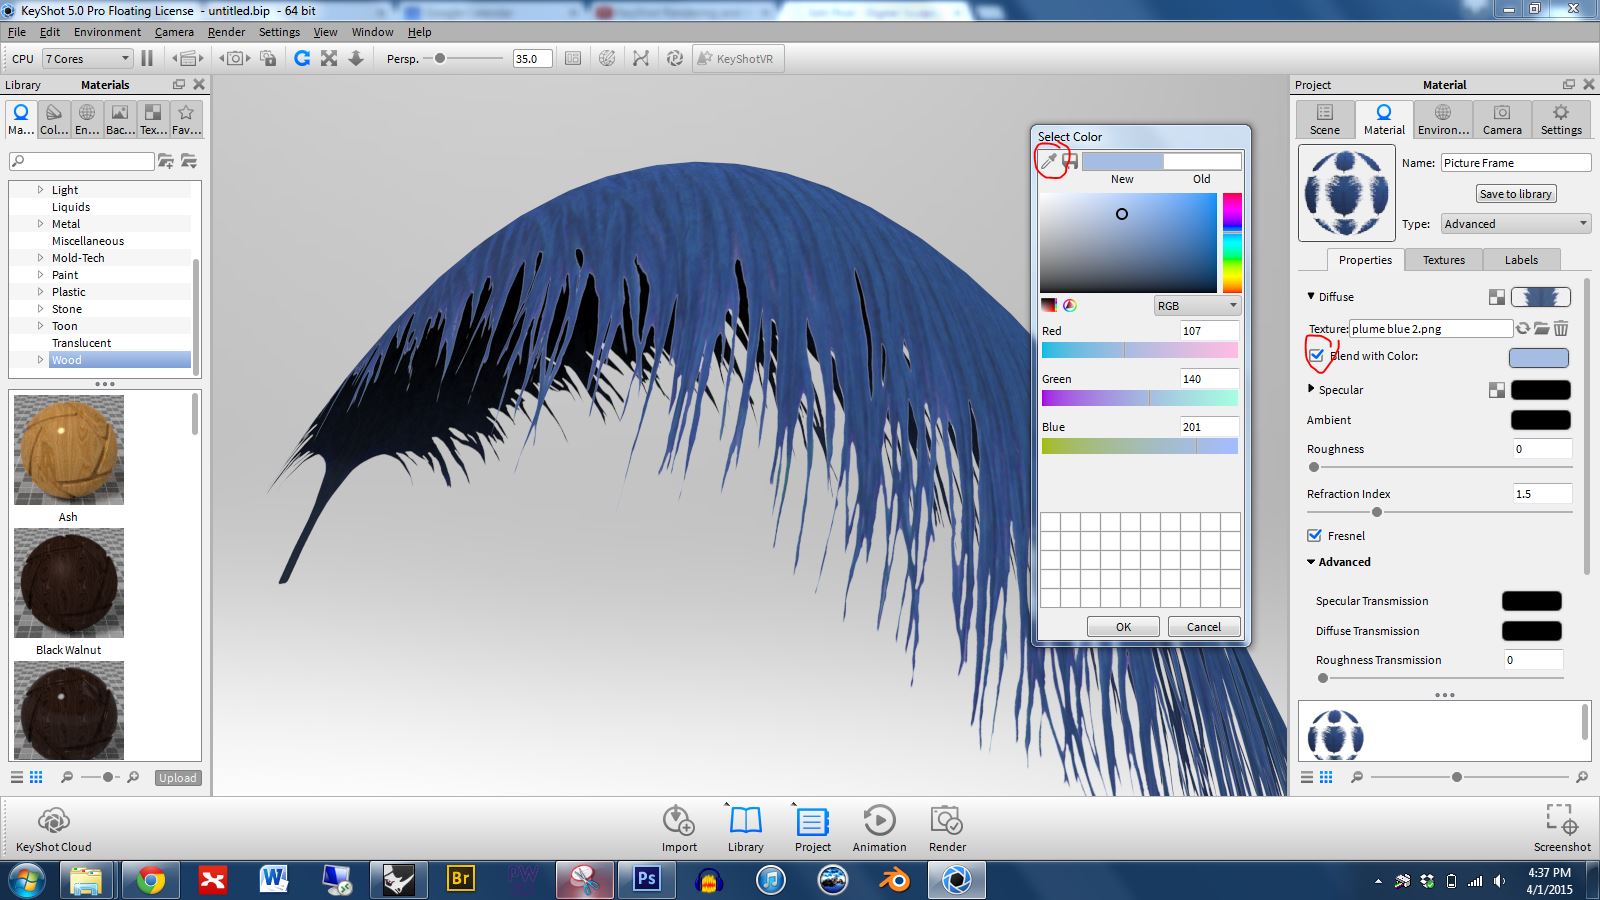
Step 10: We can minimize the outline by editing the material properties. You’ll want to choose to “blend with color” and then use the eye dropper to grab the color of your object, in this case a light blue.
Note: If your geometry is more complex and you’re not able to pictureframe your image then you’ll need to learn how to unwrap and use the UV editor. Check out the section on “Learning how to use UV coordinate mapping when necessary for complex forms” in this tutorial: http://digitalsculpture.blogs.bucknell.edu/creating-custom-materials/
Professor’s suggestions on creating animations in Keyshot:
Start simple. Before trying to animate your project I encourage you to set up a few primitives in a Keyshot scene, create a simple animation, and render the result at a small scale (e.g. 50 by 50 pixels). This will help you understand the workflow more quickly with minimal processor lag.
Expect the render of animation projects to take a looooonnnnngggg time. Get an early start and consider using multiple computers. When you’re setting up the render output options be sure to check the box that allows for frames output. This will save the individual frames as JPEGS. By doing so you’ll be able to render on multiple computers simultaneously. For example, you could render frames 1-30 on one computer, 31-60 on another computer, 61-90 on another. Then, after all of the renders are complete you can use a program like IMovie or Final Cut to put the JPEGS together into a quicktime video.
Upload your final result to YouTube. This is a very user-friendly way to share your work.
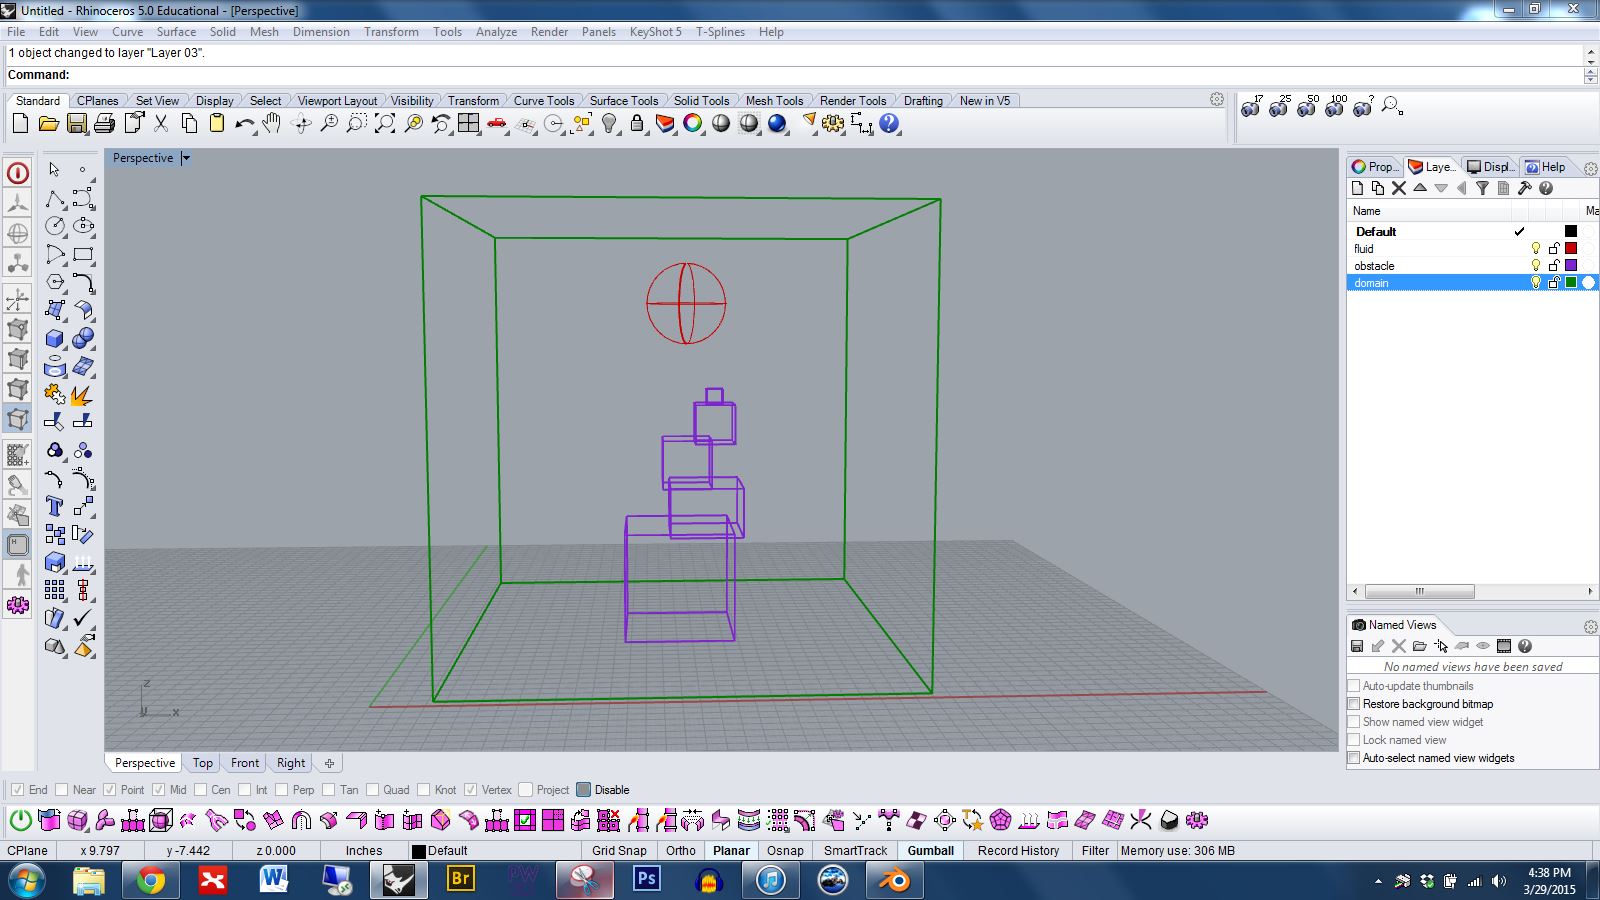
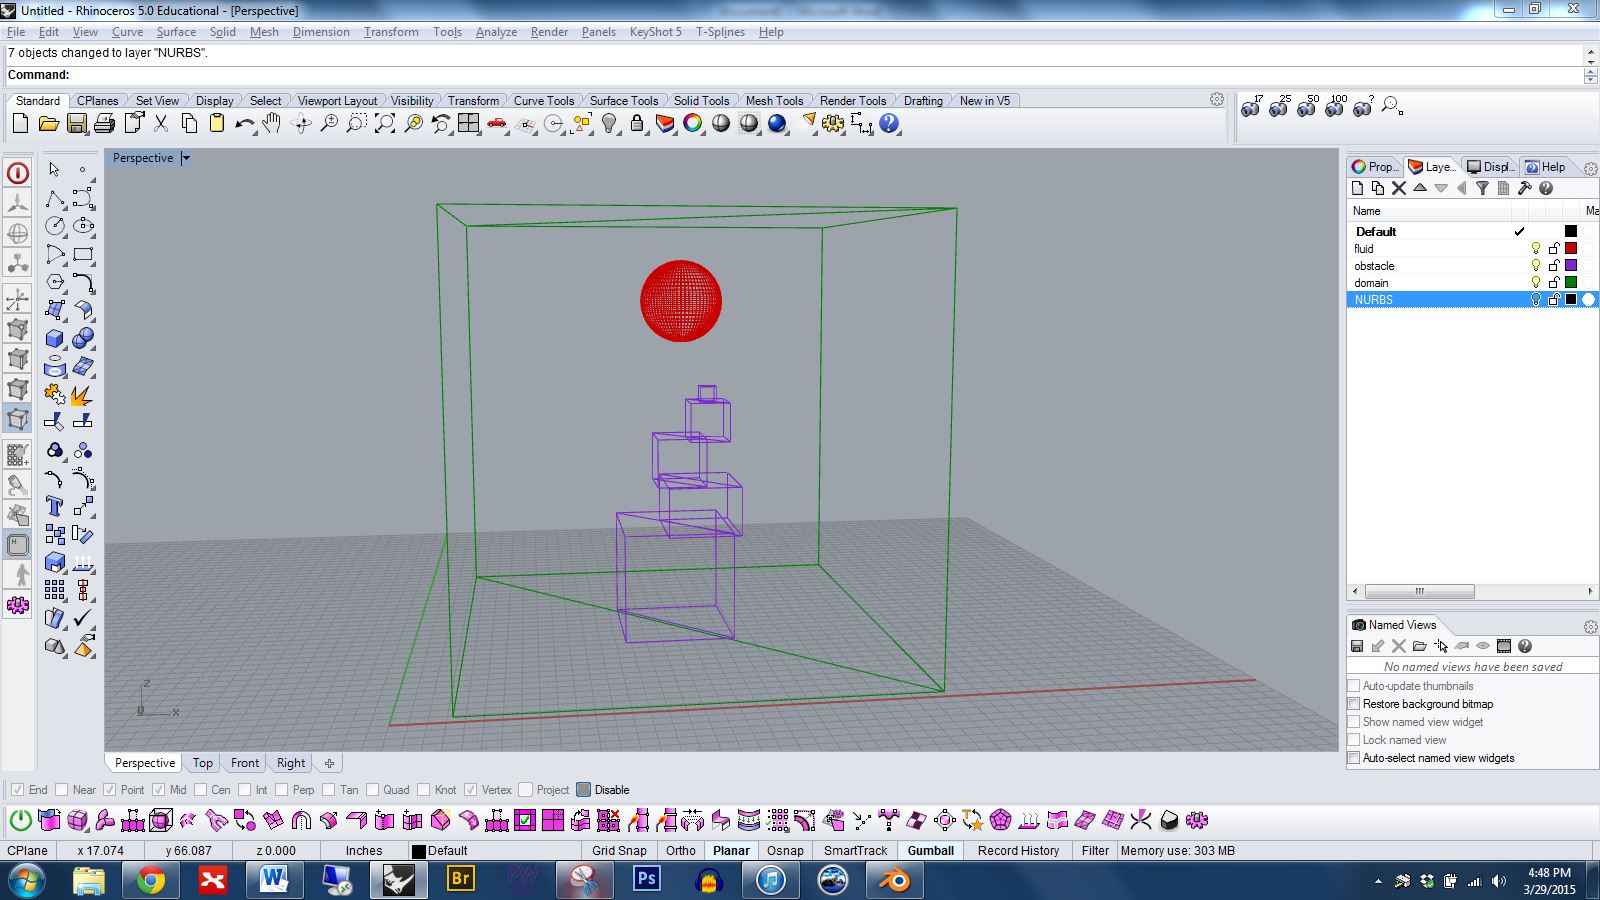
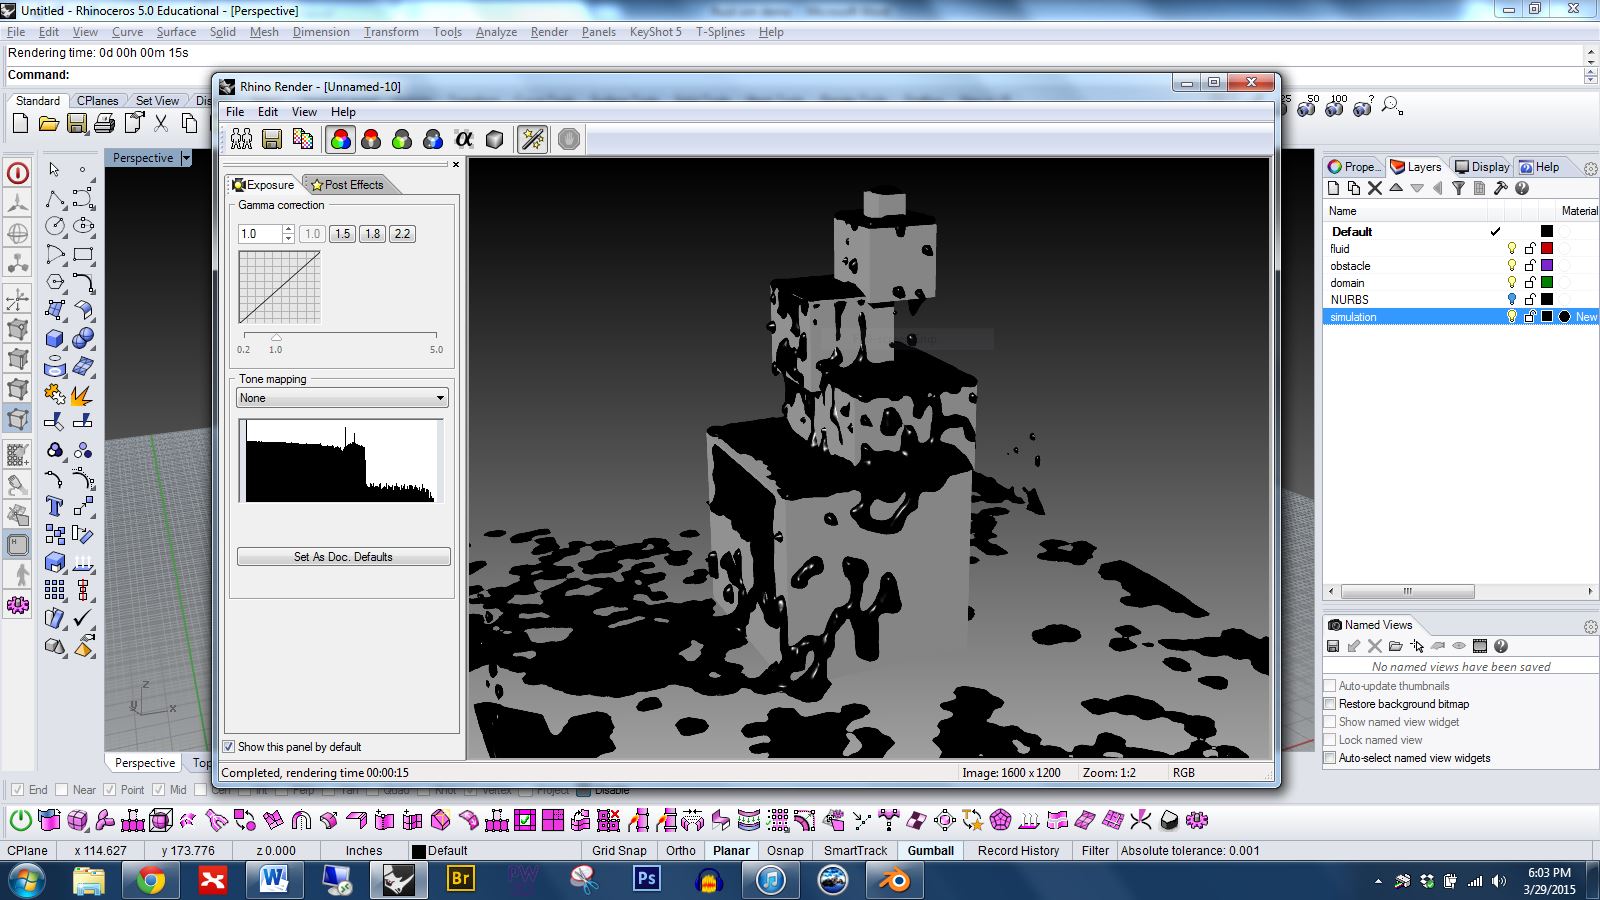
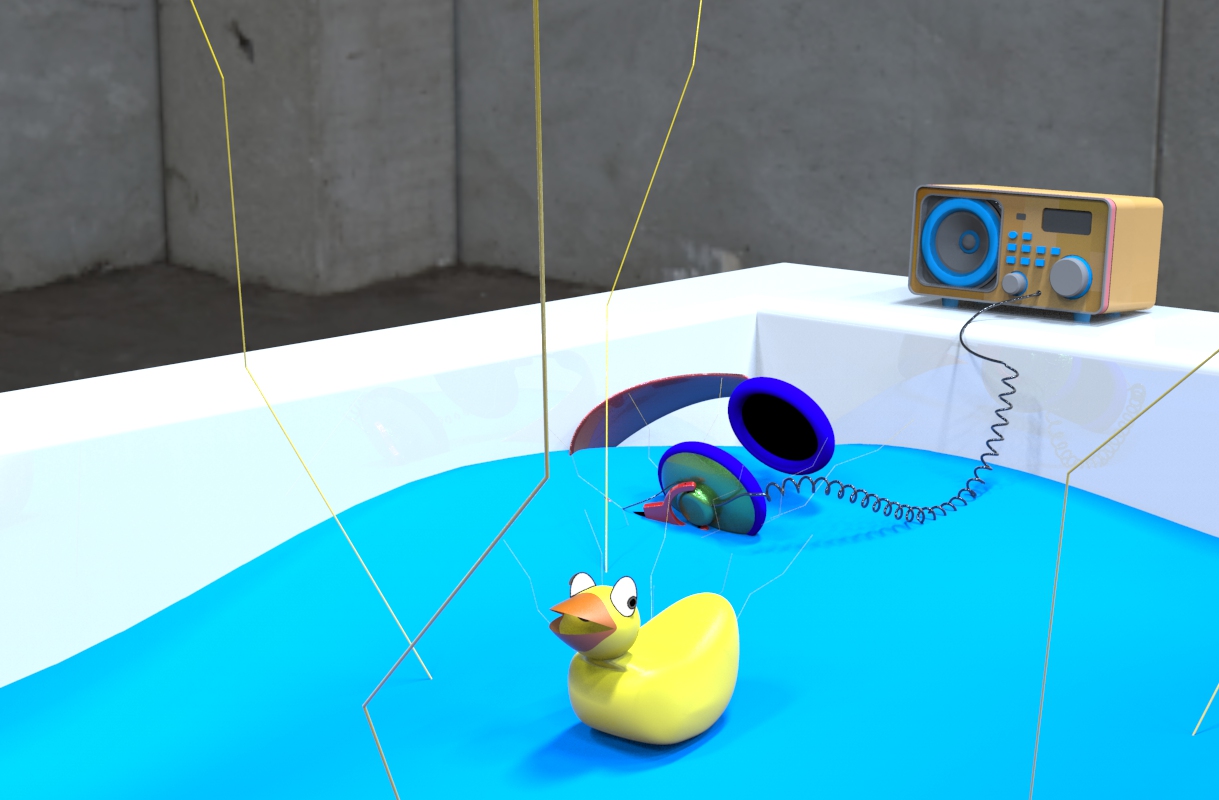
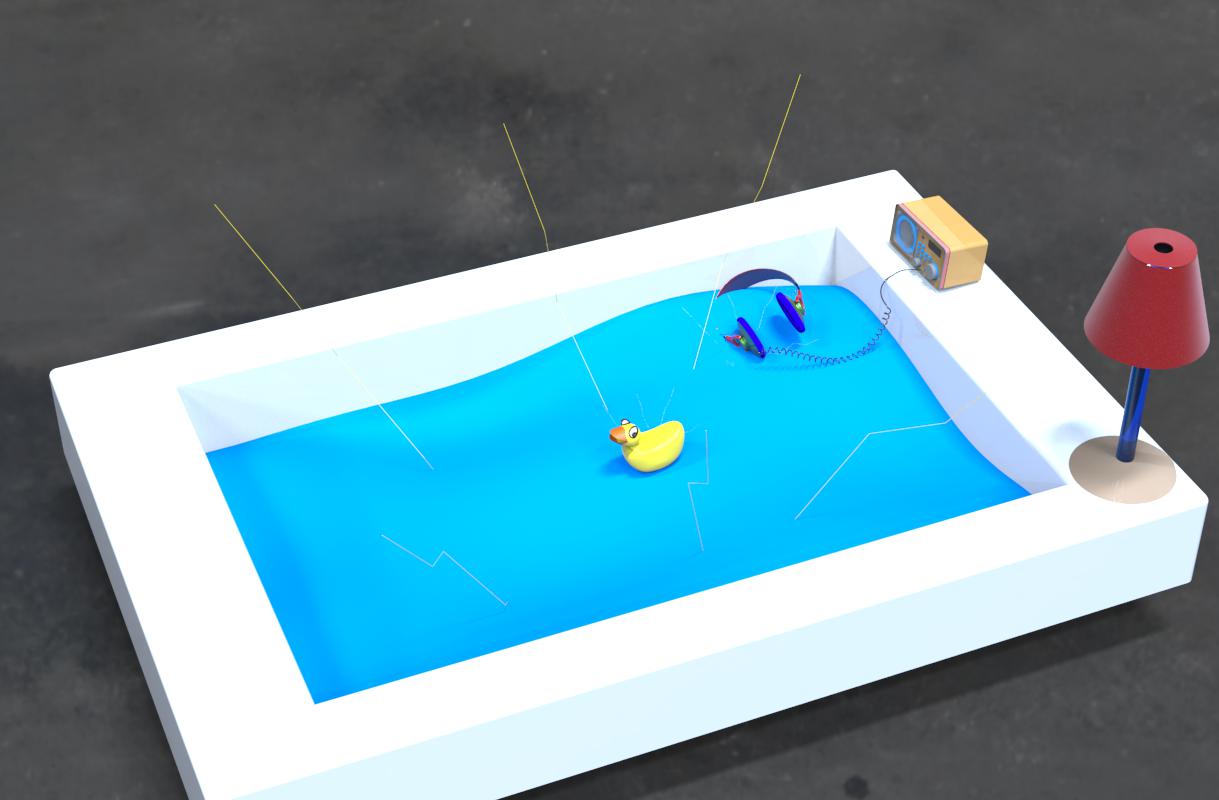
1 There are three main types of objects you’ll use in a fluid simulation: fluids, obstacles, and a domain. The fluid will collide with the obstacle object(s) and domain. The domain is the world in which the simulation will happen. (Note the layer names in this image)
2 After you’ve finished creating your fluid, obstacle objects, and domain, and you’ve assigned each type to a different layer, you’ll need to mesh all of the parts. The easiest way to do this is to select everything and type “mesh” in the command line, and then use the slider to create a mesh of sufficient but not excessive complexity. Now you’ll have both nurbs AND mesh forms, but we won’t need the nurbs for Blender, so type “selmesh”, invert the selection, and then move all nurbs parts to a hidden layer.
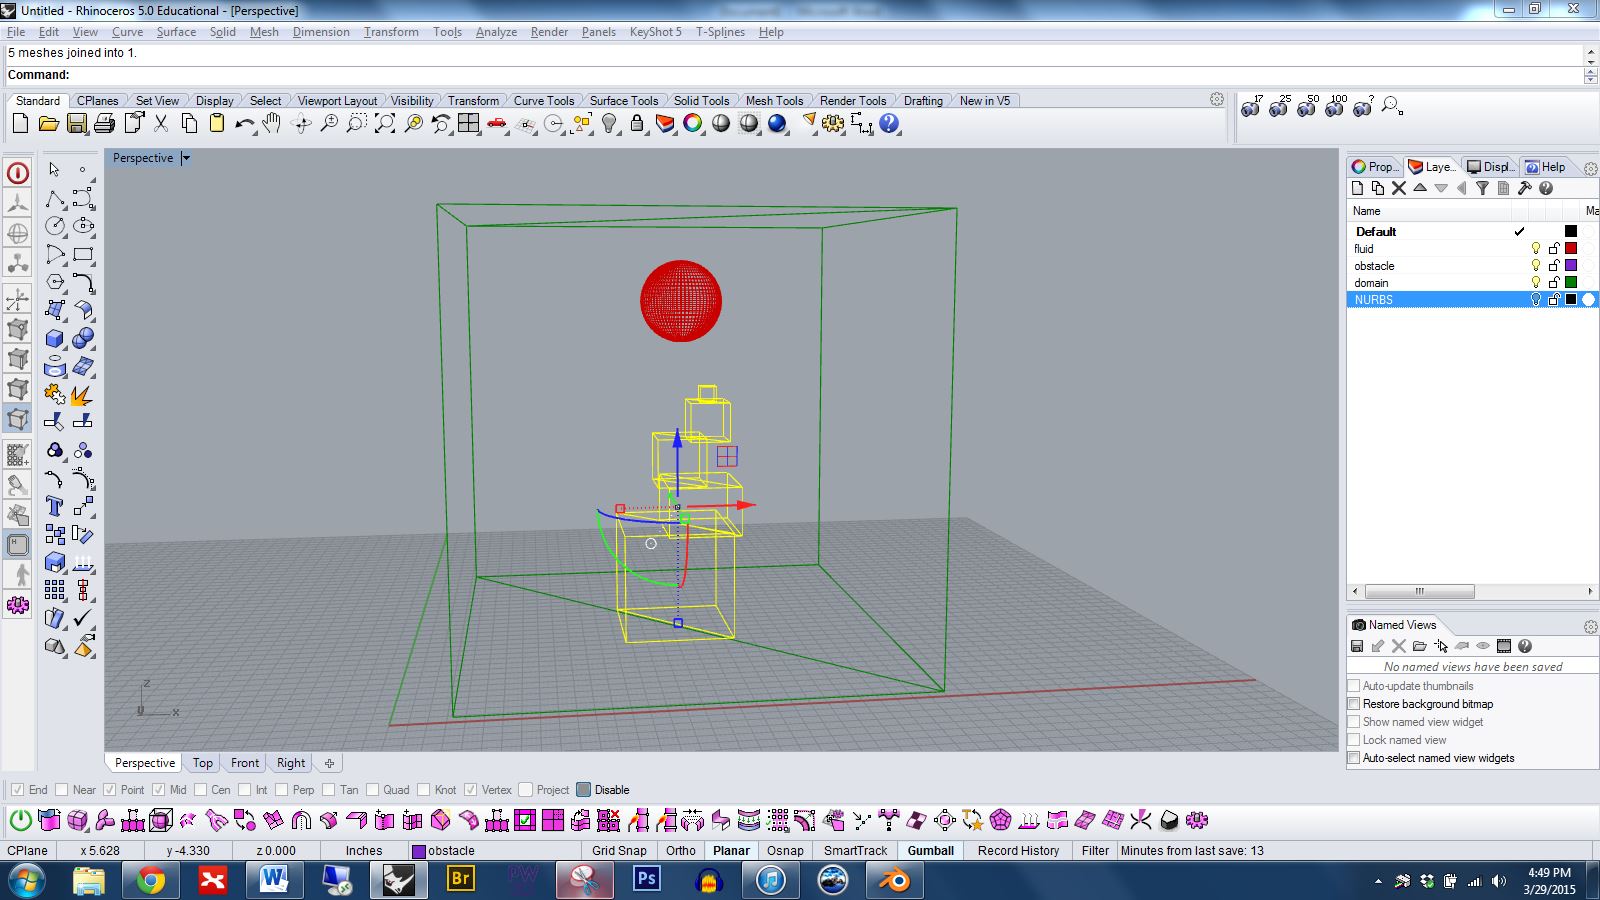
3 To make things simpler for Blender, you’ll want to join the various obstacle parts into one mesh. Meshes don’t need to share a common edge or even overlap; you can simply select them all and run the join command. If you were to ¬have different meshes for the fluids then you’d want to join those as well.
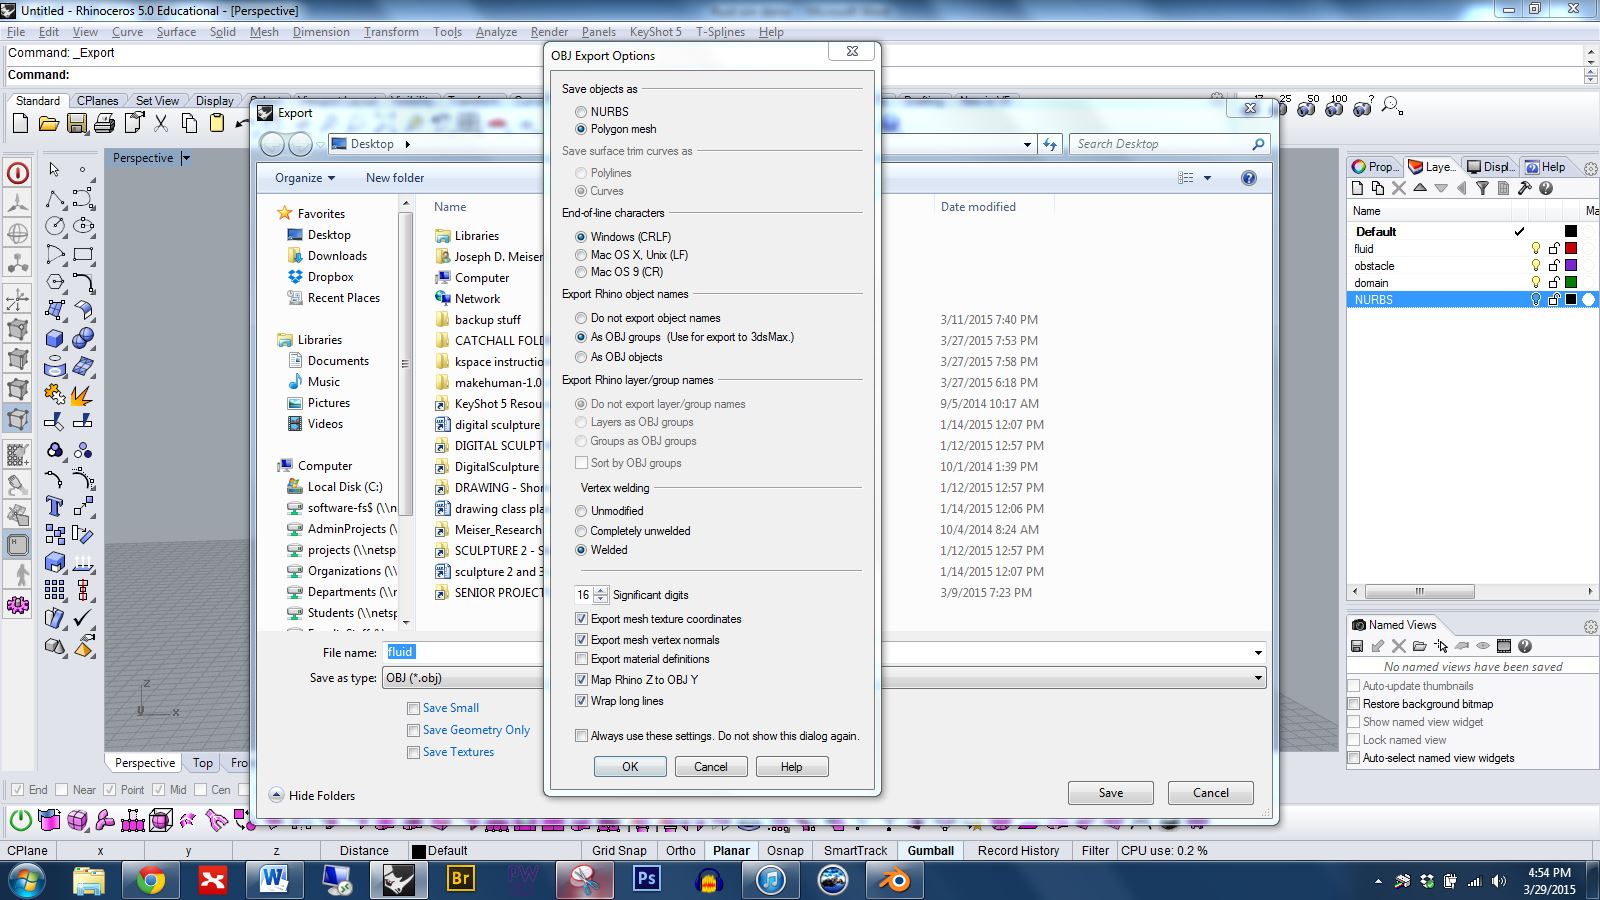
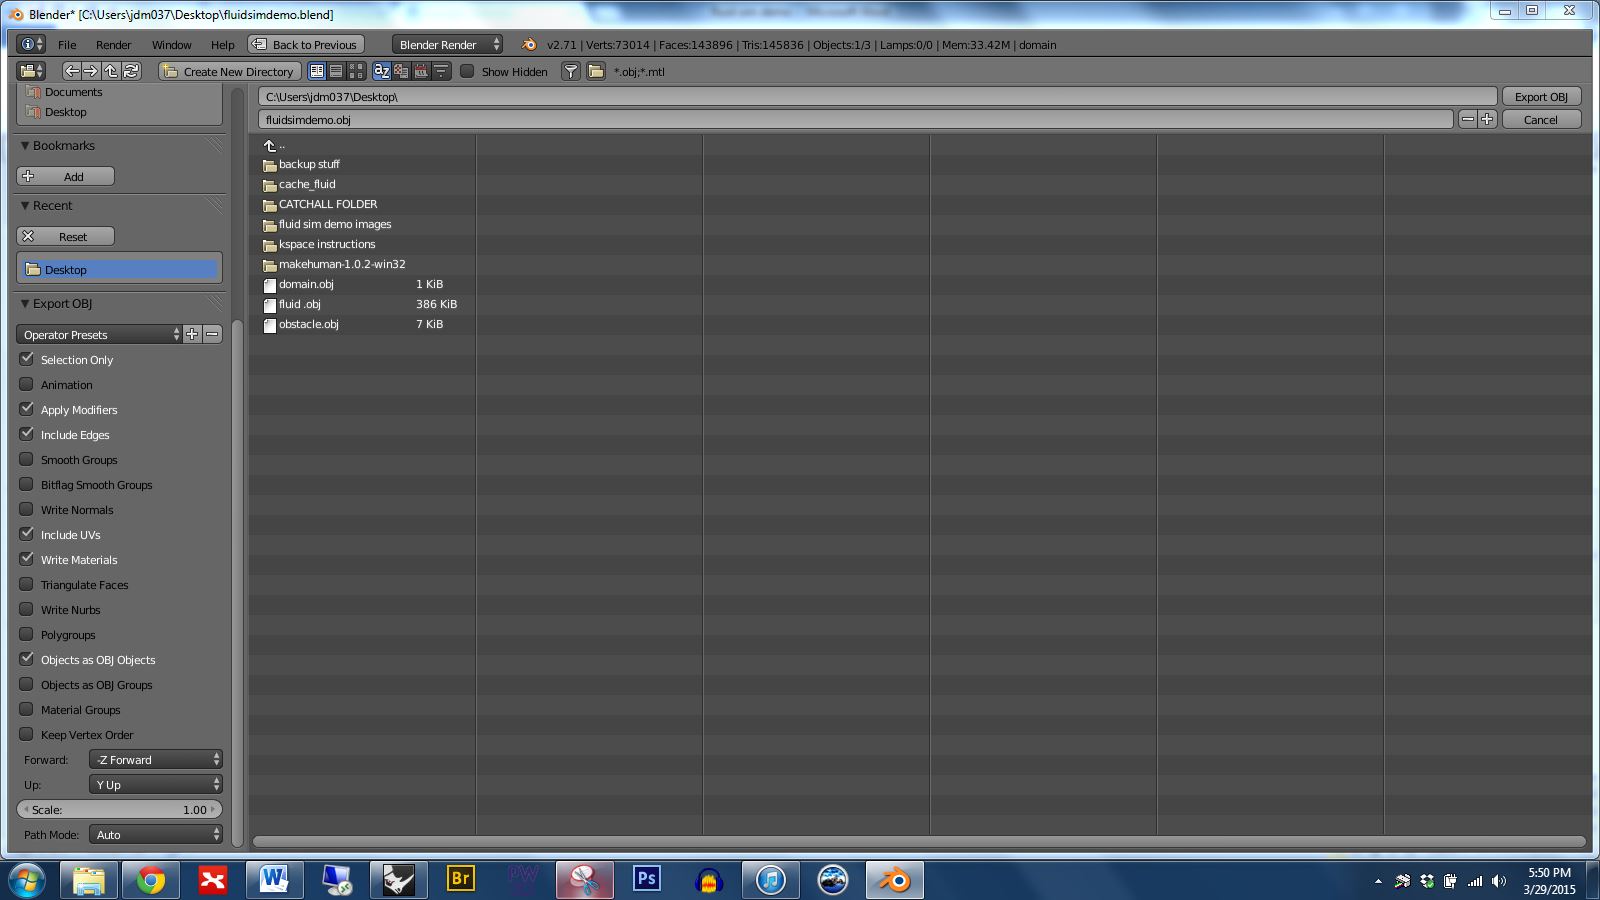
4 Export the fluid, collision objects, and domain a separate OBJ files. Note the settings that I’ve used, especially the welded edges and mapping of Rhino Z to OBJ Y.
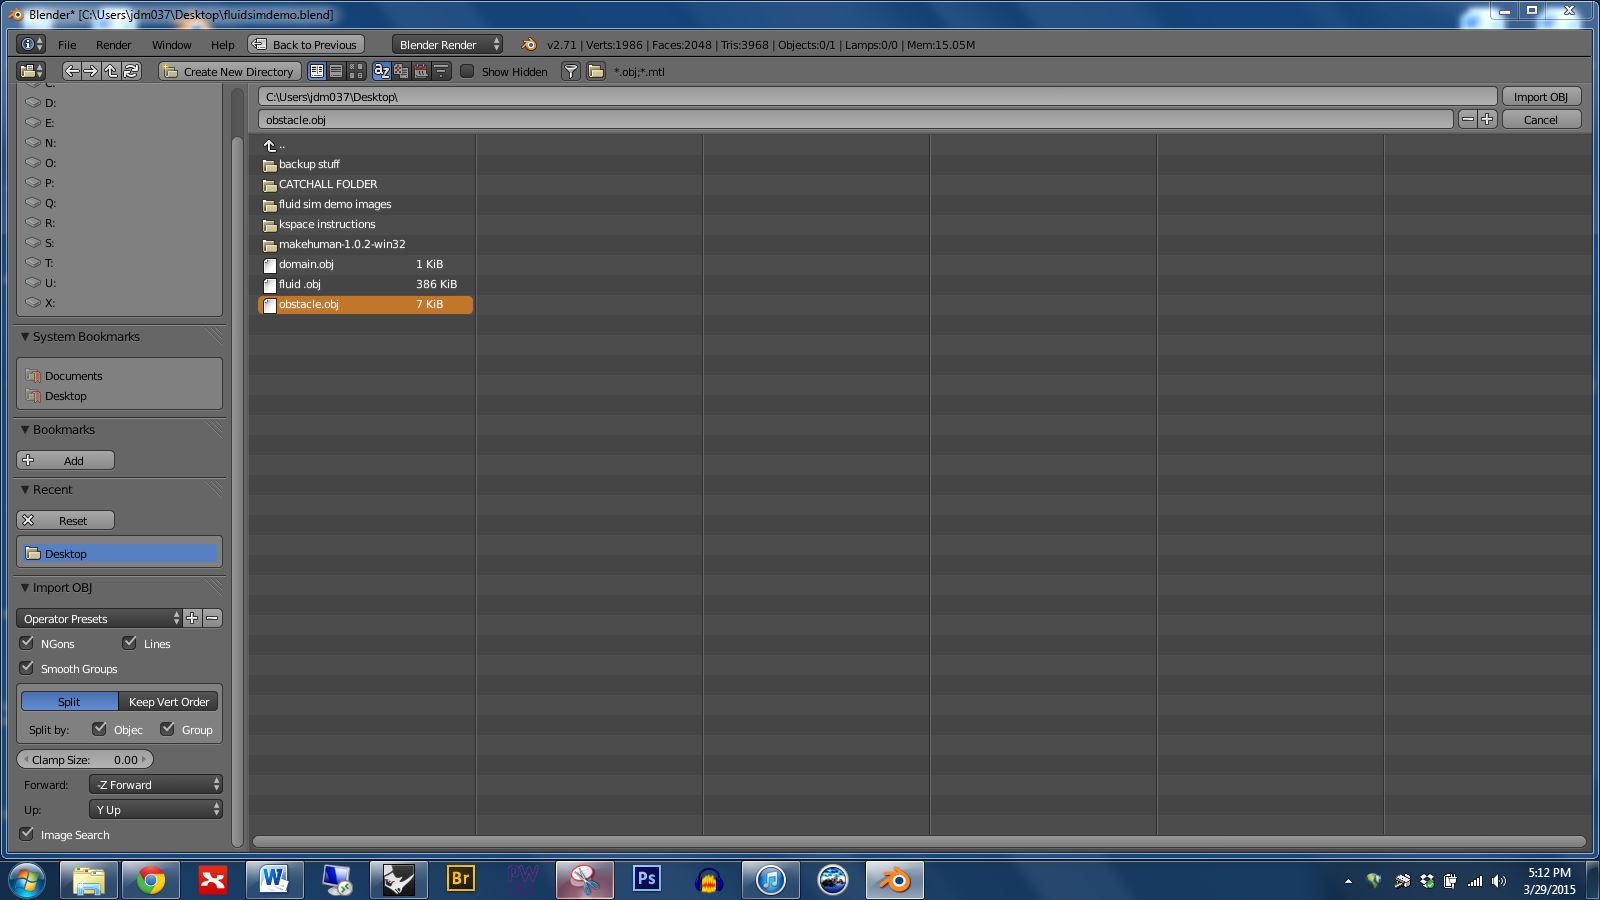
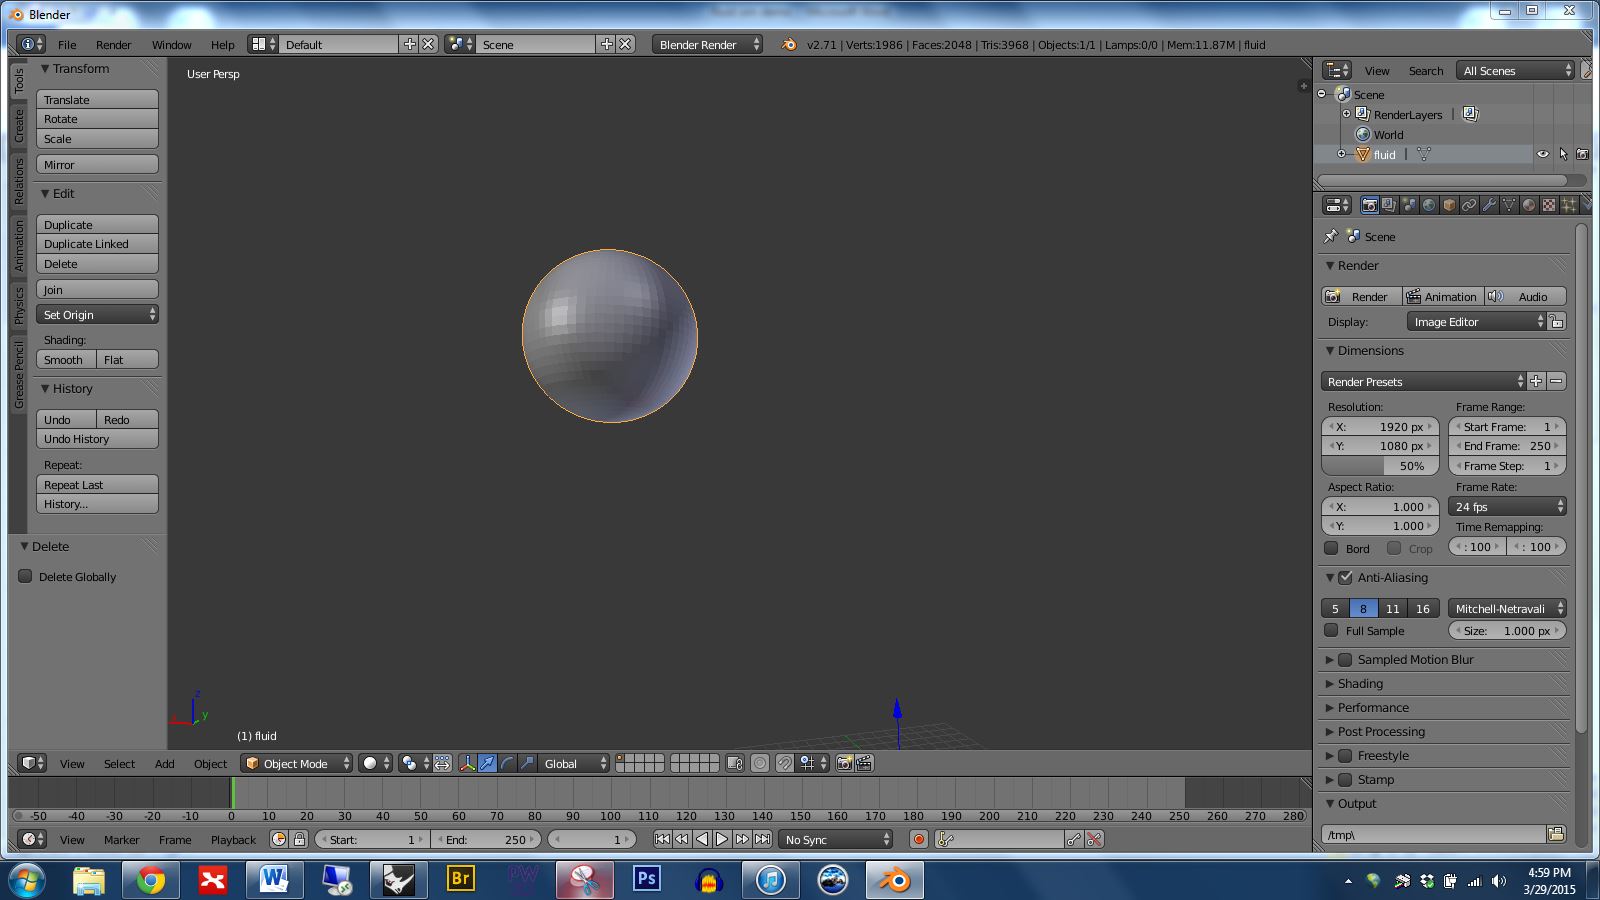
5 In Blender, delete the camera, box, and light by selecting with a right click, pressing the delete key, and clicking to confirm. Import the fluid object. Note the import settings that I’ve used in the lower left.
6 Note that your fluid mesh will show up as object 1 in the layer panel. We can right click and rename the layer “fluid”.
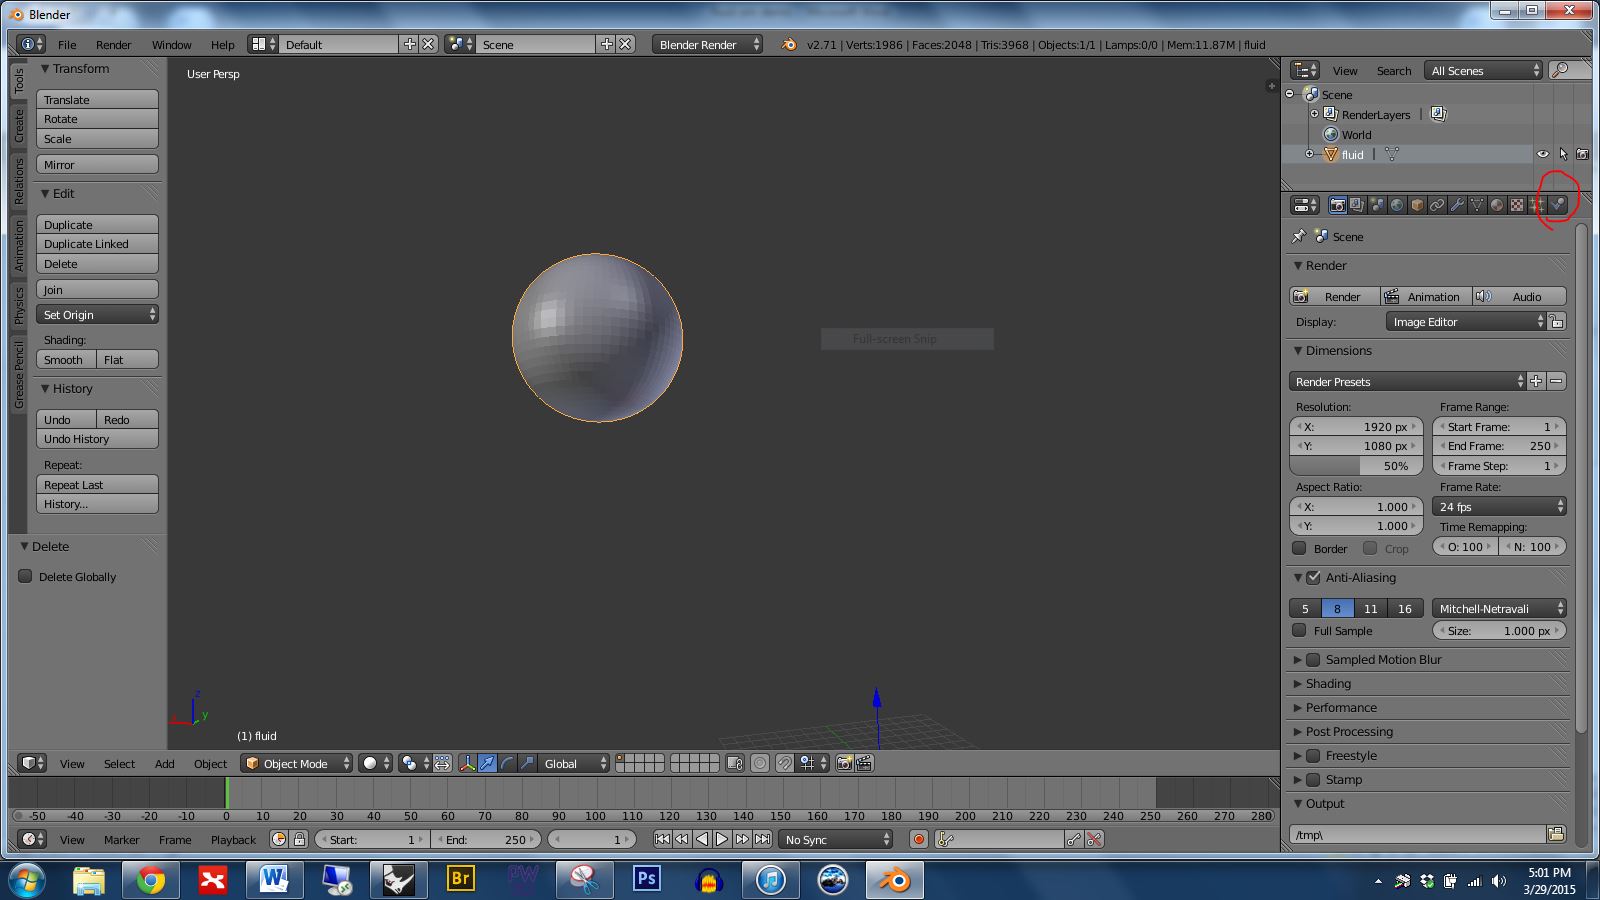
7 Click the far right button to bring up the physics panel (circled in red in the image below). Click fluid, set type to fluid.
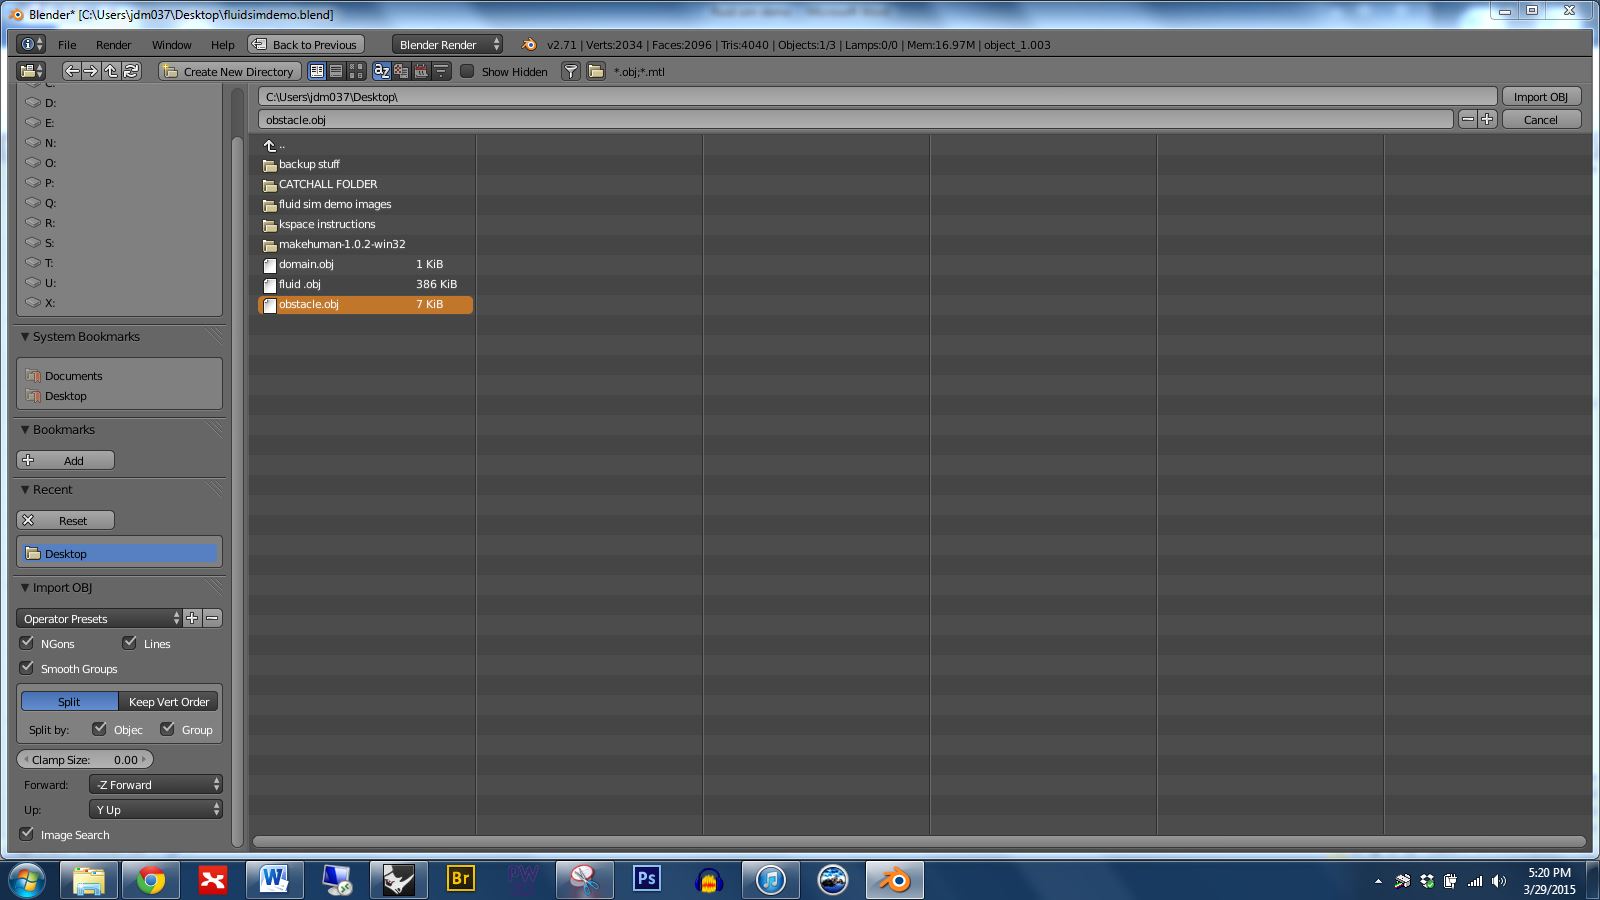
8 Import obstacle objects. Rename layer. Select obstacle objects, go to the physics panel, and click fluid. Set type to obstacle.
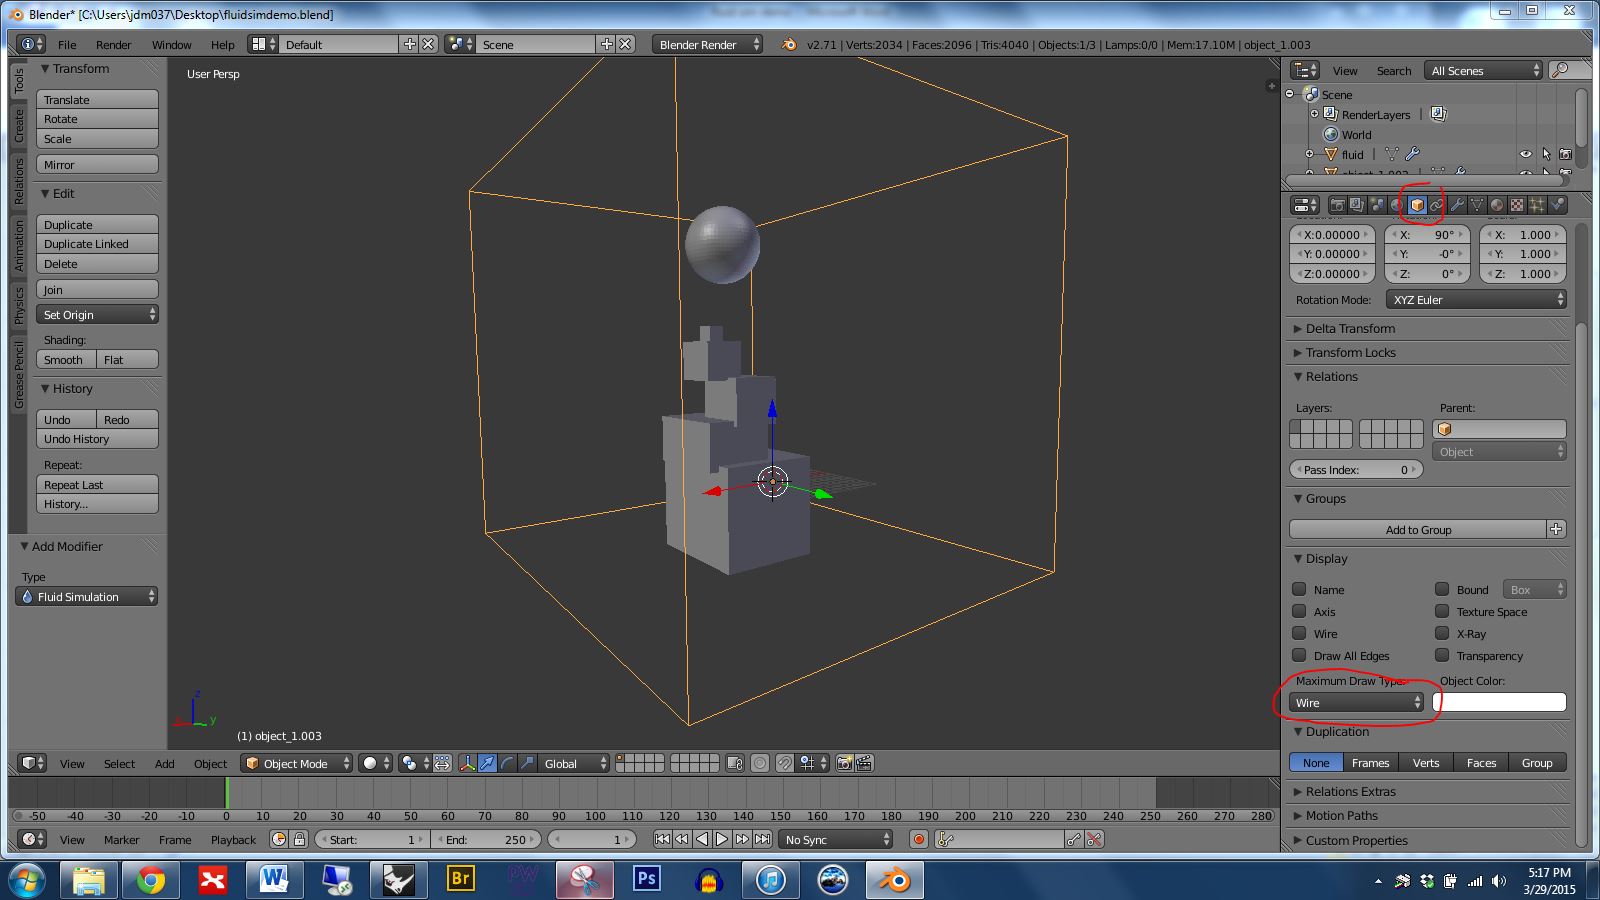
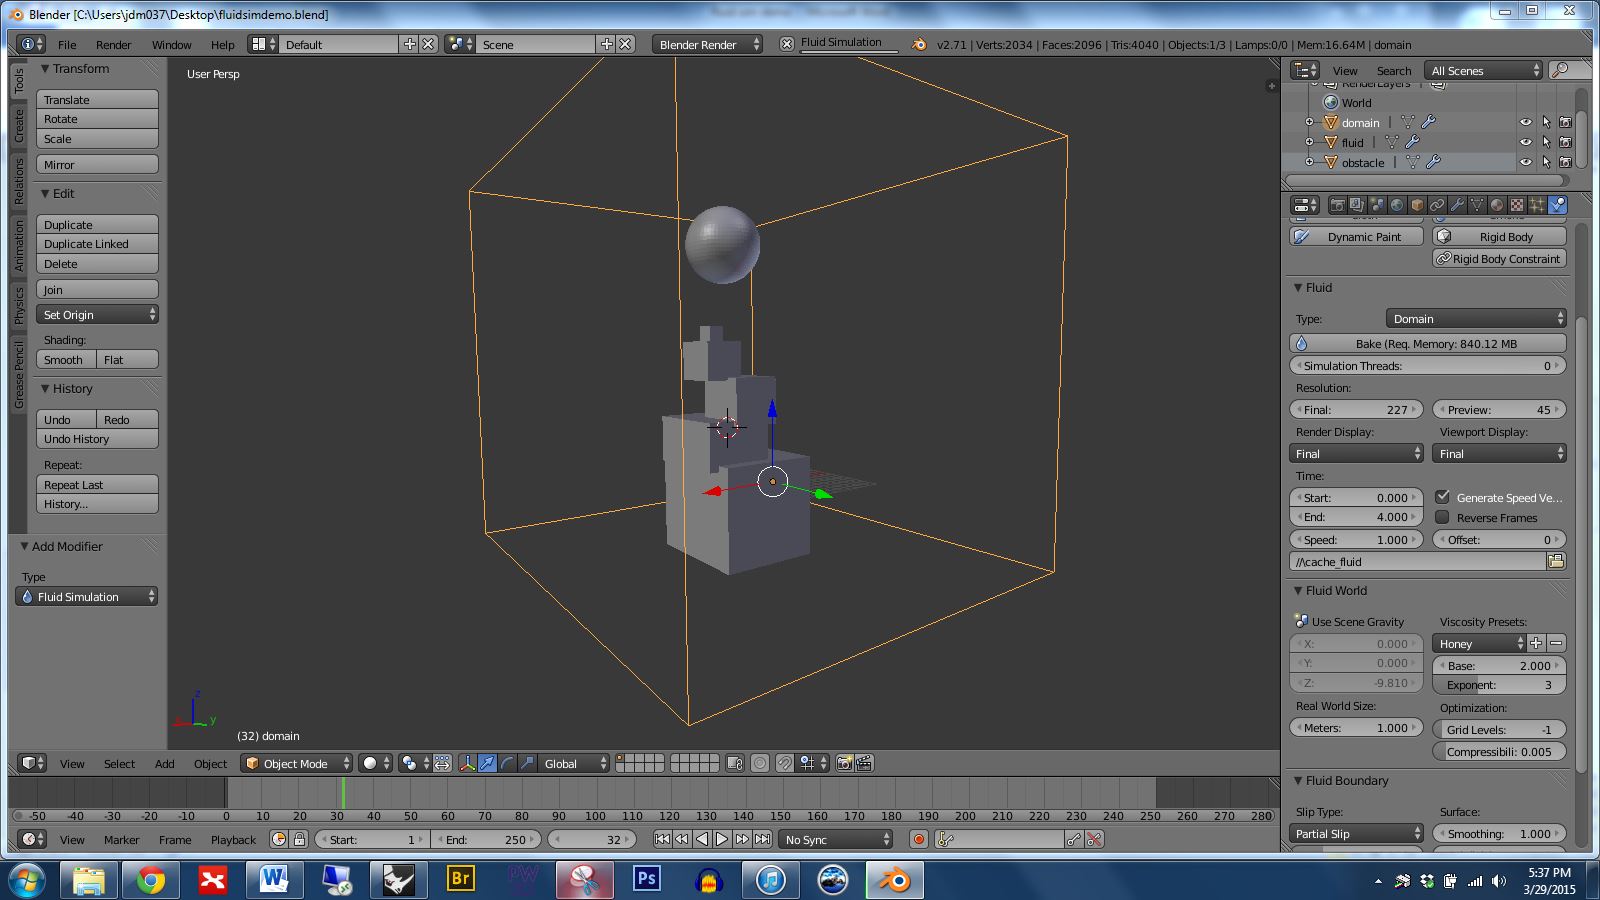
9 Import domain object. Rename layer. Note that the domain is opaque and you can’t see internal components. We can make the domain show up as wireframe by selecting the object with the right mouse button, then go to the “object” pane (circled in red in this image) then change draw type to “wire” (also circled in red)
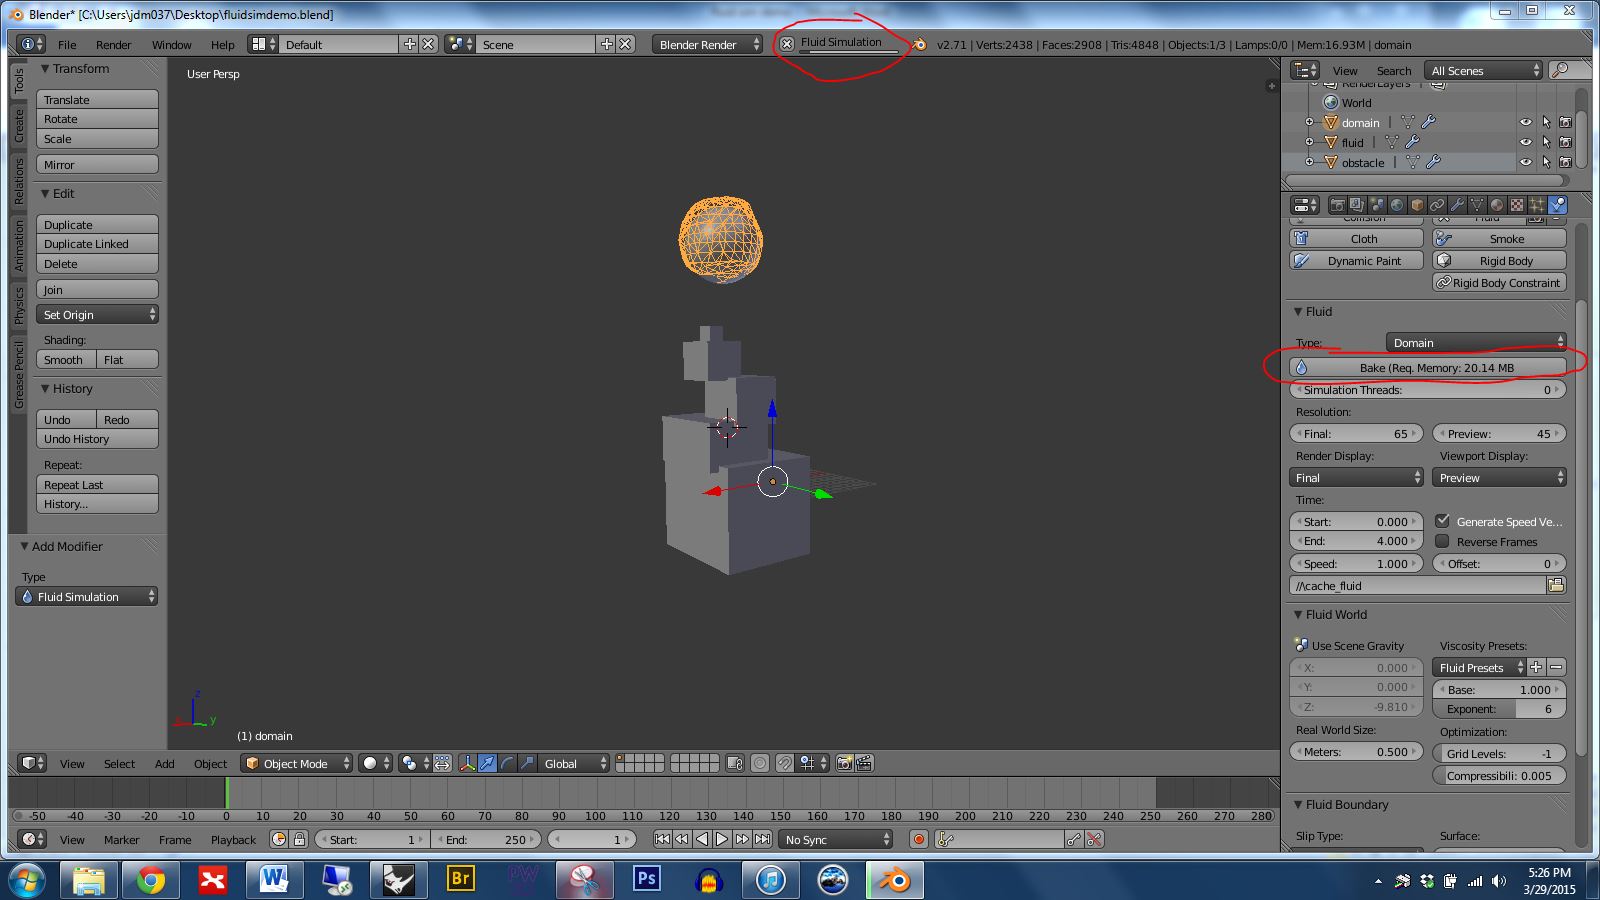
10 Select domain object. Go to physics panel and click fluid, then set type to domain. Note that there are many options that we can adjust in the domain panel.
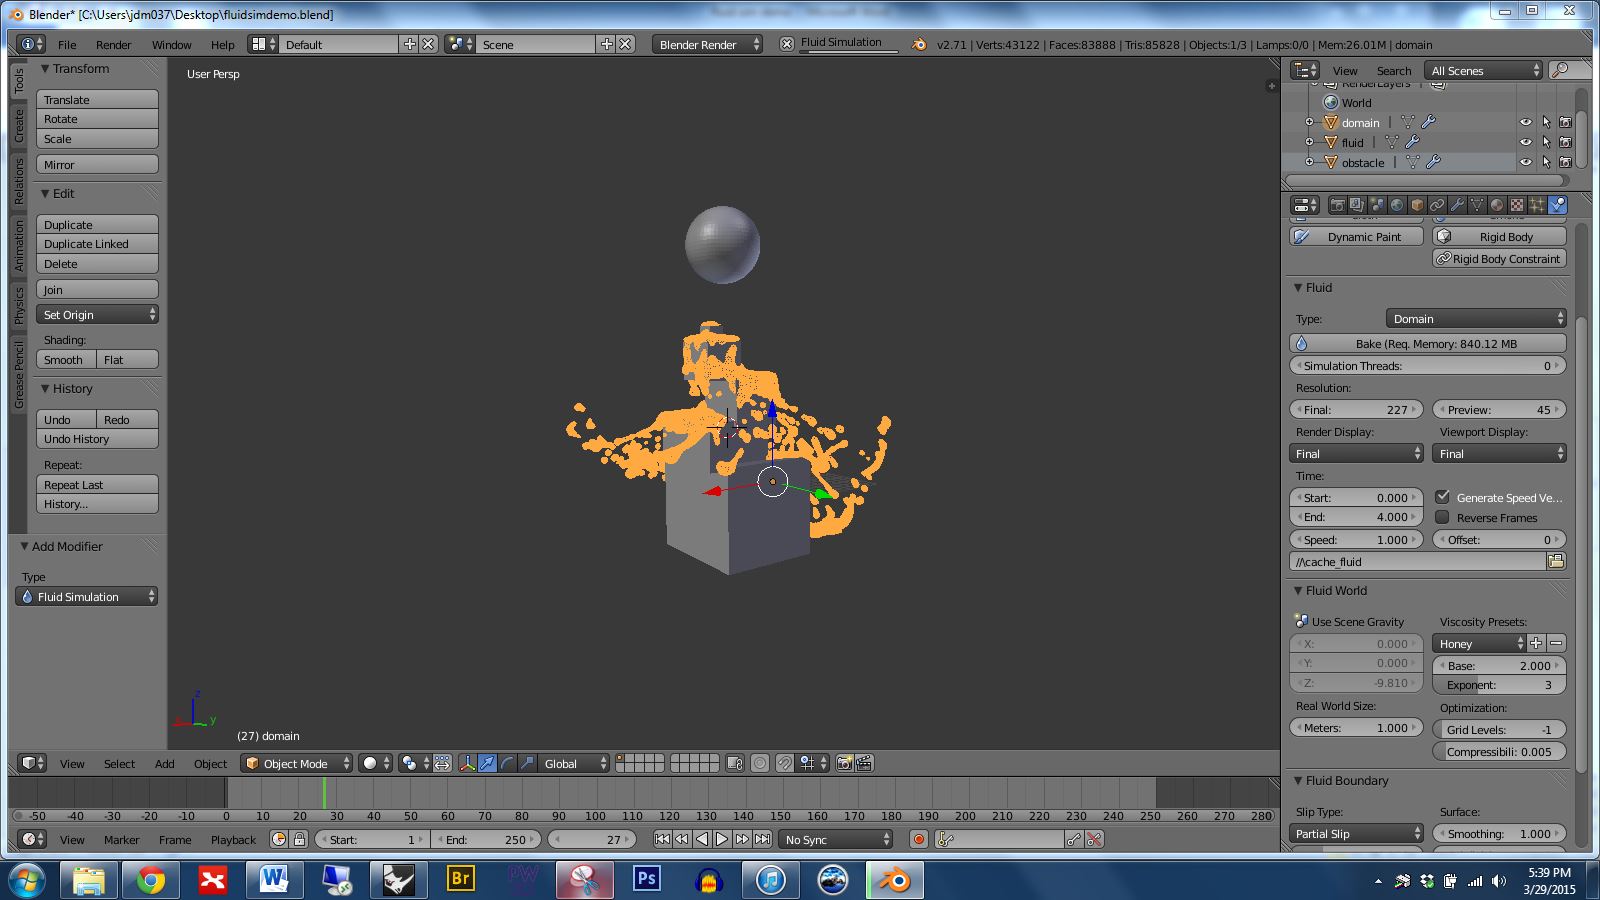
11 Click on the bake button, and notice that a status bar appears at the top, showing that Blender is processing a result.
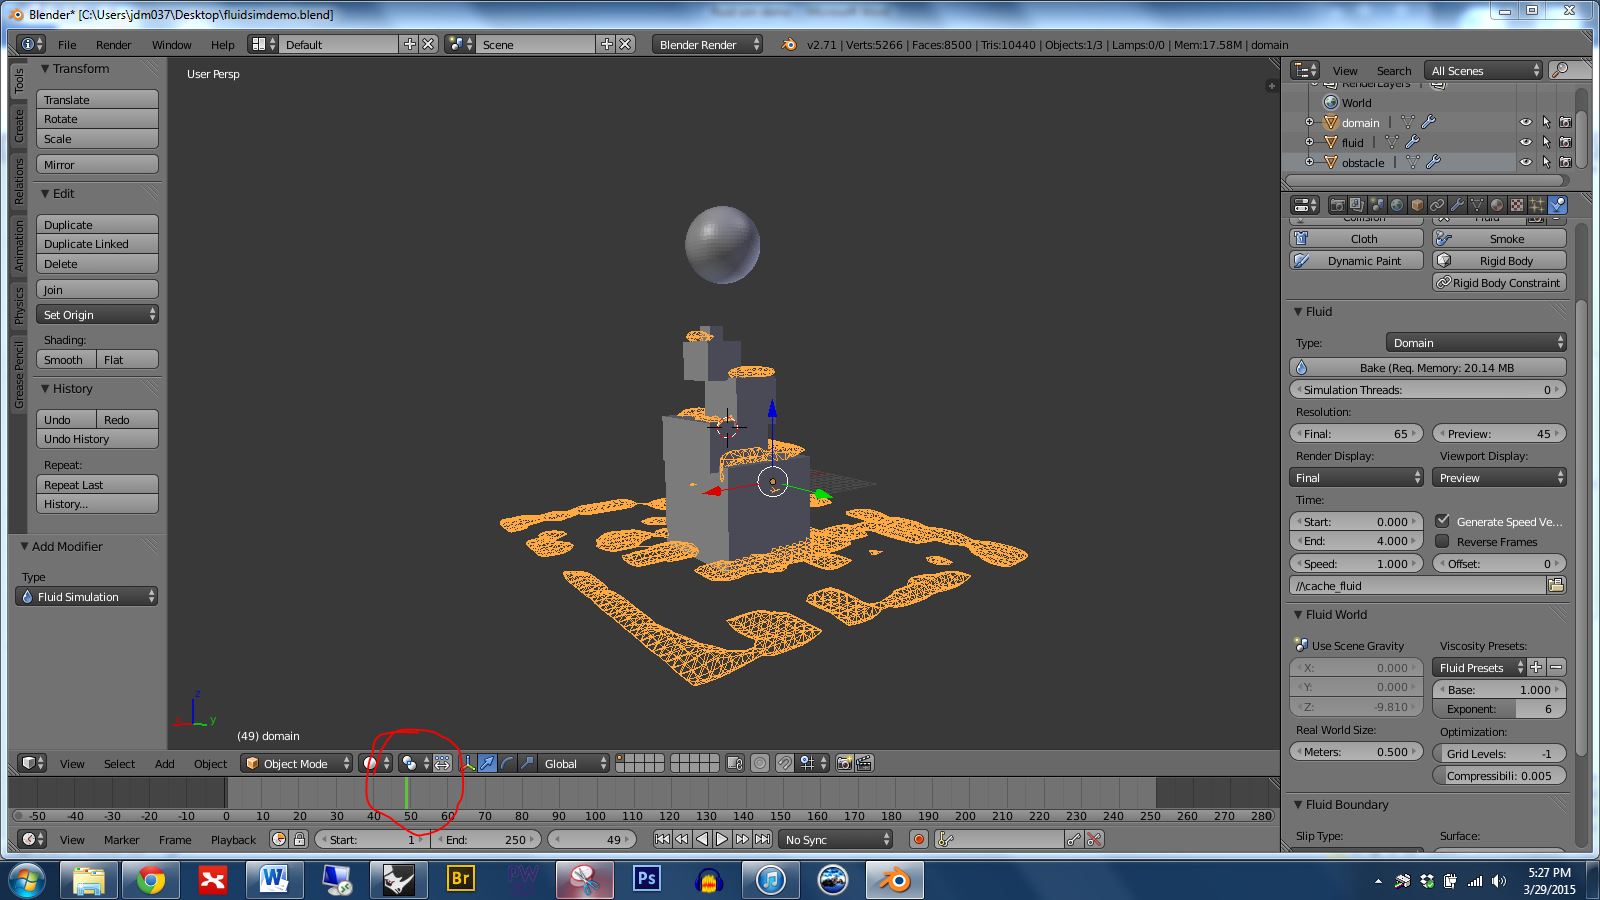
12 Click at the bottom on the timeline to see the result. Notice that the result shown is low resolution and crude.
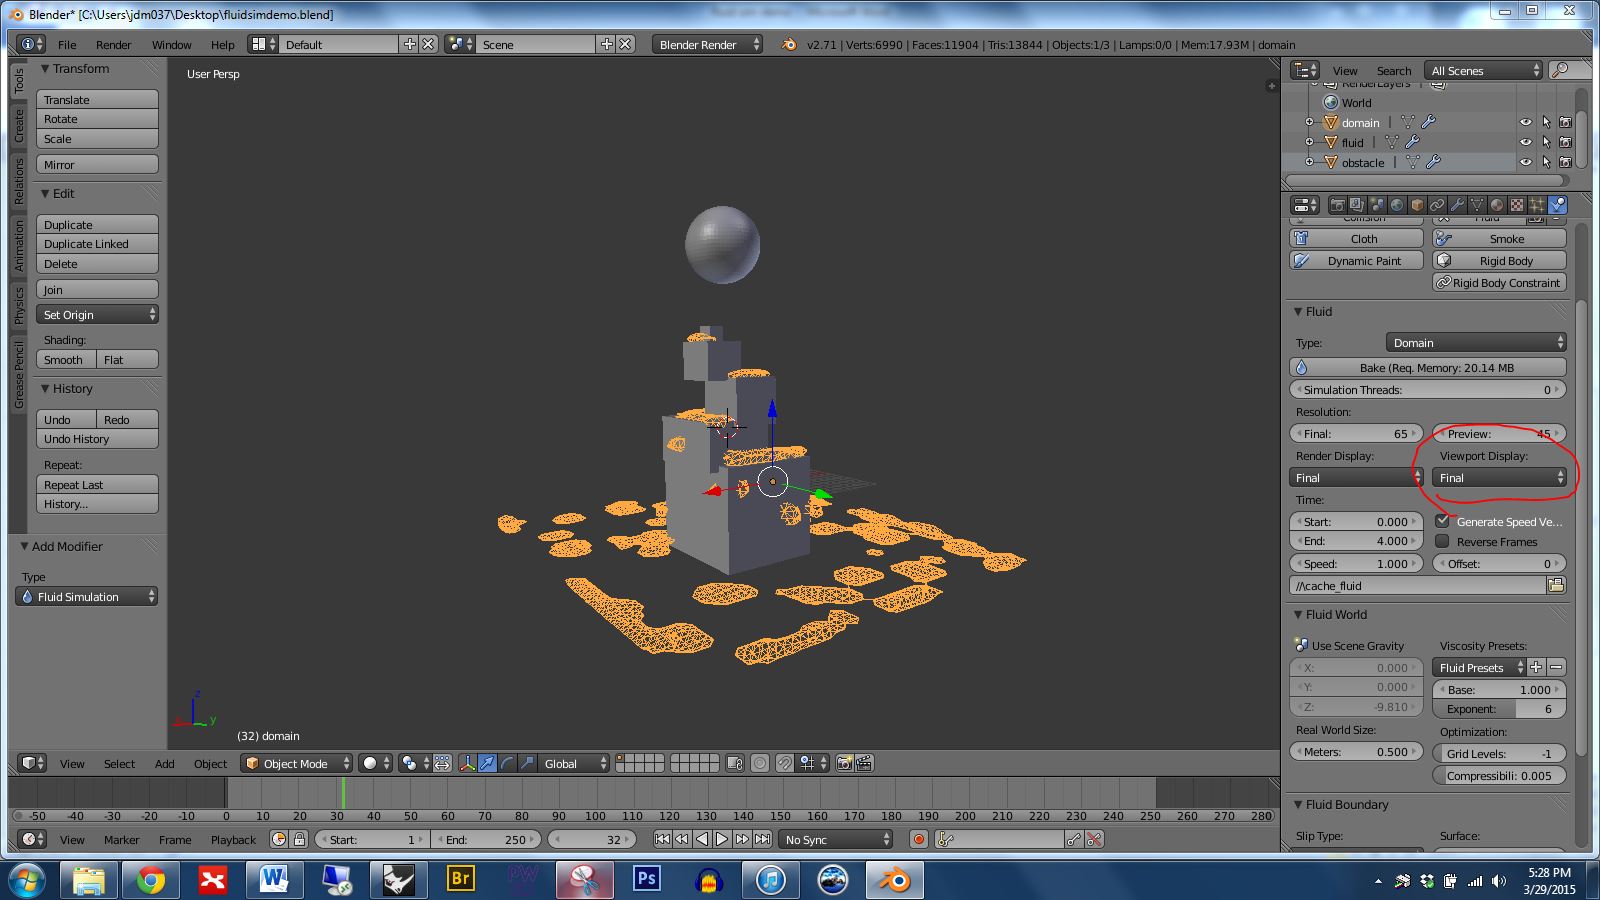
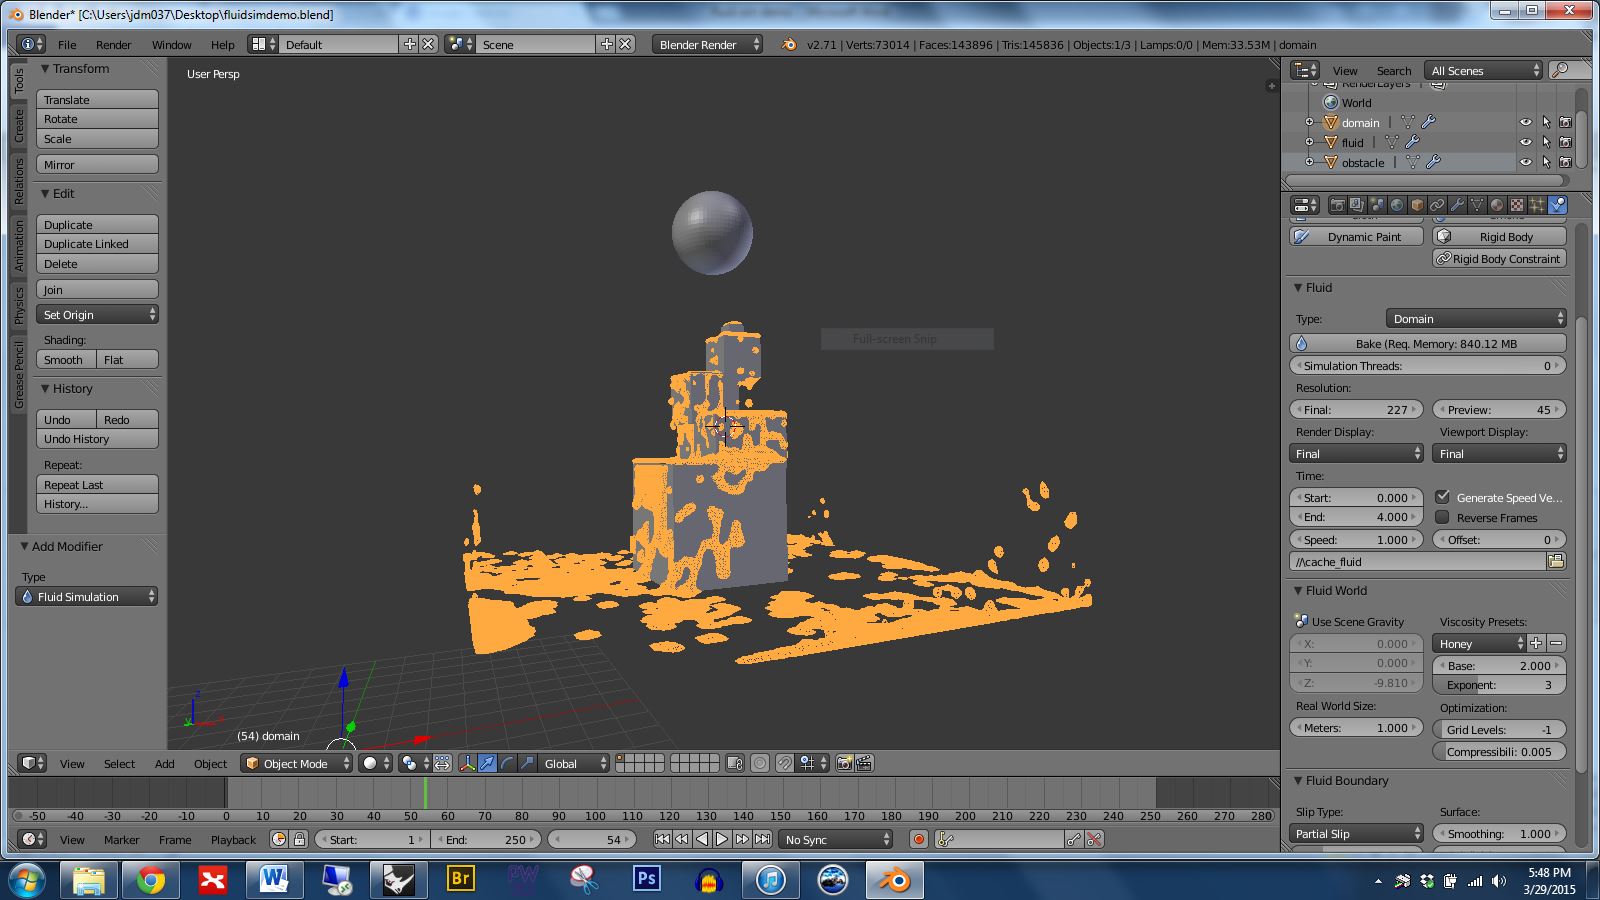
13 Set viewport display to final and notice that the result becomes more detailed.
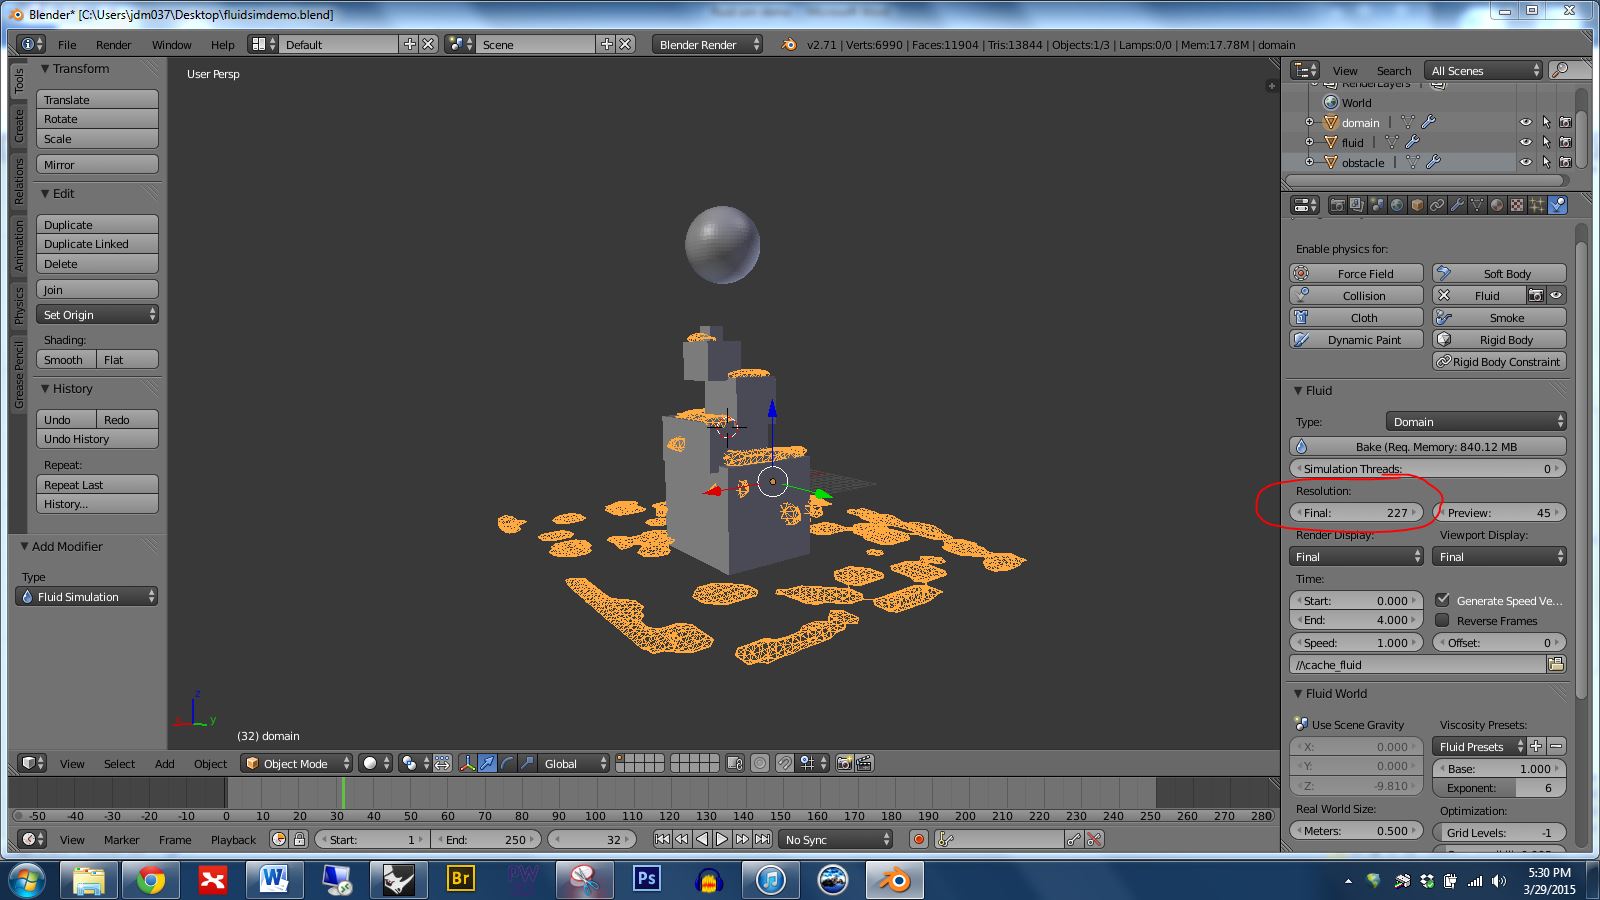
14 By holding the right mouse button and dragging to the right on the final resolution area we can increase the quality of the result produced by the bake. Notice that the total required memory is shown on the bake button. Setting this value as high as possible will give a more detailed result, but when the required memory approaches 1GB the bake is likely to fail or take a very long time to complete.
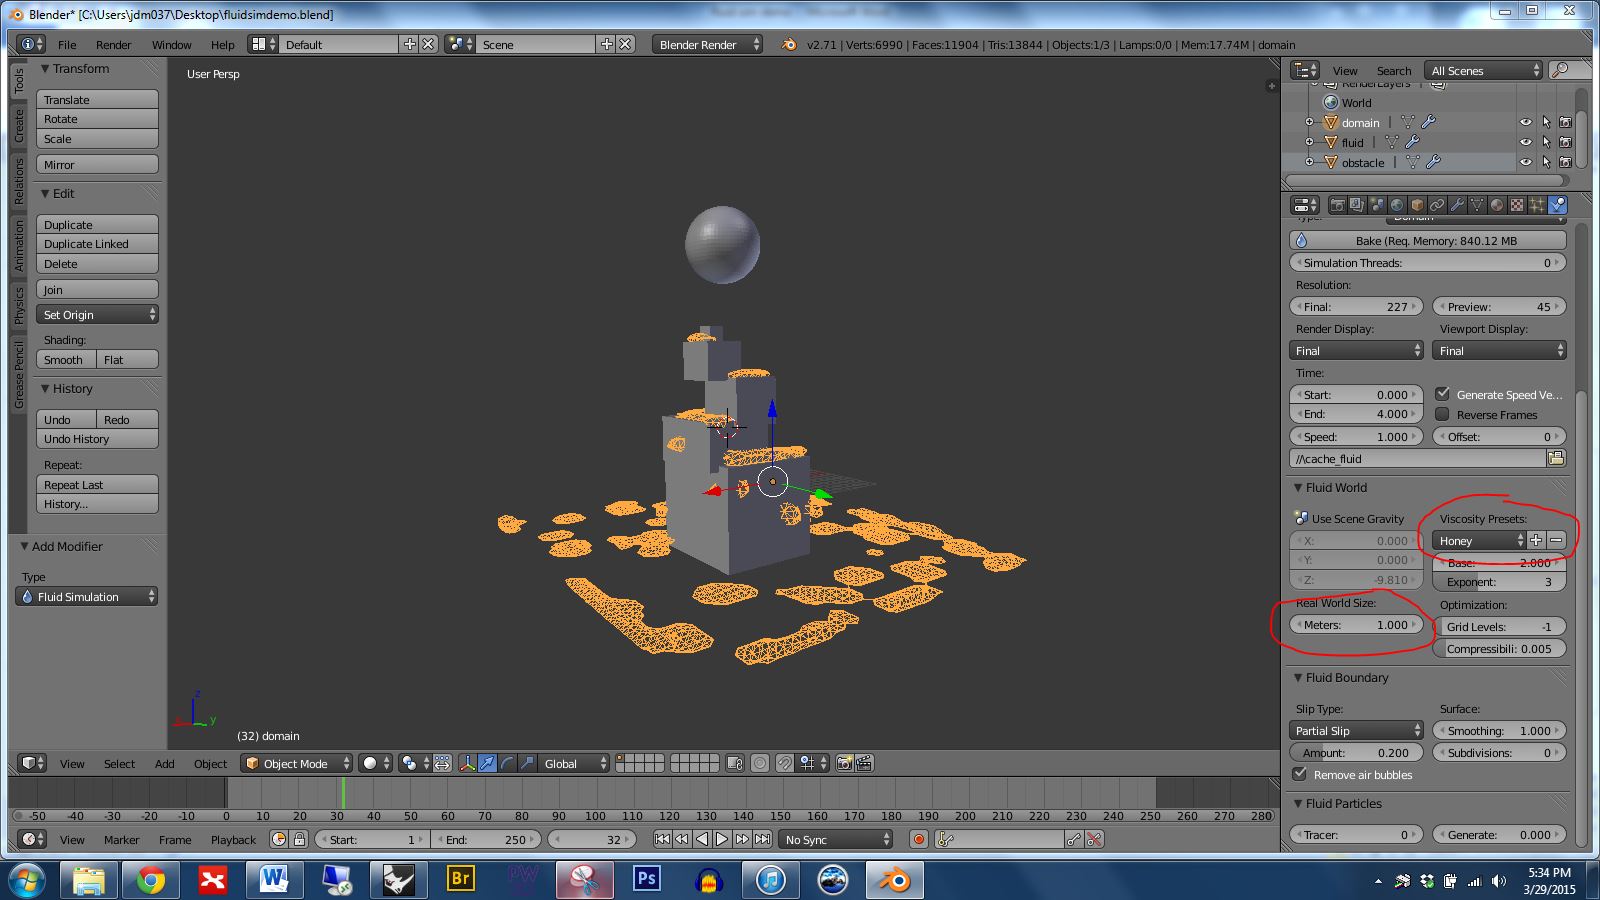
15 You’ll want to tinker with are the viscosity preset, which can make the fluid behave like honey, oil, or water. Also note that you can adjust the real world size. When creating this demo, I imagined that my domain for this render would be one meter across, so I set the real world size accordingly to give a result consistent with that size.
16 With these settings adjusted we can now create a mesh of higher quality. It will take a while to complete. I suggest saving often, since the program sometimes crashes during the baking process.
17 As the bake completes you can click in the timeline to see the result.
18 If you click too far ahead in the timeline you’ll see the original domain object. We can cancel the bake by clicking the X on the progress bar at the top of the screen.
19 When you’re satisfied with the result, set the timeline to the point you want, then make sure your fluid is selected by right clicking on it. Next go to file > export > OBJ.
20 Make sure that the selection only box is checked, and be sure too that you use the same axis orientation shown in the screenshot below.
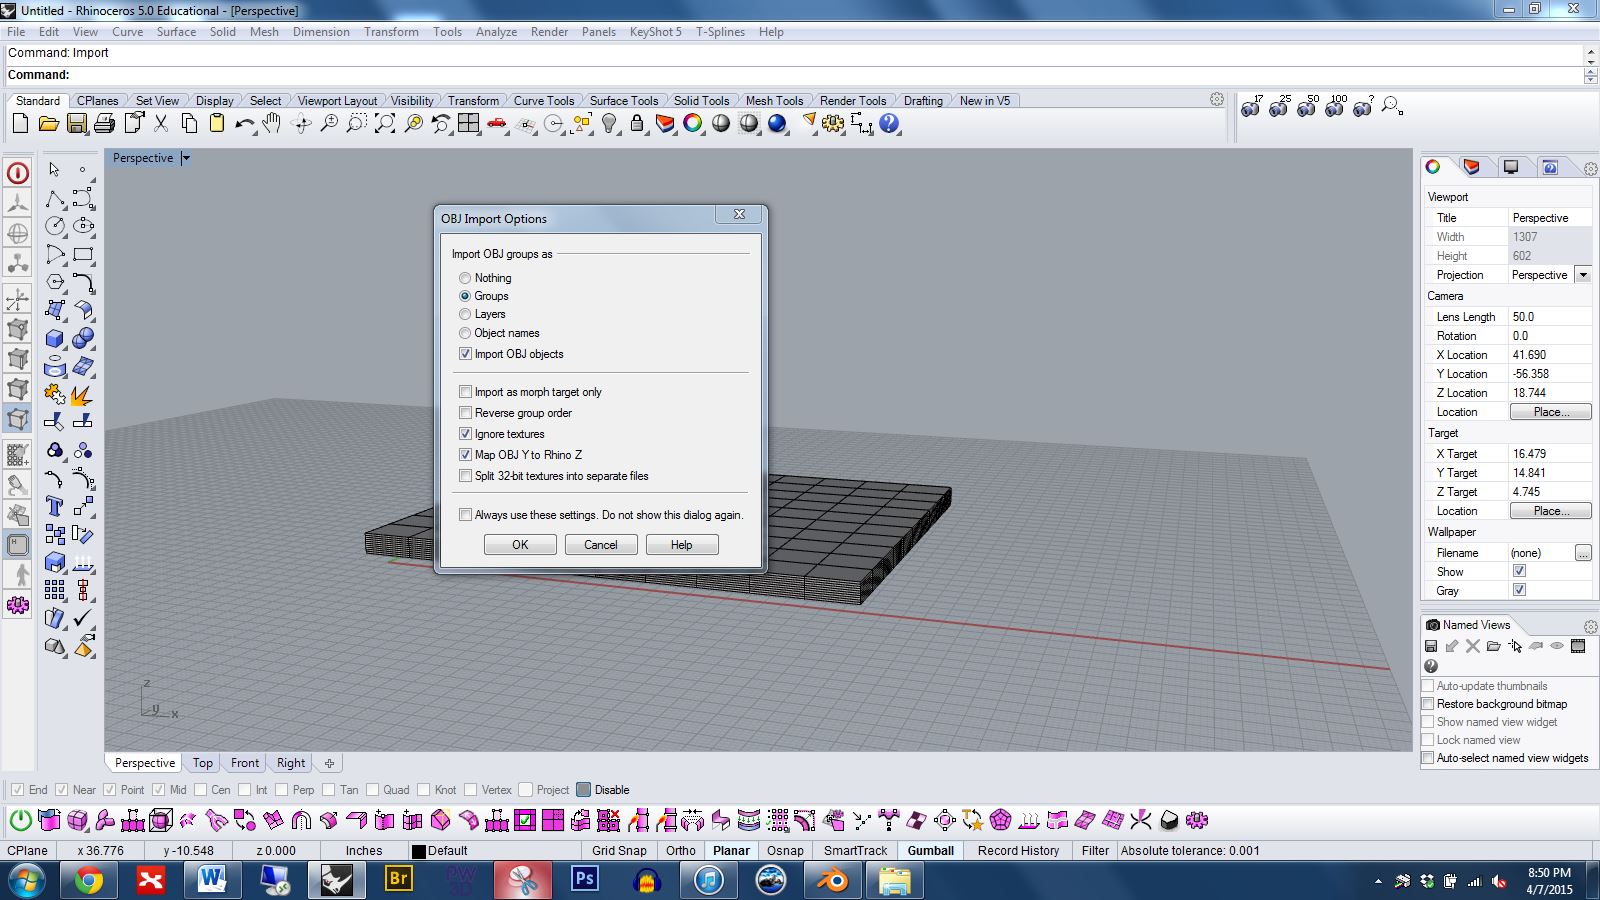
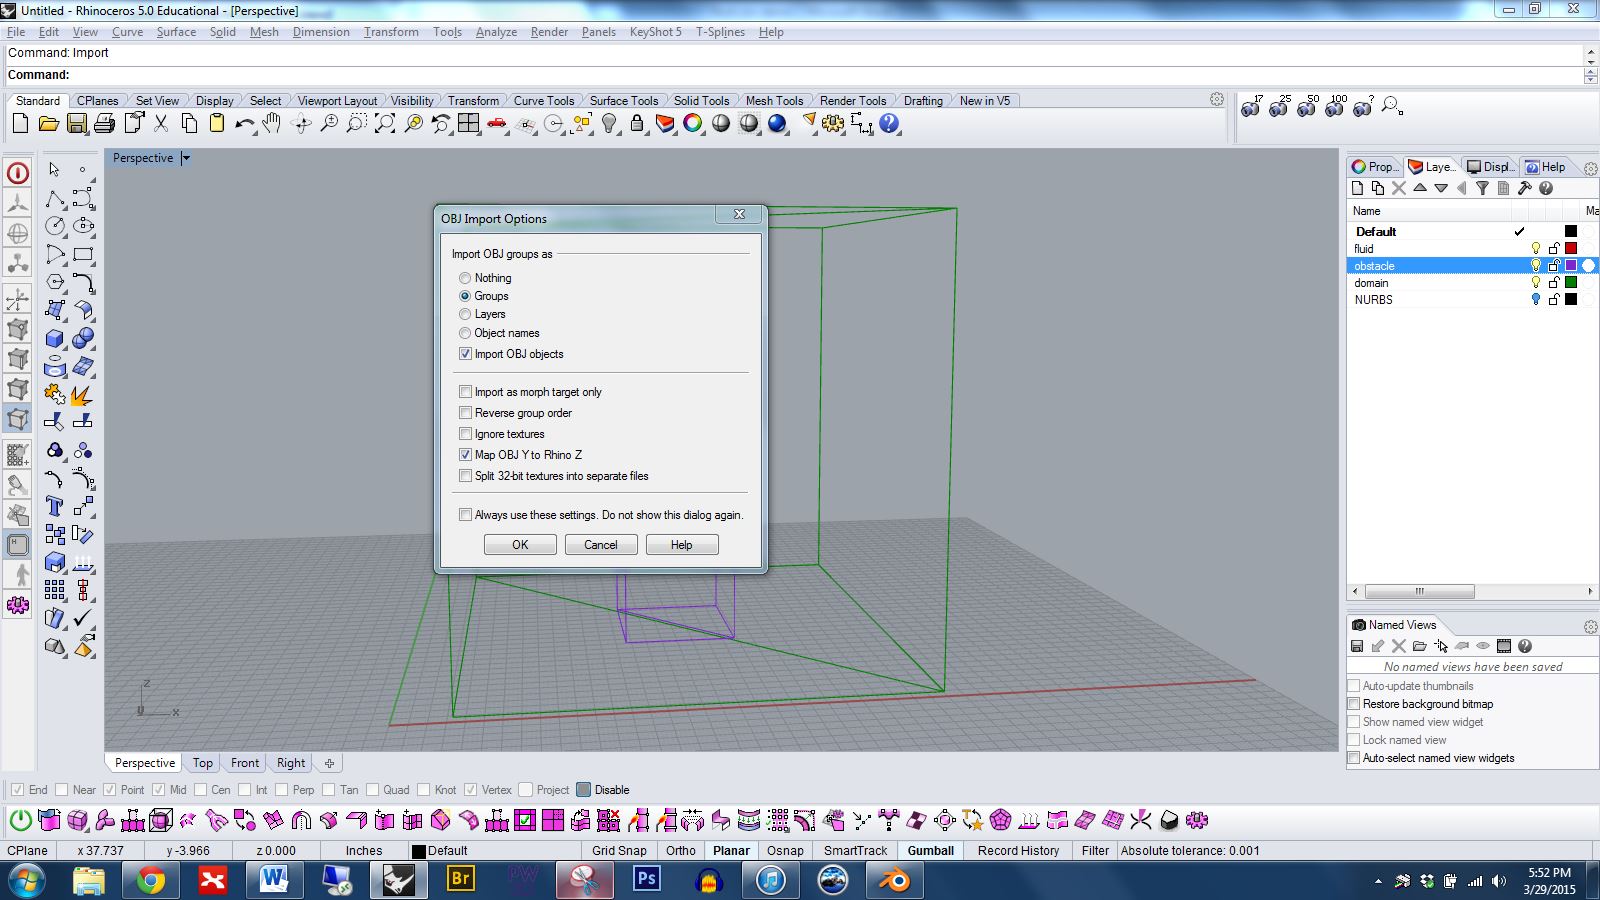
21 Import your OBJ back into Rhino using these settings.
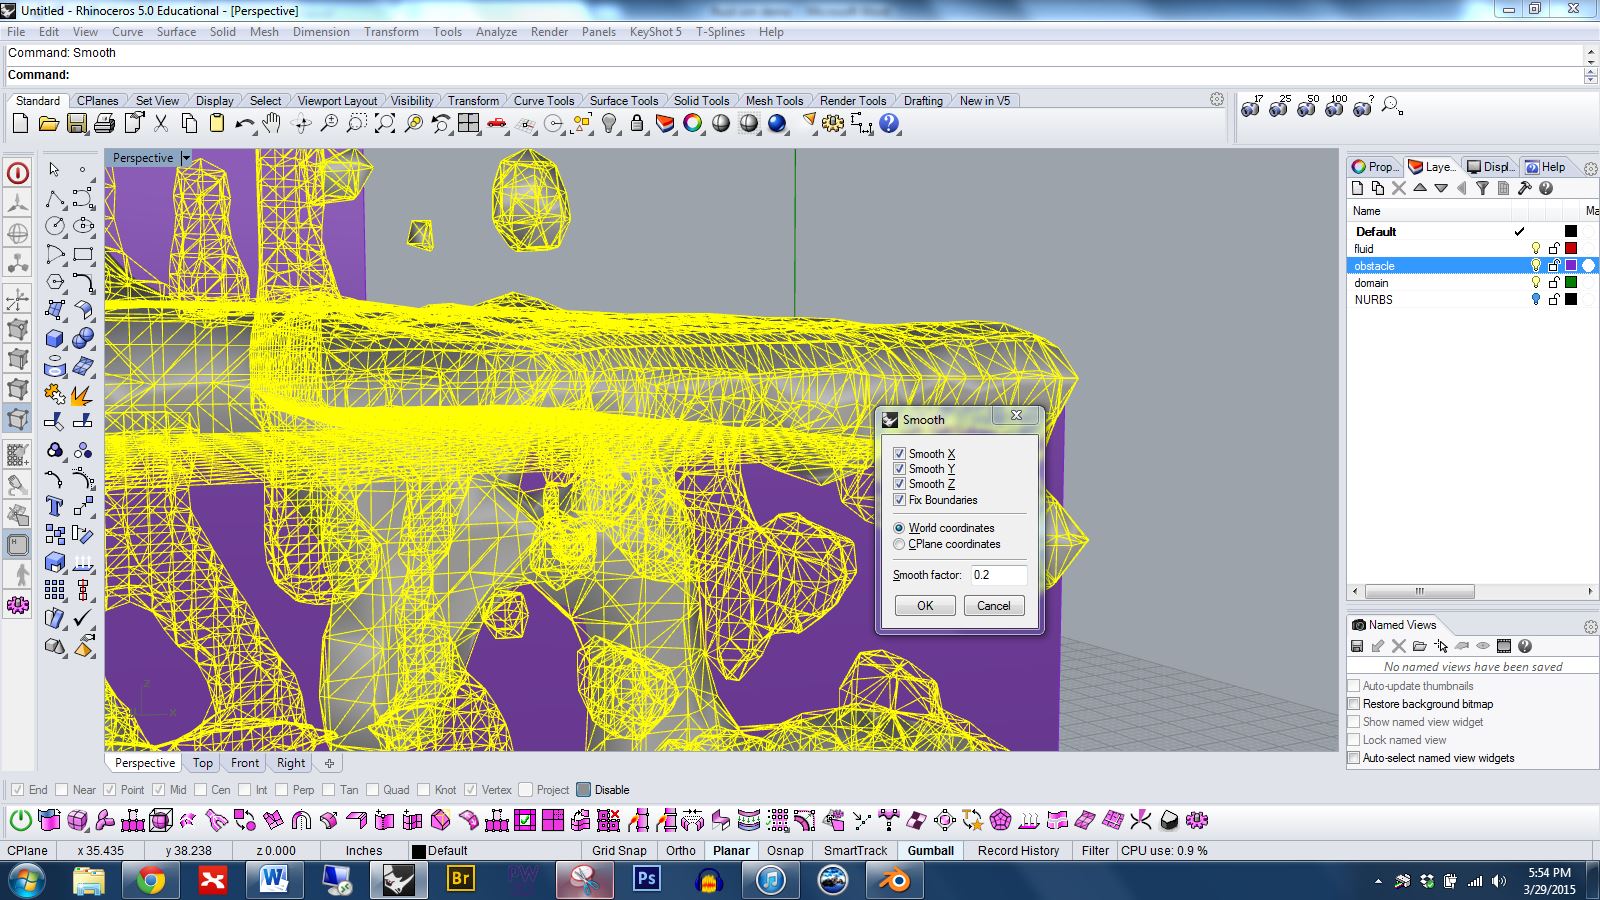
22 Note that the result is a bit jagged.
23 We can smooth the result by running the smooth command once, twice, or a few times, but be careful not to overdo it or the fluid may deform away from your obstacle objects.
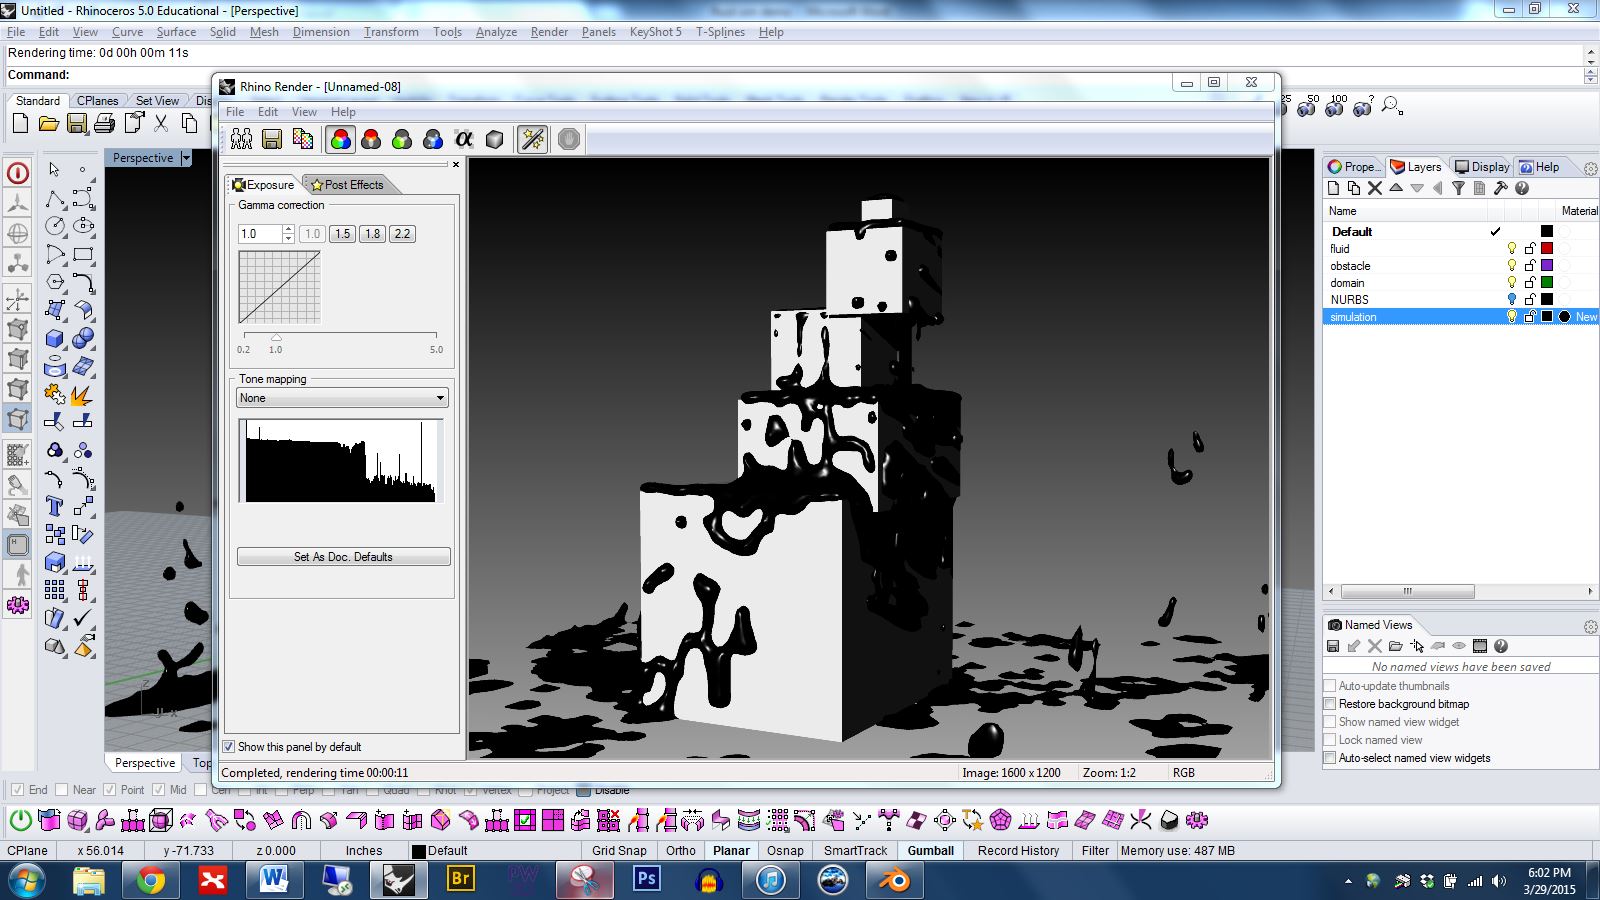
24 The result.
25
26 You can explode the mesh if you want to modify individual parts. Alternatively, you can turn the control points on for the mesh and delete parts and/or apply transformations.
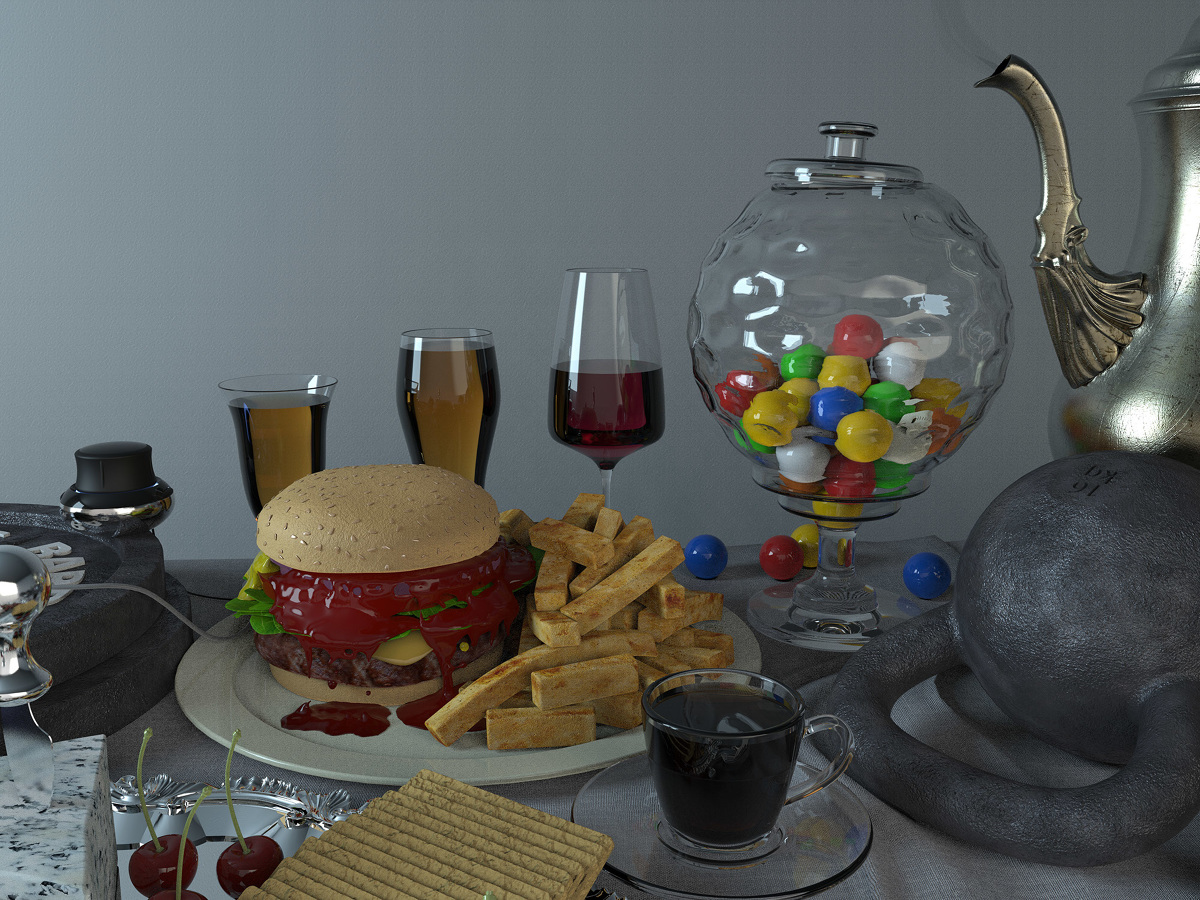
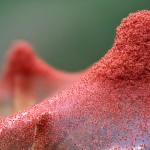
29 And I used fluid simulation to create the ketchup on this cheeseburger.
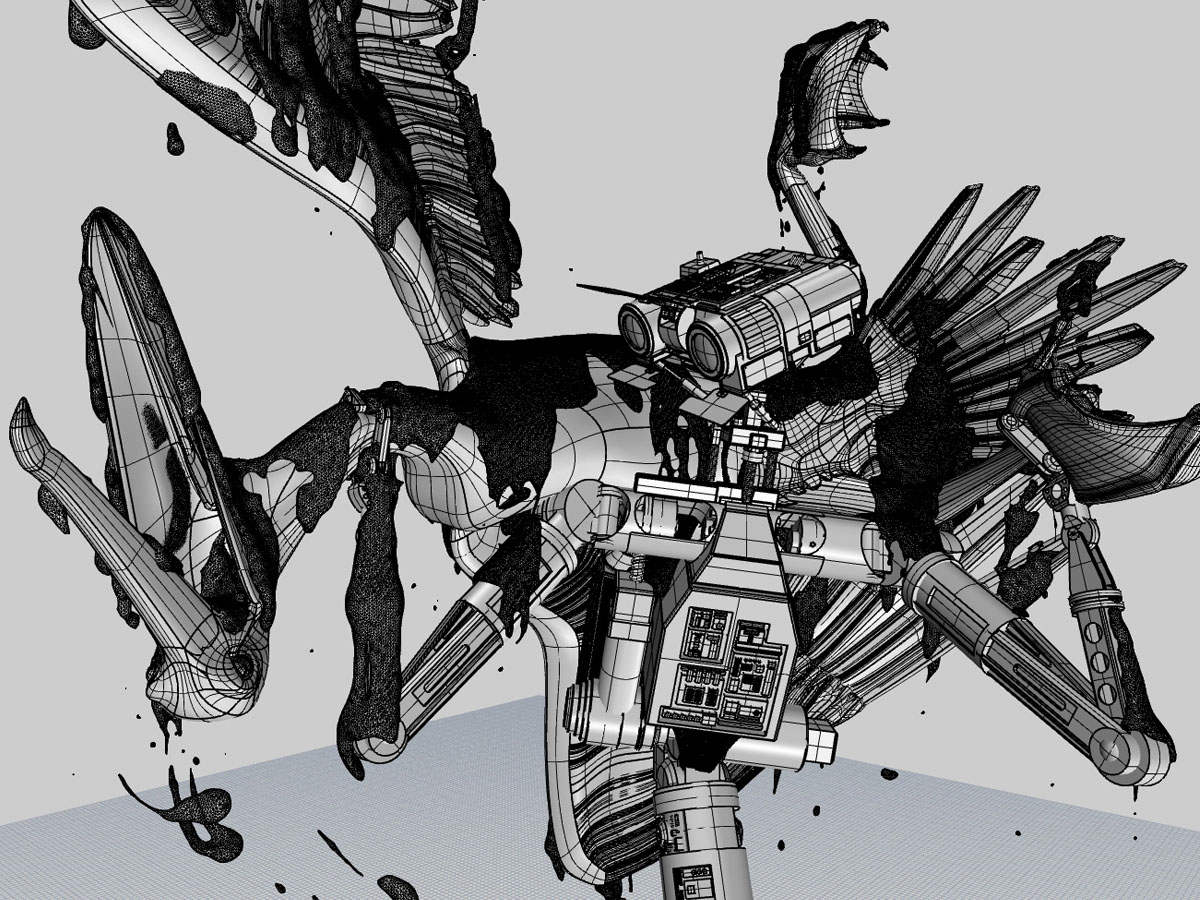
27 I used fluid simulation extensively in my Hercules and the Centaur project.
28
Note that the larger your domain box the harder Blender will have to work to process the result. The program has to account for all of the space inside the box during the simulation. With this in mind you’ll want to keep your domain as small as possible.
I asked myself “What is this 30 minute long thing?”. I most certainly did not enjoy what I have seen. It seemed so out of the reality that the story was casted in a place where nothing made sense. Music selection affected the way I looked at different sections of the video. For example the the music that was overlapped for first 5 minutes really irritated me. It didn’t have smooth harmony whatsoever but a messy set of sounds in an endless manner. I believe it is chosen to be that way since it is hard to achieve such chaos without aiming for it.
Objective Description:
The video took place in Guggenheim Museum. The apprentice, the pink male with Scottish Kilt and bloody cloth in his mouth is the main character. In the floor ground by the pool the topless ladies are making the start. In 5 different stories there are 5 different characters are set. The first Level had the bunny ladies dancing. The second floor had the punks followed by the tiger lady in the third floor. Fourth floor was composed of building materials that needs to be done in a specific way but it was unclear. Fifth floor had the man throwing wax at a black substance he set up.
Technical Decisions:
The costume selection for the piece was very vibrant both in terms of colors chosen and the forms of the clothing. However for the top floor and the second floor where the world we know might be placed in had a more ordinary scene. I think the camera angles were used appropriately, many different angles yet it was clear that the artist didn’t want some documentary style. He showed what he wanted to in a moderately descriptive manner.
The Work In The World:
I don’t know if this work has any work in the world I want to be in. I don’t know how to make sense out of it. It is really hard to follow and frankly I don’t think it adds anything the world. The piece could be used in music classes to demonstrate how overlapping different songs could end up.
Story it Tells:
I could follow that the apprentice needs to go all the way up and get challenged by different problems. Since he doesn’t interact with Richard on the top floor I am not what is going on there. When he completes the cycle once he takes a bath and this crazy weird worlds keeps spinning in its own overlapping reality.
I found this short film to be very bizarre and off-putting. There is a tension throughout this piece that doesn’t seem to ever get resolved until the very end scene when the piece reaches its climax. The odd use of music, filming perspective, and almost theatrical characters mixed with ordinary people picked off the streets resulted in a strange juxtaposition. I felt a bit unsettled and confused throughout this whole work, constantly searching for sense or some kind of progressing narrative- of which I found none.
Objective Description
This short video is filmed in a building where construction is going on and various scenes are occurring at different levels. There are two main characters that seem to have some kind of relationship, and several changes in mood and volume of music suggest the development of narrative. The apprentice is the most notable character dressed in theatrical garb and the main female lead transforms from a handicapped goddess to a cat-like creature. Throughout the film there is a building ensign that occurs with the musk and screaming/chanting crowd, in conjunction with the building’s construction.
Technical Decisions
This work is a short film that is filmed from several perspectives, angles and directions for a total of 30 minutes. The decisions seem intentional to film it in this manner, and yet there is a randomness which also benefits this deliberateness. I am not sure how the title impacts my understanding or interpretation of this work, for I am very confused about its objective. At the very end when the main female lead is shot/wounded four times, this suggested to be a metaphor to me for something larger. There are a few biblical references throughout this work such as the cross box for example that suggest perhaps this is a religious interpretation about the future or a social critique. The presentation suggests that the creator wanted the viewer to make his own conclusions, and seems to be rather ambiguous which changes the meaning of the piece.
The Work in the World
I believe the characters/actors in this work are most demonstrative of the intended commentary. This work suggests a commentary on our world, in a large commercial skyscraper building with an odd juxtaposition of scenes that occur inside.
The Story it Tells
I am unsure of the concept behind this work, however the deliberate decisions in this piece’s filming, composition, and visual mechanisms help aid in the narrative. I feel that there is a deeper significance with this work that references either biblical or mythological literature, that has been applied to modern day and its relevance for our future.
Choose an artist from the list below for your upcoming Art Report and Artist Presentation. The artists on this list all utilize CAD in their work. Please consider the following as you make your selection:
– When you find an artist that interests you, it is strongly recommended that you do a preliminary search for information. Before making your selection you’ll want to ensure that you’ll be able to learn a good deal about the artist’s ideas and intentions. In the best case scenario you’ll find multiple resources including the artist’s own writing, interviews, and/or reviews written by critics. If the information is limited you’ll need to make a judgement call on whether you’ll have enough content to create a highly informative 5-minute presentation.
– Since this is a studio art course we’re looking to discuss meaning and the intellectual content of an artist’s work, but not all digital artists are focused on generating this kind of depth in their work. Artists who are entirely commercially or technically focused would not be good selections. Look for an artist who makes work with rich, thoughtful content.
– Remember that you’ll cover the same artist for your first Art Report and Artist Presentation.
– Once you have made your selection please email the artist’s name to EVERYONE in the class, CCing the professor. Each student should choose a different artist and selections will be made on a first-come-first-serve basis.
Guidelines and rubrics for the Art Report and Artist Presentation:
Please list a few of your interests, sports you play, or other activities you’re involved in (on or off campus).
I love food, sports, and music and am a huge New York Rangers fan and played ice hockey most of my life. On campus, I am in a sorority, I am the sports editor of L’Agenda, the Bucknell yearbook, and am the President of the Biomedical Engineering Society.
Why are you taking this class? What do you most want to get out of it?
I am taking this class to learn about computer generated art and to bring out my creative side. I took art all throughout high-school but have not had the chance since coming to Bucknell, so I am very excited about this opportunity.
Are there any particular topics or techniques that you’re hoping to learn about in this class?
At the moment, no, I am ready to learn everything I can.
Bucknell email address:
hnb004@bucknell.edu
Cell phone number:
646-379-3996
Cell phone service provider:
Verizon
Henrik Lundqvist, the New York Rangers goalie, after a win during the 2013-2014 season.
Hey Everybody, here are some quick directions for using Kscan 3d, the software that allows us to capture 3d models with the Kinect Sensor.
Start a new project for your scan. Name it something meaningful to you.
Click “Enable Batch Scanning” in scan settings. Set “number of scans” to 18 (you can experiment with this and see what gives you good results, but this is a good number to start with) “delay between scans” to 1, and “delay” to 10.
Confirm that the settings under “meshing” are set to “Generate Mesh” and “Alignment Mesh Geometry”
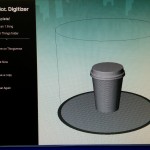
Position yourself (or the object you want to scan) on a rotating platform at least 18 inches from the Kinect. Confirm that the kinect can see the object, and that it is centered in the kinect’s field of vision (at the center of the red crosshairs)
Prepare to be scanned. If you wear glasses, you will want to remove them when the scan starts. Find a pose you like that is comfortable enough to hold for 30 seconds to a minute.
Click the green “Scan” button
The software will beep to countdown to the scan. When it beeps very rapidly the scan is about to begin! Remove your glasses (if you wear them) and strike your pose before this happens.
The software will make a shutter sound when it takes an image. Rotate yourself (or have a buddy rotate you) clockwise a very small amount.
The software will beep rapidly and make the shutter sound again when the next image is captured. Rotate yourself again, and continue rotating slowly and evenly until all 18 images have been captured.
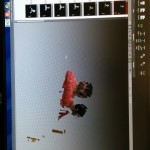
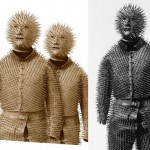
You will see a series of grey meshes in the central mesh area of Kscan! Check to see that they have all aligned correctly (check for duplicate or out of place features)
You can select the individual captures from the panel to the immediate left of the mesh area. The selected mesh will display red. Select any out of alignment meshes and delete them (if necessary).
When all meshes are aligned, select your first mesh and hold down shift while selecting your last mesh to select all meshes.
Click combine in the “combine” panel near the center-top. Wait for the combine operation to complete (this may require several minutes).
Select the combined mesh and click “Finalize” in the combine panels. The default settings for Finalize should work well, though you may want to turn “close holes” to the maximum setting (slider all the way left).
Wait for the finalize process to complete (this may take several minutes).
You should now have a finalized mesh! It should look much smoother than your rough combined mesh.
Click the down arrow at the base of “Export” in the “Scan Panel” to select a format to export your Mesh as. Obj and Stl will work best for most of our purposes.
Select your finalized mesh and click “Export” to export as the format selected.
That’s all you need to know! Once you try this process, experiment with settings and techniques and see what you can achieve.
The Digital Scholarship center has been set aside for Kscan experiments at set times over the next two weeks. To schedule Kscan time during an available slot click any of the “Open Kscan” appointment slots on this calendar page.
In approximately 300 words, please write a response to the following questions. Post your work in the “research binder” category.
Blyn suggests that we have entered a posthuman era. What do you think she means by this? What are the defining features of the posthuman era?
What do you think about Blyn’s assertion that technology has permitted Mullins to become an architect of her own identity?
What do you think of Blyn’s suggestion that the posthuman era is marked by corporate domination and ideological mechanization? Do you think she is right? Why or why not?
As you consider the positive and negative effects of augmenting the body, do you think humanity is facing a net gain or a net loss? Why? How?
Please address any additional aspects of Blyn’s chapter that were of interest to you.
Email is one of the most common means of textual communication in the professional world, and it requires a higher degree of etiquette than social media or text messaging. Over the past few years I have received many emails from students that were written in an unprofessional manner. As a professor I feel a responsibility to prepare my students for the professional world, so I have decided to implement an official policy on email etiquette in all of my courses. If I receive an email from a student that I deem to be problematic in some way, I will send a link to this message and request revision. Please adhere to the following standards of etiquette when corresponding with me by email this semester:
– Please use a subject line that is meaningful and relevant to your message.
– Please begin your message by addressing me directly. When I receive an email from a student, I expect something to the effect of “Dear Professor” or “Hello Professor”. When a message is missing this crucial element it can seem impolite. Launching immediately into the body of your message, or beginning simply with “Hey,” or “Hi,” is not up to professional standards.
– Before sending, please re-read and edit your message to ensure that it is clearly written and grammatically correct.
– Emails should end with a closing of some kind. It is suitable to end your messages with “Thanks” and your name, or “Sincerely” and your name, or if you’re in a hurry, at least include your first name or initials to indicate the conclusion of your message.
Thanks in advance for adhering to these guidelines.
Best regards,
Professor Meiser
–
Joe Meiser
Assistant Professor of Art in Sculpture
Department of Art & Art History
Bucknell University
Lewisburg, PA 17837
studio phone: 570.577.3044
website: http://www.joemeiser.com
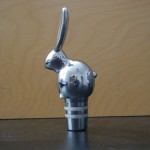
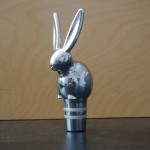
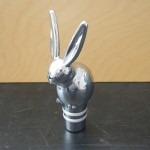
How did you split apart the T-splines surfaces for your pelican for keyshot? Converting the surface to NURBS and exploding does not seem like the best move for this.
– – –
Hi Phil,
There are many different approaches that can work for splitting surfaces up, but I found a couple of methods to be particularly effective when I prepared my pelican model for keyshot:
1) If you want to split the surface in a way that works with your existing isocurves then you can run the “split by isocurve” command. On your left main Rhino menu you should be able to right click on the “split” button to initiate the “split by isocurve” command. You’ll then be able to drag the split boundary where you want it — note that you can toggle the U and V orientation.
2) If you want to split the surface in way that does not work with your existing isocurves then you’ll need to create curves on the surface of your model and use them to split it apart. To do this you can project curves to the surface, or you might also try interpolating curves on the surface (I had really good luck with this method around the pelican’s eyes and beak). I believe you can find this command in the left main Rhino menu– look under in the submenu associated with control point curves.
Please let me know if these methods help you achieve the result you’re looking for.
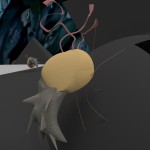
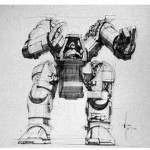
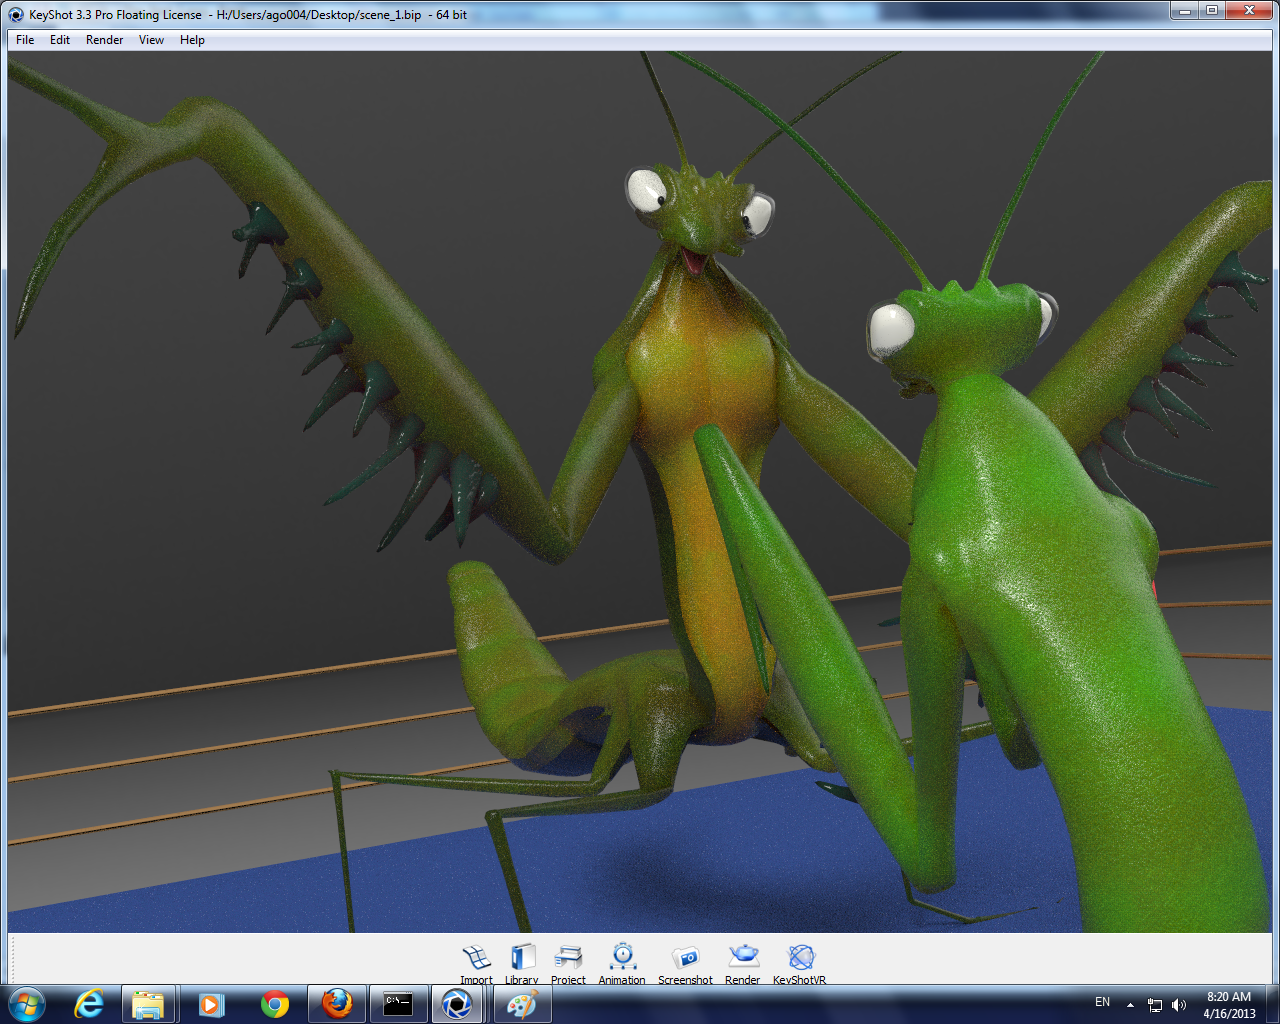
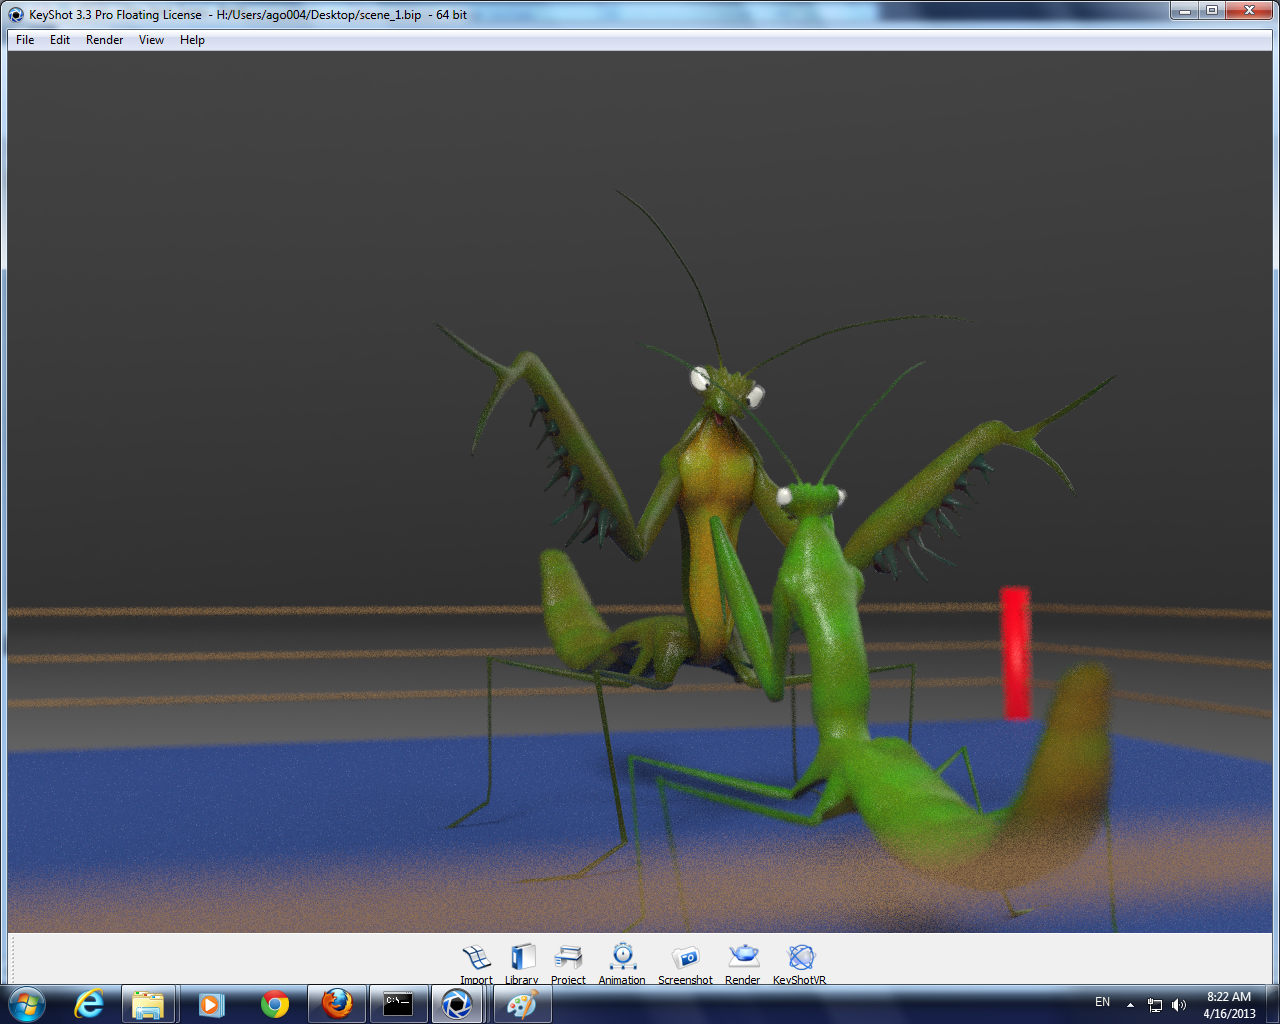
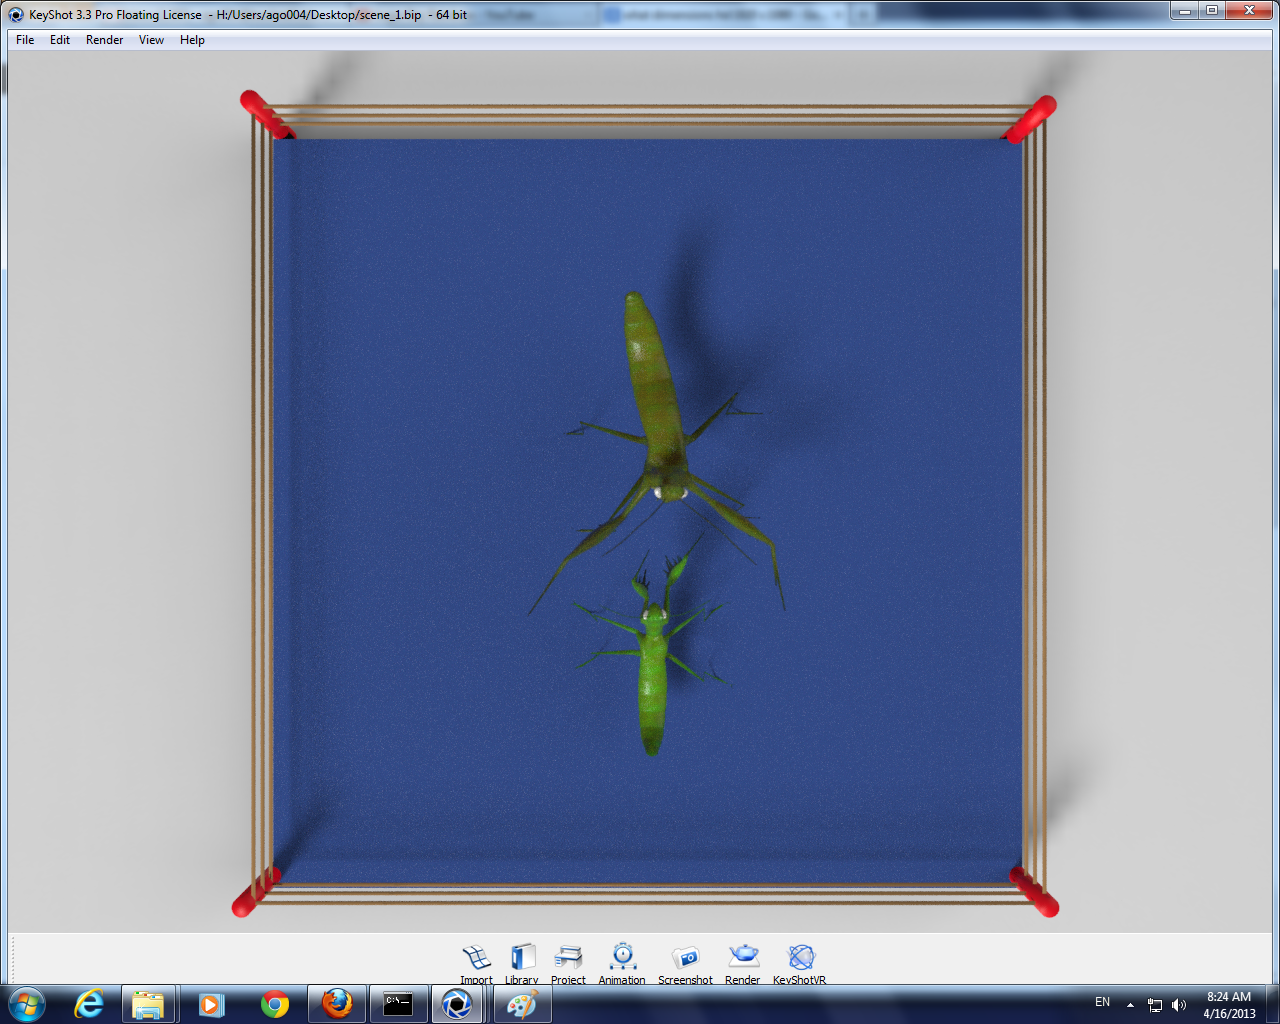
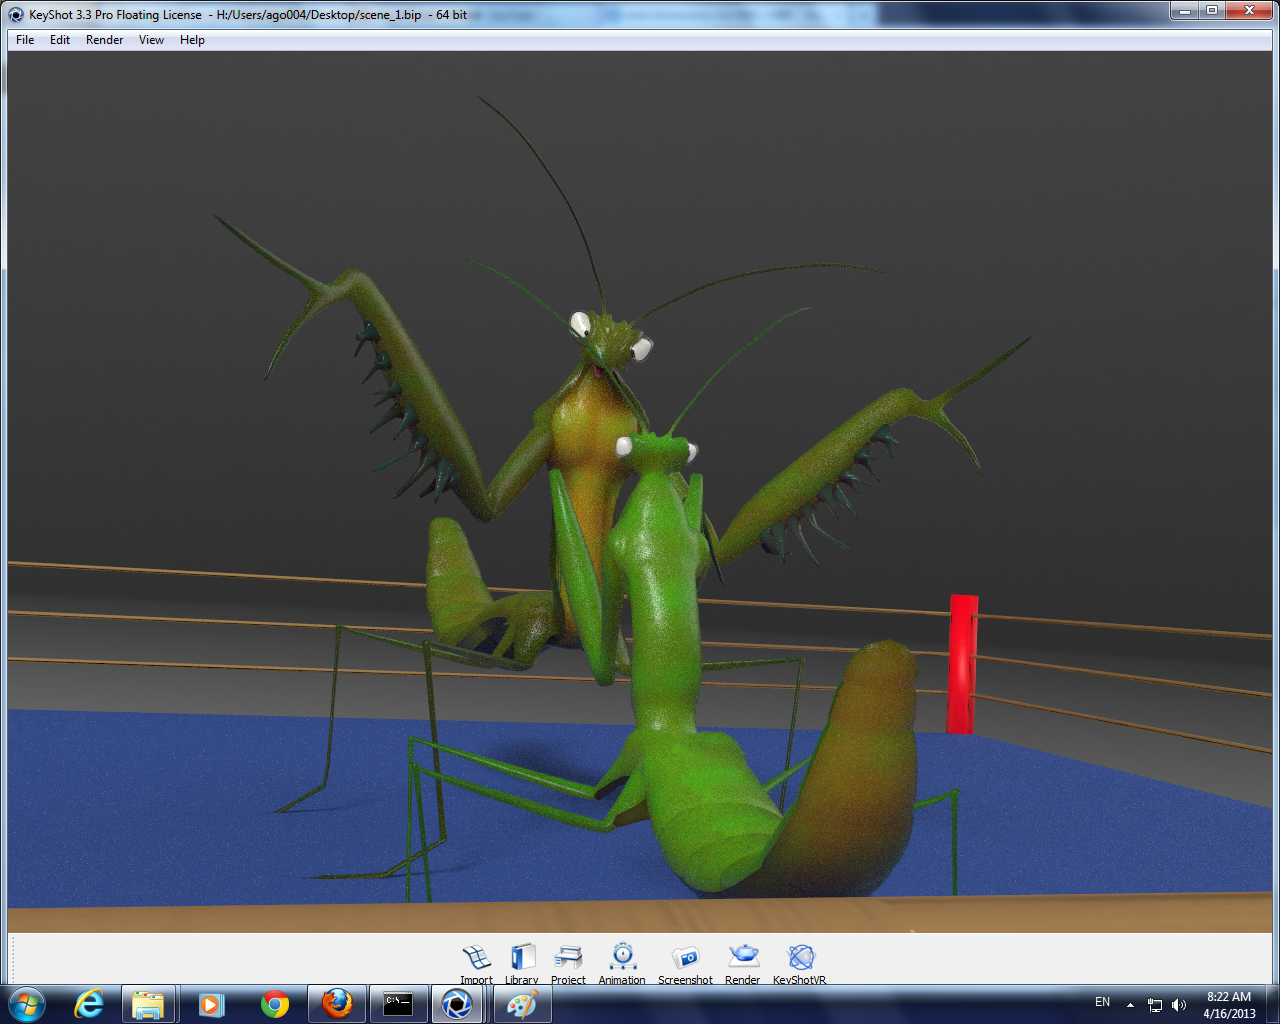
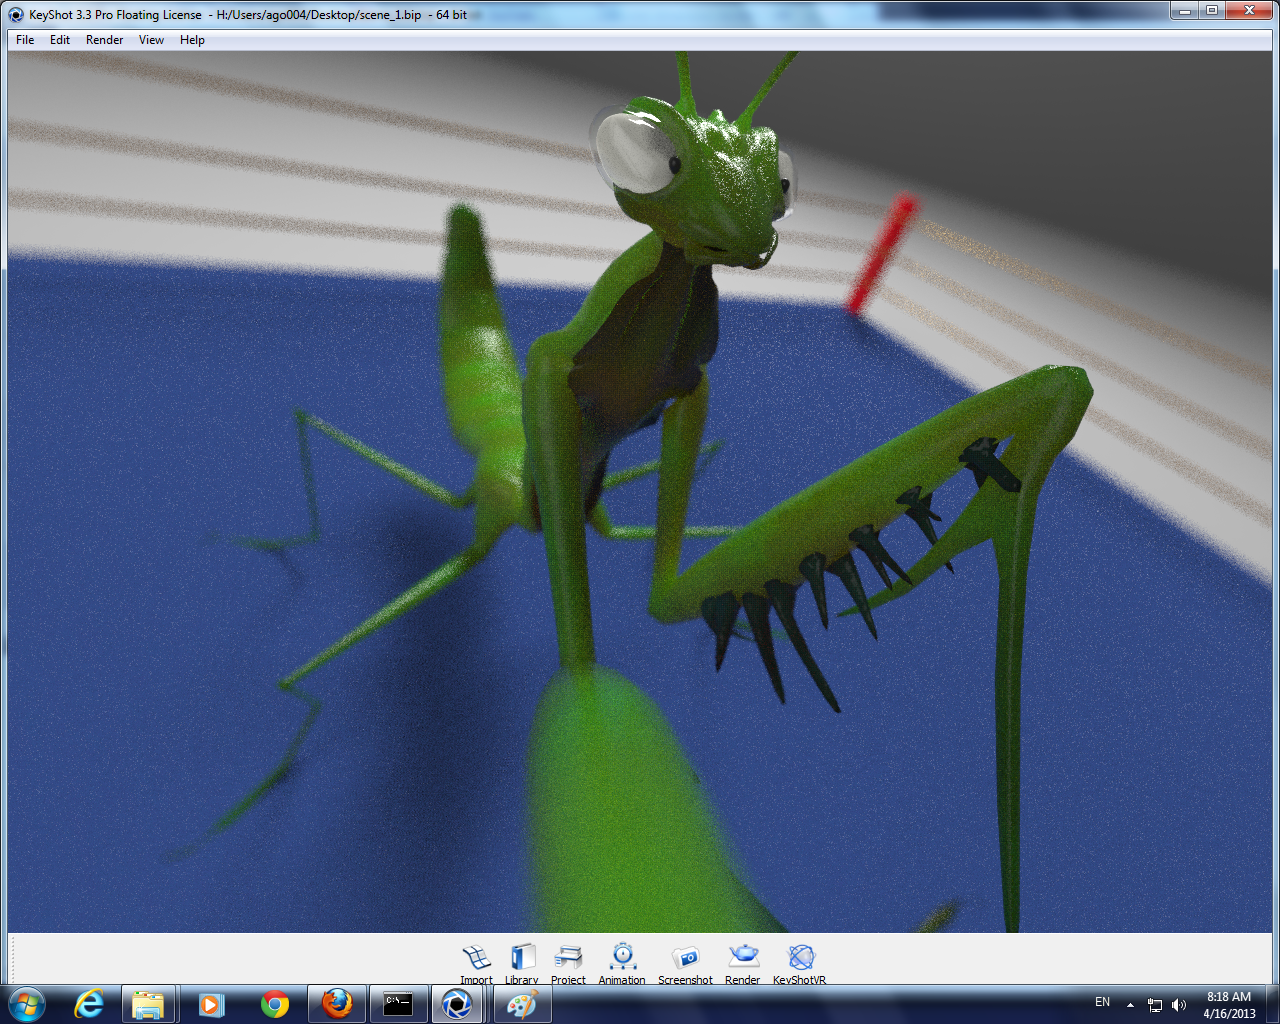
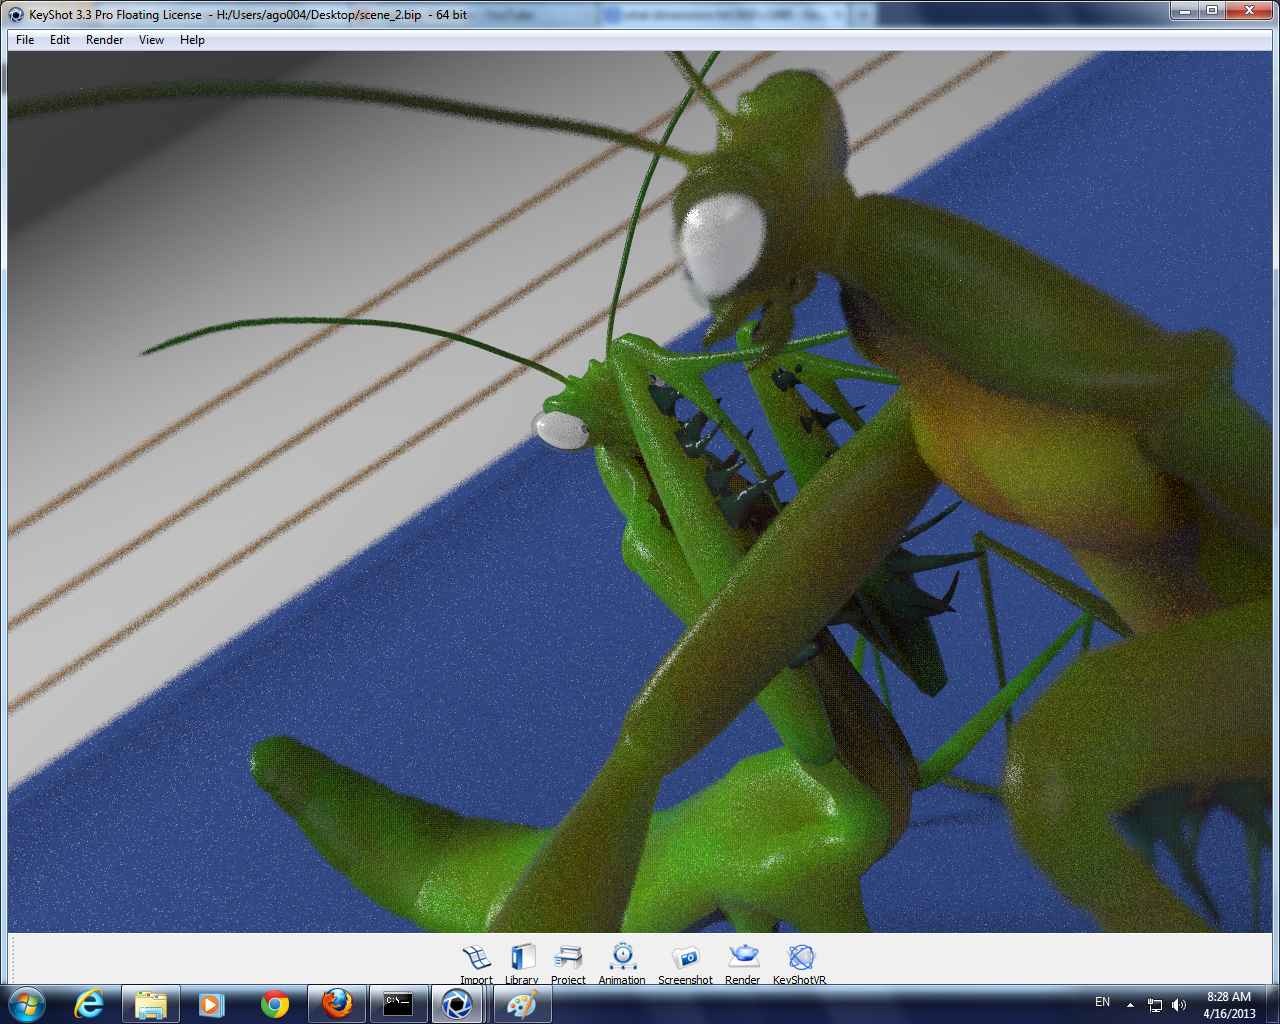
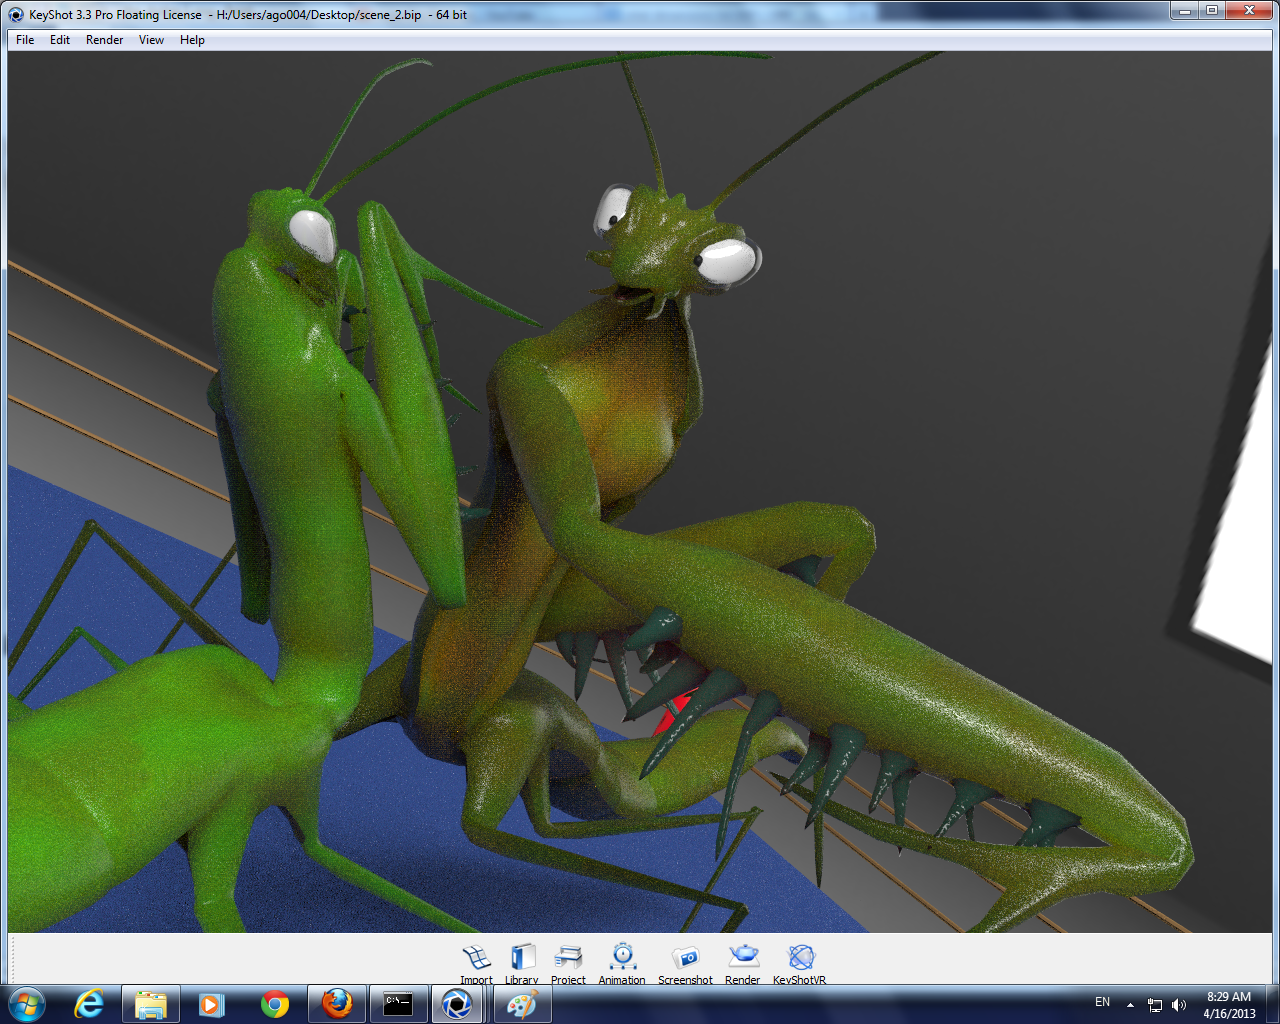
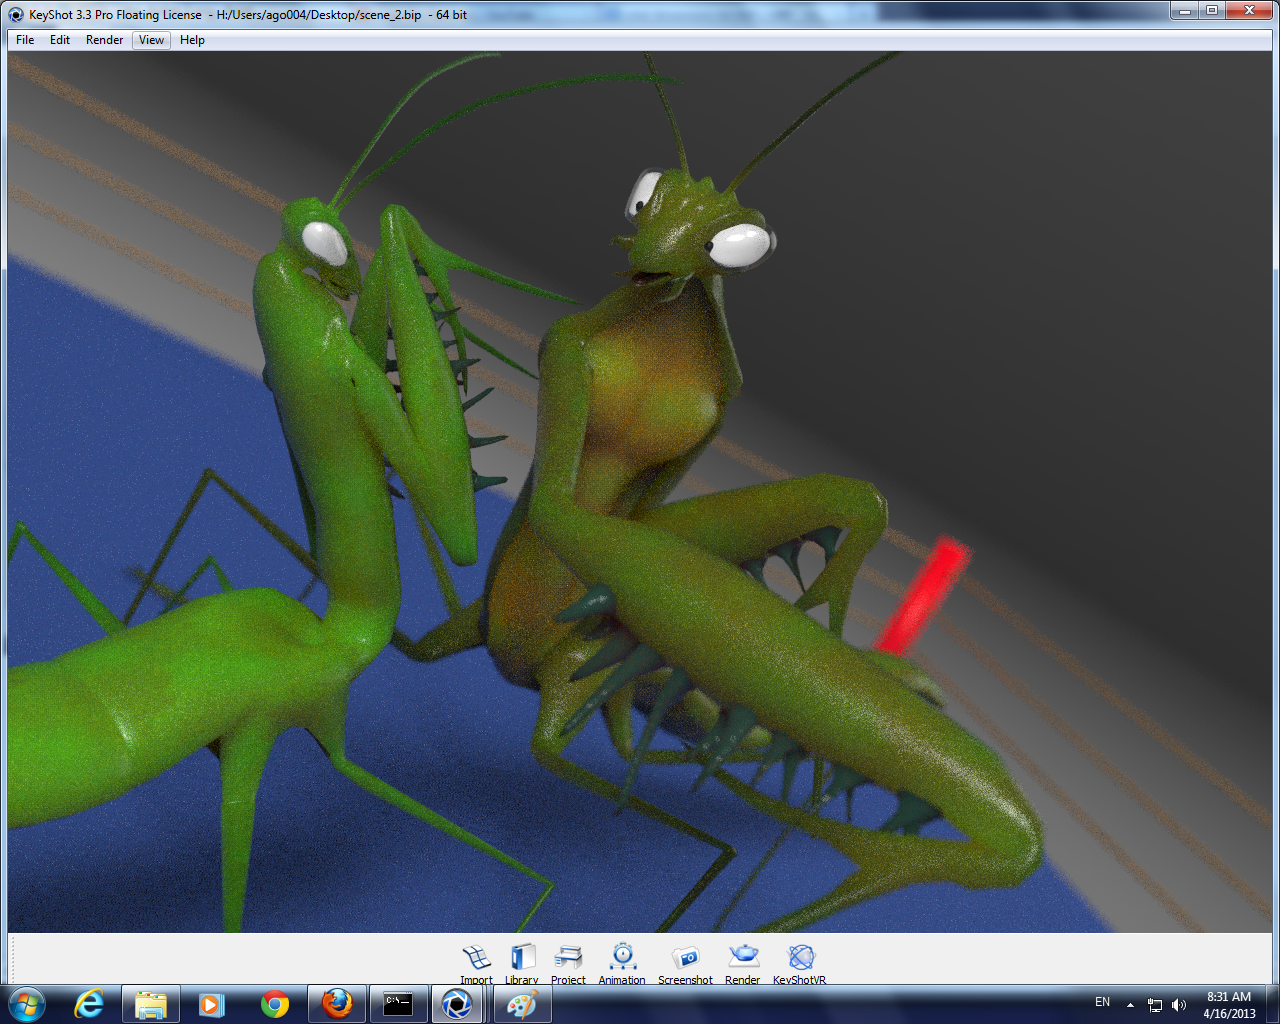
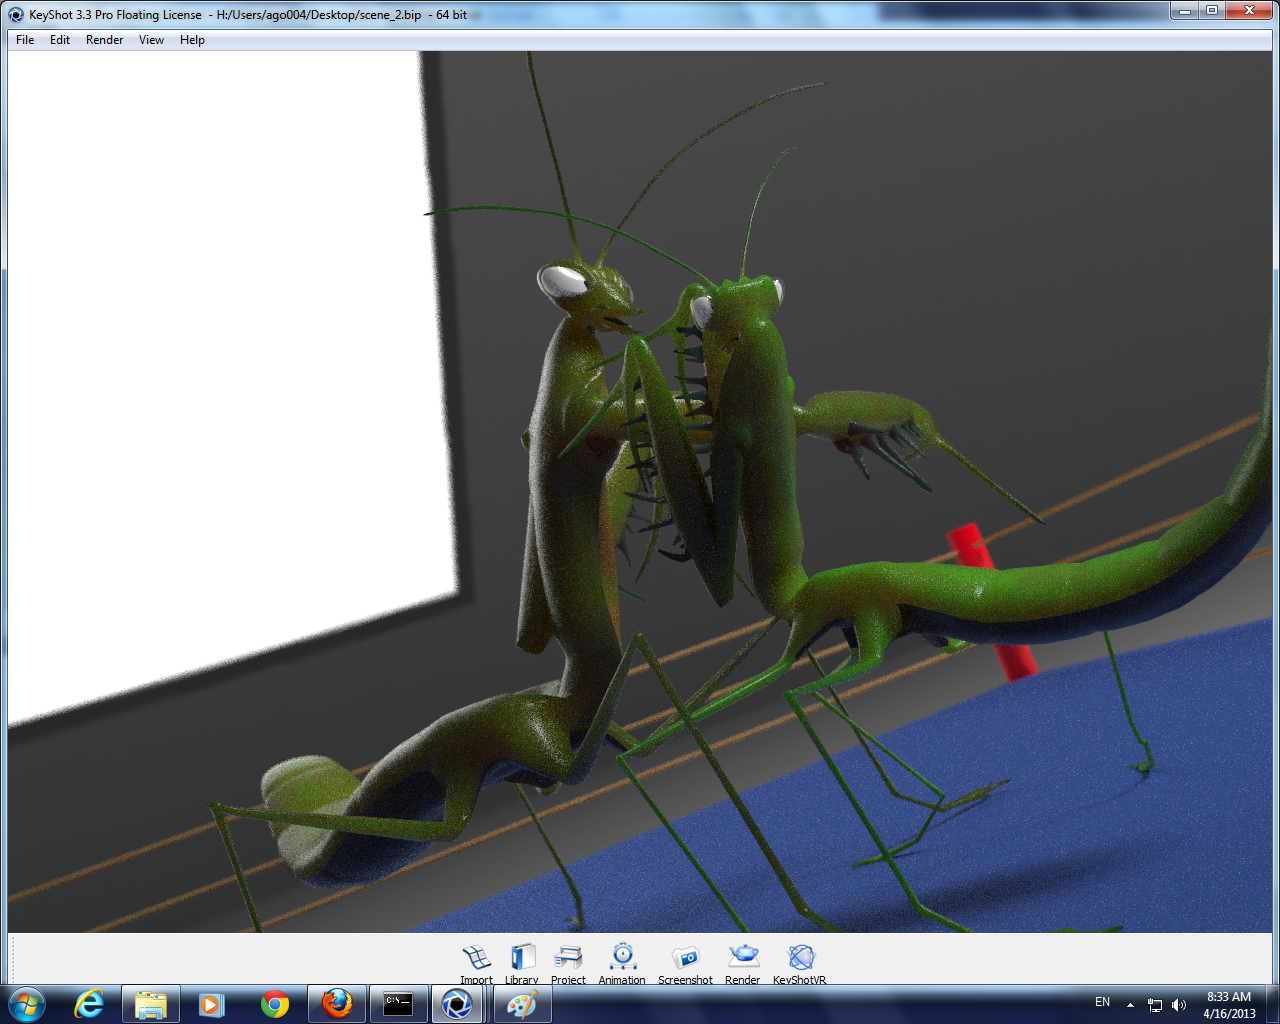
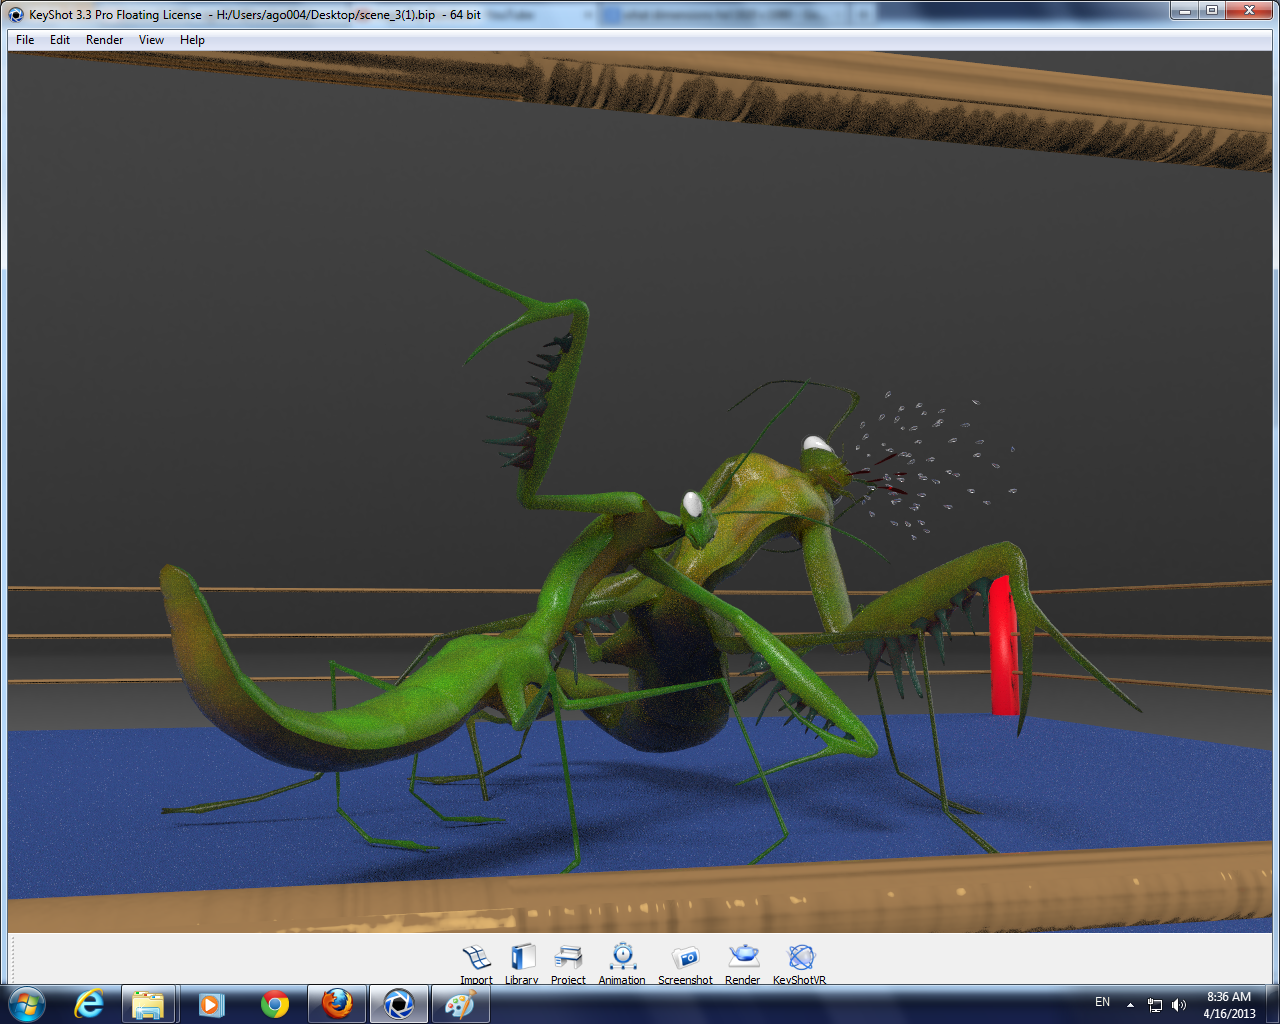
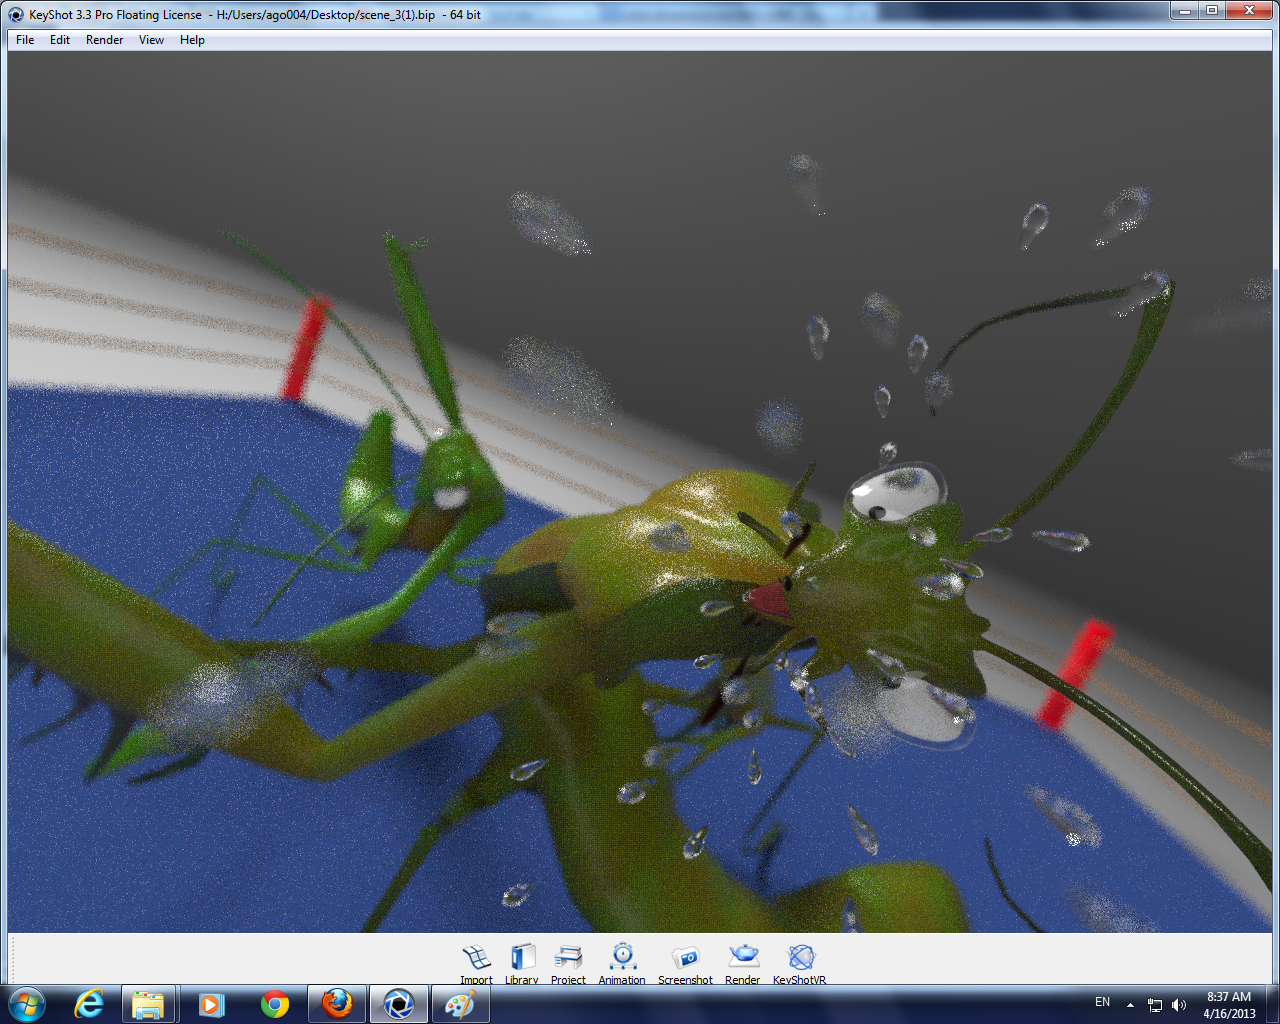
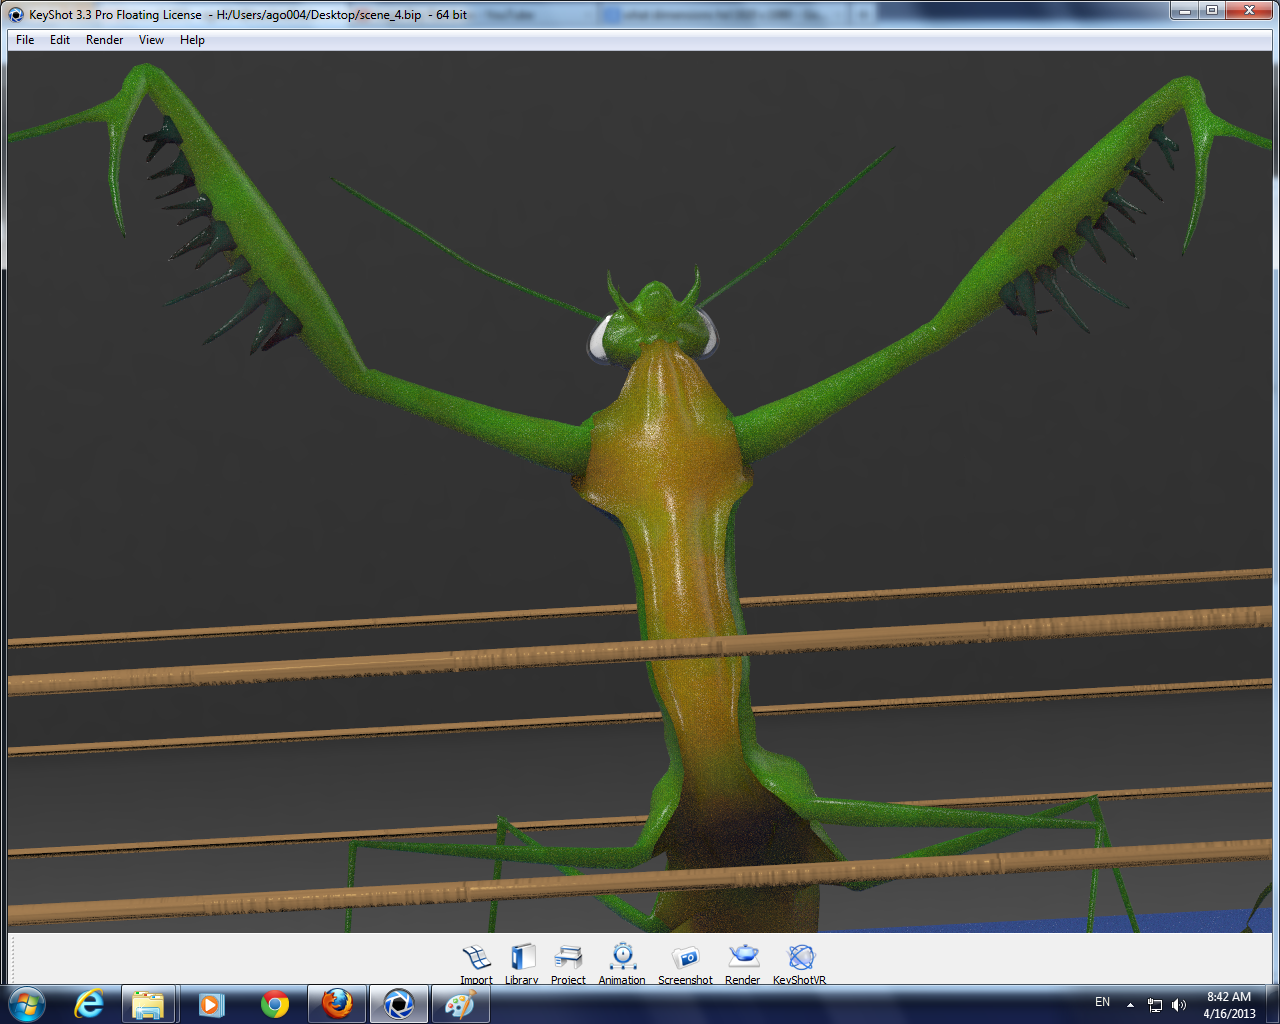
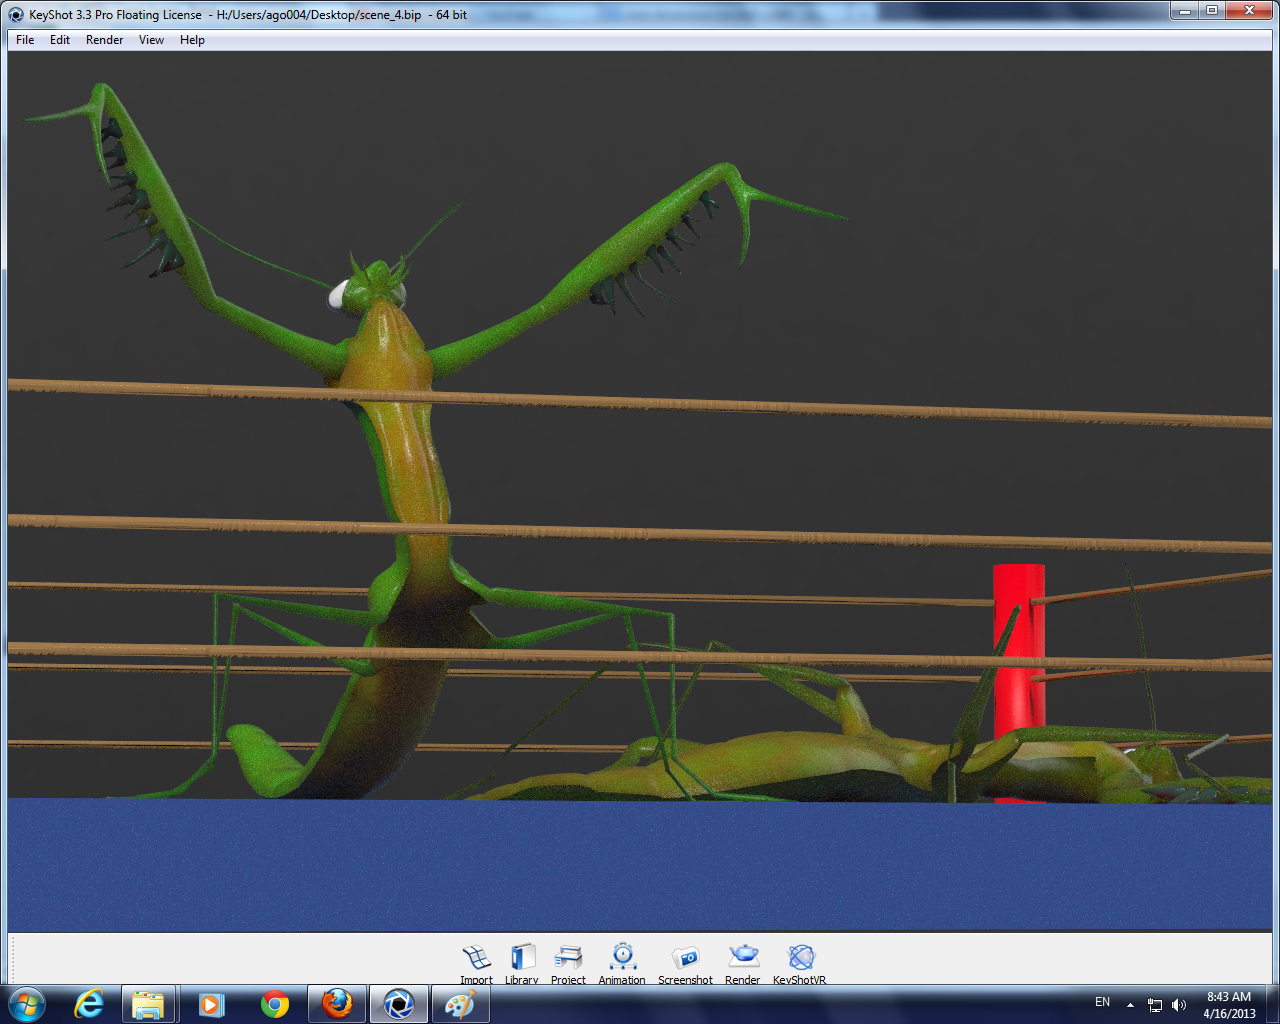
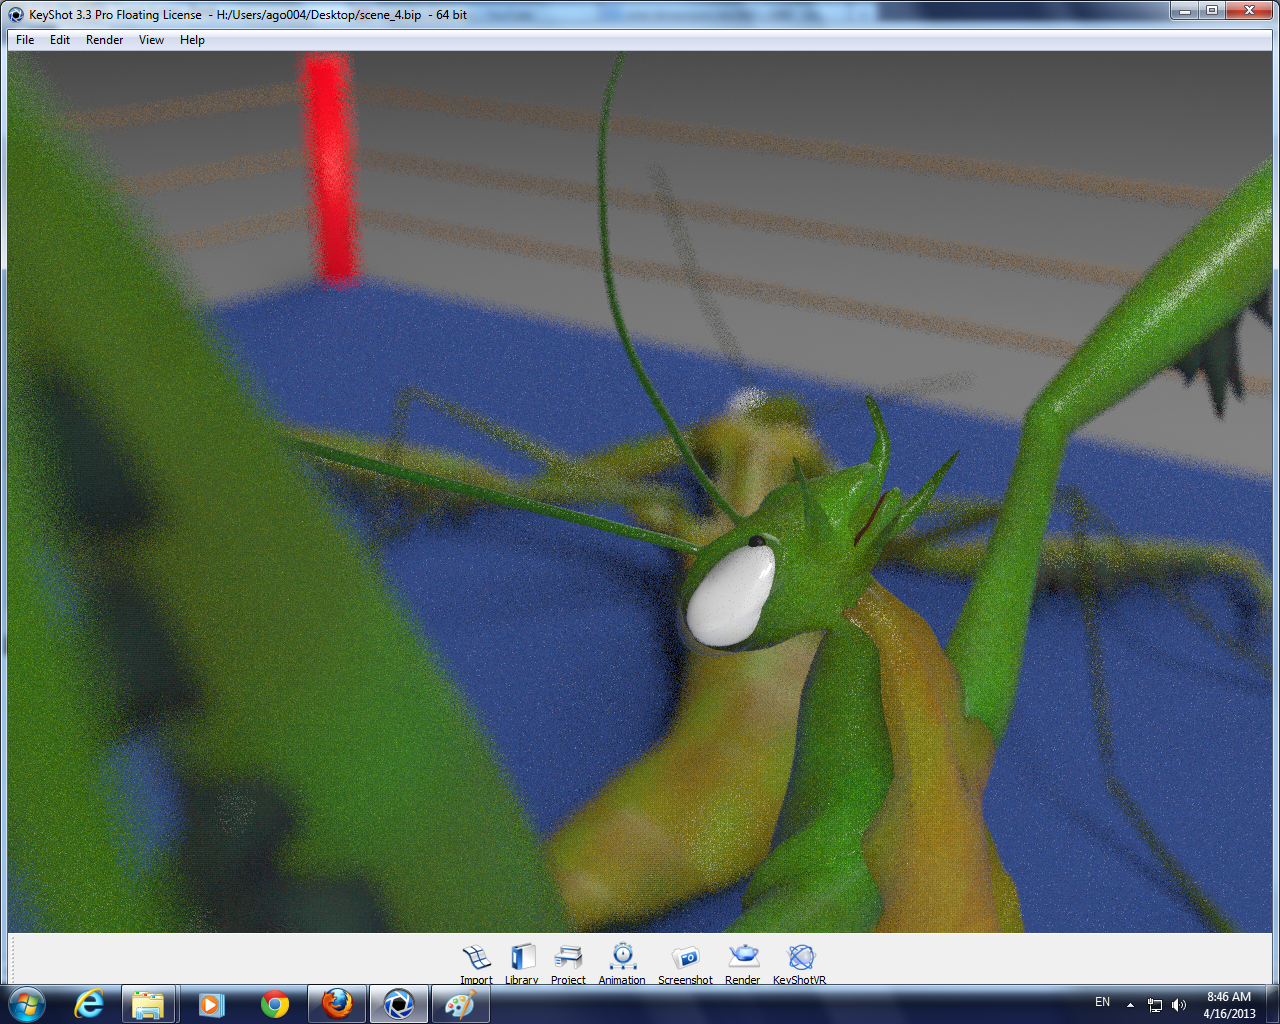
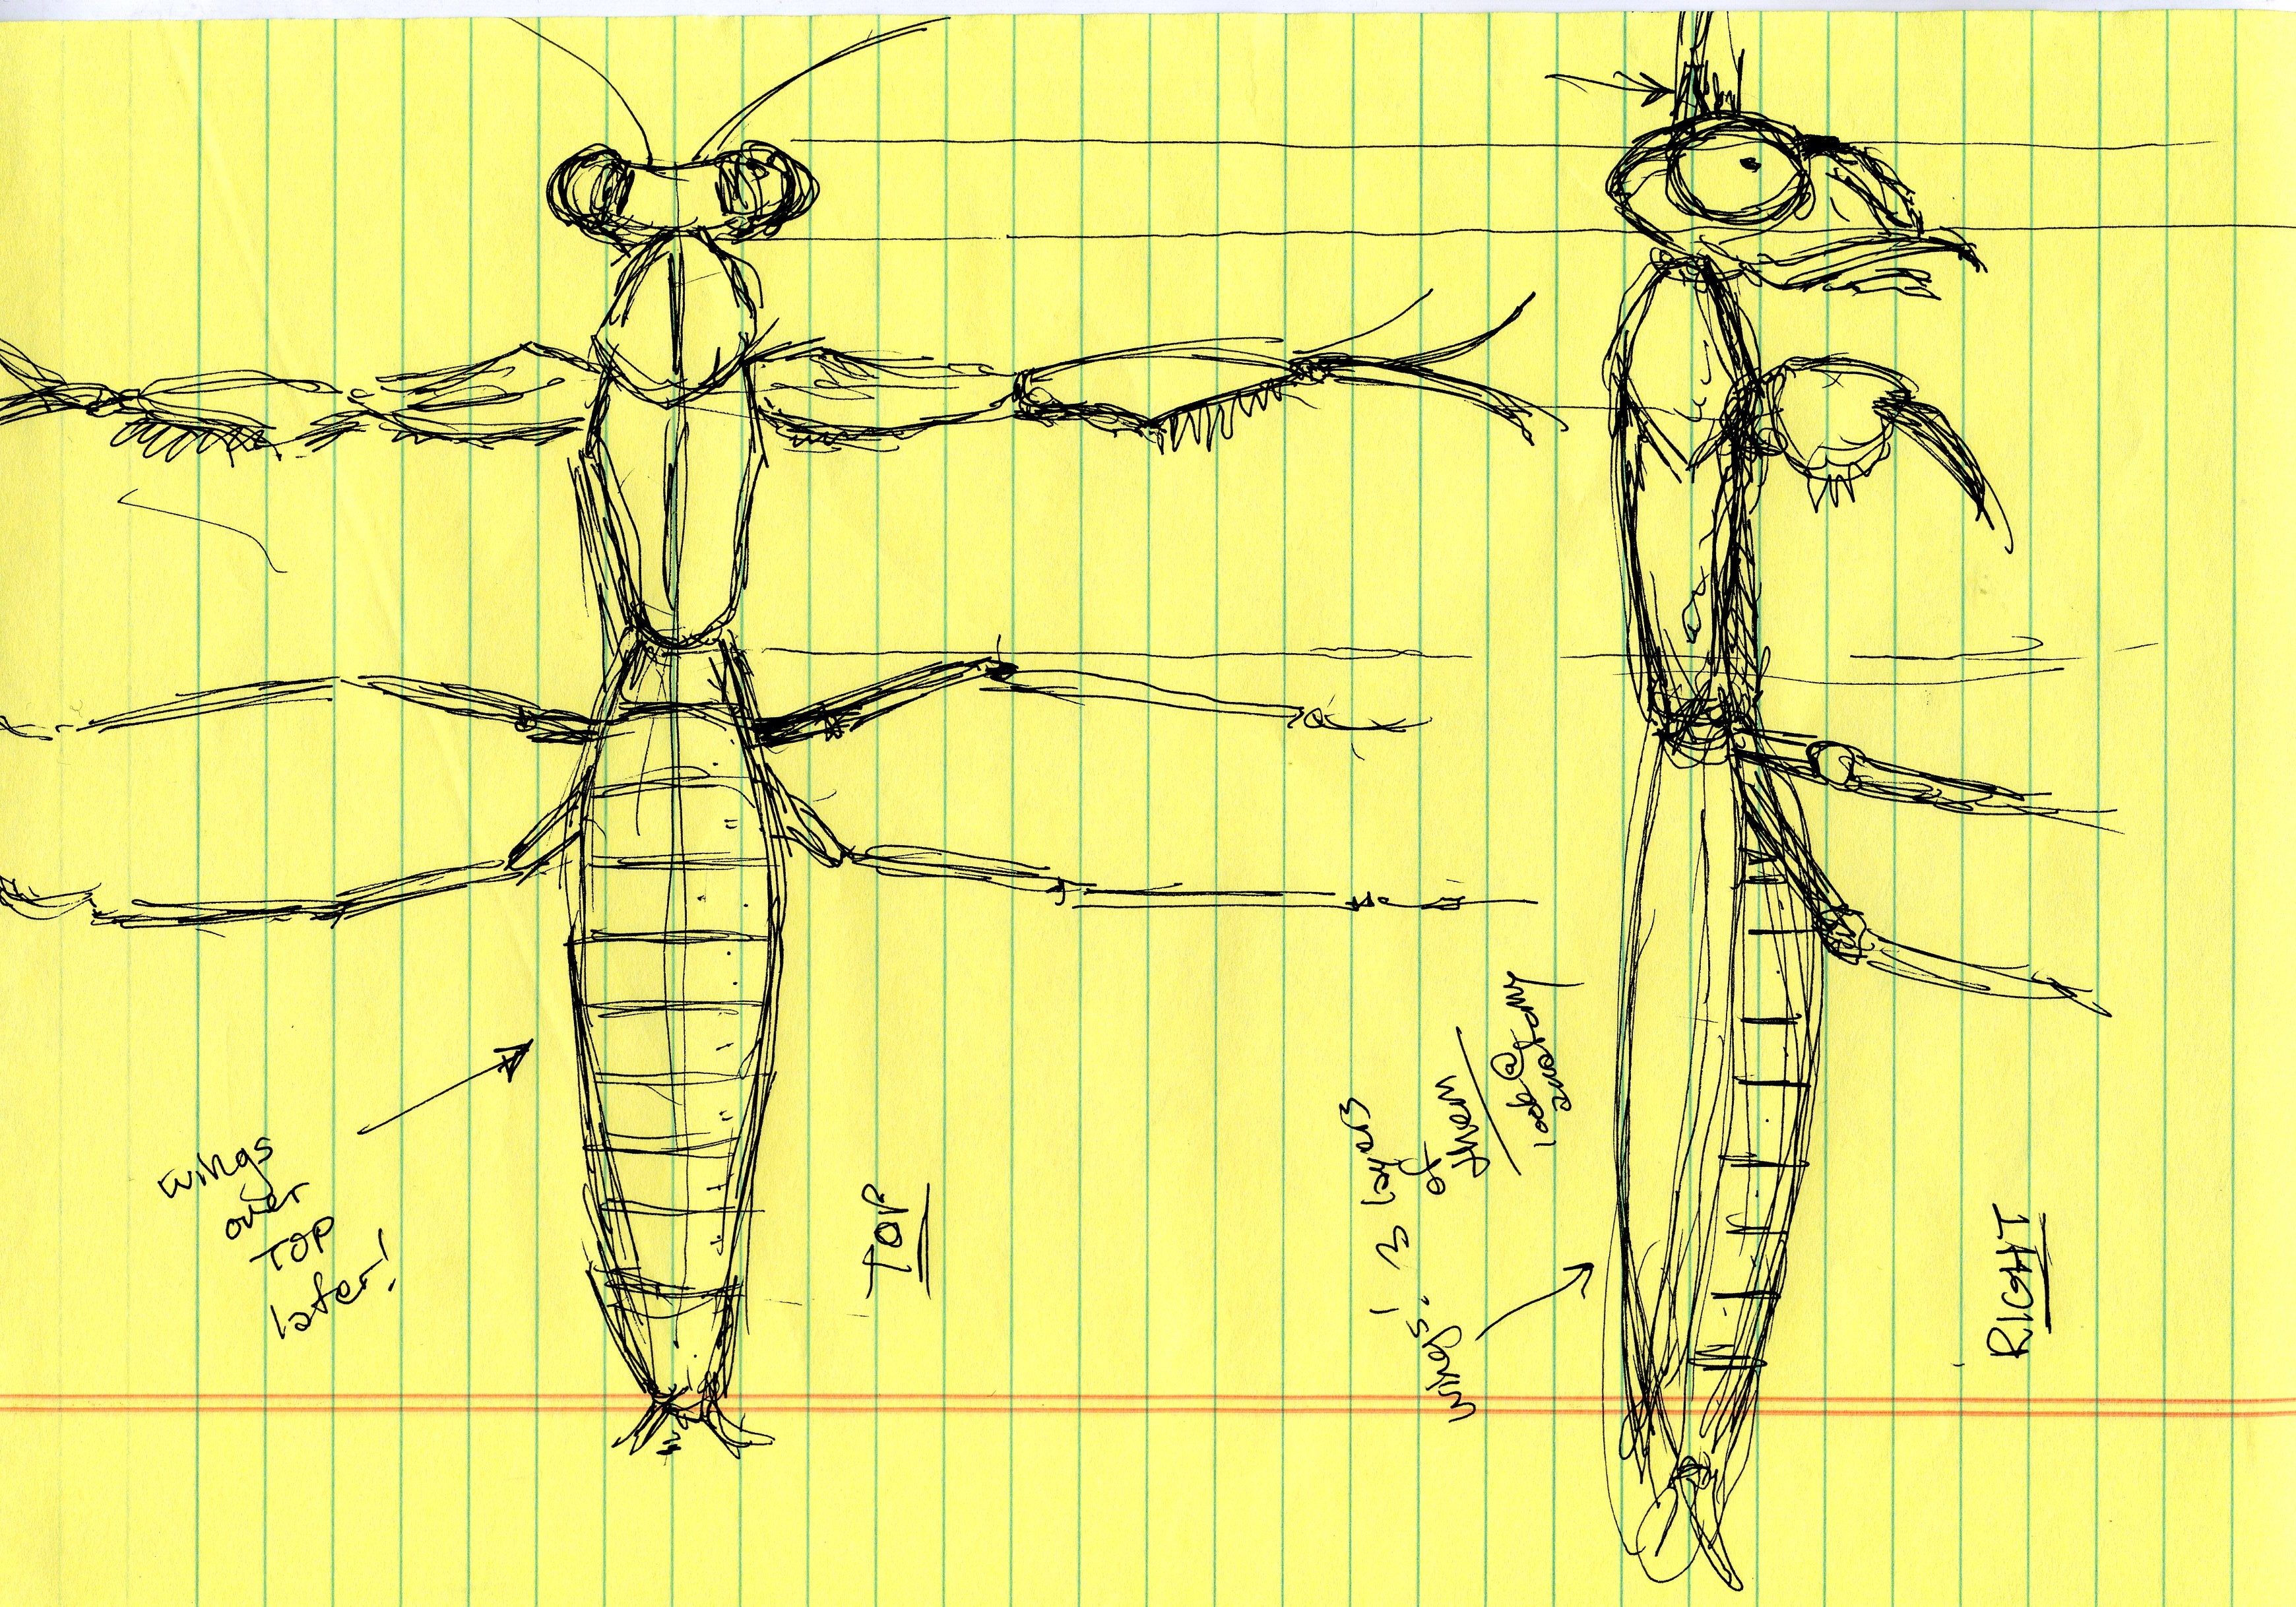
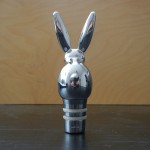
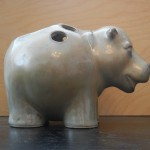
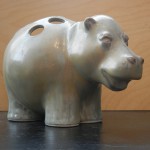
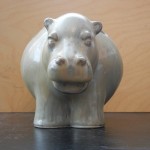
Here are my initial studies of my insect, exploring how emotion can come into play into its “face” and some initial notions about the final 3 render series. (proportions are not perfect, more for the feel/style)
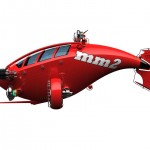
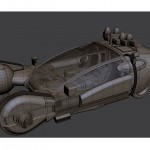
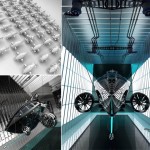
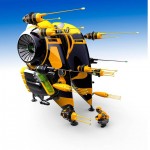
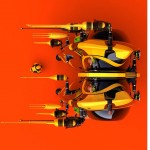
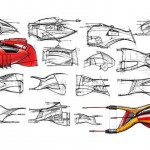
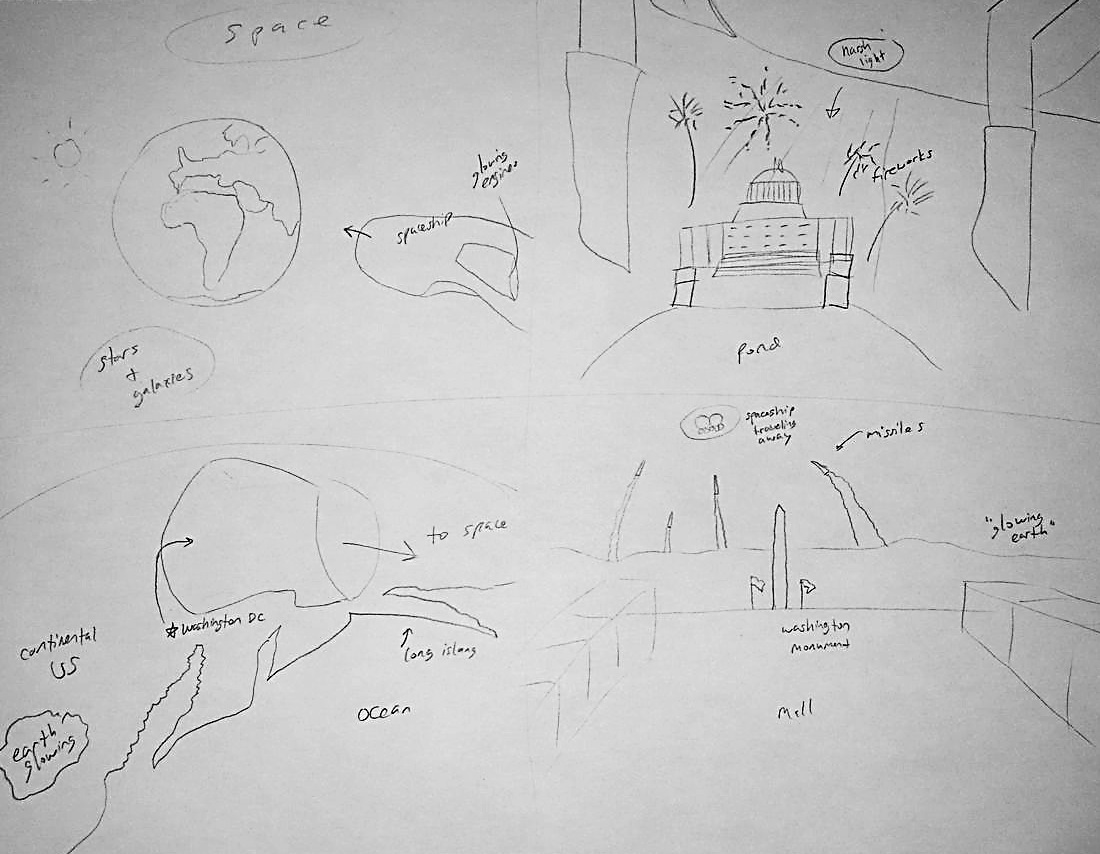
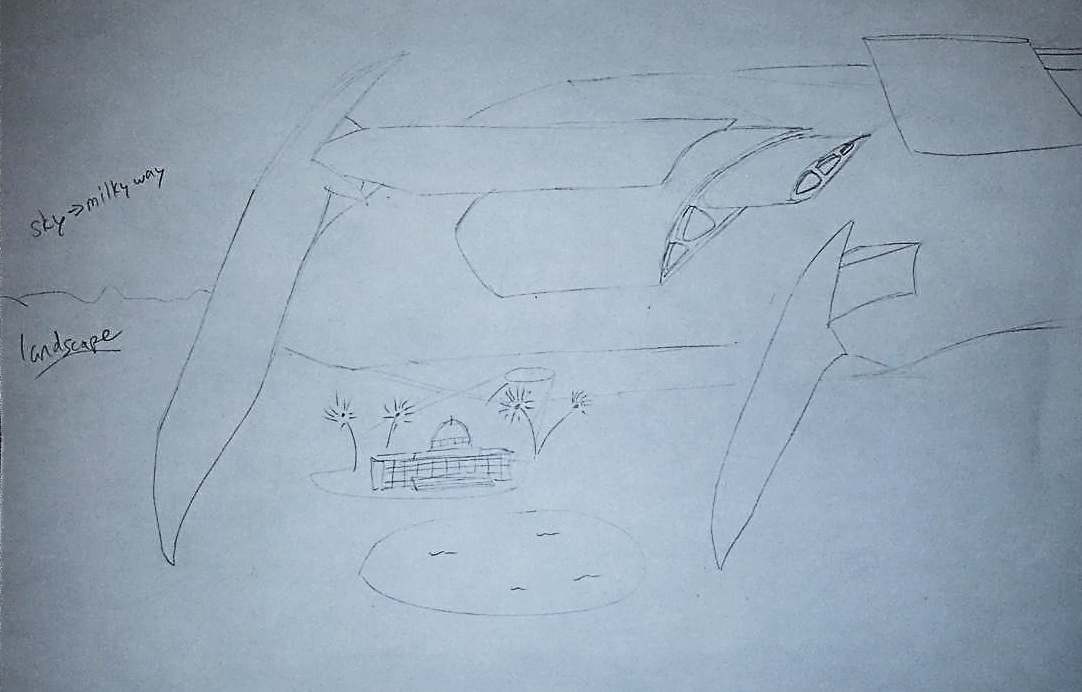
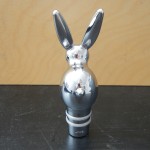
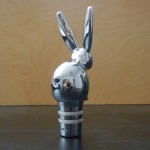
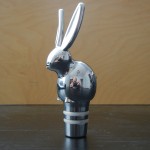
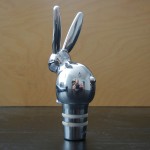
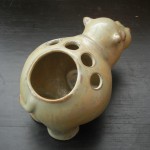
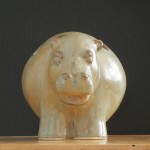
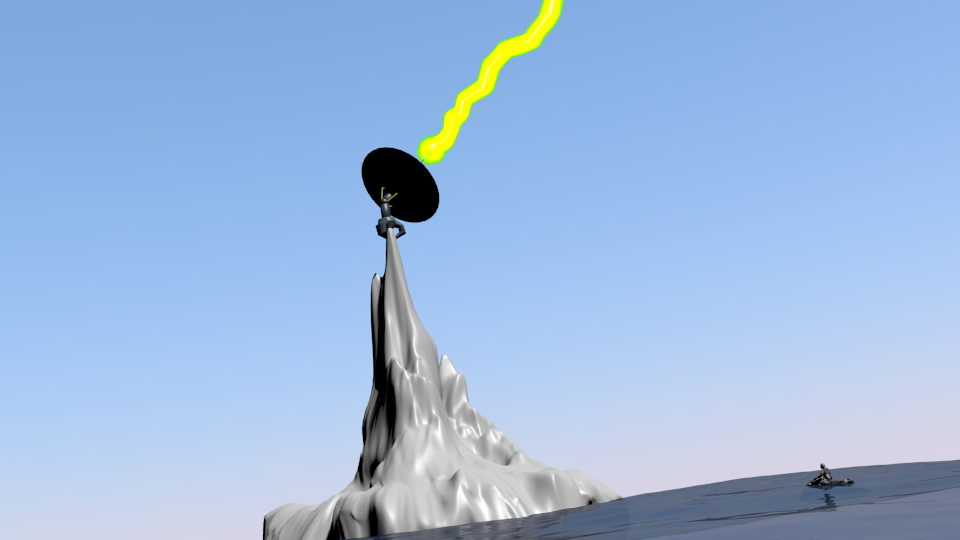
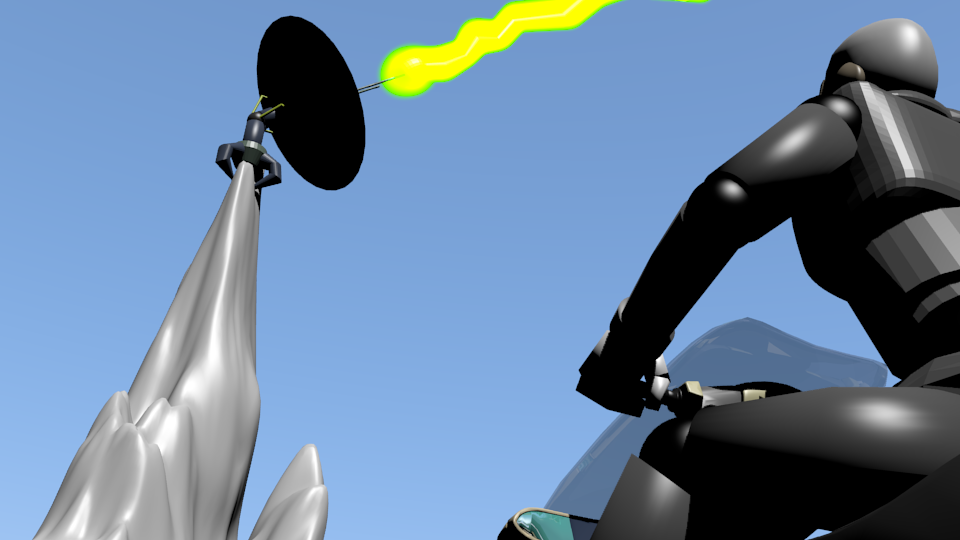
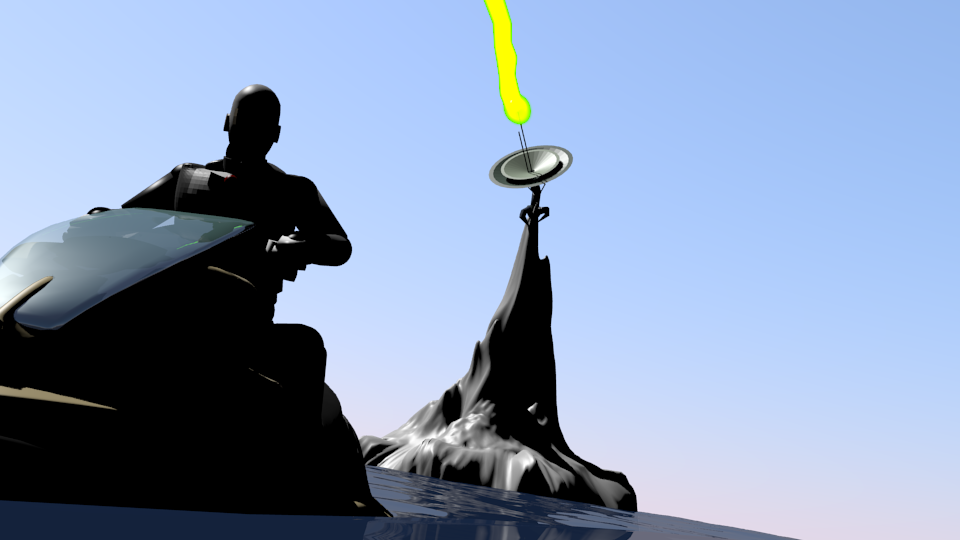
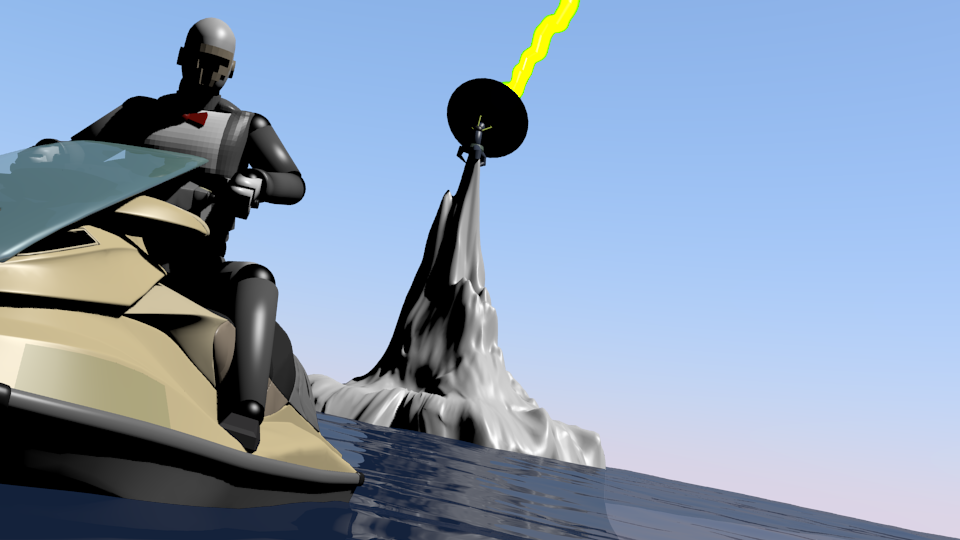
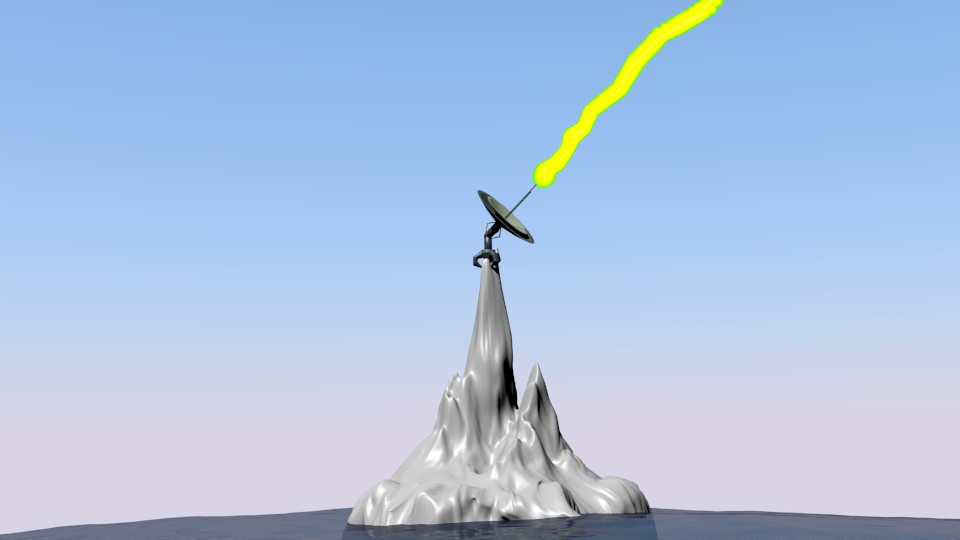
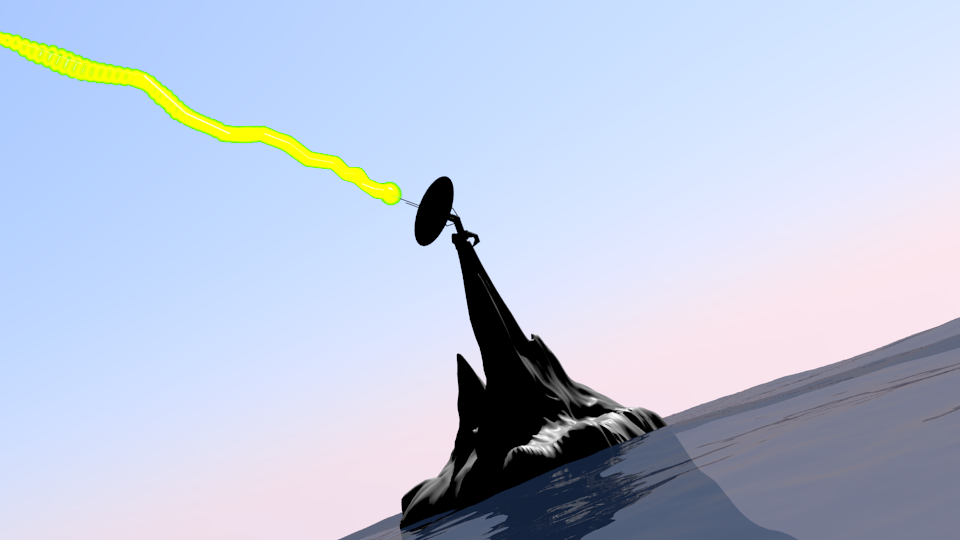
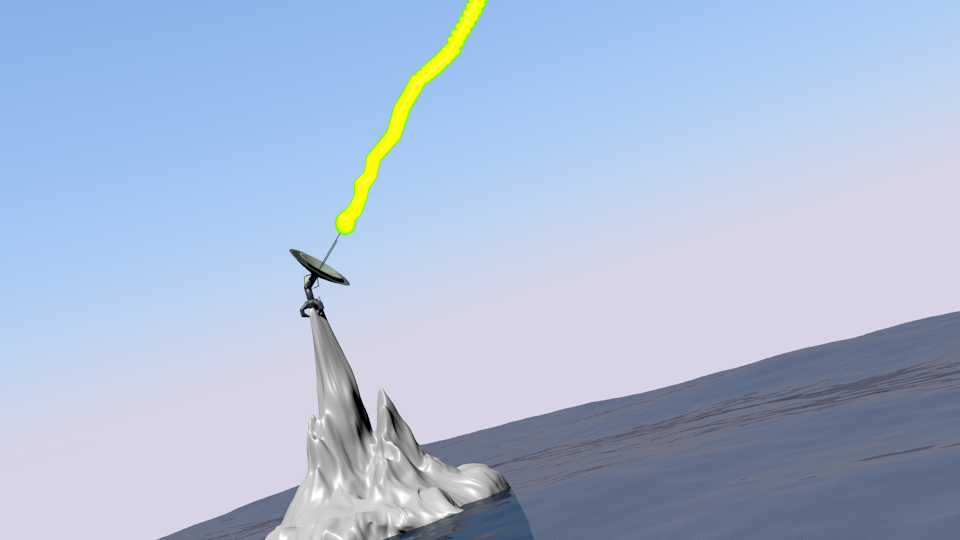
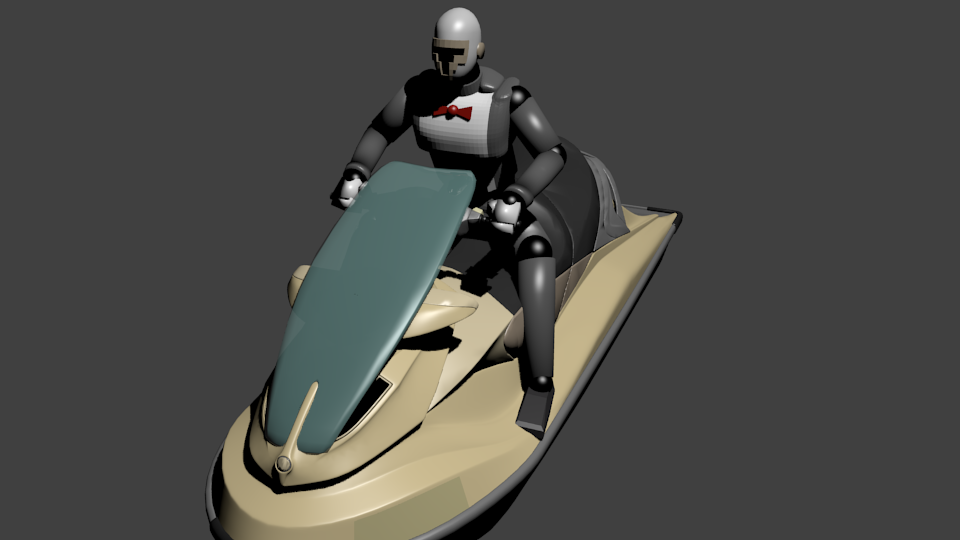
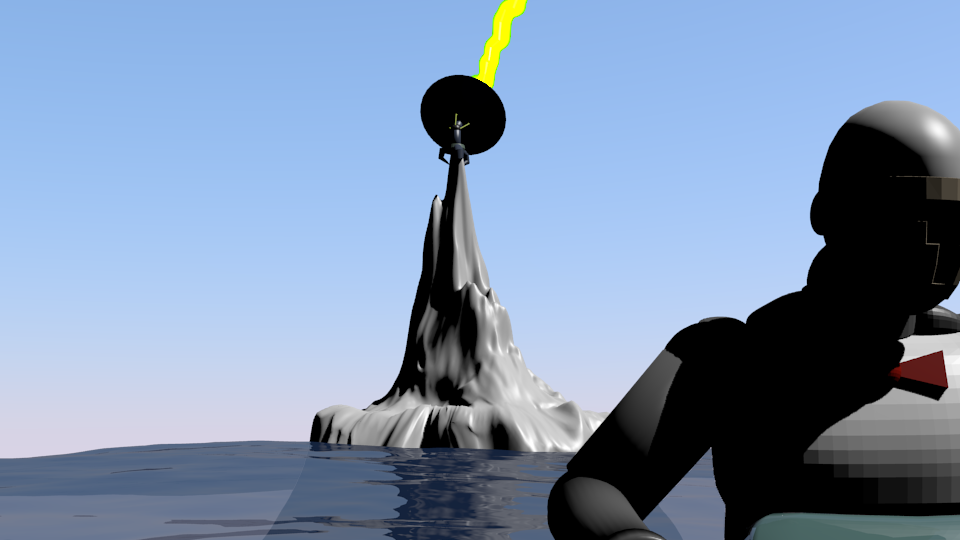
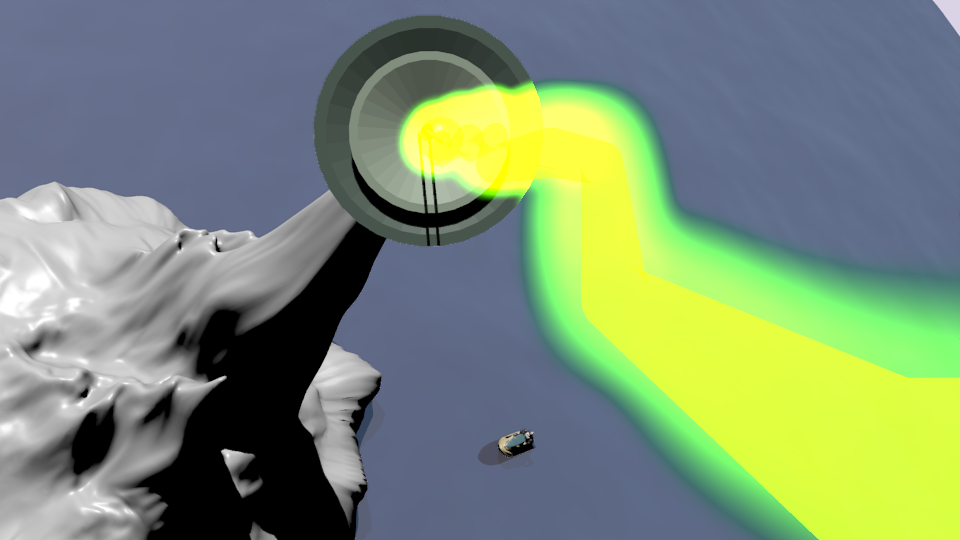
My group chose to design and model a boat equipped with ice-climbing legs for James Bond traveling in an Arctic environment to stop an evil villain’s plan of speeding up the process of global warming with his sinister global temperature decimating satellite. We chose a yacht combined with these special gadgets because we felt the vehicle was interesting and would be something that James Bond would use (given by Q) to travel such an environment. James Bond’s personality permeates the boat, ranging from the integration of class and modernism to style and sleekness. The Martini glass is one example of the “class” inserted into the deck of the ship.
<2> Prepare a 3-5 minute group presentation to tell about your vehicle’s design. This presentation will count toward your project grade. Presentations should be supported by visuals that are posted to the class website. Please put your post in your team’s designated category. Click here for instructions on how to post images to the class website.
In this presentation your group should describe the vehicle that you intend to design. Please cover the following points:
Describe the harsh environment that your group has selected, and key aspects of this environment that you were concerned with as you created your various sketches. Please support with visuals.
Tell about the famous individual your group chose and how his/her attributes, preferences, or aversions factored into your design. Please support with visuals.
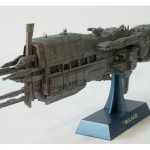
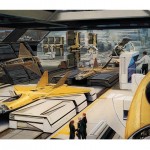
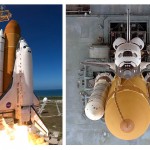
Tell about the preexisting vehicle that has informed your design. Please support with visuals.
Tell about changes to the design that your group has made through the various iterations you’ve created. Support with visuals if possible.
Describe the unique features of your vehicle. Support with visuals if possible.
Tell about any additional inspirational elements that will influence your team’s design decisions during development. Support with visuals if possible.
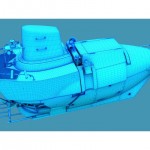
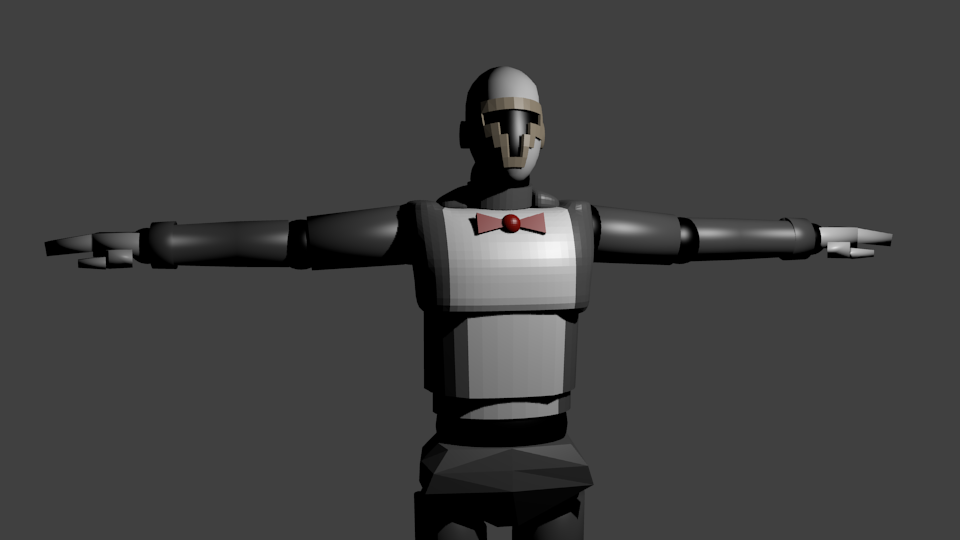
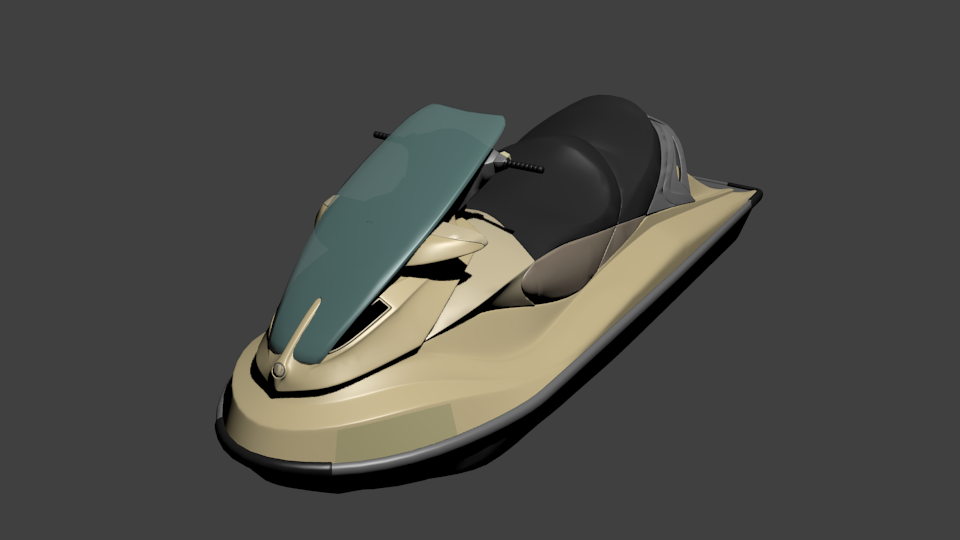
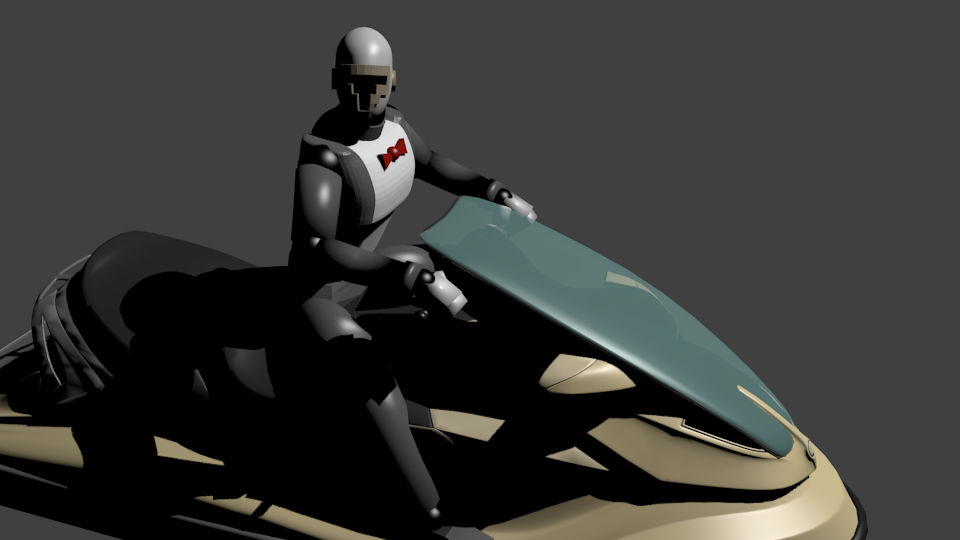
<3> Create a SIMPLE Rhino model of your vehicle that includes all of the main components. This model will help your team conceptualize how the vehicle will look as a whole, and will help convey your design during your presentation. If you’re able to create more than one version of this simple model then this would be an asset to your design process.
**Note: There is a “shared” folder in the digital sculpture netspace that will make it easier for team members to share files. To find the folder follow this path: netspace > projects > digital sculpture > private > shared
* 2 ArtsXpose are due at midterm, 2 are due at final. Not accepted late. *
ArtsXpose Learning Goals:
1. To familiarize students with local arts venues, resources and events.
2. To facilitate students’ critical awareness and their abilities to make meaningful connections between the various forms, media and formats found in theater, film, dance, literature and the visual arts.
3. To promote students’ active participation in the Art & Art History Department, Bucknell University, and the local art community.
Events that fulfill the ArtsXpose requirement include:
Visiting artist’s lectures
Exhibitions
Plays (college or professional NOT high school productions)
Films that are part of a university department sponsored film series (NOT films at commercial multiplexes)
Musical recitals or performances
Poetry/literary readings
Attendance of art club meetings (clubs may only count as one event regardless of the number of club memberships or the number of meetings attended during a term)
Arts related symposia, discussions or reading groups
Arts related conferences
Art events, demos, or workshops that are non-course related
Arts related fieldtrips (The Department of Art & Art History is taking a bus trip to New York City sometime this semester, and students are strongly encouraged to attend this trip as it will be a great opportunity to observe cutting edge contemporary artwork. Attending this trip will count as two artsXpose assignments, and students in attendance will not be required to submit any documentation.)
Instructions for submitting ArtsXpose:
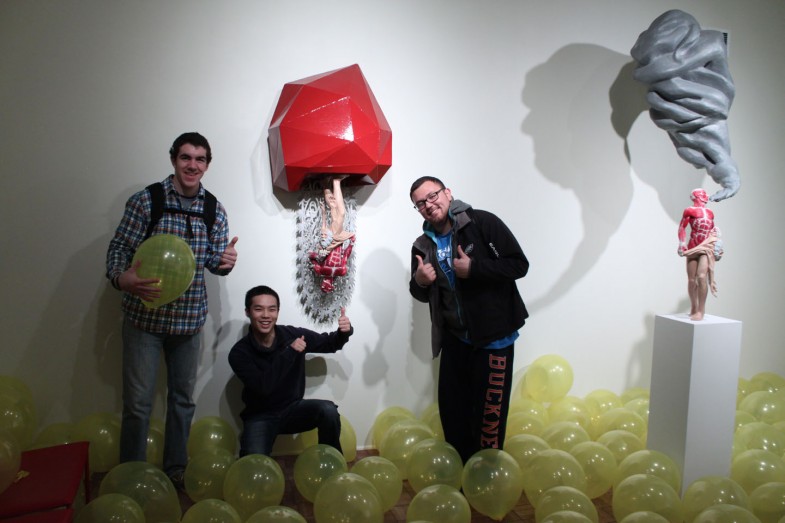
All ArtsXpose assignments will be submitted on the class website, but you can choose to either submit a photograph of yourself at the event, OR a detailed textual response to the event.
Regardless of whether you choose the form or photo option, you’ll need to begin by creating a post here on the class website, and to do so you can follow these steps:
Create a new post by clicking at the top of the page on the “+ New” button
Once the post screen comes up, check the “artsXpose” box to the right to put the post in the right category
Upload photos by clicking on the “upload/insert” button above the text field (remember to click the “insert into post” button while you’re on the upload screen)
* So that I can give you credit for your work, don’t forget to put your name in the title of the post
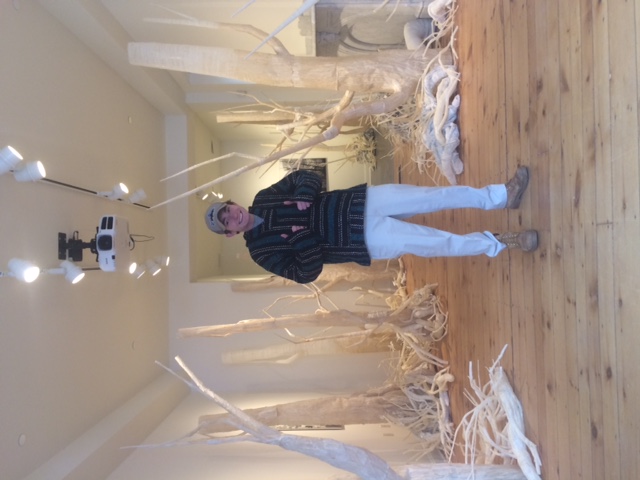
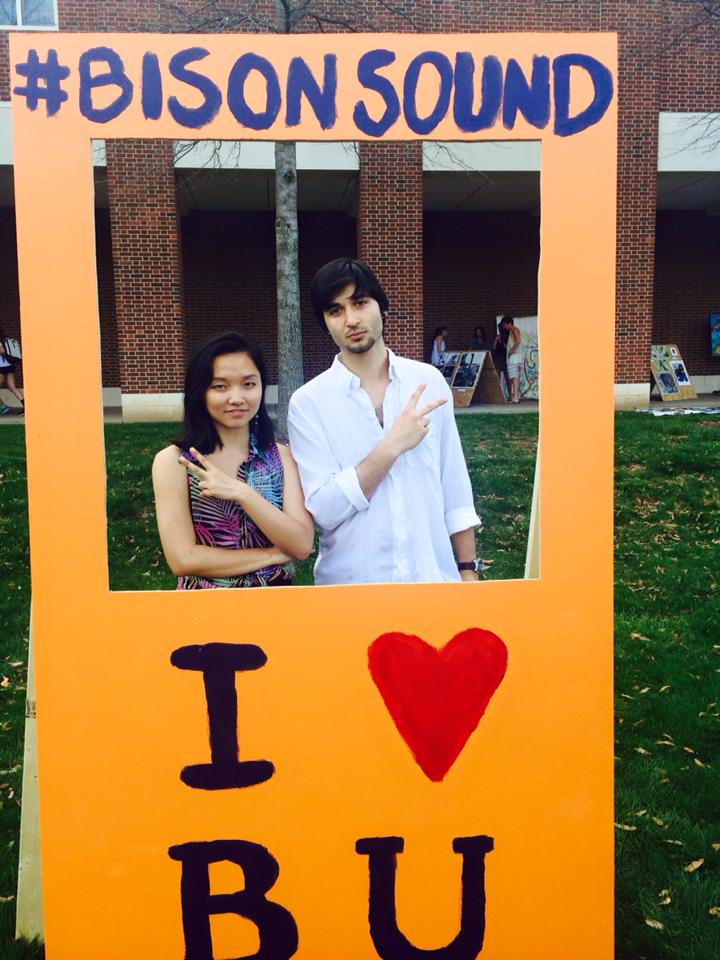
Example of how to submit artsXpose with the PHOTO option
For each artsXpose you complete, you may submit either a form OR a photo–it is not necessary to submit both. Included below is an example of how you may submit artsXpose using the PHOTO option. For the sake of efficiency, you may want to cut-and-paste the text below directly into your post and then appropriately revise the information.
Your photograph should depict you at the event with some distinctive features. This will make it obvious that you attended.
– – –
Title of Event: Joe Meiser Artist Lecture Date & Time of Event: Friday February 3rd 7 pm Location of Event: Samek Art Gallery Type of event: Artist lecture and reception
Example of how to submit artsXpose with the FORM option
For each artsXpose you complete, you may submit either a form OR a photo–it is not necessary to submit both. Included below is an example of how you may submit artsXpose using the FORM option. For the sake of efficiency, you may want to cut-and-paste the text below directly into your post and then appropriately revise the information.
– – –
Title of Event: Bill T. Jones Lecture
Date and time of event: Monday January 30th 7:30 pm
Location of Event: Harvey Powers Theater
Type of Event: Guest Artist Lecture
1.) Provide a brief detail-oriented technical description or summary of the event you attended. (This section should remain journalistic and should not be reflective of your opinion.)
Bill T. Jones gave an hour lecture with almost a full half hour of questioning. During the lecture he spoke from memory and showed a 15 minutes video of one of his dances being performed by different dancers. He also showed brief examples of his movement throughout the lecture.
2.) Use the section below to write a well-structured paragraph focusing on your personal criticalinsight / response to the event. How did you interpret or react to what was presented to you?
It was clear that Jones was a stage performer. Even in a lecture he had an amazing presence and was very confident. I enjoyed seeing him show bits of his dance moves. He also told a lot of very interesting stories about both his dad and his long time partner. One thing that I found interesting was at the beginning of the lecture he talked a lot about being a part of a counter culture and pushing against society. He described how fruitful it was for him to live in an artist colony that had no concern for material success. However at the end of the lecture he was described some of his current financial realities and the trouble of maintaining a dance company.
3.) What information, ideas, images, etc. most impressed you and why?
I was most impressed by his presence, story telling, and his brief dance moves. They were all very clear but also very unique.
4.) Overall, how would you rate this event (10 being the most worthwhile)? (10 / 9 / 8 / 7 / 6 / 5 / 4 / 3 / 2 / 1 )
eight 5.) Justify your rating in the question above:
I think for he was a really articulate speaker and was also entertaining. He also gave me two really valuable messages: don’t let yourself get in the way of the work, and why does it have to be anyone in particulars body?